 MortarDesk
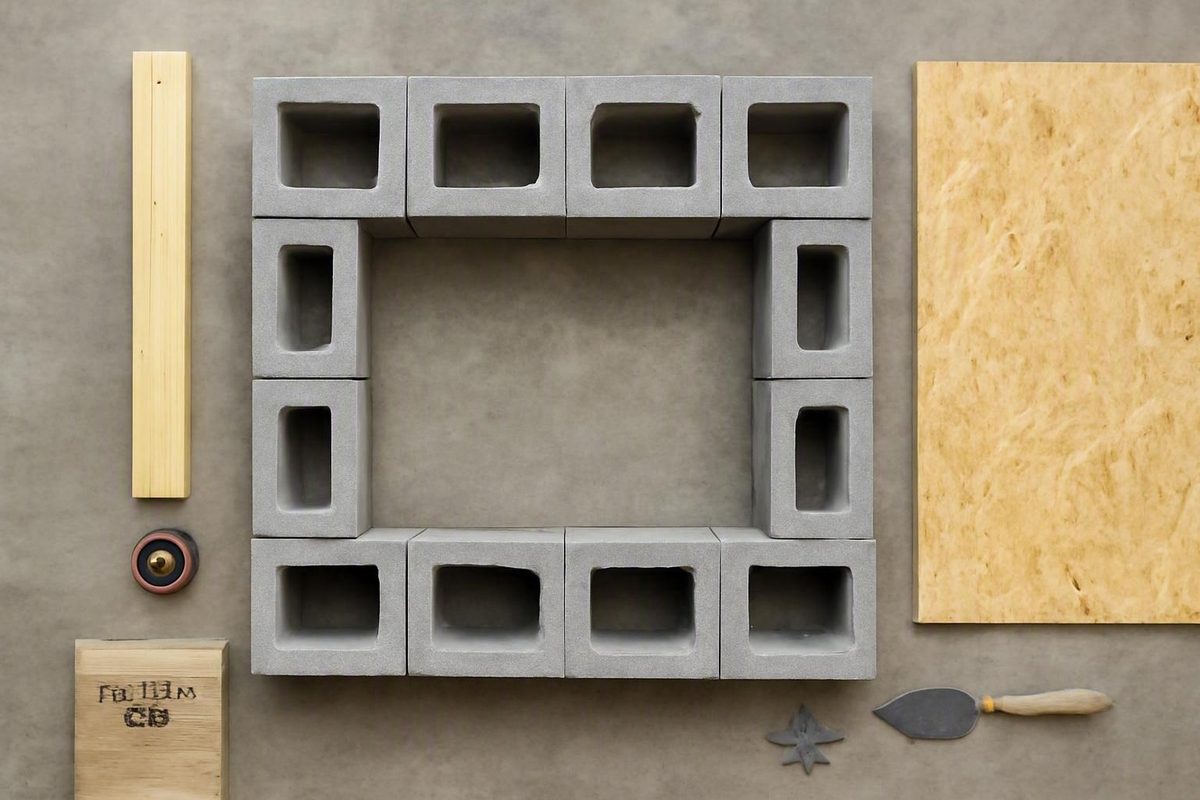
A cinderblock foundation for a shed can work in limited circumstances, but there is no safe universal recipe based only on shed length and width. A practical block-supported base begins with the exact shed design, the specified support product, a clear load path, suitable soil, controlled drainage, and confirmation that the system is acceptable locally.
For a small, lightweight shed on firm, nearly level, well-drained ground, approved solid concrete supports beneath structural skids may provide an economical, adjustable base. Hollow concrete masonry units, solid leveling blocks, deck blocks, and frost-depth piers are different products and should not be treated as interchangeable.
Before buying materials, obtain the current installation manual for the exact shed model. Confirm which foundation systems the manufacturer permits, where the shed must bear, what clearances and tolerances apply, and how the structure must be anchored. If the manual does not provide enough information to establish the support layout, stop and ask the manufacturer or a qualified local professional.
This is a screening and procurement guide, not an engineered foundation design. It intentionally does not prescribe universal block capacities, soil-bearing values, footing dimensions, excavation depths, frost depths, or anchoring details.
What “cinderblock foundation” means—and why the terminology matters
A shed can sometimes sit on block supports, but “cinderblock foundation” is an imprecise label. Retailers and homeowners may use it for several fundamentally different products:
- Traditional cinder block: Historically made with coal cinders or another lightweight aggregate. The term is now often used casually for almost any gray masonry unit.
- Hollow concrete masonry unit, or CMU: A unit with open cores that can be used in designed masonry assemblies. An unspecified hollow CMU should not automatically be treated as a suitable isolated support beneath a concentrated shed load.
- Solid concrete leveling block: A relatively thin, solid unit used as a bearing surface in some manufacturer-described skid-and-block systems.
- Deck block: A shaped precast unit intended to receive compatible posts, beams, or framing.
- Concrete pier: A deeper foundation element that transfers load into the ground and may extend below the locally applicable frost depth.
These products differ in shape, bearing area, material properties, intended use, and installation requirements. A retailer’s shelf label does not establish that a product is suitable for your shed.
Some shed guides use “cinder block” and “concrete block” loosely. A more detailed Heartland example instead specifies solid concrete leveling blocks beneath pressure-treated wood members. Its assembly uses solid blocks measuring 16 × 8 × 2 inches with pressure-treated 4×4 members above them. Those dimensions belong to that manufacturer-described system and are not universal specifications for other sheds. Review Heartland’s block-supported wood-foundation example.
Keep the following foundation concepts separate:
- Isolated solid leveling blocks beneath skids. Prepared bearing areas support solid blocks; the blocks support approved skids or other structural members; and those members support the shed floor.
- Deck blocks with a post-and-beam assembly. Shaped blocks receive compatible framing in the manner allowed by the product instructions and shed design.
- Frost-depth concrete piers. Discrete supports extend below the locally applicable frost depth. Diameter, depth, reinforcement, soil bearing, connections, and anchoring require project-specific determination.
- A continuous masonry foundation wall. A perimeter or stem-wall system has its own footing, reinforcement, moisture, drainage, and structural requirements. A row of isolated blocks is not equivalent to a continuous foundation wall.
One supplied commercial guide specifically discourages using hollow wall blocks for load-bearing shed-foundation applications. Treat that as a product-selection warning, not as a complete masonry design standard: verify the selected unit through its technical data and the shed’s approved foundation details. See the guide’s distinction among hollow wall blocks, solid blocks, and deck blocks.
Suitability depends on the specific product, orientation, bearing conditions, footing, construction quality, loads, and an approved assembly.
Before purchasing supports, ask the shed manufacturer for:
- Approved foundation types
- Required foundation dimensions and offsets
- Permitted block, pad, or pier products
- The floor-framing and skid diagram
- Approved bearing points
- Maximum permitted member spans
- Required clearance above grade
- Connection and anchoring details
- Site-level and delivery tolerances
- Warranty conditions tied to drainage or foundation preparation
Product-identification guide
| Product | What to look for | Planning distinction |
|---|---|---|
| Hollow wall CMU | One or more visible open cores | Do not assume it is an acceptable isolated shed support |
| Solid leveling block | Flat, solid bearing unit | Use only where the shed or foundation instructions specify a compatible solid support |
| Deck block | Molded recesses or slots | Must receive compatible framing in the intended configuration |
| Concrete pier | Cast or precast support extending into the ground | A deeper foundation concept requiring project-specific dimensions and connections |
Compare published product use and technical data—not just retailer terminology.
Is an on-grade block foundation suitable for your shed?
Treat blocks as a conditional option for a small, lightweight shed on firm, nearly level, well-drained ground. Do not assume every shed below a particular floor area qualifies.
Commercial recommendations illustrate why size-only rules are unreliable. Keter discusses blocks as an option for small garden sheds around 6×8 feet or less, while Homestead Supplier refers to lightweight sheds around 160 square feet or less. These are vendor recommendations for their consumer markets, not structural thresholds that apply to every shed. See Keter’s size-based consumer guidance.
Another retailer discusses block or deck-pier foundations mainly for sheds measuring 10×16 feet or smaller, again as general product guidance rather than a universal engineering limit. Compare the retailer’s guidance for blocks, gravel, and slabs.
Floor area alone does not reveal:
- The empty weight of the shed
- The weight and distribution of stored contents
- Snow, occupancy, or other applicable loads
- Concentrated loads from wheels, machinery feet, shelving, or workbenches
- Skid, beam, joist, rim, and sheathing spans
- The number and location of structural bearing lines
- Soil strength and settlement behavior
- Drainage, groundwater, and erosion conditions
- Slope and required support height
- Frost and freeze-thaw exposure
- Wind uplift and lateral forces
- Seismic conditions
- Intended use and permanence
- Locally applicable foundation and anchoring requirements
A garden shed holding hand tools is a different project from an identically sized building holding a riding mower, masonry, or heavy machinery.
Use this screening table before committing to an on-grade block system:
| Condition | Block-supported option | Safer alternative to evaluate |
|---|---|---|
| Light garden storage on stable, drained, nearly level soil | Potentially suitable if the manufacturer approves solid supports beneath designated bearing points | Full prepared gravel pad if compatible with the shed and broader drainage or vegetation control is desired |
| Riding mower or machinery | Do not assume suitability; wheel or foot loads can be concentrated | Reinforced slab or project-specific support design |
| Vehicle or boat storage | Outside a simple block-supported planning case | Reinforced slab or engineered foundation |
| Floorless shed designed to bear on concrete | Isolated blocks do not reproduce continuous slab support | Manufacturer-approved reinforced slab |
| Soft, wet, eroding, or uncertain soil | Poor candidate without an appropriate soil solution | Geotechnical review, engineered base, piers, or slab |
| Uncompacted or unidentified fill | Adding blocks does not resolve settlement risk | Remove or improve fill as professionally specified |
| Steep grade | Avoid tall or improvised stacks | Relocation, designed piers, or engineered site work |
| Deep frost or required frost protection | Surface supports remain exposed to seasonal ground movement | Footings or piers extending below the locally applicable frost depth |
| High-wind or seismic exposure | Blocks alone do not create uplift or lateral resistance | Locally accepted anchored or engineered system |
| Permanent workshop | Loads, utilities, occupancy, and durability expectations may exceed a simple base | Reinforced slab, frost-depth foundation, or engineered design |
Identify which of these load-path scenarios applies before planning the base:
Prefab shed with integrated skids. The manufacturer has selected the skids and floor framing. The base must support those skids at approved locations without introducing unintended point loads.
Site-built shed with a framed wood floor. The joist direction, bearing members, member spans, support rows, and connections are part of the structural design.
Floorless shed designed for a slab. The walls, door opening, and loads may depend on continuous slab support. Do not substitute isolated blocks merely because they are easier to place.
Move toward frost-depth piers, a reinforced slab, an engineered system, or qualified project-specific review when the project includes heavy or concentrated loads, vehicles, a substantial workshop, weak or wet soil, uncompacted fill, significant slope, high groundwater, severe frost exposure, high winds, seismic concerns, or a local requirement for frost-protected support.
Complete the site, code, and manufacturer checks first
Do not clear the site or order foundation materials until the project has passed a basic preconstruction review.
Property and local-authority questions
Contact the relevant utility-location service, property professionals, homeowners’ association, and authority having jurisdiction as appropriate for the site. Ask:
- Have underground utilities been located before excavation?
- Are the property boundaries verified rather than inferred from fences or landscaping?
- What setbacks apply to property lines, buildings, wells, septic components, waterways, or other regulated features?
- Are easements or access restrictions recorded for the proposed location?
- Do association rules restrict the shed’s size, appearance, placement, or foundation?
- Does the project require a permit?
- Is an on-grade block system an accepted foundation type for this shed and site?
- What locally applicable frost or footing provisions must be followed?
- What uplift, lateral, or seismic anchoring provisions apply?
- Do the shed’s size, height, use, utilities, or occupancy affect the approval process?
The answers are jurisdiction-specific. A small shed should not be assumed exempt without confirmation. Heartland’s consumer guidance likewise tells buyers to check foundation type, permits, setbacks, zoning, and frost-line conditions with the local building department or homeowners’ association. Read Heartland’s pre-foundation checks.
Manufacturer checks
Read the current installation manual for the exact shed model—not a generic guide for a similar-looking building. Confirm:
- Finished foundation dimensions
- Required offsets beyond or inside the wall line
- Approved support and bearing locations
- Skid and floor-member orientation
- Level and square tolerances
- Required ground clearance
- Permitted foundation products
- Delivery-truck, trailer, crane, or assembly access
- Required working space around the site
- Ramp dimensions or coordination requirements
- Connection and anchoring details
- Warranty exclusions related to drainage, settlement, or foundation preparation
For a delivered prefab shed, ask whether the installer requires a particular skid orientation, pad size, elevation tolerance, or access route. Resolve those requirements before preparing the site.
Site checks
Observe the location after rain if possible. Look for:
- Standing water
- Runoff channels
- Soft or pumping ground
- Seepage
- Erosion
- Downspout discharge
- Water moving toward the proposed footprint
- Soil washed away from nearby structures or landscaping
Avoid a depression that collects water. Plan grading and drainage so runoff moves away from the shed without washing through support pockets, eroding pad edges, or discharging onto neighboring property.
Remove sod, roots, leaf litter, and other organic material from the bearing areas. Do not treat decaying roots, buried debris, loose topsoil, or unidentified fill as a stable base. Additional gravel placed over an unresolved soil problem does not necessarily make the ground suitable.
An on-grade block foundation can be level when installed and still move during freeze-thaw cycles. Surface leveling establishes an initial plane; it does not move the support below frost depth or make the system frost-protected.
Stop and consult an appropriately qualified contractor, structural professional, or geotechnical professional if you encounter:
- Soil that cannot be identified or compacted reliably
- Expansive clay
- Unverified fill
- Buried organic material or debris
- Active erosion
- High groundwater or recurring saturation
- A severe slope
- Unusual or concentrated loads
- Unclear frost requirements
- Unresolved uplift, lateral, or seismic anchoring
Mortar Desk describes itself as a building-material reference service rather than a contractor or engineering provider and directs structural work to licensed trades working under local requirements. Review Mortar Desk’s scope and limitations.
Plan the support layout from the shed’s load path
There is no universal answer to “How many blocks do I need?” Shed length and width alone do not provide enough information.
Begin with the manufacturer’s approved support diagram and the permitted spans of the skids, joists, beams, rim framing, and floor sheathing. If the documents do not identify the bearing points, ask the manufacturer or obtain project-specific design assistance rather than inventing a grid.
The basic load path is:
- The shed and stored contents load the floor.
- Floor sheathing transfers distributed loads to the joists or other framing.
- The joists transfer load to skids, beams, walls, or designated bearing points.
- Those structural members transfer load through approved blocks or piers.
- The support bases distribute that load into prepared aggregate and suitable soil.
Blocks belong beneath structural skids, beams, joists, or other approved bearing points.
For a prefab shed with integrated skids: Mark every skid on the plan. Identify each permitted support point along it. Confirm whether the shed arrives with skids attached and whether the delivery crew requires a specific foundation arrangement.
For a site-built framed floor: Establish the joist direction first. Then identify perpendicular beams or skids, perimeter bearing, interior bearing lines, and support rows. Verify the applicable member spans before setting block centers.
For a floorless shed designed for concrete: Follow the specified slab dimensions and wall-bearing requirements. Do not replace continuous support with isolated blocks unless the manufacturer approves a different foundation.
Map concentrated loads before finalizing the pattern, including:
- Door thresholds and ramp reactions
- Riding equipment and wheel paths
- Machinery feet
- Workbench legs
- Tall or heavily loaded shelving
- Interior partitions
- Stored masonry, tile, liquids, or other dense materials
- Loft ladders and storage platforms
- Utility equipment
The support arrangement may need to account for those loads, but any change must remain compatible with the framing design. Placing a random extra block beneath the floor is not a substitute for tracing the load path.
Vendor spacing figures can illustrate what model-specific instructions look like, but they are not general structural standards. Heartland describes support spacing of no more than 72 inches along the same supported member and no more than 48 inches between support rows in its own wood-and-block system. Those figures apply to that manufacturer-described assembly, not every shed.
A different vendor gives an approximate range of 4–6 feet between blocks, depending on shed size and weight. That is also vendor-specific guidance rather than a transferable design rule. See Bald Eagle Barns’ product-oriented spacing and skid guidance.
Do not transfer either example to another shed without verifying the framing, loads, support product, soil conditions, and manufacturer instructions. The same limitation applies to published block-count tables.
Conceptual support-layout diagram—not to scale
                Shed outline
       A  ┌──────────────────────┐
          │  │      │      │     │
          │  ●      ●      ●     │  Skid/support row
          │  │      │      │     │
          │  ●      ●      ●     │  Skid/support row
          │  │      │      │     │
          │  ●      ●      ●     │  Skid/support row
          └──────────────────────┘  B
             ↑      ↑      ↑
          Floor joists run in this direction

● = approved support centered beneath a structural skid
A and B = opposite corner references for diagonal checks
A completed project drawing should show the shed outline, joist direction, perpendicular skids, approved block centers, interior support rows, door and ramp location, concentrated-load zones, corner reference dimensions, and both corner-to-corner diagonals. Equal diagonals check a rectangular layout for square; they do not verify soil capacity, framing spans, or anchoring.
Prepare drainage and a stable aggregate base
At a planning level, site preparation follows this sequence:
- Select a drained location.
- confirm the approved footprint and finished elevation.
- Remove vegetation, roots, topsoil, and other organic material from bearing areas.
- Excavate as required by the approved site design.
- Place the specified aggregate.
- Compact it using the specified procedure.
- Establish drainage that will not wash through or beneath the supports.
- Set and level the approved support products.
Excavation depth, aggregate type, gradation, layer thickness, bearing area, and compaction requirements depend on the soil, climate, loads, drainage, and selected foundation system. Do not borrow a universal depth or compaction percentage from an unrelated shed project.
Isolated compacted aggregate pockets use less material. Each support sits on an individually prepared bearing area. Because more native ground remains exposed beneath the shed, vegetation, mud, animal access, and uneven moisture may remain concerns.
A full compacted gravel pad prepares the entire footprint and may include a specified extension beyond it. When properly designed and constructed, it can improve general drainage, vegetation control, access, and site cleanliness. It does not eliminate the need for structural bearing points, adequate framing spans, frost provisions, or anchoring.
Commercial instructions differ on whether gravel is optional, required under individual supports, or recommended across the whole footprint. The practical conclusion is not that gravel is universally optional or universally sufficient. It is that approved supports need a stable, prepared base rather than loose, organic, muddy, or erosion-prone soil.
Once the approved pad area and compacted layer depth are known, estimate aggregate volume as:
Area × compacted depth = compacted volume
Keep units consistent. For a rectangular pad, area is length multiplied by width. Divide an irregular pad into measurable shapes, calculate each part, and combine the results. Convert the volume into the supplier’s selling unit only after confirming whether the quotation is by volume or weight.
Mortar Desk’s own material coverage calculator converts entered area and depth into planning estimates for volume, typical weight, bag count, and truckloads. It does not choose the correct aggregate, establish layer depth, determine soil-bearing capacity, prove structural suitability, prescribe compaction, or guarantee an order quantity.
Ask the aggregate supplier:
- What exact product and gradation are being quoted?
- Is that product suitable for the specified compacted base?
- Is the quoted depth loose or compacted?
- Is the material sold by weight or volume?
- What density applies to the exact product from that quarry?
- Are there minimum orders or dispatch increments?
- What delivery vehicle and access are required?
- Should the order include an allowance for grading, compaction, and incidental loss?
- Can matching material be obtained later if the first delivery is insufficient?
Keep quantity estimating separate from foundation design. An exact volume calculated from an unverified pad depth is still the wrong order.
Square, level, and verify the support system
Once the design, location, and materials are approved, establish the footprint with stakes and string. Use the manufacturer’s required foundation dimensions and offsets rather than assuming the outside wall dimensions define the base.
For a rectangular layout:
- Establish one reference side.
- Position the adjacent sides approximately perpendicular.
- Confirm all specified side lengths.
- Measure both corner-to-corner diagonals.
- Adjust the corners until the diagonals match while preserving the side lengths.
- Recheck the complete footprint before marking support centers.
Matching diagonals indicate that a rectangle is square. They do not confirm that the footprint is correctly placed on the property or that the support rows align with the framing.
Set each approved solid support on its prepared base and center it beneath the specified skid, beam, joist, or bearing point. The structural member should have full, stable bearing as required by the approved design; a block touching only one edge is not properly aligned.
Compare all support tops as one system. Suitable layout tools may include:
- A rotary or line laser
- A builder’s level and grade rod
- A long, straight reference member with a level
- A carefully tensioned string line, accounting for sag
Do not level only one support against its immediate neighbor. Small local errors can accumulate across several rows and leave the final support plane twisted.
Correct elevation by lifting and resetting the individual support, adjusting the approved base material beneath it, and recompacting that material. Recheck for rocking after every adjustment. Do not use loose soil, scrap lumber, random stones, broken masonry, or improvised shims. Avoid tall block stacks unless they are part of a project-specific approved system.
A stable initial plane matters because uneven or rocking supports can distort the floor frame, contribute to floor sag or bounce, and cause doors or ramps to bind. Establishing a documented initial plane also makes later movement easier to diagnose.
Where the approved system uses pressure-treated skids, the skids bridge between supports and distribute loads into the floor framing. Heartland’s example places pressure-treated 4×4 members on solid leveling blocks, but skid size, orientation, treatment, spacing, and connections must come from the applicable shed design rather than that example alone.
Do not invent a generic method for fastening wood skids or the shed directly to blocks. Use the shed manufacturer’s connection details and the anchoring system accepted for the project.
Before delivery or assembly, verify:
- [ ] Foundation footprint matches the approved dimensions
- [ ] Required offsets and clearances are correct
- [ ] Both diagonals match
- [ ] Support rows align with structural bearing members
- [ ] Every support has full, stable bearing
- [ ] All support tops lie in one plane
- [ ] The system is level in both directions
- [ ] No support rocks
- [ ] No improvised shims or unstable stacks are present
- [ ] Surface water drains away without crossing or undermining supports
- [ ] Required clearance above grade is maintained
- [ ] Skids match the specified size, condition, orientation, and treatment
- [ ] Delivery and assembly access remains open
- [ ] Ramp placement is coordinated with the final floor elevation
- [ ] Connection and anchoring details have been approved
- [ ] The completed base has been photographed and measured for records
Compare blocks with a gravel pad, frost-depth piers, and a slab
Foundation options solve different problems. “Cheapest” and “best” cannot be established universally because excavation, site access, labor, aggregate, concrete, reinforcement, permits, drainage, anchoring, and future maintenance vary by project.
| Foundation option | Typical use | Drainage and ground contact | Mobility | Concentrated loads | Frost exposure | Anchoring and maintenance |
|---|---|---|---|---|---|---|
| Isolated on-grade solid blocks | Some small, lightweight, skid-supported sheds | Elevates the shed, but isolated bearing areas can settle or erode | Some compatible sheds may remain repositionable | Limited unless framing and supports are specifically verified | Exposed to seasonal ground movement | Needs a separate approved anchoring system and may require releveling |
| Full compacted gravel pad | Site preparation beneath compatible skids or supports | Can provide broader drainage and vegetation control when properly specified | May remain compatible with movable skid-supported sheds | Aggregate alone does not validate point-load capacity or framing spans | Still on grade unless combined with deeper supports | Does not itself anchor the building; pad construction is site-specific |
| Frost-depth piers | Sites requiring deeper discrete supports | Transfers structural reactions below frost-active surface soils when properly designed | Generally less movable | Can be designed for project-specific reactions | Intended to extend below the locally applicable frost depth | Pier dimensions, reinforcement, bearing, and connections require project-specific determination |
| Reinforced slab | Floorless sheds, workshops, vehicles, machinery, or substantial loads | Provides a continuous floor but still requires drainage and moisture planning | Usually treated as a permanent foundation | Better suited to substantial loads when designed accordingly | Performance depends on the complete slab, edge, and footing design | Can incorporate designed anchors; thickness, reinforcement, joints, and edges must be specified |
On-grade blocks are accessible and adjustable, and some skid-supported sheds can be moved more readily than structures on permanent foundations. Those advantages come with vulnerability to settlement, erosion, freeze-thaw displacement, and inadequate uplift or lateral resistance if the site and anchoring are not properly addressed.
A full gravel pad is broad site preparation, not automatically a complete structural foundation. It can provide a cleaner and more uniform surface beneath a compatible shed, but it does not determine where the framing must bear.
Frost-depth piers are a separate foundation concept. They transfer loads through discrete supports extending below the locally applicable frost depth. There is no universal pier diameter, depth, spacing, reinforcement pattern, or connection detail suitable for every site.
A reinforced slab is commonly the alternative to investigate for a large shed, permanent workshop, floorless building, vehicle, riding mower, machinery, or another substantial or concentrated load. Commercial shed guidance also distinguishes lightweight block-supported applications from slabs or stronger bases for larger workshops and heavy loads. See Sunrise Structures’ comparison of foundation conditions.
Choose by verifying what the project needs, not by counting which option appears to use the fewest materials initially.
Inspect, relevel, and troubleshoot the foundation
A block-supported shed is adjustable, but it is not maintenance-free.
Look for:
- Sinking or tilting supports
- Supports that rock as loads change
- Cracked, chipped, or displaced blocks
- Eroded or washed-out aggregate
- Standing water beneath or beside the shed
- Frost-related displacement
- Deteriorated or decayed skids
- Floor sag or bounce
- Doors that bind or no longer latch
- Ramps that have shifted relative to the threshold
- Wall or roof distortion
- Pest access or nesting
- Loss of level across the floor
- Loose, failed, or corroded anchors
A small movement may be correctable, but first determine why it occurred.
If movement is detected:
- Remove stored loads from the affected area when that can be done without entering an unstable zone.
- Keep people away from the affected support area.
- Identify whether drainage, erosion, settlement, frost, decay, or overload caused the movement.
- Obtain the shed manufacturer’s releveling procedure or engage a qualified contractor.
- Have the affected bearing area rebuilt and compacted as required.
- Recheck the complete support plane rather than only the visibly low corner.
- Inspect the connections and anchoring after the building is restored to level.
Do not use anecdotal lifting methods as instructions for jacking or supporting a loaded shed. If the building must be lifted, have the work planned around its weight, condition, lifting points, equipment, and temporary-support requirements by the manufacturer or a qualified trade.
Seek professional review or rebuild the base if you find:
- Recurring settlement after correction
- Several moving supports
- Cracked or displaced blocks
- Deteriorated skids
- Significant floor, wall, or roof distortion
- Soil washout, voids, or recurring saturation
- Tall or unstable support stacks
- Loads that were not included in the original plan
- Loose or failed anchoring
- A support arrangement that does not align with the framing
- Evidence that the selected foundation is not acceptable for the location
Coordinate any enclosure with the shed’s ventilation and moisture requirements.
The final approach is verification-first:
- Confirm the exact support product.
- Read the current shed manual.
- Identify the structural bearing points and expected loads.
- Assess soil, slope, drainage, frost, wind, and seismic exposure.
- Ask the applicable local authority about foundation and anchoring requirements.
- Prepare and compact the specified aggregate base.
- Square the footprint and bring every support into one plane.
- Use only approved skids, framing, connections, and anchors.
- Document and inspect the completed foundation.
If the load path, soil suitability, frost protection, or anchoring remains uncertain, move to a reinforced slab, frost-depth system, engineered foundation, or qualified project-specific advice rather than relying on a generic block recipe.
Can a shed sit directly on cinder blocks?
Sometimes, but “cinder blocks” must first be identified. Some small, lightweight, skid-supported sheds may sit on approved solid concrete leveling blocks placed on stable, prepared bearing areas. The supports must align beneath structural members, and the complete system must match the shed instructions and locally applicable requirements.
Do not place unsupported floor sheathing directly on random blocks. Do not assume hollow wall CMUs are equivalent to solid leveling blocks. Heavy contents, poor soil, drainage problems, frost exposure, slope, or anchoring requirements may make a prepared pad, piers, slab, or engineered foundation more appropriate.
Are hollow cinder blocks safe for a shed foundation?
Do not assume that an unspecified hollow CMU is suitable as an isolated support beneath a shed. Suitability would need to be established by the product data and an approved assembly for the proposed loading, orientation, bearing conditions, and installation.
Avoid generic advice about rotating, stacking, filling, capping, or reinforcing hollow units. Ask for the exact support product specified by the shed manufacturer and verify that its intended use matches the project.
How many blocks do I need beneath my shed?
The count depends on the approved bearing diagram, skid or beam layout, member spans, expected loads, support product, and bearing conditions. Shed length and width alone cannot determine it.
Map each structural skid or bearing line, then locate supports only at approved points. Treat block counts and spacing from another shed brand as examples, not transferable specifications. If the manual does not provide a layout, contact the manufacturer or obtain qualified design assistance.
Do shed-support blocks need gravel underneath them?
They need a stable, prepared base rather than loose, organic, muddy, or erosion-prone soil. Depending on the approved design, that may involve compacted aggregate beneath individual supports or a full compacted gravel pad.
A full pad can offer broader drainage, vegetation-control, and access benefits when correctly specified and constructed, while individual pockets use less aggregate. Neither arrangement can compensate for weak soil, inadequate bearing, excessive framing spans, or frost movement.
Does leveling blocks make a shed foundation frost-proof or wind-resistant?
No. Leveling brings the support tops into one initial plane. It does not place the foundation below frost depth, prevent frost-related soil movement, or create resistance to wind uplift and lateral forces.
Frost protection depends on the locally accepted foundation concept. Confirm both before installation.