 MortarDesk
What an insulated well house does—and what it does not guarantee
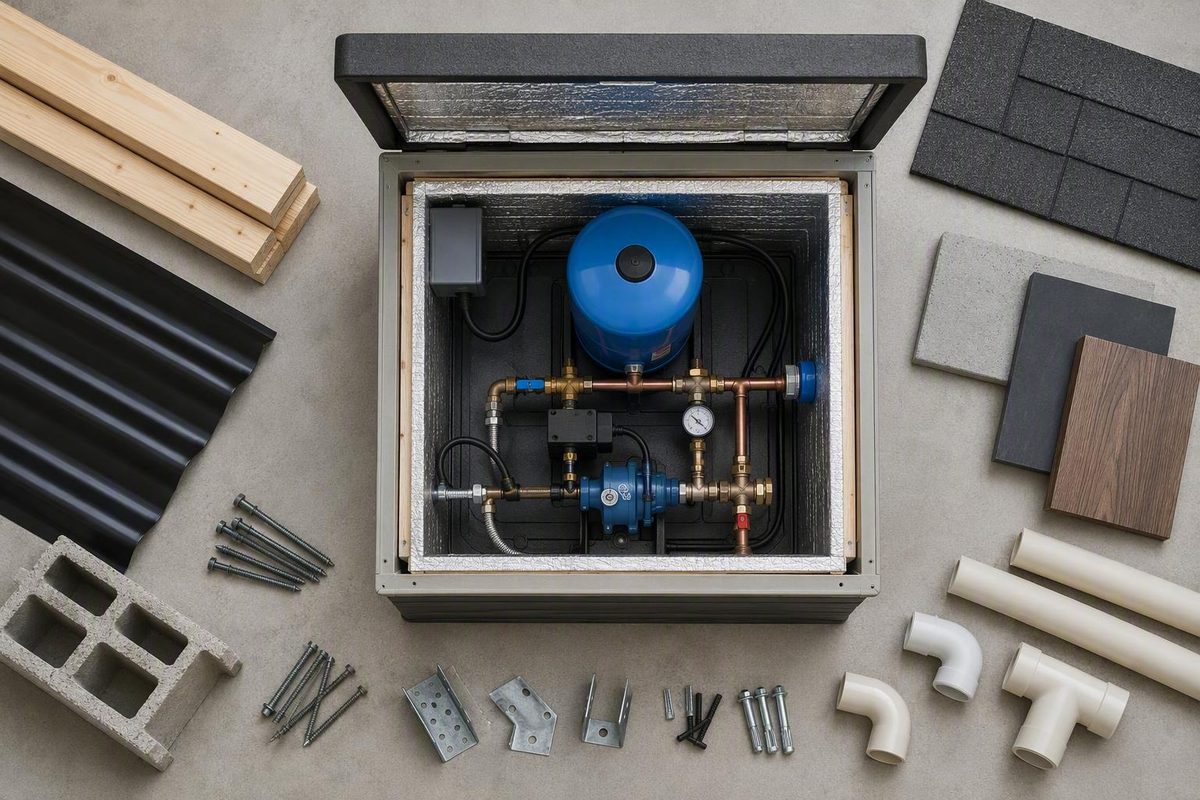
Depending on the installation, it may contain the well head, pressure tank, piping, valves, unions, pressure switch, gauge, pump or control box, electrical controls, and water-treatment equipment.
The term covers products with very different capacities:
- A compact well-head cover encloses a small area around the casing or limited equipment. It is not necessarily large enough for a pressure tank, treatment system, or walk-in maintenance access.
- A walk-in prefabricated well house provides a door and interior space for equipment, inspection, and service.
- A site-built enclosure can be designed around an existing arrangement, but the owner or builder must specify its structure, insulation, foundation, access, moisture control, and mechanical and electrical provisions.
- An ordinary storage shed may provide weather protection, but it may lack a floor opening, insulated doors and panels, attachment provisions, removable access, or a layout designed around plumbing service.
That distinction matters when comparing products. A compact cover and a walk-in house may both be advertised as insulated, but they do not provide the same interior volume, working room, replacement path, or installation options. K&L, for example, lists its compact well-head cover separately from its larger insulated houses.
Purpose-built products may use open or floorless construction so that the enclosure can be lowered around existing equipment. Other potentially useful features include anchor tabs, base plates, bolt-down flanges, lifting hardware, wide service doors, or panel systems that enclose both the walls and roof. These features may simplify installation or servicing, but their presence does not establish thermal or structural performance.
The central limitation is straightforward: insulation slows heat transfer but does not produce heat. An insulated enclosure can retain heat from the ground, operating equipment, or a designed heating system, but insulation alone does not guarantee that pipes, tanks, valves, or controls will remain above freezing.
Most available specifications also come from manufacturers and sellers. Product pages commonly identify dimensions, panel materials, insulation thickness, hardware, and listed prices, but the supplied evidence does not contain independently verified freeze ratings, climate-specific heat-loss calculations, or complete wind, snow, uplift, and structural data for these products. Treat phrases such as “extreme-temperature protection” or “built to last” as marketing unless the seller provides a defined test method and documented result.
This article is therefore limited to a vendor-specification roundup and quote-comparison checklist. It does not establish a compliant foundation, anchoring design, heater selection, electrical installation, heat-trace system, drainage plan, structural capacity, or freeze-protection guarantee. Those questions require project-specific information and review by the appropriate local authority or qualified trade.
Choose the footprint from the equipment and service path
Start with the installed equipment rather than a seller’s standard footprint. A nominal 5-by-5-foot house may sound adequate until wall thickness, framing, pipes, a swinging door, and the tank-removal route are considered.
Use this measurement sequence:
- Inventory every component. Include the well casing, sanitary cap, pressure tank, filters, softener or treatment vessels, valves, unions, gauges, controls, manifolds, drain points, heating equipment, and monitoring devices.
- Measure actual width, depth, and height. Do not rely on model-category names or nominal tank capacity.
- Map the pipe layout. Record pipes projecting from walls, floors, or equipment, and note the space needed to operate valves or disconnect unions.
- Map electrical and control equipment. Identify panel-door swing, service areas, conduit routes, receptacles, sensors, lighting, and locations that must be kept away from likely leaks.
- Define the service position. Determine where a technician would need to stand or kneel to reach each critical component.
- Measure the replacement path. The largest tank or treatment vessel must pass through the clear door opening and around fixed pipes, controls, and framing.
- Allow for future equipment. Consider a larger tank, filtration, treatment, monitoring, or rearranged plumbing before fixing the footprint.
Exterior dimensions alone do not establish usable room. Wall and insulation thickness reduce internal width. Framing and panel joints may project inward. A sloped roof can limit headroom near the walls, while door swing and installed hardware can consume otherwise open floor area.
Seller-listed size snapshot
The following dimensions are transcribed from seller or manufacturer pages; they are not independent field measurements. “Not stated” means the cited page does not provide the measurement and it should not be estimated.
| Seller | Listed footprint or dimensions | Height disclosed? | Cover or full house? | Important measurements not stated |
|---|---|---|---|---|
| Dillon | 4 × 4, 5 × 5, 6 × 6, 7 × 7, and 8 × 8 ft | Not stated | Full pump house | Interior dimensions, wall-thickness effect, overall height, roof clearance |
| All-Tex | 5 × 5 × 6.5 ft; 5 × 5 × 7.5 ft; 6 × 6 × 7.5 ft; 7 × 7 × 7.5 ft | Yes | Full well house | Clear door opening, usable interior dimensions, equipment clearances |
| K&L | 48 × 48 × 83 in; 64 × 64 in; 80 × 80 in | Only for the 48 × 48 model | Full well houses | Heights of larger models, internal dimensions, clear door opening |
| K&L | 29 × 29 in | Not stated | Well-head cover | Height, access opening, internal capacity |
| M&D | 4 × 4 × 5 ft through 80 × 80 in models, including a tall-wall option | Partial | Full well houses | Complete internal clearances, door dimensions, panel thickness, several model heights |
Dillon’s standard 24-by-60-inch RV-style door illustrates why the opening must be checked separately from the footprint: a wide enclosure can still have a comparatively constrained equipment-removal path. Its published page lists five standard footprints but does not state their heights or internal dimensions.
All-Tex gives length, width, and height for all four listed models, making a basic height comparison possible. Its page does not, however, state the clear door opening or usable interior working area.
K&L separates its 29-by-29-inch well-head cover from the larger houses. Height is supplied only for the 48-by-48-inch model, so buyers should not infer that the larger footprints share its height.
M&D lists 4x4x5, 80x80, and 80x80 Tall Wall well houses and says it offers larger options Insulated Well Houses | M&D Enterprises. The seller also discloses that the houses use second-hand insulated panels, but it does not publish complete internal-clearance or panel-thickness details.
A North Idaho vendor suggests 6-by-8 feet for a well head and pressure tank, 8-by-8 feet when controls or treatment are added, and 8-by-10 or 8-by-12 feet for more extensive systems. These are vendor planning examples—not standards, code minimums, or universal recommendations—and should be used only as prompts when testing a real equipment layout. The vendor guide ties its example footprints to different equipment combinations.
Pre-order measurement checklist
Before approving a drawing or quote, record:
- [ ] Exterior maximum width, depth, and height
- [ ] Usable interior width, depth, and standing height
- [ ] Wall, frame, and insulation thickness
- [ ] Clear door width and height, not merely nominal door size
- [ ] Direction and arc of door swing
- [ ] Largest tank or vessel replacement path
- [ ] Pipe, valve, union, and conduit projections
- [ ] Access to pressure switches, gauges, filters, and controls
- [ ] Treatment-equipment footprint and service height
- [ ] Proposed heater area for review by the responsible trade
- [ ] Lighting and receptacle locations
- [ ] Clear working space around service points
- [ ] Space for likely future equipment
- [ ] Roof or removable-panel access needed for pump service
A scaled plan is often more revealing than a list of dimensions. Draw the wall thickness, door swing, pipes, tanks, controls, and standing areas—not just rectangles representing equipment.
Compare construction and insulation by disclosed specifications
The products in this market use several distinct assemblies. A material name alone does not make them thermally comparable. Panel joints, framing, doors, penetrations, roof construction, air leakage, and thermal bridges may all affect the completed enclosure.
Side-by-side specification comparison
| Product | Wall or shell | Frame | Insulation | Thickness | Stated R-value | Floor | Door | Attachment feature | Lifting feature | Finish options | Not stated |
|---|---|---|---|---|---|---|---|---|---|---|---|
| Polar Sheds | Two 26-ga primed mild-steel skins around a solid core | Panelized assembly; separate framing details not stated | Polystyrene or polyurethane | 1.75-in panel assembly | R8 polystyrene; R16 polyurethane, manufacturer-stated | Floorless | Details not stated | Treated 2×4 base plate; concrete-anchor guidance | Optional lifting eye | Primed steel can be painted | Weight, door insulation, structural ratings, independent test documentation |
| All-Tex | 22-ga Galvalume sheet metal | 2×2-in angle iron | Closed-cell spray foam | 1.25–1.5 in | Not stated | Open floor | Not stated | Four corner tabs for anchor bolts | Not stated | Not stated | Weight, R-value, door details, anchor inclusion, structural ratings |
| Dillon | One-piece fiberglass-faced foam shell | No wood; other frame details not stated | Foam board with fiberglass on both sides | 1 in | Not stated | Not stated | 24×60-in RV-style door | Bolt-down flanges | Roof eye bolts | White, black, green; custom colors | Height, weight, thermal limit, structural ratings |
| M&D | Second-hand insulated panels | Not stated | Usually described as polystyrene; polyurethane may be available | Not stated | Not stated | Not stated | Not stated | Not stated | Optional lifting eye | Not stated | Panel history, thickness, R-value, detailed assembly, structural ratings |
Polar states that its panel assembly uses two sheets of 26-gauge primed mild steel around either a polystyrene or polyurethane core. Its R8 and R16 figures are manufacturer-provided; the supplied evidence contains no independent test documentation and does not establish that the published core or panel figures apply unchanged across doors, joints, base connections, or penetrations.
All-Tex describes 22-gauge Galvalume over a 2-by-2-inch angle-iron frame, with 1.25 to 1.5 inches of closed-cell spray foam. No R-value is supplied. The thickness should not be converted into an assumed whole-assembly R-value without details about the foam, installation, framing, joints, door, and roof.
Dillon describes a one-piece seamless shell made with one-inch foam board and fiberglass on both sides, with no wood. It also lists bolt-down flanges, roof eye bolts, a standard RV-style door, and optional window, vent, and lighting upgrades. Its R-value, tested temperature limit, weight, and structural ratings are not stated.
M&D uses second-hand insulated panels and warns that blemishes, scratches, and wear marks are common. Polystyrene is described as typical, with polyurethane potentially available. This creates a price-versus-documentation tradeoff: cosmetic wear is disclosed, but panel thickness, R-value, prior exposure, joint construction, and a condition-grading method are not.
Do not rank these assemblies merely by material name or insulation thickness. A stated foam thickness does not disclose the complete thermal performance of a metal-framed enclosure. Likewise, a core or panel R-value does not automatically account for door edges, base joints, hardware, steel paths, or uncontrolled openings.
For every missing field, write “not stated.” Do not substitute a generic insulation chart, infer one seller’s foam formulation from another’s, or convert an advertised panel value into a whole-building rating.
Plan freeze resilience as a system, not a product claim
Freeze resilience depends on the complete enclosure and its operating conditions. The useful distinction is between:
- Retaining heat: insulation and air sealing slow heat loss.
- Generating heat: the ground, operating equipment, or a designed heating system supplies heat.
- Detecting failure: monitoring may identify falling temperature or power loss.
- Responding to failure: the owner, a service provider, or a project-specific backup plan addresses the problem before damage occurs.
Polar explicitly recommends adding heat in below-freezing conditions because insulation retains heat but does not generate it. The manufacturer mentions customer-used examples such as a light bulb or small space heater, but it provides no project-specific heat-loss calculation. Those anecdotes are not a sufficient basis for selecting equipment or capacity.
No universal heater size or thermostat setting can be derived from enclosure footprint alone. Heat demand may be affected by:
- Local winter design conditions
- Wind exposure
- Wall, roof, door, floor, and perimeter thermal performance
- Total enclosure surface area
- Air leakage at doors, seams, base joints, vents, and penetrations
- Ground, gravel, or slab configuration
- Heat emitted by operating equipment
- Location of vulnerable pipes and valves
- Desired minimum indoor temperature
- Frequency and duration of door opening
- Recovery needs after an outage or service visit
For quote comparison, ask how the proposed design addresses six separate layers:
- The intended thermal boundary, including walls, roof, door, base, and penetrations.
- Unwanted air leakage at joints, openings, and seals.
- Project-specific heat demand, if supplemental heat is proposed.
- Especially exposed piping, with the treatment determined by the responsible trade.
- Temperature and power monitoring, if included.
- A response plan for heater or utility-power failure.
An archived GreenBuildingAdvisor community discussion mentions thermostatic heat and an independent low-temperature alarm while also documenting disagreement about slab insulation and moisture management. It is useful as an illustration of questions to consider, not as a code, controlled test, engineering method, or basis for heater sizing. Review the community discussion in that limited context.
A low-temperature alarm may be worth discussing, but the supplied evidence does not establish the correct device, sensor position, wiring method, notification route, or alarm threshold for a particular project. Those details should be resolved with the people responsible for the enclosure and its electrical and mechanical systems.
Likewise, examples ranging from a light bulb to multi-kilowatt heaters do not support a recommendation. Ask for a project-specific heat-loss calculation based on the actual enclosure dimensions, assembly, estimated leakage, target temperature, and local winter conditions. Heater, receptacle, heat-trace, alarm, and wiring choices should be determined by a qualified trade working to applicable local requirements; this comparison does not establish a compliant selection.
Outage-planning checklist
Use this list to frame questions for the installer or system designer:
- [ ] How quickly could the enclosure cool after loss of heat?
- [ ] Which pipe, valve, tank, or control is most vulnerable?
- [ ] How will indoor temperature and power status be monitored?
- [ ] Who receives an alert?
- [ ] Will the notification route work when the property is unattended?
- [ ] How quickly can someone respond during snow, ice, or road closures?
- [ ] What project-specific backup, shutdown, drainage, or restoration procedure is approved?
- [ ] How and when will alarms and response procedures be tested?
- [ ] What happens if the pump, heater, and utility power fail together?
The goal is not to attach a freeze-proof label to a box. It is to understand how the proposed system is expected to behave when outdoor temperature falls, wind increases, a door seal leaks, or power is lost—and to identify which claims remain undocumented.
Foundation, anchoring, lifting, and installation questions
A floorless structure can be positioned around an existing well head and plumbing without routing that equipment through a finished floor. It may also preserve the possibility of removing the enclosure for major service. Those advantages do not eliminate the need to coordinate the base, drainage, soil, exposure, attachment method, and manufacturer instructions.
Documented attachment provisions differ:
- Polar: a treated two-by-four base plate, with manufacturer guidance to bolt it to concrete using concrete anchors.
- Dillon: bolt-down flanges that may be positioned internally or externally.
- All-Tex: manufactured tabs at all four corners for anchor bolts.
- Open-floor placement: All-Tex describes positioning the house over a well or attaching it to a concrete pad.
Polar also reports that some customers use rebar stakes on dirt or gravel, while recommending anchoring to a solid surface. That customer practice is not evidence that stakes are adequate for every soil, structure, or wind exposure.
An anchor tab, flange, or base plate is only an attachment provision. It does not prove that anchors are included, that the underlying base is suitable, or that the completed installation satisfies project-specific uplift or structural requirements. Ask the manufacturer what foundation and attachment information it supplies, then have the proposed arrangement checked for the actual site.
Lifting provisions also vary. Polar and M&D offer optional lifting eyes, while Dillon lists roof eye bolts. The presence of a lifting point does not establish:
- Total structure weight
- Rated lifting capacity
- Approved sling or spreader arrangement
- Permitted lifting direction
- Whether the door must be secured
- Whether the building may be lifted with equipment inside
- Whether rigging hardware is included
M&D states that customers must provide their own equipment and personnel to load units at its lots. That affects logistics and total cost: purchasing the enclosure does not necessarily include seller-side loading, freight, unloading, or final placement.
Resolve these questions before ordering:
- Who loads the structure at the seller’s location?
- Who arranges and pays for freight?
- Who unloads and sets it at the site?
- Is rigging supplied, or must the buyer provide it?
- What are the verified empty weight and center of gravity?
- What equipment capacity and reach are required?
- Are the lift points rated, and what lifting procedure does the manufacturer authorize?
- Must doors, panels, or installed equipment be removed or secured before lifting?
- Can the enclosure be removed later for pump or well service?
- What base, pad, or foundation information is provided?
- Which anchors and attachment hardware are included?
- Who is responsible for grading and drainage?
Foundation dimensions, uplift resistance, setbacks, drainage, permits, snow loads, and wind loads must be verified for the actual site. The supplied product pages do not establish universal requirements, and a detail used for one enclosure on concrete should not be transferred automatically to another structure on gravel or soil.
Control leaks and condensation without assuming one ventilation answer
Moisture inside a well house can come from at least three different sources:
- Plumbing leakage, including slow seepage at valves, unions, filters, drains, or pressure-tank connections.
- Water entering at the base, such as runoff, wind-driven rain, snowmelt, or groundwater.
- Condensation, which may occur when cold well water lowers the surface temperature of pipes, tanks, or equipment below the surrounding air’s dew point.
These sources require different responses. A vent will not repair a leaking fitting or redirect runoff. Conversely, sealing every opening does not prevent condensation if moist air continues to contact cold surfaces.
That is why “add a vent” and “seal it tightly” are both incomplete instructions when detached from climate, enclosure operation, and moisture sources.
The available sources do not present a consensus. The North Idaho vendor guide proposes a small screened low vent intended to manage condensation while limiting heat loss. The archived community discussion emphasizes air sealing and also considers drainage and possible summer dehumidification. Neither source supplies a universally applicable airflow calculation or tested design.
Accordingly, the evidence does not support one vent size, airflow rate, sealed-envelope rule, or dehumidifier capacity. Use the following list to organize a project-specific discussion:
- [ ] Inspect likely leak points and keep them visible.
- [ ] Avoid burying valves, unions, drains, or filters behind fixed finishes.
- [ ] Ask how surface water will be kept away from the base.
- [ ] Have any drainage arrangement reviewed for the site and local requirements.
- [ ] Keep controls and connections away from likely wet areas.
- [ ] Identify and seal unintended envelope gaps that create drafts.
- [ ] Evaluate winter and summer condensation separately.
- [ ] Inspect cold pipes, tank surfaces, fasteners, framing, and panel joints.
- [ ] Determine whether proposed ventilation helps or hurts under seasonal conditions.
- [ ] Keep door seals, coatings, drains, and moisture-control components accessible for maintenance.
The floor and ground boundary also remain project-specific. Leaving soil or gravel thermally connected may capture some ground heat, but it may complicate air sealing and moisture control. Perimeter or sub-slab insulation changes heat flow and must be coordinated with the foundation design. The community discussion considers leaving the ground connected, insulating the perimeter, and adding sub-slab insulation, but supplies no authoritative consensus.
Keep generator ventilation separate from well-house moisture control. The vendor guide distinguishes the two because a generator enclosure raises additional combustion-air and exhaust questions. The supplied evidence is not sufficient to design a shared generator and water-equipment enclosure.
Compare listed prices with the likely total installed cost
Seller-page prices are useful for preliminary budgeting, but they do not establish the current delivered or installed cost. Two houses with the same nominal footprint may differ in height, panel condition, insulation, door, attachment hardware, finish, loading terms, and delivery distance.
Seller-page price snapshot
The figures below are prices displayed in the supplied seller pages. The research record does not include retrieval dates, so no access date can be stated without inventing one. Reconfirm every price, configuration, loading term, and availability condition directly with the seller.
| Seller | Listed item | Seller-page price | Important qualification |
|---|---|---|---|
| M&D | 4 × 4 × 5 ft | $1,075 | Promotional figure; reused panels |
| M&D | 64 × 64 in | $1,210 | Promotional figure |
| M&D | 80 × 80 in | $1,400 | Promotional figure |
| M&D | 80 × 80 in tall-wall | $2,000 | Promotional figure |
| M&D | Optional lifting eye | $150 | Customer must supply loading equipment and personnel |
| K&L | 29 × 29 in well-head cover | $400 | Cover, not a full walk-in house |
| K&L | 48 × 48 × 83 in house | $1,270 | Delivery and installation terms not stated |
| K&L | 64 × 64 in house | $1,430 | Height not stated |
| K&L | 80 × 80 in house | $1,640 | Height not stated |
M&D’s figures are promotional, and its reused-panel construction is not directly equivalent to a product with a different shell, insulation system, door, or condition. The customer-loading requirement should also be included in the logistics budget.
K&L lists the compact cover separately from the full houses. Its catalog does not establish freight, taxes, installation, warranty, current availability, or complete construction specifications.
Dillon, All-Tex, and Polar do not provide comparable prices in the supplied pages. No reliable estimate for those products should be invented.
Total-cost worksheet
Add a line for each applicable cost when comparing quotes:
| Cost category | Quote or allowance | Confirmed in writing? |
|---|---|---|
| Base enclosure | ||
| Size or layout customization | ||
| Door, vent, window, or lighting options | ||
| Paint, coating, or finish | ||
| Dealer markup | ||
| Freight | ||
| Seller-side loading | ||
| Site unloading | ||
| Crane, forklift, skid steer, or rigging rental | ||
| Site clearing, grading, and drainage | ||
| Foundation, slab, curb, or prepared base | ||
| Anchors and attachment hardware | ||
| Placement and installation labor | ||
| Electrical design and installation | ||
| Heater and controls | ||
| Project-specific pipe protection | ||
| Temperature and power monitoring | ||
| Permits and inspections | ||
| Taxes | ||
| Ongoing energy and maintenance |
Request a written delivered quote that identifies the exact model and specifications, included hardware, loading and unloading responsibility, placement scope, lead time, current availability, warranty, exclusions, and return conditions. A low catalog price may cease to be the least expensive option once missing logistics and site work are included.
A specification-first checklist for comparing quotes
Do not begin by naming a “best” insulated well house. Begin by eliminating options that do not fit, then compare the information each seller can document.
Dimensions and access
- [ ] Exterior length, width, and overall height
- [ ] Usable interior dimensions
- [ ] Wall and roof thickness
- [ ] Clear door width and height
- [ ] Door swing and required exterior clearance
- [ ] Roof slope and minimum interior headroom
- [ ] Working space at valves, controls, filters, and tanks
- [ ] Complete tank- and vessel-removal route
- [ ] Access required for pump or well service
- [ ] Allowance for future treatment or control equipment
Thermal specifications
- [ ] Insulation material and manufacturer
- [ ] Insulation or panel thickness
- [ ] Stated assembly R-value
- [ ] Test basis for the stated R-value
- [ ] Roof and door insulation
- [ ] Floor, skirt, slab-edge, or base treatment
- [ ] Thermal bridging through frames and fasteners
- [ ] Locations of panel joints and seals
- [ ] Door weather-stripping details
- [ ] Documented operating limits—or explicit confirmation that none are stated
Structure and installation
- [ ] Total empty weight
- [ ] Foundation or base requirements
- [ ] Manufacturer attachment or anchor schedule
- [ ] Anchor type, quantity, spacing, and embedment
- [ ] Included and excluded hardware
- [ ] Wind, snow, and uplift ratings
- [ ] Test reports or engineering documents behind any ratings
- [ ] Assembly and installation instructions
- [ ] Required site tolerances and drainage
- [ ] Permit documentation available from the manufacturer
Lifting and delivery
- [ ] Location and rating of lift points
- [ ] Maximum permitted lifting weight
- [ ] Approved sling, spreader, or rigging method
- [ ] Whether doors or panels require bracing
- [ ] Whether installed equipment must be removed
- [ ] Freight cost and delivery limitations
- [ ] Seller-side loading responsibility
- [ ] Buyer-side unloading responsibility
- [ ] Required equipment capacity and reach
- [ ] Final placement and leveling responsibility
Freeze planning
- [ ] Person responsible for the heat-loss calculation
- [ ] Outdoor design conditions used
- [ ] Minimum indoor design temperature
- [ ] Trade responsible for heater and electrical selection
- [ ] Treatment of especially vulnerable pipes
- [ ] Temperature-sensor locations
- [ ] Low-temperature notification method
- [ ] Power-failure notification method
- [ ] Backup or outage-response plan
- [ ] Maintenance and pre-winter testing schedule
Moisture and maintenance
- [ ] Drainage provision for leaks
- [ ] Protection against water entering at the base
- [ ] Condensation-control strategy
- [ ] Seasonal purpose of any vent
- [ ] Corrosion protection
- [ ] Paint or coating requirements
- [ ] Door-seal inspection and replacement
- [ ] Visibility of leak-prone fittings
- [ ] Heater and alarm inspection intervals
- [ ] Anchor, panel-joint, and roof-maintenance schedule
Commercial terms
- [ ] Current enclosure price
- [ ] Delivered price
- [ ] Taxes and fees
- [ ] Customization charges
- [ ] Lead time and availability
- [ ] Dealer service area
- [ ] Installation scope
- [ ] Warranty duration and exclusions
- [ ] Replacement parts and seals
- [ ] Cancellation and return conditions
- [ ] Responsibility for damage in transit or unloading
Use the following decision sequence:
- Eliminate options that do not fit the equipment, door opening, service space, or replacement route.
- Compare known construction and insulation data while marking missing fields “not stated.”
- Calculate the complete delivered and installed cost.
- Identify unresolved heat, moisture, electrical, lifting, foundation, and structural questions.
- Verify local foundation, structural, plumbing, electrical, drainage, setback, and permit requirements.
- Commit only after the seller’s scope and specifications are in writing.
Mortar Desk is an independent general-reference publisher, not a seller, contractor, or engineering adviser. Its published limitations note that specifications change and codes are local. Read Mortar Desk’s scope and limitations.
Frequently asked questions
Does an insulated well house need a heater in freezing weather?
It may. Insulation reduces the rate of heat loss but does not create heat. Whether supplemental heat is needed depends on outdoor conditions, enclosure size, insulation, air leakage, ground or slab configuration, internal heat sources, vulnerable equipment, and the required indoor temperature.
Do not select capacity from a seller anecdote or from footprint alone. Ask for heat demand to be calculated for the actual enclosure, and address monitoring and outage response as separate parts of the plan.
What R-value should an insulated well house have?
The supplied evidence does not establish one R-value for every climate or enclosure. R-value is only one input; doors, panel joints, framing, air leakage, surface area, wind, ground conditions, and available heat also affect performance.
Ask for wall, roof, door, and any floor or perimeter values, together with the test basis and thermal-bridge details. If a seller gives only insulation type or thickness, record the assembly R-value as “not stated” rather than estimating it.
Can a floorless well house be installed on dirt or gravel?
Some floorless houses can be positioned over dirt or gravel, but the correct base and attachment method depend on drainage, soil, exposure, structure, manufacturer instructions, and local requirements. A report that another customer used rebar stakes does not establish that the method is adequate for a different site.
Ask the manufacturer for its base and attachment information, then have the proposed installation checked for the actual location.
How much does a prefabricated insulated well house cost?
The reviewed pages show that compact covers and walk-in houses occupy different price categories, but the displayed figures are undated seller-page snapshots rather than verified current totals. The products are not directly equivalent.
Budget separately for freight, loading, unloading, placement equipment, site preparation, foundation work, anchors, electrical work, heat, monitoring, permits, taxes, and ongoing energy use. Obtain a current written delivered quote before comparing final costs.
Should an insulated well house be ventilated?
Not automatically. Ventilation may remove moisture under some conditions, but it can also increase winter heat loss or introduce humid summer air. Cold well water may contribute to condensation even when the enclosure has no obvious plumbing leak.
Evaluate leaks, drainage, air sealing, seasonal humidity, and cold-surface condensation together. The supplied evidence does not support a universal vent size, fully sealed design, or dehumidifier capacity.
Make the final decision from documented specifications
The best-supported purchasing approach is to compare disclosed specifications rather than broad freeze-protection or durability claims.
Measure the equipment, working area, door opening, and replacement path first. Mark undisclosed insulation, structural, lifting, and installation data as unknown instead of estimating it. Calculate the complete delivered and installed cost, not just the enclosure price. Then identify unresolved questions involving heat, moisture, anchoring, electrical work, drainage, lifting, and outage response.
Before ordering, obtain the manufacturer’s specifications and commercial terms in writing. Verify applicable foundation, structural, plumbing, electrical, drainage, setback, and permit requirements for the actual site with the relevant local authority and qualified trades.