 MortarDesk
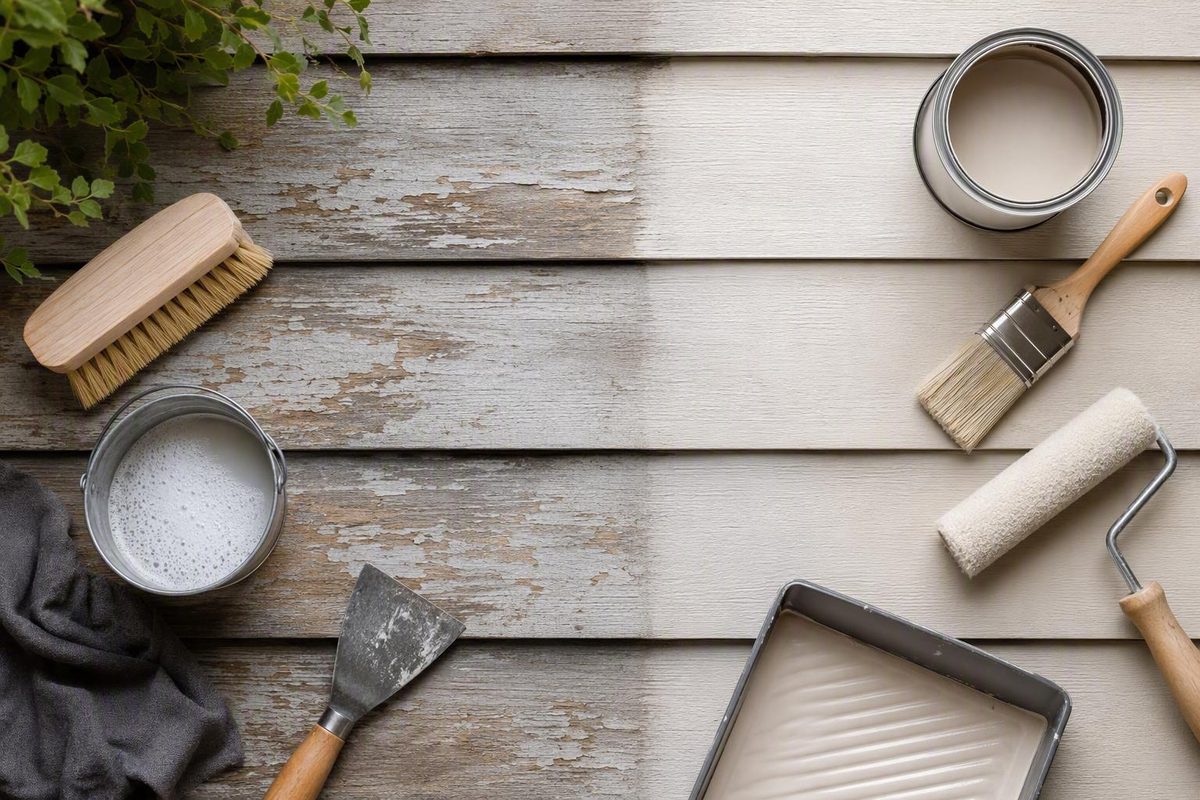
Repainting cedar siding is not simply a matter of choosing a color and adding another coat. Durability depends largely on what is beneath the new finish: whether the existing coating is bonded, whether the cedar is sound and dry, whether the wall can drain, and whether the primer can control tannin staining.
The required work may vary around the same house. One elevation may need washing, localized scraping, spot priming, and repainting. Another may have widespread weathering that justifies broader sanding and full-surface priming. Recurring bubbles, persistent dampness, or repeated peeling can indicate that the project is no longer just a painting job.
A practical sequence is:
- Assess each elevation and investigate recurring failure.
- Identify the existing finish as reliably as possible.
- Address lead risk, access, tools, and weather.
- Repair damaged siding and correct moisture paths.
- Clean, scrape, and feather-sand without damaging the cedar.
- Choose spot or full-surface priming according to conditions.
- Apply a compatible finish with complete, even coverage.
- Inspect periodically and diagnose symptoms before recoating.
Start With a Three-Way Condition Assessment
Begin by sorting each elevation into one of three conditions. This avoids turning a few bare patches into an unnecessary stripping project—and prevents systemic failure from being hidden under another coat.
1. Sound coating with isolated defects
Here, most of the existing paint or solid-color stain remains firmly bonded. Defects are limited to areas such as board ends, fastener heads, a few peeling edges, or small patches below a window.
The usual approach is to:
- Repair isolated damage.
- Clean the elevation.
- Scrape failed coating.
- Feather-sand the prepared edges.
- Prime exposed cedar as required.
- Apply the specified finish coat or coats.
Firmly bonded coating does not automatically need to be removed. The objective is to eliminate unstable material and prepare the retained finish so the new system can adhere. Industry guidance for Western red cedar similarly recommends scraping loose, cracked, or peeling coatings and feathering the remaining edges rather than stripping every intact layer by default (Real Cedar siding-finishing guidance).
2. Widespread bare or weathered cedar
Place a wall in this category when coating loss is extensive, much of the cedar is exposed, or the surface has become rough, fibrous, discolored, or heavily weathered.
This condition normally requires broader preparation than a few spot repairs. Loose coating still must be removed, but degraded wood fibers may also need sanding. Because extensive bare cedar and numerous cut or repaired areas increase the risk of uneven absorption and tannin bleed, full-surface stain-blocking primer may be more appropriate than isolated spot priming.
Cedar does not require replacement merely because it is old. Age and coating failure are not the same as wood failure. A board that remains firm, intact, and serviceable may be refinished; a board that is soft, rotten, broken, or extensively split is a stronger candidate for replacement.
3. Repeated or systemic coating failure
Stop treating the project as routine repainting if a recently coated house develops widespread bubbling, the same areas peel after each coating cycle, or the siding remains persistently damp.
Possible contributors include:
- Roof, window, trim, or penetration leaks.
- Missing or defective flashing.
- Poor drainage at the base of the wall.
- Condensation or high interior moisture.
- Inadequate ventilation or drying behind the siding.
- Lap bottoms or other drainage paths sealed with caulk or paint.
- Surface contamination.
- Weak underlying coating layers.
- Incompatible primer and finish systems.
- Coating damp wood or applying the topcoat before the primer was ready.
These conditions can create similar symptoms, so a blister is not a diagnosis. Community discussion of newly bubbling cedar illustrates the uncertainty: moisture, sealed laps, contamination, incompatible coatings, and application timing were all proposed, but the cause could not be confirmed without inspecting the wall (Home Improvement Stack Exchange discussion).
Inspect each elevation separately
Do not assume that the front of the house represents the other walls. Record each elevation separately, noting:
- Direct sun and heat.
- Persistent shade.
- Nearby trees, shrubs, and climbing plants.
- Wind-driven rain.
- Roof and gutter runoff.
- Splashback near grade.
- Snow accumulation.
- Marine, freeze-thaw, or other local exposure.
- Windows, decks, roofs, and trim that interrupt drainage.
Inspect board faces, laps, end grain, corners, penetrations, and transitions. Look for:
- Soft or rotten wood.
- Broken, split, or loose boards.
- Protruding or loose fasteners.
- Rust or dark staining around fasteners.
- Failed joints and caulk.
- Mildew or other organic growth.
- Exposed cuts and end grain.
- Chalking, cracking, peeling, or blistering.
- Coating that releases with little resistance.
- Water staining or persistently damp areas.
Photograph defects and mark them on a simple elevation sketch. Documentation separates coating-preparation areas from carpentry or drainage repairs and preserves a record of conditions that will disappear beneath the finish.
Use this compact decision tree:
- Localized defects with otherwise sound coating: clean, scrape, feather-sand, spot-prime where permitted, and repaint.
- Widespread exposed or weathered cedar: perform broader preparation and consider full-surface priming.
- Recurring bubbles, broad peeling, or unexplained dampness: stop and diagnose before refinishing.
Before committing to an entire elevation, prepare a representative test area and apply the proposed system according to its instructions. Check adhesion, stain blocking, compatibility, color, texture, and appearance after drying.
Mortar Desk publishes general reference information, not an individual diagnosis. Extensive rot, inaccessible elevations, persistent moisture, or suspected defects within the wall assembly warrant evaluation by an appropriately qualified professional.
Identify the Existing Finish Before Choosing the Next One
Compatibility begins with identifying what is already on the wall. The practical categories are:
- Latex or acrylic paint.
- Older oil-based paint.
- Solid-color stain.
- Penetrating semi-transparent stain.
Appearance alone may not settle the question. Opaque solid-color stain can resemble paint, and multiple weathered layers can obscure the behavior of the original finish. Do not rely solely on color, sheen, or one scraped edge.
Look for:
- Labeled leftover cans.
- Invoices and project records.
- Contractor specifications.
- Previous owners’ maintenance records.
- Product names visible in old photographs.
- Written guidance from the manufacturer of the proposed system.
When the retained coating is sound, continuing with the same general finish type is usually the lower-risk approach. It reduces uncertainty about adhesion and avoids the extensive removal often required when changing to a fundamentally different system.
Recoating latex and old oil-based finishes
Old latex coatings are generally recoated with latex rather than an oil-based finish paint. A sound older oil-based coating may accept an acrylic-latex topcoat after cleaning, suitable preparation, and application of an approved compatible primer.
“May accept” is important. The retained coating must still be firmly bonded, clean, and properly prepared. Glossy areas may require deglossing, and the primer must be suitable for both the old coating and the new topcoat. Confirm the complete assembly—not just the finish paint—against current technical data.
Can painted cedar be switched to stain?
Painted cedar generally cannot be changed directly to a penetrating stain. Retained paint prevents absorption, producing an uneven surface where bare areas take stain differently from coated areas.
A penetrating stain becomes realistic only if enough paint is removed to expose uniformly absorbent wood. That work can be laborious, and aggressive removal can damage soft siding. Test a small area before full stripping to determine whether the cedar can be exposed evenly and whether the intended appearance is achievable.
Solid-color stain requires separate consideration. It provides more color coverage than semi-transparent stain and, depending on its formulation and substrate, may behave more like a film-forming coating. The word stain does not by itself guarantee penetration, simple renewal, or freedom from peeling.
Choose according to appearance and system suitability:
- Paint provides opaque, uniform color and largely conceals the grain.
- Semi-transparent stain leaves more wood color and grain visible but requires absorbent wood.
- Solid-color stain provides greater color uniformity while often preserving more surface texture than paint.
A manufacturer’s overview also distinguishes these appearances and notes that painted cedar must be stripped or worn sufficiently bare before stain can penetrate (ZAR paint-versus-stain overview).
Before buying materials, confirm that the retained coating, cleaner, repair products, primer, caulk, and topcoat are approved for use together. Current product technical data should control over generic rules.
Plan for Lead, Access, Tools and a Suitable Weather Window
Exterior preparation creates debris and may involve ladders, cleaners, abrasives, solvents, and spray equipment. Address those conditions before scraping begins.
Address possible lead paint first
For a home built before 1978, test the existing coating for lead before scraping or sanding. If lead is found or presumed, pause ordinary preparation and consult the current government guidance applicable to the property and jurisdiction or engage a qualified lead-safe professional. Do not improvise disturbance, containment, cleanup, or disposal procedures from a standard painting checklist (cedar-preparation safety guidance).
Decide whether access is suitable for DIY work
High elevations, steep grades, difficult roof transitions, overhead work, nearby electrical service, and extensive coating removal can move a project beyond reasonable DIY limits.
Reconsider doing the work yourself if you cannot establish stable access or complete every repair and preparation step without overreaching. Hiring help for upper dormers or difficult rooflines is preferable to leaving those areas inadequately scraped, repaired, or coated.
Assemble the basic tools
A non-brand-specific setup may include:
- Garden hose and controlled water supply.
- Soft-bristle cleaning brush.
- Exterior wood cleaner suitable for the coating and site.
- Paint scrapers in appropriate shapes.
- Abrasives suitable for feathering and deglossing.
- Dust-control equipment appropriate to the identified hazard.
- Moisture meter if required by the selected system.
- Brushes, rollers, or permitted spray equipment.
- Buckets, trays, grids, and extension poles.
- Masking paper, film, tape, and drop protection.
- Paintable exterior caulk compatible with the system.
- Tools and materials for limited repairs.
- Access equipment suitable for the site.
Avoid steel wool and wire brushes. They can leave metal deposits that react with cedar and create dark blue-black staining.
Select the weather window from product instructions
The siding must be dry enough for the selected primer and paint, but there is no universal moisture percentage or fixed waiting period for every product and project.
Plan for conditions in which:
- Cleaning water and recent rain can dry.
- The siding is not damp.
- Direct sun has not excessively heated the surface.
- Rain is unlikely to interrupt application or curing.
- Temperature and humidity remain within product limits.
- Heavy wind will not disrupt application or carry overspray.
Check the instructions for every selected cleaner, repair product, caulk, primer, and finish. Confirm:
- Application-temperature range.
- Permitted substrate-moisture level.
- Drying and recoat intervals.
- Coverage or application rate.
- Preparation requirements.
- Safety precautions.
- Restrictions involving sun, rain, humidity, or wind.
Requirements can differ among products in the same system. A primer that feels dry may not yet be ready for a topcoat.
Repair Damage and Correct Moisture Paths Before Coating
Painting should follow carpentry and moisture correction, not conceal the need for them.
Replace siding that is soft, rotten, broken, or extensively deteriorated. Limited defects in otherwise sound boards may sometimes be repaired with a compatible exterior product, but filler is not a cure for continuing wetting. Correct the moisture source first.
Reset loose or protruding fasteners. Where replacement is necessary, use corrosion-resistant exterior fasteners appropriate for the cedar, siding profile, substrate, and exposure.
Inspect common water-entry and retention points:
- Roof-to-wall intersections.
- Window and door heads, jambs, and sills.
- Trim-to-siding transitions.
- Flashing above openings and penetrations.
- Deck and porch attachments.
- Soffits and fascia.
- Vents, pipes, lights, and utility penetrations.
- Gutters, downspouts, and splash zones.
- Lower walls near soil or paving.
Bubbles or repeated peeling may be associated with moisture in or behind the siding, but appearance alone cannot establish the cause. Contamination, weak underlying paint, incompatible layers, inadequate drying, and poor application conditions can look similar. Discussions of repeatedly failing cedar show substantial disagreement over causes and remedies, reinforcing the need for site-specific investigation rather than diagnosis from photographs (PaintTalk failure discussion).
Caulk selectively
Remove failed caulk only where the joint is intended to be sealed, then install a paintable exterior sealant compatible with the coating system. Appropriate locations may include certain trim joints and penetrations, but the correct treatment depends on the wall design.
Do not automatically caulk:
- Bottom edges of lap siding.
- Openings intended to drain.
- Ventilation paths.
- Weep details.
- Joints intentionally left open by the siding system.
Sealing these locations may trap water or obstruct drying. If the proper treatment is uncertain, identify the siding profile and wall detail before applying sealant.
Pause the project if dampness remains unexplained, damage extends behind the siding, or broad failure has returned after previous repainting. The next step may require inspection of flashing, sheathing, drainage, ventilation, and interior moisture conditions—not another coating.
Clean, Scrape and Feather-Sand Without Damaging the Cedar
Use a conservative sequence:
- Remove loose debris and protect adjacent surfaces.
- Clean away dirt, chalk, grime, and organic growth.
- Rinse as directed by the cleaner.
- Let the siding dry.
- Scrape failed coating.
- Feather-sand edges and degraded areas.
- Remove preparation dust.
- Verify that the substrate meets the coating system’s moisture requirement.
If the selected cleaner requires a different sequence, follow its instructions.
Hand washing is the lower-risk default
For old, soft, heavily weathered, or fragile cedar, begin with a hose, suitable mild exterior cleaner, and soft-bristle brush. Work in manageable sections, do not let the cleaner dry on the wall, and rinse as directed.
Organic growth must be removed rather than painted over, but do not assume that any household chemical is suitable. Cleaner compatibility, runoff, nearby plants and metals, dwell time, mixing restrictions, and protective measures vary by product.
Treat pressure washing as a controlled option, not a stripping method
Pressure washing should not be used as an aggressive substitute for scraping. Concentrated spray can gouge soft cedar, erode fibers, drive water into joints, and prolong drying. Industry guidance specifically warns against power washing as a coating-removal method because damaged fibers can impair adhesion.
If the siding and coating guidance permit cautious pressure cleaning:
- Keep pressure low.
- Use a broad fan pattern.
- Maintain adequate distance.
- Keep the spray moving.
- Avoid concentrating water on damaged areas.
- Never direct spray upward beneath laps.
- Stop if fibers lift, fray, or erode.
These are risk controls, not a universal equipment specification. Hand washing is preferable where the cedar cannot tolerate controlled pressure (preparation and pressure-cleaning guidance).
Remove failed paint, not every sound layer
Scrape coating that is:
- Loose.
- Flaking.
- Peeling.
- Cracked and lifting.
- Blistered.
- Poorly bonded.
Work carefully with the grain where practical to reduce gouging. Do not force a scraper beneath paint that remains firmly attached merely to create a uniformly bare wall.
Full stripping may be necessary when failure extends through multiple coating layers, the retained system is incompatible with the proposed finish, or a penetrating stain is planned. It is not the default requirement for every cedar repaint.
Feather-sand where conditions require it
Sand transitions between exposed cedar and retained coating so the edges are stable and less visible. Also address:
- Rough or weathered fibers.
- Splinters.
- Scraper marks and shallow gouges.
- Glossy coating that requires deglossing.
- Raised repair material.
- Dried primer runs or defects.
Whole-house sanding is not automatically necessary. The scope depends on adhesion, texture, coating buildup, substrate condition, and the expected appearance. Rough-sawn siding will retain its texture, while smooth clapboards may reveal preparation ridges more readily.
After cleaning, rain, or wet preparation, allow the siding to dry. Check shaded walls, lower courses, joints, and repairs—not only a sunny board. If the manufacturer specifies a moisture limit, verify it by the prescribed method rather than relying on a universal waiting period.
Choose Between Spot Priming and Full-Surface Priming
Cedar contains tannins that can migrate through a coating and appear as yellow, brown, or reddish discoloration. Finish paint may conceal the stain temporarily without preventing further migration.
Use a dedicated exterior stain-blocking primer labeled for cedar and approved for the retained coating and planned topcoat. An alkyd or oil-based stain-blocking primer may be used beneath acrylic-latex paint when the manufacturers approve the complete assembly. Primer and topcoat chemistry need not be identical, but compatibility must be established.
A “paint and primer” label does not by itself show that a finish paint can replace a separate cedar-compatible stain-blocking primer. Cedar guidance commonly distinguishes the stain-blocking primer from the acrylic-latex finish coat (Quality Cedar Products painting overview).
When spot priming may be appropriate
Spot priming may be reasonable when:
- Only isolated areas have been scraped to bare wood.
- The surrounding coating is firmly bonded.
- Tannin staining is not widespread.
- The old and new colors are similar.
- Repairs and field cuts are limited.
- The selected system expressly permits spot priming.
Prime each bare area completely rather than touching only the center of a patch. Cover exposed cuts, end grain, repairs, faces, and accessible edges that would otherwise remain unprotected.
When full-surface priming is more defensible
Full-surface priming may be justified when:
- Bare cedar is widespread.
- The surface is substantially weathered.
- Tannin staining has recurred.
- Repairs and field cuts are numerous.
- The retained coating is inconsistent.
- The color change is substantial.
- The project is changing coating systems.
- Spot priming produces uneven absorption or appearance.
An unknown coating requires compatibility investigation; full priming alone does not resolve that uncertainty. Manufacturer approval and a successful test patch should control. Full priming also cannot compensate for loose coating or damp wood.
Where permitted, tinting the primer toward the finish color may improve visual coverage during a major color change. Do not exceed the manufacturer’s tinting limits.
Use a representative test patch
A test patch is especially important where the old finish is unknown or tannin bleed has persisted. Prepare the area exactly as the wall will be prepared and apply the complete proposed system at its specified rate.
After the patch has dried or cured as directed, check:
- Adhesion to retained coating.
- Adhesion at bare-wood transitions.
- Tannin and knot blocking.
- Interaction with repairs and caulk.
- Color and sheen.
- Visibility of feathered edges.
- Surface texture.
- Bubbling, wrinkling, or lifting.
Apply the Acrylic-Latex Finish for Complete, Even Coverage
High-quality exterior acrylic-latex paint is a recurring topcoat recommendation for previously painted cedar. Verified compatibility and current product instructions still control; an “exterior” label alone does not establish suitability for every cedar substrate or retained coating.
Brush, roll, or spray?
Brushing is reliable for working coating into porous, textured, and detailed areas. It is particularly useful at board ends, lap undersides, corners, repairs, and transitions that broad application passes may miss.
Rolling can be effective on accessible faces when the product permits it. Back-brush or back-roll where needed to improve contact, level buildup, and reach surface texture.
Spraying can cover large elevations efficiently, but it requires careful masking and disciplined application. It does not eliminate brush work at difficult details. Conversely, it is too broad to claim that every sprayed finish will fail unless it is back-brushed. Follow the selected product’s instructions and back-brush or back-roll where required for that surface and system.
Work systematically
Move from top to bottom so runs can be corrected as work progresses. Maintain an appropriate wet edge and avoid stopping in conspicuous areas where lap marks may form.
Inspect and coat:
- Board faces.
- Accessible side edges.
- Lap undersides.
- Exposed end grain and cuts.
- Corners.
- Repairs and filled areas.
- Trim transitions.
- Fastener areas.
- Rough or recessed texture.
- Areas missed by a direct spray or roller pass.
Do not bridge open drainage joints with heavy paint buildup. Preserve the function of lap bottoms and other details intended to remain open.
When spraying:
- Mask windows, doors, roofs, fixtures, landscaping, and adjacent property.
- Maintain consistent passes and overlap.
- Avoid runs and excessive buildup.
- Monitor wind and overspray.
- Brush inaccessible details separately.
- Work coating into rough areas where the instructions require it.
- Check coverage from several viewing angles.
Do not assume one spray tip, pressure, overlap, or spread rate is suitable for every product and surface.
Correct primer defects before finishing
Once the primer is ready for preparation, inspect it in raking light. Sand runs, drips, raised repair edges, or other defects as needed, then remove the dust. A finish coat usually emphasizes hardened defects rather than hiding them.
Determine coat count from the actual system
Two finish coats are commonly preferred over primed bare cedar and for major color changes. They may also be necessary to achieve uniform appearance or the specified film build. They are not a universal requirement for every repaint.
Determine the number of coats from:
- Manufacturer instructions.
- Required application rate.
- Amount of bare or repaired cedar.
- Color change.
- Texture and porosity.
- Coverage after drying.
- Uniformity of sheen and color.
- Required coating thickness.
Observe the specified drying and recoat intervals. Do not topcoat primer merely because it feels dry, and do not coat damp or sun-heated siding. Stop early enough that falling temperatures, dew, rain, or other unsuitable conditions will not interfere with curing.
Troubleshoot Failures and Maintain by Inspection, Not the Calendar
When a symptom returns, investigate its possible causes before adding more material.
| Symptom | Possible explanations | Appropriate response |
|---|---|---|
| Yellow, brown, or reddish bleed-through | Cedar tannins, incomplete stain-blocking primer coverage, exposed cuts, or unsuitable primer | Identify where staining originates and whether the specified stain-blocking primer fully covered the cedar. Test the corrected system before broad recoating. |
| Bubbles soon after painting | Moisture, contamination, incompatible layers, incomplete primer cure, excessive heat, damp substrate, or unsuitable application conditions | Stop repeated spot recoating. Open a representative failed area, document the layers, check moisture and water paths, and review compatibility and timing. |
| Peeling at old paint edges | Weak retained coating, inadequate scraping, abrupt edges, or poor feathering | Remove unstable material until the remaining edge is sound, then feather the transition. |
| Broad recurring peeling | Moisture, weak underlying layers, contamination, system incompatibility, or wall-assembly defects | Diagnose the wall before another full repaint. Do not assume stronger primer alone will solve the problem. |
| Mildew returning | Residual growth, incomplete cleaning, persistent dampness, shade, vegetation, or nearby moisture sources | Clean appropriately and address conditions that keep the wall damp. Do not treat mildew only as a paint defect. |
| Dark blue-black marks | Metal contamination from steel wool or wire brushes, or reactive fasteners | Identify and remove the source where practical, prepare the stain correctly, and replace unsuitable fasteners when necessary. |
| Cracks or open joints | Coating movement, failed sealant, wood movement, or incorrect joint detailing | Determine whether the joint is intended to be sealed before applying caulk. Preserve drainage and ventilation openings. |
A fixed repainting calendar is less useful than condition-based inspection. Coating life varies with climate, exposure, wall orientation, substrate condition, preparation, product, application rate, and maintenance.
Inspect the exterior periodically and after severe weather. Look for:
- Fading or chalking.
- Hairline cracking.
- Loss of adhesion.
- Exposed wood.
- Open joints.
- Failed caulk at joints intended to be sealed.
- Water staining.
- Softness or rot.
- Fastener movement or corrosion.
- Blocked drainage paths.
- Vegetation holding moisture against the siding.
Localized defects are generally easier to correct before they expand into broad exposed and weathered areas. Record where failures recur; repetition near the same window, roof transition, or lower wall may reveal a moisture path missed during the first inspection.
For repeated film-coating failure, obtain current manufacturer or professional guidance before full stripping or changing to a penetrating stain. Such a change is feasible only if retained paint can be removed sufficiently to expose uniformly absorbent wood. Flashing, drainage, sheathing, and ventilation behind the siding may also require investigation.
Stop coating and seek qualified evaluation when there is:
- Persistent moisture above the selected product’s limit.
- Extensive rot or concealed deterioration.
- Unexplained recurring bubbles.
- Broad failure after multiple repainting cycles.
- A suspected lead hazard that cannot be managed properly.
- Inaccessible or unsafe work areas.
- Evidence of flashing, drainage, or wall-assembly defects.
Frequently Asked Questions
Do I have to remove all the old paint before repainting cedar siding?
No. Remove loose, cracked, peeling, blistered, or poorly bonded coating. Firmly attached paint can often remain if it is clean, properly prepared, and compatible with the new system.
Feather-sand transitions between retained paint and exposed cedar. Full stripping may be justified where failure extends through multiple layers, the old finish is incompatible, or absorbent wood must be exposed for a penetrating stain.
Can cedar siding be pressure washed before repainting?
Sometimes, but treat pressure washing as cautious cleaning—not paint stripping. Soft, aged, or fragile cedar is generally safer to wash by hand.
Where pressure cleaning is permitted, use low pressure, a broad fan, adequate distance, continuous movement, and no upward spray beneath laps. Stop if the cedar begins to gouge, fray, or erode. Let the wall dry and verify that it meets the selected coating’s moisture requirement before priming.
Should bare cedar be spot-primed or should the entire wall be primed?
Spot priming may be sufficient where bare patches are isolated, the surrounding coating is sound, tannin staining is limited, and the selected system permits it.
Full-surface priming may be more defensible where exposed cedar is widespread, weathering is substantial, tannin bleed has recurred, repairs are numerous, or the project involves a major color or coating-system change. In either case, use a cedar-compatible exterior stain-blocking primer.
Can I apply acrylic-latex paint over an old oil-based finish?
Potentially. A sound old oil-based finish may accept acrylic-latex after thorough cleaning, any required deglossing or sanding, and application of a compatible primer. Painting over weak layers will not stabilize them.
Confirm the exact primer and topcoat combination with current manufacturer technical data rather than assuming compatibility because both products are labeled for exterior use.
Why is newly applied paint bubbling or peeling on cedar siding?
Possible causes include moisture in or behind the siding, contamination, weak retained paint, incompatible layers, incomplete primer cure, damp wood, excessive surface heat, or unsuitable application conditions.
Stop repeatedly sanding and repainting the same spots until the cause is investigated. Check water entry, flashing, condensation, drainage, ventilation, sealed lap bottoms, substrate moisture, preparation, primer timing, and coating compatibility. Old cedar does not require replacement solely because of age, but soft, rotten, broken, or extensively damaged boards should be repaired or replaced.
A Condition-Based Repaint Lasts Longer
The durable approach to repainting cedar siding is condition-based: preserve sound coating, remove unstable material, repair damaged wood, restore moisture control, clean and dry the surface, prime according to cedar exposure and tannin risk, and apply a compatible finish under suitable conditions.
When the evidence points to rot, persistent dampness, recurring bubbles, unsafe access, lead risk, or wall-assembly defects, diagnosis—not another coat—is the correct next step.