 MortarDesk
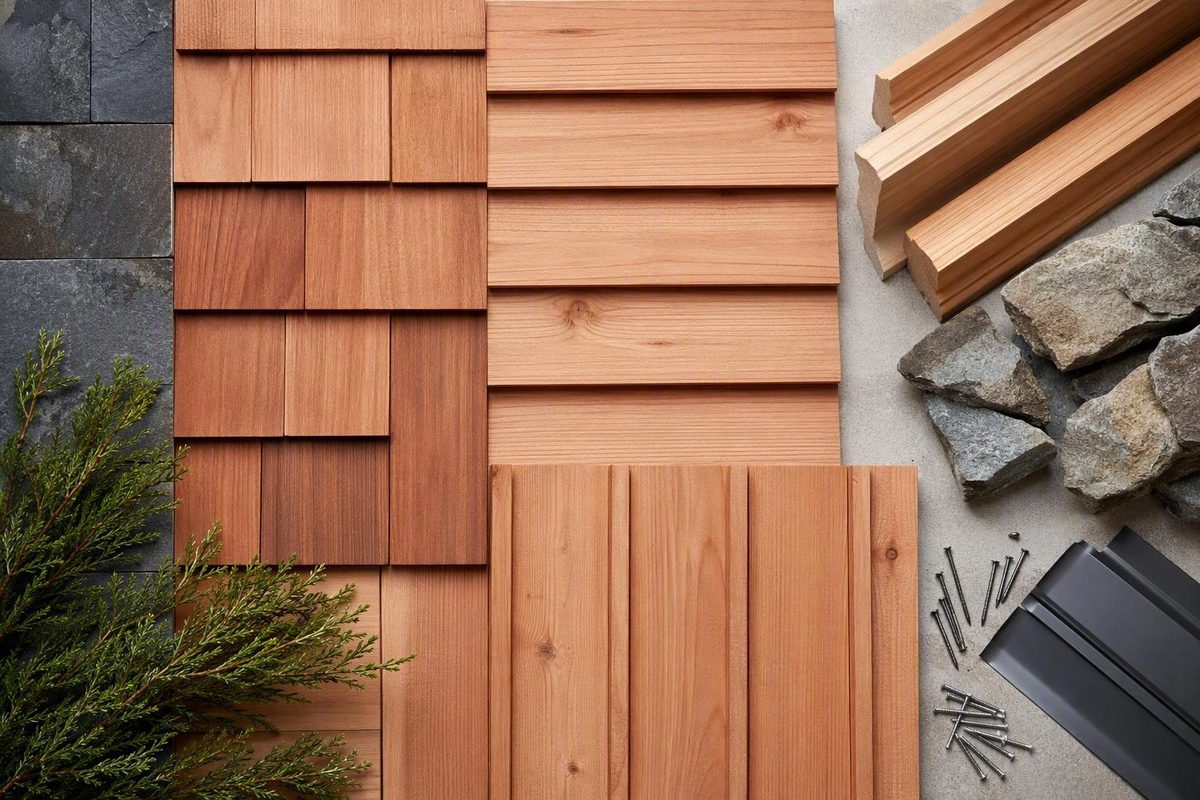
Red cedar siding is best evaluated as a wall system, not simply as a row of attractive boards. Species, profile, grade, actual dimensions, installed face coverage, moisture condition, finish, fasteners, substrate, flashing, drainage, freight, and warranty requirements all affect what the siding costs and how it must be installed.
Nominal board size and price per piece are therefore poor comparison tools on their own. Before ordering, convert every proposal into the same basic specification: verified species, applicable grade rule, installed coverage, landed material cost per installed square foot, finish system, fastening base, and water-management details.
This is a general purchasing and specification guide, not a buildable installation specification. Current product instructions, coating requirements, warranty terms, engineered wall details, evaluation reports, and local building codes take precedence.
What “red cedar siding” means when you are comparing products
“Cedar siding” is a broad commercial description. It can refer to natural siding made from red or white cedar, and solid wood must also be distinguished from engineered wood. Those materials should not be assumed to share dimensions, installation methods, maintenance requirements, or performance documentation. One contractor comparison, for example, defines cedar siding broadly as natural siding made from red or white cedar, illustrating why the commercial name alone is not sufficient identification.
Most of the technical guidance in this article concerns Western Red Cedar. Do not automatically apply it to Eastern white cedar, engineered wood, another species, or a product identified only as “cedar.”
For every product under consideration, ask the supplier to confirm:
- Botanical or recognized commercial species
- Solid-wood or engineered construction
- Grade designation and governing grading rule
- Kiln-dried, otherwise seasoned, or green moisture condition
- Profile name and profile drawing
- Actual milled dimensions
- Installed face coverage or exposure
- Permitted installation orientation
- Current installation manual
- Approved finish and fastener systems
- Applicable warranty and exclusions
Natural material characteristics must be separated from guaranteed product performance. Western Red Cedar is commonly selected partly for its natural resistance to decay, but that does not make a wall waterproof, rot-proof, pest-proof, or suitable for every climate. End grain, joints, penetrations, damaged finishes, trapped water, incompatible fasteners, and inadequate clearances remain potential failure points.
The practical question is not simply, “Is cedar naturally durable?” It is, “Is this particular cedar product suitable for this wall assembly, exposure, finish, and maintenance plan?”
This article retains red cedar siding as the common search term but treats the material as Western Red Cedar only where the documentation supports that identification. Mortar Desk publishes general reference information rather than individual contracting or engineering advice. Its editorial scope also emphasizes that specifications change and codes vary by locality.
Profiles, orientations, and grade labels
A siding profile is more than an appearance choice. Milling determines how courses overlap or interlock, how much of each board remains visible, where fasteners go, whether boards can move independently, and which installation orientations are permitted.
The main profile families can be compared as follows:
| Profile family | Typical visual and joint arrangement | Common orientation | What to verify before buying |
|---|---|---|---|
| Bevel | Tapered boards installed in overlapping courses | Usually horizontal | Installed exposure, required overlap, starter detail, nail position, butt-joint treatment |
| Board-and-batten | Wide boards with narrower battens covering or spanning their joints | Usually vertical | Board spacing, batten width and overlap, fastening sequence, horizontal nailers |
| Tongue-and-groove | One board’s tongue engages the adjacent board’s groove | Horizontal or vertical when permitted | Net face, expansion detail, groove orientation, blind- or face-nailing rules |
| Lap or shiplap | Milled edges overlap or rebate together | Commonly horizontal; product dependent | Joint geometry, expansion allowance, face coverage, nail position |
| Channel | A milled channel creates a recessed shadow line | Horizontal or vertical, depending on product | Channel direction, expansion gap, independent fastening, nail count |
| Rainscreen profile | Boards are milled or arranged for use in a drained and ventilated cladding system | Product dependent | Clip or fastener system, cavity requirements, open-joint details, insect screening |
| Shakes | Individual or panelized split or textured pieces | Courses | Exposure, side-lap, undercourse, fastening and corner details |
| Shingles | Sawn or patterned units installed in courses | Courses | Exposure, side-lap, panel joints, starter course and fastening schedule |
The Western Red Cedar Lumber Association organizes its profile information into bevel, board-and-batten, tongue-and-groove, lap, trim-board, and shingle-panel categories, with separate resources for specifications, sizes, grades, and coverage. Retailers may add names such as shiplap, channel, V-joint, nickel-gap, or rainscreen. Treat these as product-specific milled forms rather than interchangeable labels (Real Cedar profile overview).
Bevel siding
Bevel siding is normally installed horizontally in overlapping courses. Plain-bevel guidance generally starts at the bottom and places the fastener above, rather than through, the overlap so that the pieces are not locked together.
Exposure, overlap, and fastener position depend on the exact board geometry. A wider board, different taper, rabbeted edge, or changed milling run can alter the correct detail. Do not transfer an overlap or nail line from another bevel product.
Tongue-and-groove siding
Tongue-and-groove siding may be permitted horizontally or vertically. Common horizontal guidance starts at the bottom with the grooves facing down.
Some guides permit blind nailing through the tongue for boards up to 6 inches wide, while wider boards or walls exposed to high winds may require face nailing. Vertical tongue-and-groove siding requires horizontal blocking or furring. These are general supplier-guide examples, not a substitute for the selected product’s instructions (tight-knot Western Red Cedar installation guide).
Vertical siding and board-and-batten
Vertical siding needs a horizontal fastening base. Depending on the assembly, that may mean blocking, horizontal nailers, or framing-connected furring. Fasteners should not simply be driven into sheathing or insulation without confirming that the specified substrate provides the required attachment.
Board-and-batten uses wider boards with narrower battens covering or spanning the joints. Board spacing, batten overlap, and fastening sequence are profile-specific. The arrangement must allow the underlying boards to move as intended rather than indiscriminately locking multiple pieces together.
Shiplap, channel, and rainscreen profiles
Shiplap, channel, and rainscreen are not three names for one joint. Each can have different geometry, face width, shadow line, drainage behavior, expansion detail, and fastening requirement. Obtain the profile drawing and installation instructions for the exact product.
The assembly still needs the specified cavity, water-control layer, flashing, drainage or ventilation openings, attachment system, and any required insect screening.
Understanding grade labels
Retail listings use labels such as Select Tight Knotty, Select Knotty, Select, and Clear Vertical Grain. These terms affect appearance and may affect availability and price, but buyers should not create a universal quality ranking without the applicable grading rule.
For example, one Western Red Cedar collection combines Select Knotty, Select, and Clear Vertical Grain labels with V-joint tongue-and-groove, shiplap, rainscreen, bevel, channel, surfaced boards, nominal dimensions, multiple lengths, and kiln-dried or green material. The displayed starting-price field does not consistently identify the sales unit, so those prices should not be assumed to be per board, linear foot, or square foot (Advantage Lumber’s Western Red Cedar collection).
For each grade, ask:
- Which knots and other appearance characteristics are permitted?
- Which face is graded?
- Is grain orientation specified?
- How much color variation should be expected?
- Can separate orders be matched reasonably?
- What lengths are available in that grade?
- Is the material kiln-dried, otherwise seasoned, or green?
- Can defect rejection materially change usable quantity?
- Does the price apply to random, fixed, or selected lengths?
Photographs cannot answer all of these questions reliably. Request the governing grading rule and a physical sample showing the intended face, texture, profile, and finish. If appearance matching is critical, establish how boards will be selected and what happens when replacement stock comes from a later production run.
Dimensions and installed coverage: the numbers that control an order
A nominal board name is a product category, not necessarily its finished measurement. Profile milling then removes or overlaps additional width. The controlling quantity is installed face coverage, also called net face or exposure.
Keep three dimensions separate:
- Nominal size: the commercial name, such as 1×8.
- Actual dimensions: the board’s milled thickness and total width.
- Installed face coverage: the width left visible after the required overlap or interlocking joint is assembled.
Only installed face coverage converts linear footage into installed wall area. For further context, see why nominal sizes differ from actual dimensions.
Plain-bevel example
A retailer lists a nominal 1×8 Western Red Cedar plain-bevel board with a 6¼-inch installed face. Its profile is stated as ⅛ inch thick at the top and 11/16 inch at the bottom, with listed stock lengths of 8, 10, 12, 14, and 16 feet, subject to availability (Twin Creeks’ 1×8 Western Red Cedar bevel listing).
Although the board is called 1×8, neither the nominal “eight” nor its uninstalled width should be used as the exposure. The published 6.25-inch face is the relevant quantity figure, provided the delivered profile and current installation instructions confirm it.
Tongue-and-groove example
A different seller lists a Western Red Cedar tongue-and-groove product as 1 inch thick with a 5-inch net face, supplied in 8- to 12-foot lengths. One bundle is stated to cover 15 square feet (WoodPlank’s Western Red Cedar tongue-and-groove listing).
Keep this example separate from the bevel calculation. The profiles have different joint geometry, net faces, packaging, fastening instructions, and sales units.
Core coverage formula
For siding sold by the linear foot:
Square feet covered per linear foot = installed face width in inches ÷ 12
For a 6.25-inch installed face:
6.25 ÷ 12 = 0.5208 square foot per linear foot
Once coverage per linear foot is known:
Required linear feet = net siding area ÷ square feet covered per linear foot
For products sold by bundles or packs:
Required units = net siding area ÷ stated coverage per bundle or pack
Apply the project’s waste allowance separately and then round up to full sale units.
Why nominal board area is misleading
Nominal board area does not account for:
- Overlap hidden behind the next course
- Tongue-and-groove or shiplap engagement
- Required expansion allowance
- Unusable defects
- Damaged ends and end trimming
- Butt-joint layout
- Window and door openings
- Outside and inside corners
- Gable cuts
- Course alignment
- Short stock lengths
- Color or grain selection
A board can contain a certain raw area yet cover substantially less wall once installed.
Measuring the wall
Measure each wall rectangle separately:
Rectangle area = width × height
Measure gables and other triangular areas separately:
Triangle area = base × height ÷ 2
Whether openings should be deducted fully depends on their size, the cutting required around them, and the supplier’s takeoff method.
Keep trim and accessory quantities separate. Corner boards, window trim, water-table boards, starter components, soffits, and fascia generally should not be buried inside the siding coverage calculation.
Before ordering, obtain written confirmation of the current net face. Retailer photographs, reused diagrams, and online specifications can be outdated or ambiguous. Measure an approved sample when fit, restoration matching, or course alignment is critical.
Estimating material quantity and comparing quoted prices
A useful estimate separates coverage from waste and board cost from the cost of the complete installed system.
Estimating worksheet
Work through the estimate in this order:
- Gross rectangular wall area
- Gross gable and irregular area
- Openings deducted under the selected takeoff method
- Net siding area
- Installed coverage per linear foot, board, bundle, or pack
- Base quantity before waste
- Waste allowance shown separately
- Rounding to full boards, bundles, or packs
- Trim and accessory boards
- Primer, stain, paint, sealer, and end treatment
- Approved fasteners
- Weather-resistant barrier, flashing, furring, and screens
- Freight and unloading
- Sales tax
- Installation and finishing labor
- Contingency or replacement stock
Keeping these lines separate makes proposals easier to audit.
Converting a linear-foot price
The plain-bevel example has a stated face of 6.25 inches:
6.25 ÷ 12 = 0.5208 square foot per linear foot
At the retailer’s displayed price of $2.89 per linear foot:
$2.89 ÷ 0.5208 = approximately $5.55 per installed square foot
The price and availability were observed on the supplied retailer page on August 8, 2026. This is a product-specific retailer example, not a market average or installed price. It excludes waste, freight, trim, finish, fasteners, tax, and labor; the same page showed the item as unavailable or backordered and warned that specifications and stock can change.
Converting a bundle price
For the separate tongue-and-groove example:
$374.99 per bundle ÷ 15 square feet = approximately $25.00 per square foot
The seller also states a 300-square-foot minimum order, equal to 20 bundles at the listed coverage:
20 × $374.99 = $7,499.80
Those figures were observed on the supplied seller page on August 8, 2026. They represent material before waste and other project costs. A project requiring 300 installed square feet would need more than the stated minimum if its waste allowance increased the order beyond 300 square feet.
The approximately $5.55 and $25.00 figures are not a low-to-high market range or a comparison between equivalent products. One is a plain-bevel linear-foot conversion; the other is a tongue-and-groove bundle with different dimensions, packaging, profile, and order conditions.
Prices, promotions, stock lengths, minimum orders, lead times, and delivery terms are seller-controlled and can change. Use these examples to understand normalization, then obtain a current written quote.
Waste is a project input
There is no universal waste percentage. The cited bevel seller suggests 5–10% for ordinary walls and 15–25% for gable ends, depending on roof angle. The tongue-and-groove seller suggests 10–15% for trimming and waste. These are seller recommendations for their estimates, not rules for every project.
Waste can increase because of:
- Steep or numerous gables
- Diagonal layouts
- Short available stock
- Strict color or grain matching
- Rejection of knots or other appearance characteristics
- Repeated small openings
- Complex corners and transitions
- Fixed butt-joint locations
- Freight or handling damage
- A requirement to preserve replacement boards
Apply waste after calculating the base quantity:
Order quantity before rounding = base quantity × (1 + waste rate)
Entering 10% means multiplying by 1.10. Round the result up to the seller’s full board, bundle, or pack.
Quote-comparison checklist
Normalize each quote by recording:
- Species and solid-wood or engineered construction
- Grade and grading rule
- Profile and actual dimensions
- Installed face coverage
- Kiln-dried, otherwise dry, or green condition
- Texture and graded face
- Fixed, random, or selected lengths
- Quantity basis and stated waste
- Landed material cost per installed square foot
- Factory-applied finish, if any
- Trim included or excluded
- Fasteners included or excluded
- Freight method and delivery-access requirements
- Who unloads the shipment
- Sales tax
- Lead time
- Return and damage policy
- Replacement-stock availability
- Warranty documentation
The lowest price per board may produce the highest installed cost if it provides less face coverage, undesirable lengths, greater waste, expensive freight, or substantial finishing requirements.
Finish choices, weathering, and realistic maintenance
Western Red Cedar can follow four broad appearance paths. The right choice depends on whether the priority is visible grain, uniform color, controlled weathering, or compatibility with an existing design.
| Finish path | Appearance | Main purchasing and maintenance considerations |
|---|---|---|
| Natural weathering | Color changes with exposure; variation is expected | Uniform weathering cannot be assumed; details still require inspection |
| Transparent or semitransparent stain | Retains more visible grain and natural variation | Preparation, end treatment, and fastener staining are conspicuous |
| Solid-color stain | Produces more uniform color while retaining some wood character | Cedar-compatible preparation and primer may be required |
| Paint | Creates the most opaque and uniform appearance | Primer, preparation, film condition, and peeling checks become important |
Transparent and semitransparent finishes show more of the wood’s grain and color variation. Solid-color stain and paint create a more uniform surface, but they do not eliminate wood movement, end-grain exposure, or moisture-management requirements.
Western Red Cedar guidance commonly recommends finishing all faces and ends before installation and promptly treating every field-cut end. For paint and solid-color stain, the supplied guidance favors a cedar-compatible stain-blocking primer. The coating manufacturer’s current instructions must determine surface preparation, application temperature, coverage, drying, and curing.
One tight-knot installation brochure warns that varnishes and other film-forming coatings may crack or peel over time. That is not a categorical ban on every film-forming finish; it is a reason to verify that the proposed coating is designed for exterior cedar, compatible with the wood’s moisture condition, and supported for the intended exposure.
Leaving cedar unfinished is a legitimate appearance choice. It allows the surface to weather rather than preserving its original color. It does not remove the need to inspect:
- Flashing and drainage openings
- Roof and grade clearances
- Joints and penetrations
- Exposed end grain
- Fastener staining
- Splits and board movement
- Moisture-prone shaded areas
- Softness or other deterioration
There is no defensible universal refinishing calendar. Finish chemistry, color, ultraviolet exposure, wall orientation, climate, overhangs, surface texture, preparation, and desired appearance all affect when work is needed.
One retailer suggests that many exterior finishes may need recoating every three to five years, depending on ultraviolet exposure. Treat that as a seller’s general recommendation, not a guaranteed service interval.
A condition-based inspection is more useful. Look for:
- Fading or uneven color beyond the intended appearance
- Loss of water repellency where the selected system relies on it
- Coating erosion
- Cracking, blistering, or peeling
- Open joints
- Failed sealant where the system calls for sealing
- Caulk obstructing locations intended to drain
- Bare or exposed end grain
- Dark streaking around fasteners
- Persistent staining
- Soft areas
- Splitting, checking, cupping, or movement
- Damaged or displaced flashing
Cleaning should follow the siding and coating manufacturers’ instructions. The supplied evidence does not establish one pressure-washing procedure as safe for every cedar surface, profile, finish, and condition.
Before installation: inspection, storage, moisture, and prefinishing
The following points are general purchasing and preparation checks. They do not replace the selected product manual, project specification, or a qualified installer’s assembly details.
Inspect the shipment before installing any boards. Confirm:
- Species
- Grade and applicable rule
- Profile
- Actual dimensions and net face
- Moisture condition
- Surface texture
- Finish and batch
- Quantity and lengths
- Color variation
- Freight damage
- Conformity with the purchase order
Open representative bundles instead of judging the entire order from the top board. Compare the material with the approved sample and profile drawing. If boards are wet, damaged, incorrectly graded, wrongly milled, or visually unacceptable under the order, stop and contact the supplier rather than installing them.
Western Red Cedar gains or loses moisture in response to its surroundings. It can swell or shrink while approaching equilibrium with the local environment, so storage and acclimation are intended to reduce abrupt movement after fastening.
Shared storage principles include:
- Keep siding elevated off the ground.
- Store it flat or sticker it correctly.
- Keep stickers vertically aligned where used.
- Protect the material from rain, snow, dirt, and direct sun.
- Allow air to circulate.
- Do not seal wet boards tightly in impermeable wrapping.
- Separate wet material so it can dry.
- Protect finished faces from abrasion and staining.
Acclimation periods are only rough guidance. One supplier suggests 7–10 days for dry knotty siding in many environments and 30 days or longer for green siding, while noting that damp, humid, hot, or dry conditions can change the period (Cedar Country Lumber’s acclimation guidance).
A fixed number of days does not prove readiness. Relevant variables include:
- Initial board moisture
- Local relative humidity
- Temperature
- Recent rain or job-site wetting
- Board width and profile
- Storage airflow
- Whether the building is enclosed
- Product-specific instructions
A Western Red Cedar Lumber Association guide gives suggested average siding moisture values of 12% for most areas, 9% for dry areas, and greater than 12% for damp, warm coastal areas. Its table cites the 1987 Wood Handbook, so these figures should be treated as older industry guidance rather than a universal acceptance standard (WRCLA installation guide).
Where the project specification or installer requires moisture readings, record measurements across multiple representative boards and bundles. Do not rely on one surface reading or invent a universal threshold. Follow the meter manufacturer’s procedure, project specification, and siding manufacturer’s acceptance criteria.
Prefinishing all accessible surfaces and ends before installation is commonly recommended because the back and edges become difficult or impossible to coat afterward. Promptly treat every field cut with the specified product. Keep coating batch numbers and application records where appearance matching or warranty compliance may matter.
A useful job record includes:
- Bundle and grade labels
- Delivery-condition photographs
- Profile and dimension checks
- Moisture readings where taken
- Storage dates and conditions
- Finish product and batch
- Fastener make, metal, and size
- Installation weather
- Installer and inspection records
Documentation cannot correct a poor assembly, but it can establish which material and procedure were used.
Fasteners, substrates, and profile-specific attachment
Fastener selection has two parts: the metal must be compatible with cedar, and the fastener must be long and strong enough to reach the designed attachment base. The selected product manual, engineered wall design, wind requirements, warranty, and local code control the final specification.
Stainless steel is the consistently preferred material in the supplied Western Red Cedar guidance, especially where transparent finishes leave staining visible. Industry guidance commonly identifies No. 304 stainless steel for general applications and No. 316 for seacoast or salt-air exposure. Qualifying hot-dipped galvanized and aluminum nails are also listed as corrosion-resistant options (Real Cedar pre-installation guidance).
Electroplated, mechanically galvanized, copper, or otherwise incompatible fasteners may corrode, deteriorate, react with cedar, or produce stains and streaks. “Galvanized” is not sufficiently specific when the applicable instructions require a particular coating process or standard.
Thin-shank, blunt-point siding nails are intended to reduce splitting. Ring- or spiral-shank nails provide greater holding power than a comparable smooth shank. Predrilling may be appropriate near vulnerable ends when required by the selected product instructions.
Fasten to the designed base
Fasteners must reach solid framing, properly designed blocking, framing-connected furring, or another documented attachment base. Rigid foam has little or no useful nail-holding power for cedar siding and should not be treated as that base. If exterior insulation separates the siding from framing, the wall needs furring or another designed attachment system capable of transferring cladding loads to the structure.
Horizontal siding normally attaches through the required wall layers to studs or blocking. Vertical siding generally needs horizontal blocking, nailers, or furring. Masonry and other nontraditional substrates require a designed attachment arrangement rather than improvised fastening.
Allow pieces to move independently
Overlapping siding pieces generally should be fastened independently. Driving one fastener through both pieces can restrict moisture-related movement and contribute to splitting.
For bevel siding, that usually means fastening above rather than through the overlap. Channel and other overlapping profiles have their own permitted fastening locations. The principle may be shared, but the nail position remains profile-specific.
The penetration conflict
The supplied Western Red Cedar guides do not establish one universal minimum penetration into solid wood. The WRCLA guide states 1¼ inches, while the tight-knot supplier brochure states 1½ inches. This conflict should not be hidden or resolved by choosing the more convenient number.
Fastener length must instead be established from:
- The selected product manual
- Board thickness and profile
- Sheathing and insulation thickness
- Framing or furring design
- Wind requirements
- Fastener type
- Warranty conditions
- Local code
A nominal nail length does not reveal how much solid-wood penetration remains after the fastener passes through the siding, drainage cavity, sheathing, and insulation.
Nail position and count vary
Some guides permit blind nailing for tongue-and-groove boards up to a specified width, while wider boards or high-wind exposure may require face nailing. Vertical channel siding may use a different nail count according to board width. Bevel siding has its own fastening line above the overlap.
Generic intervals such as 16 or 24 inches on center should not be presented as universal siding spacing. Attachment depends on framing, sheathing, profile, orientation, wind exposure, and current instructions.
Set fasteners flush rather than crushing the wood. Repair overdriven holes promptly using a method compatible with the finish and applicable instructions. If splitting occurs near ends, stop and review edge distance, nail diameter, point type, moisture condition, driving pressure, and predrilling requirements before continuing.
Water management, clearances, and the final buying decision
Siding is not the wall’s water-control layer by itself. A complete exterior assembly normally needs:
- A suitable weather-resistant barrier
- Properly integrated flashing
- A path for incidental water to drain outward
- Detailed openings and penetrations
- Appropriate roof, deck, and grade clearances
- Compatible sealants at selected joints
- A secure fastening substrate
- Ventilation or a rainscreen cavity where required
Flashing is particularly important above windows and doors, around penetrations, at roof-to-wall intersections, and where materials or wall directions change. It should direct water outward rather than trapping it behind trim.
Caulk cannot replace flashing. Selected siding-to-trim contacts or joints at openings may require compatible sealant, but the junction above outward-draining flashing may need to remain open.
Supplier guidance lists sealant families including polyurethane, polysulfide, acrylic, acrylic-silicone, latex-silicone, and terpolymer rubber, while discouraging pure silicone for Western Red Cedar. Compatibility must still be confirmed with the siding, coating, flashing, and adjacent materials.
Rainscreens and exterior foam
A rainscreen cavity can provide drainage and ventilation behind the cladding. Western Red Cedar guidance recommends giving it particular consideration over rigid foam and in demanding exposures, but that does not make a rainscreen universally mandatory or universally optional.
Its status may be controlled by:
- Local code
- Wall design
- Climate and exposure
- Exterior insulation
- Product warranty
- Sheathing type
- Building height
- Wind and rain conditions
Exterior rigid foam requires framing-connected furring or another designed attachment method. The siding should not be fastened into foam as though it were solid lumber.
Conflicting clearance figures
The supplied guides also disagree on universal clearances. Recommendations range from 1 to 2 inches above roofs or decks and from 6 to 8 inches above grade. One supplier guide specifies 2 inches above roofs or decks and 6 inches above grade, while also distinguishing sealant locations from drainage openings (Western Red Cedar supplier installation guidance).
Do not average conflicting numbers. Use the clearance required by the selected siding system, wall detail, warranty, local code, roof or deck manufacturer, and site conditions.
Comparing cedar with alternatives
Western Red Cedar offers authentic wood grain, natural variation, multiple profiles, and the flexibility to weather, stain, or paint. Those qualities come with tradeoffs:
- Recurring inspection
- Eventual refinishing when a maintained coating is desired
- Moisture-sensitive storage and detailing
- Grade-dependent appearance and pricing
- Variable freight costs
- Possible pest, impact, or moisture damage
- Combustibility
- Greater dependence on workmanship and compatible fasteners
Comparisons with fiber cement should be treated cautiously. The supplied comparison articles are published by contractors or manufacturers with commercial interests, and they often discuss cedar broadly rather than comparing Western Red Cedar under equivalent wall assemblies.
Western Red Cedar is combustible wood.
Frequently asked questions
Is red cedar siding the same as Western Red Cedar siding?
Not necessarily.
Confirm the species, construction, grade, moisture condition, profile, and installation manual. Do not apply Western Red Cedar dimensions, fasteners, finishes, or installation details to an unidentified product.
How much extra cedar siding should I order for waste?
Set waste from the actual layout rather than using one universal percentage. Straight walls using suitable stock lengths may generate relatively little waste, while gables, diagonal layouts, complex openings, short boards, strict color matching, and defect rejection can generate substantially more.
Calculate the base quantity from installed face coverage, show waste separately, and then round up to full sale units. Ask the supplier or installer to explain the allowance used in the takeoff.
Can cedar siding be installed directly over rigid foam?
Not with the foam acting as the fastening base. The attachment must connect to framing, blocking, framing-connected furring, or another designed support system.
An assembly over exterior foam may also require a drainage and ventilation cavity. Confirm the furring design, fastener length, wind requirements, water-control layers, warranty, and code requirements before installation.
What nails or screws should be used with Western Red Cedar?
Stainless steel is generally preferred, particularly with transparent or semitransparent finishes. Qualifying hot-dipped galvanized and aluminum fasteners may also be permitted by applicable Western Red Cedar guidance.
Metal is only one part of the specification. Confirm shank type, diameter, length, location, number per board, required penetration, and compatibility with the complete assembly. Do not assume that one fastener schedule applies to every profile.
How often does red cedar siding need to be stained or refinished?
There is no universal interval. Recoating depends on the finish system, preparation, ultraviolet exposure, climate, wall orientation, moisture detailing, surface texture, and desired appearance.
Inspect the siding periodically and respond to actual conditions such as fading, coating erosion, loss of water repellency, peeling, exposed end grain, open joints, staining, splitting, or board movement. Follow the coating manufacturer’s current maintenance and preparation instructions rather than treating a seller’s calendar estimate as a guarantee.
Final buying decision
Before issuing a purchase order, obtain:
- Confirmed species and construction
- Governing grading rule
- Approved physical sample
- Profile drawing
- Nominal and actual dimensions
- Installed face coverage
- Permitted installation orientation
- Moisture condition
- Available stock lengths
- Finish and end-treatment specifications
- Approved fastener metal, type, length, location, and count
- Fastening-substrate details
- Weather-barrier, flashing, and drainage details
- Rainscreen or cavity requirements
- Roof, deck, and grade clearances
- Sealant requirements and prohibited locations
- Warranty terms and exclusions
- Fire, wind, coastal, or evaluation reports where required
- Sourcing certification and chain-of-custody documents if claimed
- Freight method and unloading responsibility
- Lead time
- Damage and return procedure
- Replacement-board availability
Choose red cedar siding only after converting the proposal into comparable installed specifications. Attractive boards alone do not define a durable wall. Verify species, grade, profile, coverage, moisture condition, finish, waste, landed cost, fastening base, and drainage details—and obtain the current product manual, warranty, coating requirements, and required code documentation before ordering.