 MortarDesk
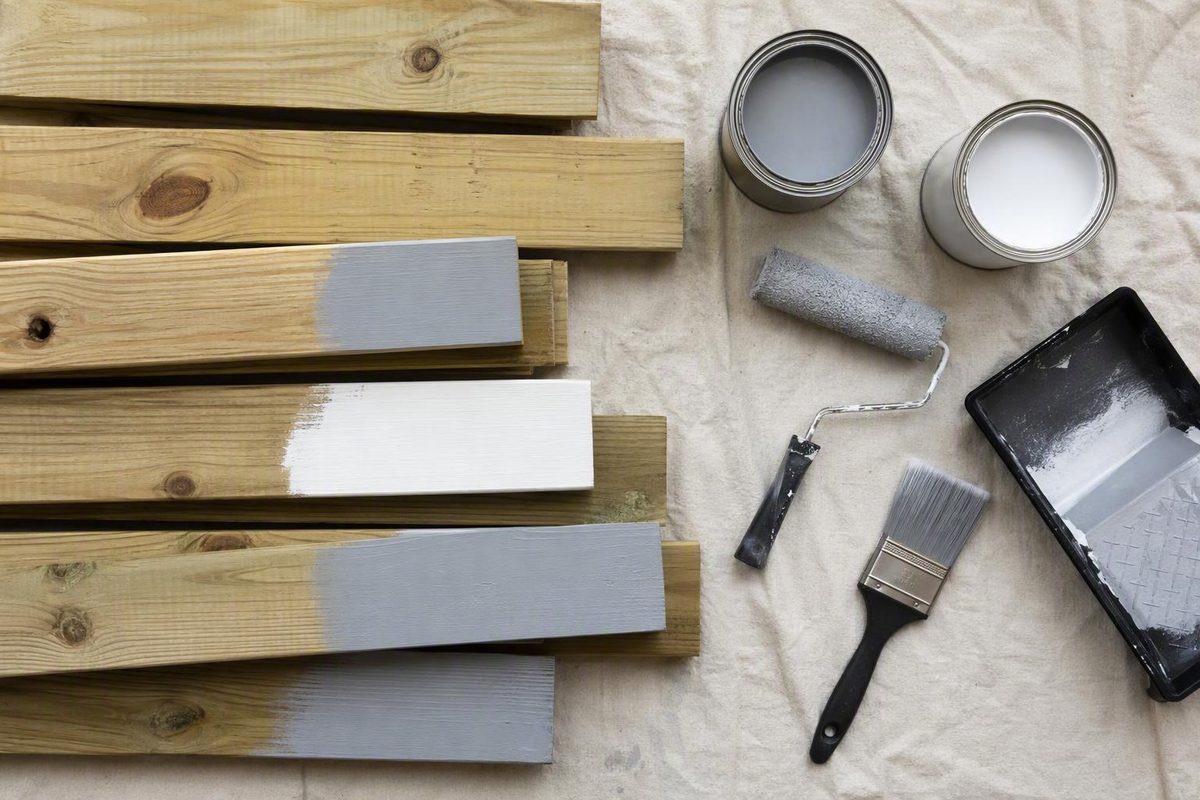
The short answer: painting is optional, but timing is not
Yes, you can paint pressure-treated lumber. You do not have to paint it simply because it is pressure treated. Depending on the project, the wood can be painted, stained, sealed with a compatible water repellent, or left unfinished.
Pressure treatment and paint serve different purposes. Treatment introduces preservatives intended to improve resistance to decay and insects. Paint does not activate or complete that treatment. It changes the appearance and adds a surface barrier against weather and ultraviolet exposure.
Paint is most useful when you want:
- An opaque, uniform color
- Broad color choices
- Concealment of treatment tint, stains, knots, or mismatched boards
- A finish coordinated with siding, trim, or other painted structures
- A surface film rather than a natural or stained-wood appearance
A suitable finish may reduce surface weathering, but it would be misleading to promise a specific increase in service life. Results depend on the treatment category, construction details, drainage, climate, coating condition, preparation, and maintenance.
The nonnegotiable condition is moisture: do not paint freshly treated lumber until it is sufficiently dry. New treated wood commonly retains moisture from the treatment process, and premature coating can interfere with adhesion. Depending on the lumber and conditions, drying can take weeks or months, so the boards themselves—not a fixed date—must determine readiness (Lowe’s guide to finishing pressure-treated wood).
Before choosing paint, consider:
- Whether you want opaque color or visible wood grain
- Whether the surface is horizontal, vertical, or sheltered
- Whether people will walk on it
- How much rain, sun, shade, and humidity it will receive
- Whether you are willing to maintain a surface-forming coating
- Whether the lumber is actually dry enough
- Whether the primer and topcoat are approved for the wood and intended exposure
Those factors matter more than a blanket answer to “Should I paint treated lumber?”
Decide among paint, stain, sealer, and no finish
The right finish is the one that matches the desired appearance, exposure, and maintenance commitment. Paint is not automatically the most protective choice, and leaving selected components unfinished is not automatically neglect.
| Option | Appearance | Where it often makes sense | Main tradeoffs |
|---|---|---|---|
| Exterior paint system | Opaque; hides grain and most color variation | Railings, trim, fence components, decorative structures, and other surfaces where solid color matters | Broad color choice, but the film can blister, crack, or peel if applied to damp wood or stressed by wood movement |
| Penetrating exterior stain | Transparent and semitransparent products preserve more grain; solid stains provide heavier color coverage | Deck boards, steps, fences, and exposed wood where a penetrating finish is preferred | Avoids the same kind of thick paint-film buildup, but its color and protection still weather and require renewal |
| Clear or lightly pigmented water repellent | Natural-looking, with prominent grain | Projects where the wood should remain visually close to unfinished lumber | Limited concealment; compatibility, ultraviolet resistance, and maintenance needs vary by product |
| No finish | Wood weathers naturally and may change color, check, or develop surface variation | Genuinely sheltered framing, undersides, or utility components where appearance is unimportant | No coating maintenance, but no added surface barrier or control over weathered appearance |
Paint: maximum concealment, greater commitment
Paint creates an opaque film over the wood. It is the clearest choice when color matching and concealment are priorities. It can hide uneven treatment color, patches, weathering, and visible differences among boards.
That coverage comes with a maintenance commitment. Pressure-treated wood changes dimension as it dries and as weather conditions vary. If moisture enters through a crack, damaged edge, fastener location, or water-holding joint, the coating may blister or peel. Stain may fade gradually, while paint-film failure often produces conspicuous flakes and lifted edges.
Painting is also comparatively difficult to reverse. If you later want a penetrating stain and visible grain, the paint and primer generally have to be removed first. Guidance comparing deck finishes likewise notes that changing from paint to stain requires removal of the existing paint system (Davis Painting’s paint-versus-stain discussion).
Stain: visible character with less film buildup
Penetrating stains are designed to enter the wood rather than form the same type of thick surface film as paint. Transparent and semitransparent stains preserve more grain. Solid stains contain more pigment and can obscure much of the grain while still presenting a different surface character from conventional paint.
Stain is often favored for deck boards and other demanding horizontal surfaces because those components receive foot traffic, rainfall, retained moisture, and substantial dimensional movement. That does not prove that every stain will outlast every paint. Product quality, preparation, exposure, traffic, and application all affect performance.
Choose stain because its appearance and weathering behavior suit the project—not because of a universal claim that stain always lasts longer.
Clear or lightly pigmented water repellent: a natural appearance
A compatible transparent or lightly pigmented water repellent can be appropriate when you want the treated lumber to look like wood rather than a painted object. It may reduce water absorption while preserving the grain and much of the natural appearance.
The tradeoff is limited concealment. Clear products also cannot guarantee that the lumber will retain its original color. Sun, rain, dirt, and normal weathering continue to affect the surface.
Check that the product is compatible with the particular treated lumber and intended exposure. Follow its renewal instructions rather than assuming one maintenance schedule applies to every product and climate.
No finish: reasonable in selected locations
Leaving sheltered framing or undersides unfinished can be practical when the lumber is correctly specified for the application and appearance is unimportant. These areas may receive little direct sunlight, rain, or wear.
That is practical guidance rather than a universal technical rule. An underside exposed to wind-driven rain, splashback, or persistent condensation is not necessarily sheltered. Make the decision according to actual exposure, not the component’s name or position alone.
Exposed surfaces generally receive more benefit from a compatible finish than protected framing. Even so, a finish cannot compensate for trapped water, poor drainage, unsuitable construction details, or lumber that is not properly specified for its use.
Avoid choosing a finish according to a promised universal maintenance interval. Sunlight, rainfall, climate, preparation, traffic, wood movement, and the selected coating system can change performance substantially.
Match the finish to the part of the project
A deck floor and a fence rail should not automatically receive the same coating. Orientation, traffic, water exposure, and visibility all affect the decision.
| Project component | Practical finish approach | Important limitation |
|---|---|---|
| Deck walking surfaces and steps | A compatible penetrating deck stain is commonly favored; an opaque coating must be specifically approved for deck or porch traffic | Ordinary exterior house paint is not an appropriate default |
| Railings and balusters | Properly primed exterior paint works well when solid color is important; stain is also an option | Hand contact, joints, ledges, and end grain require careful preparation and coverage |
| Fence boards | Paint, stain, or water repellent, depending on the desired opacity | Opposite faces may receive different amounts of sun and moisture |
| Exterior trim | A compatible primer and exterior paint are practical for a coordinated solid-color finish | Paint cannot correct joints or details that trap water behind the trim |
| Exposed framing | A compatible finish may reduce surface weathering or improve appearance | Coating is not a substitute for appropriate spacing, slope, flashing, or drainage |
| Sheltered framing and undersides | May be left unfinished if exposure and appearance do not justify coating | Confirm that the location is genuinely sheltered and that the lumber is suitable for the application |
| Cut ends and field cuts | Apply any treatment-specific field preservative required by the lumber documentation, then prime if directed by the coating system | Primer should not be assumed to satisfy preservative requirements |
Deck boards and other horizontal surfaces
Horizontal boards experience a demanding combination of sunlight, wetting, debris retention, foot traffic, and wood movement. A penetrating deck stain is therefore commonly favored for these surfaces. Lumber-retailer guidance similarly distinguishes between penetrating stain for decks and other wet horizontal surfaces and properly primed paint for trim, railings, and porch structures (Ladiesburg Lumber’s application guidance).
If you want an opaque deck floor, use only a coating labeled for deck or porch traffic and for the specific substrate. Check the product’s stated traction characteristics. Painted deck surfaces can become slippery when wet, so a coating intended only for vertical siding or trim should not be used underfoot (Culpeper’s comparison of deck finishes).
Railings, fences, trim, and decorative structures
Paint is often practical on vertical or near-vertical components because water drains more readily, walking traffic is absent, and solid color may be central to the design. Railings, balusters, pergola components, fence elements, and exterior trim can all be reasonable paint candidates once the wood is dry and properly prepared.
Exposed and sheltered framing
Finishing exposed framing may improve appearance and reduce direct surface weathering, but cosmetic finishing and moisture management are separate matters. Paint cannot correct a beam pocket that holds water, missing flashing, a flat ledge that cannot drain, or a connection that remains persistently wet.
Sheltered framing and undersides may remain unfinished when direct exposure is limited and appearance does not matter. Make that judgment component by component rather than painting every piece merely for visual consistency.
Cut ends, ground contact, and structural components
Consult the lumber tag, supplier documentation, and preservative manufacturer’s instructions for any required end-cut preservative. Then follow the coating system’s directions for priming and painting. Field treatment and coating are separate requirements.
Ground-contact and structural components fall outside generic coating prescriptions. Paint does not change the lumber’s documented treatment category or correct a structural or drainage defect.
Do not use a calendar as the dryness test
“How long should treated lumber dry before I paint it?” has no single reliable answer.
Published guidance ranges from a few weeks to several months. That spread is not a useful countdown; it demonstrates why actual board condition must control. Culpeper notes that some newer treated projects may be ready within about a month but still directs users to verify dryness with a water-drop test rather than treating that estimate as a guarantee (Culpeper’s treated-lumber finishing guidance).
Drying time changes with:
- The treatment process and how wet the lumber was when supplied
- Whether it was kiln-dried after treatment
- Species, board thickness, and component size
- Temperature and relative humidity
- Rainfall and repeated wetting
- Sun versus shade
- Air circulation around the installed wood
- How closely boards are stacked or assembled
- Orientation and the ability of water to drain
Freshly treated lumber often contains substantial moisture from treatment. It may look dry at the surface or feel less wet than it did at purchase while remaining unsuitable for a paint system.
Kiln-dried-after-treatment lumber
Lumber labeled KDAT, meaning kiln-dried after treatment, has undergone an additional drying stage and may reach paint-ready condition sooner than ordinary freshly treated material. “Sooner” does not mean “automatically ready today.” Storage, rain, transport, local humidity, and installation can change its moisture condition after it leaves the mill.
Read the grade stamp, end tag, invoice, or supplier documentation instead of deciding from appearance. Then test representative boards and compare their condition with the coating manufacturer’s limits.
Weather can reset the practical waiting period
A generic waiting period becomes especially unreliable after rain. High humidity, shade, poor ventilation, repeated wetting, and thick stock can extend drying even after an estimated waiting period has elapsed. Favorable drying conditions may allow some lumber to become ready earlier than a conservative estimate.
It is generally acceptable to leave the lumber unfinished while it dries, provided the assembly can drain and receive airflow. That does not validate every installation detail. Water-trapping joints, tightly bundled material, or inadequately spaced construction must be addressed on their own merits.
Readiness checklist
Before deciding that enough time has passed:
- Identify the lumber. Determine whether it is ordinary treated lumber, KDAT, or another documented product.
- Review supplier guidance. Look for finishing restrictions and field-cut treatment requirements.
- Consider recent conditions. Account for rain, humidity, shade, and poor airflow.
- Inspect several components. Thick posts, shaded boards, and protected joints may dry differently.
- Test multiple locations. Do not rely on the driest, sunniest board.
- Check the coating instructions. Confirm the permitted wood-moisture level and application conditions for the selected primer or paint.
The calendar tells you how long the lumber has been installed. It does not tell you whether the lumber is ready to paint.
Test the boards before opening the paint
A water-drop test is a useful first screen because it shows whether clean, bare wood readily accepts water at the surface.
How to perform the water-drop test
- Choose several boards. Include sunny and shaded areas, different board sizes, and components that appear to dry at different rates.
- Select several locations on each board. Test broad faces as well as areas closer to joints or ends, while avoiding visibly contaminated spots.
- Make sure the surface is clean and bare. Dirt, treatment residue, an old sealer, or another coating can affect the result.
- Place a few drops of clean water on each location.
- Observe the droplets. Note whether they absorb readily or remain rounded and beaded on the surface.
If the water absorbs readily, the surface may be ready for finishing. If it remains beaded, postpone coating and allow more drying. Home-center guidance recommends the same absorption test, but it should be treated as a screening check rather than a complete moisture analysis (Kight Home Center’s treated-lumber FAQ).
Testing one spot is inadequate. Moisture can differ among boards, between shaded and sunny faces, and from one part of a board to another.
Understand what the test cannot prove
The water-drop test assesses surface behavior. It does not prove that the center of a thick post, beam, or dimensional board is dry. Surface absorption can also be affected by contamination, prior coatings, and the characteristics of the wood.
Use a moisture meter when better confirmation is needed, particularly when:
- The lumber is thick
- Its drying history is uncertain
- The project will be difficult to recoat
- The wood has been repeatedly rained on
- Surface tests vary among boards
- Premature coating failure would have significant consequences
Take readings at several representative locations and use the meter according to its instructions. Do not adopt one moisture percentage as a universal cutoff. Compare the readings with the maximum moisture content permitted by the selected primer or paint manufacturer.
Go or no-go
Wait when:
- Water still beads on clean, bare wood
- Rain or washing has recently rewetted the boards
- Meter readings exceed the coating manufacturer’s limit
- Different boards or locations produce inconsistent results
- The product requires application conditions that are not currently available
Proceed to preparation when:
- Representative surfaces absorb water readily
- Meter readings, where used, meet the selected coating’s requirement
- Recent weather has allowed adequate drying
- The treatment documentation permits the intended finish
- The primer and paint are compatible with the substrate and with each other
Passing the water test supports proceeding, but it does not override the coating label.
Choose one compatible primer-and-paint system
Generic primer advice for pressure-treated wood conflicts. Some guidance recommends a water-based or acrylic exterior primer formulated for treated lumber. Other guidance recommends an alkyd or oil-based bonding primer followed by an acrylic-latex topcoat.
Neither primer chemistry should be declared universally superior. The correct choice depends on the preservative treatment, wood condition, primer formulation, topcoat, and exposure. Supplier guidance discussing both oil-based bonding primer and acrylic alternatives illustrates why the product label and technical instructions matter more than a category-wide rule (Arnold Wood on primer and paint selection).
Use this selection sequence:
- Read the lumber supplier’s finishing guidance. Identify restrictions associated with the preservative or drying process.
- Select a primer approved for exterior wood and compatible with pressure-treated lumber.
- Select the finish paint for the component and exposure. Exterior acrylic or latex paint is the most recurring topcoat recommendation in the available guidance.
- Confirm primer-to-topcoat compatibility. The primer must accept the selected finish paint.
- Check orientation and use. A vertical trim coating may not be approved for a horizontal deck floor.
- Review all application requirements. Wood moisture, preparation, temperature, humidity, recoat conditions, and expected rain all matter.
Primer and topcoat are separate decisions. An alkyd or oil-based bonding primer does not automatically mean an oil-based finish paint is suitable. Likewise, a water-based topcoat does not establish that every water-based primer is compatible.
Avoid assembling a coating system from unrelated recommendations—for example, one source’s primer, another source’s topcoat, and a third source’s clear sealer.
A clear sealer over paint is not automatically necessary. Apply one only if the selected paint system explicitly calls for and permits it.
For deck boards, steps, and other walking surfaces, use only a coating specifically rated for deck or porch traffic and offering suitable traction for the location. Ordinary exterior wall or trim paint is not an acceptable default.
Prepare and paint the lumber step by step
Good paint cannot compensate for damp, dirty, or incompatible surfaces. Treat preparation as part of the coating system rather than an optional preliminary task.
1. Verify that the lumber is dry
Test multiple boards and locations. Use a moisture meter where better confirmation is appropriate, and compare its readings with the coating manufacturer’s stated limit. Complete this check before washing or opening the primer.
2. Review the treatment and coating instructions
Check:
- The lumber tag and supplier documentation
- Any required field-cut or end-cut preservative
- Primer compatibility with treated wood
- Topcoat compatibility with the primer
- Whether the product is approved for vertical, horizontal, or walking surfaces
- Required temperature, humidity, and rain-free conditions
- Safety, drying, and cleanup directions
If the instructions conflict, contact the lumber or coating manufacturer rather than improvising a hybrid system.
3. Clean the wood
Remove dirt, pollen, loose fibers, construction residue, and other surface contamination. A firm brush and a cleaner approved by the coating manufacturer are a conservative starting point.
There is no universal aggressive cleaning formula suitable for every preservative, contaminant, and coating. Stronger chemicals do not automatically produce better adhesion.
Pressure washing can damage wood fibers when the pressure, tip, distance, or technique is unsuitable. If you use it, follow the lumber and coating manufacturers’ limits rather than placing a concentrated stream close to the surface (Lowe’s treated-wood preparation guidance).
4. Let the wood dry again
Cleaning adds moisture. Lumber that passed an initial readiness test may no longer be ready immediately after washing.
Wait until the surface and underlying wood again meet the selected coating’s requirements. Retest representative areas instead of relying on a generic post-washing interval.
5. Address rough or raised fibers
Lightly sand only where splinters, roughness, or raised grain would interfere with the finish. The goal is to smooth problem areas, not aggressively remove the treated surface.
When sanding treated lumber, wear appropriate eye and respiratory protection, control airborne dust, collect the debris, and follow the lumber supplier’s handling and disposal instructions. Remove sanding dust before priming.
6. Prime according to the approved system
Stir and apply the compatible primer as directed. Cover the faces, edges, joints, and cut ends required by the system, but do not assume every concealed face of every component needs identical treatment.
If the lumber documentation requires a field-cut preservative, apply that product as directed. Do not substitute primer unless the treatment documentation explicitly permits it.
Use thin, even application rather than trying to build excessive thickness in one pass. Follow the specified spreading rate and drying conditions.
7. Apply compatible exterior topcoats
Once the primer is ready for recoating, apply the specified exterior paint in even coats with full coverage. Two finish coats appear in several manufacturer and supplier recommendations, but the selected product label controls the actual coat count, film thickness, spreading rate, drying time, and recoat interval (Culpeper’s painting instructions).
Do not rush another coat merely because the first feels dry to a fingertip.
8. Work only in suitable weather
Do not apply paint:
- Outside the product’s permitted air or surface-temperature range
- When humidity exceeds the product’s limits
- In conditions that make the coating dry too quickly
- When dew is likely before the coating can set
- Without the required rain-free window
- When the boards have been rewetted and no longer meet label conditions
Plan safe access before beginning. Follow the coating label’s protective-equipment instructions and use stable, appropriate access equipment for elevated or difficult-to-reach components.
Pre-application checklist
Before applying primer, confirm that you have:
- Dry lumber verified in several places
- A clean, dust-free surface
- Treatment documentation and any necessary end-cut instructions
- A compatible primer and topcoat forming one coherent system
- A traffic-rated coating if people will walk on the surface
- Suitable temperature, humidity, sunlight, and rain conditions
- Safe access to the required surfaces
- Enough time for drying and recoating under label conditions
If one of those conditions is missing, postpone application until the coating requirements can be met.
Prevent peeling and plan for maintenance
The central preventable cause of premature failure is painting lumber that is still too damp. Excess moisture can impair adhesion and contribute to bubbling, blistering, cracking, flaking, or peeling. Commercial finishing guidance consistently warns that freshly treated wood may retain enough moisture to interfere with paint adhesion (Decks & Docks on painting treated wood).
Other avoidable risks include:
- Painting over dirt, residue, or loose fibers
- Using a primer not approved for treated wood
- Applying a topcoat incompatible with the primer
- Coating outside the label’s temperature or humidity limits
- Painting shortly before rain or dew
- Applying ordinary exterior paint to a walking surface
- Building excessive film thickness
- Ignoring joints or details that trap water
- Leaving damage in the coating film open to further weather exposure
Treated wood continues to respond to drying and weather. Expansion and contraction stress a paint film, especially across joints, end grain, fastener locations, and horizontal surfaces. Paint can reduce direct exposure while intact, but it does not make the assembly immune to moisture.
Inspect by condition, not by a fixed calendar
There is no credible universal repainting schedule for every treated-wood surface. Inspect according to the project’s exposure and look for:
- Hairline cracks or open joints
- Blisters or raised areas
- Peeling edges and loose flakes
- Worn deck or step traffic zones
- Exposed cut ends or damaged corners
- Dirt and debris that hold moisture
- Water collecting on ledges or between boards
- Failed sealant where the assembly uses it
- Areas that remain wet longer than surrounding wood
Do not paint blindly over failure
If an existing coating is peeling, another coat will not repair the lost adhesion beneath it. Address loose material and investigate the underlying cause as far as practical. Possible contributors include damp wood, contamination, incompatible products, and details that hold water.
Allow the lumber to dry and follow the new coating manufacturer’s preparation requirements for previously coated wood. Depending on the existing finish and proposed system, preparation may involve cleaning, scraping, feathering edges, adhesion testing, spot priming, or more extensive removal. No single repair process is suitable for every unknown coating and preservative combination.
Painting pressure-treated lumber therefore creates an ongoing commitment. Expect inspection, cleaning, local touch-ups, and eventual recoating. If that commitment does not suit the project, a compatible penetrating stain—or no finish on genuinely sheltered components—may be the better choice.
Frequently asked questions
Can I paint pressure-treated lumber immediately after buying it?
Usually not. Freshly treated lumber often contains too much moisture for reliable paint adhesion. Even if the surface does not look wet, the boards may need additional drying after purchase or installation.
Do not assume that a particular number of days is sufficient. Identify the lumber, consider its storage and recent weather, test several clean areas with water, and use a moisture meter if better confirmation is needed. Proceed only when the wood meets the selected coating’s requirements.
Does kiln-dried-after-treatment lumber still need to be tested before painting?
Yes. KDAT lumber may be ready sooner because it was dried after treatment, but it can absorb moisture during storage, transportation, rainfall, or installation.
Confirm the label, test representative boards, and compare any meter readings with the primer or paint manufacturer’s permitted moisture level. Kiln drying supports the possibility of a shorter wait; it is not an unconditional instruction to paint immediately.
Can previously stained pressure-treated wood be painted?
Potentially, provided the existing stain, surface condition, and proposed coating system are compatible. The wood must be clean, sound, and dry, and loose or deteriorated material must be addressed.
A penetrating stain, solid stain, film-forming stain, and water-repellent sealer can require different preparation. Follow the selected primer and paint manufacturer’s instructions for previously coated wood, including any adhesion testing or removal they require. Do not assume that primer will bond to an unidentified or water-repellent surface.
Can I use regular exterior paint on pressure-treated deck boards?
Not as a default. Deck boards are walking surfaces exposed to traffic, water, debris, and substantial wood movement. Use a compatible penetrating deck stain or a coating explicitly labeled for deck or porch floors, the substrate, and the expected traffic.
Evaluate traction as well. A product suitable for railings, siding, or exterior trim may be unsuitable underfoot.
What should I do if water still beads on the lumber?
Wait. Beading indicates that the surface is not ready to accept the finish reliably, although moisture is not the only possible cause. A prior sealer, oily contamination, or treatment residue can also affect water behavior.
Allow more dry weather and airflow, then retest several boards and locations. If beading persists despite continued drying, determine whether a previous finish or contamination is present and consult the coating manufacturer about suitable preparation. Do not resort to aggressive sanding or stronger cleaners without confirming that they are appropriate.
The practical conclusion is conditional: paint dry pressure-treated lumber when solid color and concealment justify the preparation and future maintenance. Consider a compatible penetrating stain for demanding horizontal surfaces, and leave genuinely sheltered components unfinished when exposure and appearance do not justify coating them. The final go-ahead should come from the boards’ moisture condition, the lumber-treatment documentation, and the selected coating system—not from a universal waiting period.