 MortarDesk
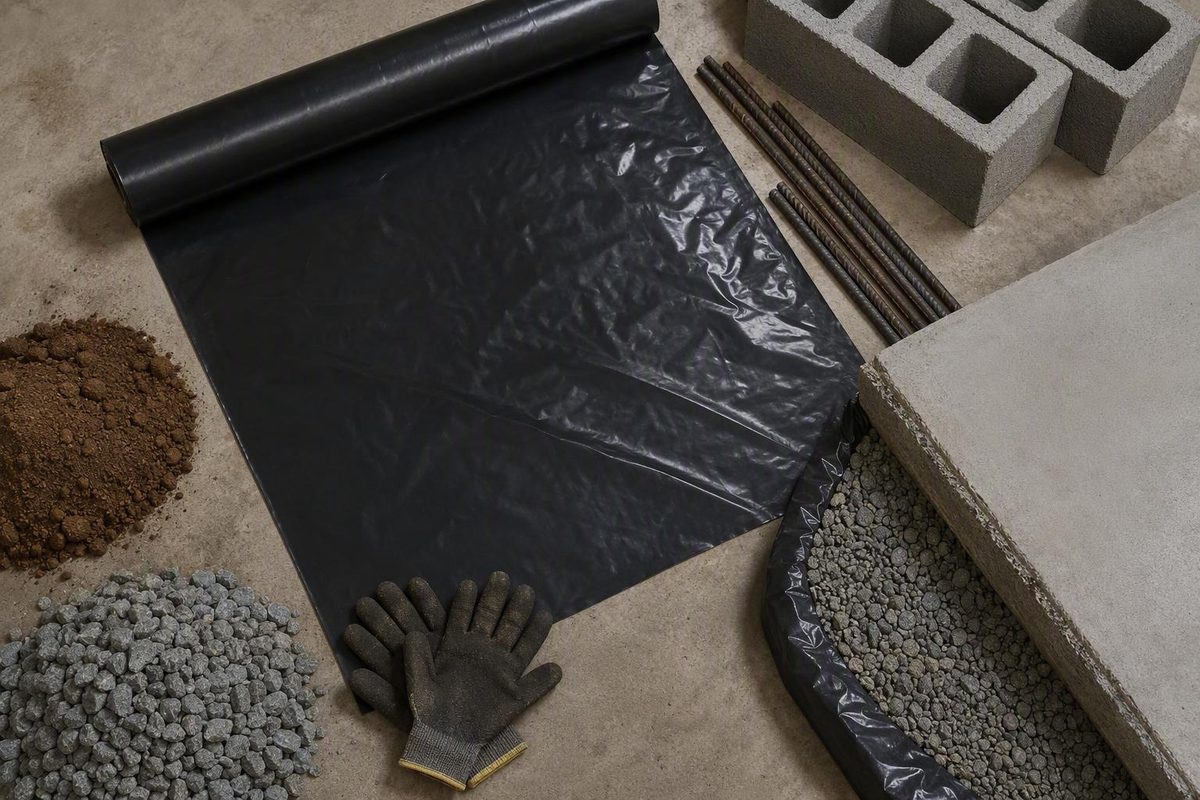
A vapor barrier basement floor assembly should be selected only after identifying the moisture condition and the finished-floor system. An above-slab membrane can limit water vapor reaching moisture-sensitive materials, but it is not automatically necessary on every slab and cannot repair leaks, flooding, failed drainage, or groundwater-pressure problems.
In this guide, moisture-control layer is the broad term for films, membranes, and underlayments intended to manage vapor beneath flooring. Vapor barrier and vapor retarder should be reserved for products with documented vapor-transmission properties and a stated application.
The practical decision turns on five questions:
- Is the moisture vapor, surface condensation, capillary movement, or liquid-water entry?
- Is a vapor retarder documented beneath the concrete?
- What does the slab-moisture assessment show?
- What do the flooring, adhesive, underlayment, and membrane instructions permit?
- Can the selected system be installed continuously without compromising drains, transitions, or other building details?
Answer those questions before choosing polyethylene by thickness alone. This article provides a general decision framework, not a complete specification for every membrane, floor covering, test method, or jurisdiction.
Start With the Moisture Source, Not the Membrane
Begin with the basement rather than the product shelf. Inspect the floor during normal conditions and, if dampness is intermittent, after the conditions associated with it—such as rain, snowmelt, humid weather, plumbing use, or operation of the heating and cooling system.
Use this diagnostic sequence:
- Look for visible water. Check the slab, wall-floor joint, cracks, penetrations, sump area, utility rooms, and low points for standing water or seepage.
- Record when and where dampness appears. Moisture concentrated after rain calls for a different investigation from widespread surface dampness during humid weather.
- Note recurring evidence. Record wet cracks, peeling finishes, staining, mildew, and repeated efflorescence without treating any single sign as proof of a particular cause.
- Review construction records. Plans, invoices, photographs, inspection records, or reliable builder documentation may show whether a retarder was installed beneath the slab.
- Read the proposed flooring instructions. Identify the required test method, acceptance limit, approved underlayment, and installation restrictions before designing the assembly.
Concrete is porous and can transmit moisture vapor toward the interior. Condensation is different: it can form when warm, humid air contacts a colder concrete slab. A basement floor may therefore become damp at the surface even when that visible moisture is not moving through the slab. A building-products retailer discusses porous-concrete transmission and condensation on cold concrete as separate basement moisture mechanisms, although its system recommendations are commercially oriented (Spycor’s basement-moisture overview).
Capillary movement should also be kept conceptually separate from bulk-water entry. Water can move through concrete pores without appearing as a stream, but active seepage, plumbing leakage, flooding, failed drainage, and groundwater pressure should not be relabeled as vapor problems.
An above-slab vapor-control layer has a limited purpose: reducing vapor migration from the concrete into the flooring assembly. It is not basement waterproofing, a drain, or a foundation repair. Polyguard similarly distinguishes vapor control from control of liquid water and cautions that a surface membrane does not resolve leaks, drainage failures, or hydrostatic pressure (Polyguard’s concrete-floor vapor-barrier guide).
Pause the flooring project if you find:
- Standing water
- Active seepage through a crack, joint, wall, or penetration
- Cracks that remain visibly wet
- Recurring moisture after rain or snowmelt
- Water emerging at the wall-floor joint
- A sump system that is overflowing or ineffective
- Suspected plumbing or appliance leakage
- Mildew or other affected material that has not been addressed
These conditions warrant source investigation before the slab is concealed. Covering them can hide useful evidence while exposing the new floor and any wood-based components to continuing moisture.
Do not diagnose a vapor problem, drainage failure, or microbial condition from one observation alone.
Decide Whether an Above-Slab Barrier Is Needed
The supplied evidence does not support a universal rule requiring additional polyethylene over every existing basement slab. An above-slab layer may be required by a flooring system, justified by the slab conditions, or unnecessary in a particular assembly.
Use three primary decision inputs.
1. Is a below-slab retarder documented?
A retarder installed beneath the concrete can limit ground-source vapor before it enters the slab. Plans, construction photographs, invoices, or reliable inspection records may confirm that such a layer exists.
Missing paperwork proves neither presence nor absence. Drawings may be incomplete, field construction may differ from the plans, and an undocumented slab cannot be assumed to contain an intact retarder. Conversely, the lack of records does not prove that no material was installed.
2. What does the slab assessment show?
Inspection and the test method required for the proposed flooring help define the conditions that the assembly must tolerate. Compare the results with the published requirements for the exact flooring, adhesive, primer, patching compound, membrane, and underlayment—not with a generic online threshold.
Assessment is especially important when construction details are unknown, the floor has a history of dampness, or the selected finish is moisture-sensitive or adhesive bonded.
3. What does the selected flooring system require?
The finish floor controls much of the assembly. A floating plank floor may allow separate film, require a particular underlayment, or include vapor control in the underlayment itself. A bonded floor may require direct contact between the concrete, preparation products, adhesive, and finish. Wood systems can impose additional testing and assembly conditions.
A documented underslab retarder does not override those instructions, moisture limits, or warranty conditions.
An archived Green Building Advisor discussion illustrates why the decision is project-specific. The basement described there had documented 6-mil polyethylene beneath the slab, a granular layer below it, no significant reported water problem, and a planned floating vinyl floor. An expert member and an editor considered another polyethylene layer unnecessary for that case. Their conclusion was an opinion about the described assembly, not a general standard or product approval (archived Green Building Advisor Q&A).
Do not assume a second low-permeance layer is harmless merely because one already exists below the slab. Another sheet may be unnecessary or incompatible with the approved underlayment, adhesive, or warranty. The relevant question is not whether more plastic can be added, but whether the complete assembly is permitted and suitable.
Possible project outcomes include:
- No added sheet because the documented slab protection and flooring instructions do not require one
- Separate polyethylene beneath an approved floating floor
- An underlayment with an integrated vapor-control layer
- A reinforced membrane where installation damage is a concern
- A dimpled membrane with an approved rigid layer above it
- A manufacturer-approved moisture-control system for bonded flooring
- No flooring installation until active-water problems are corrected
Assess and Prepare the Concrete Slab
Inspect the full slab, including areas that will later be under closets, cabinets, equipment, or partition edges. Move stored materials rather than extrapolating from one exposed area.
Look for:
- Visible moisture or dark areas
- Standing water or seepage
- Mildew
- Dirt, dust, oil, paint, and other contaminants
- Old adhesive, curing compound, or coating residue
- Sharp aggregate, projections, or fastener remnants
- Significant holes, spalls, breaks, or uneven patches
- Displaced, moving, or persistently wet cracks
- Floor drains, cleanouts, posts, pipes, and other interruptions
Prepare the concrete to the conditions required by the selected assembly. Remove debris and projections that could damage a membrane. Address mildew rather than trapping affected material beneath the new floor.
Repair requirements are product-specific. A loose sheet may tolerate a surface condition that would be unacceptable beneath a bonded coating, while a dimpled membrane and panel system may have its own support and flatness requirements. Use preparation and repair products approved for the membrane, primer, adhesive, and finish floor. The available evidence does not establish one patching product or procedure for every combination.
Moisture-assessment methods
Commercial concrete-floor guidance identifies two methods used in flooring work:
- In-slab relative-humidity probes
- Calcium-chloride testing
Polyguard names both methods while emphasizing that barrier selection also depends on the application and flooring system. The supplied evidence does not provide the governing test procedures or establish a universal pass-fail result, so follow the current method and limits specified by the selected product manufacturers.
Record at least:
- The test method
- Test locations
- Test date
- Results
- The product limits used for comparison
- Any preparation or mitigation decision that follows
Pre-covering checklist
Do not conceal the slab until every applicable item can be checked:
- [ ] The likely moisture source has been investigated.
- [ ] No standing water or active seepage is present.
- [ ] Recurring rain-related dampness has been resolved or evaluated.
- [ ] The full slab is clean and free of damaging projections.
- [ ] Relevant holes, breaks, cracks, and uneven areas have been addressed as required.
- [ ] The required moisture test has been completed and recorded.
- [ ] Results have been compared with the selected product limits.
- [ ] Drains, cleanouts, posts, pipes, and transitions have an approved detail.
- [ ] Current instructions for every assembly component are available.
- [ ] Added floor height and affected clearances have been checked.
Compare Basement-Floor Vapor-Control Systems
Flat film, reinforced sheet, integrated underlayment, and dimpled membranes address different installation needs. The available comparisons are primarily manufacturer- and retailer-led, so the table below is a selection framework rather than an independent performance ranking.
| System | Intended role | Installation-damage considerations | Seam approach | Floor height and rigid layers | Finish-floor considerations |
|---|---|---|---|---|---|
| Flat polyethylene film | Low-permeance separation between concrete and an approved overlying floor | Vulnerability depends on the product, substrate, thickness, and handling | Product-specified laps with compatible tape or sealant | Usually a relatively thin option; some finishes need a separate supporting layer | Often discussed beneath floating floors; not automatically suitable beneath bonded finishes |
| Reinforced sheet membrane | Vapor control with greater practical resistance to handling damage | Reinforcement may reduce tearing or puncturing during installation | Specified laps and compatible tape, sealant, or accessories | Product-specific; a rigid layer may still be required | Approval depends on the membrane and finish-floor documentation |
| Integrated vapor-control underlayment | Combines underlayment functions with vapor control | Product-specific; edges and seams remain important | Often uses attached strips, proprietary tape, or sealed laps | Included in the flooring build-up; normally used without an extra sheet unless expressly permitted | Intended for compatible floating floors |
| Dimpled HDPE membrane | Creates physical separation and a shallow cavity above the slab | Shaped sheet may resist some handling damage better than light film, but can still be damaged | Manufacturer-specified laps, tape, and perimeter details | Adds more height than flat film; plywood or OSB may be needed for finishes requiring greater rigidity | Direct installation depends on load, support, and explicit product approval |
Polyguard presents flat polyethylene and reinforced membranes as different choices based partly on durability and puncture exposure. MP Global Products describes both separate film and underlayments with integrated vapor control for selected floating floors. Spycor describes dimpled HDPE systems and notes that carpet or greater rigidity may call for plywood or OSB. These are product-market examples, not universal category approvals.
Flat polyethylene
Flat polyethylene is familiar, thin, and commonly discussed for floating-floor assemblies. Its suitability still depends on the floor above it. A material that limits vapor does not automatically provide cushioning, load distribution, attachment support, or a bondable surface.
Performance also depends on continuity. Tears, open laps, cuts around columns, and unplanned fastener penetrations interrupt the intended layer.
Reinforced sheet
Reinforcement or greater thickness may improve practical resistance to tearing and puncturing during handling. That can matter when rolls must be repositioned, panels will be placed above, or other work will continue before the membrane is concealed.
This is a durability consideration, not proof of superior vapor performance or a universal service life. Compare the published properties of the actual products.
Integrated underlayment
An integrated product may combine vapor control with cushioning, sound-control, compression, or other underlayment functions for a compatible floating floor. MP Global Products presents separate 6-mil film and integrated options while directing users to check the flooring requirements (manufacturer overview of separate and integrated products).
If an approved underlayment already provides the required vapor-control function, another sheet should not be added automatically. The combined layers must remain within the flooring manufacturer’s permitted assembly.
Dimpled membrane
A dimpled HDPE membrane creates physical separation and a shallow cavity between the slab and the materials above it. That geometry may suit a panelized subfloor or another approved assembly, but the cavity should not be assumed to ventilate, drain, or relieve groundwater pressure automatically.
A drainage function requires a designed path to an appropriate outlet. The evidence supplied here does not establish a general drainage detail or justify floating a membrane over active groundwater entry.
Read the Specification Beyond 6, 10, or 20 Mil
Mil is a nominal thickness designation, not a complete moisture-control specification. Products with the same stated thickness can differ in material, reinforcement, permeance, puncture resistance, seam design, and approved applications.
Permeance and thickness answer different questions
Permeance describes water-vapor transmission under defined test conditions. Commercial vapor-barrier sources commonly use 0.1 perm or less as a vapor-barrier range, but the available evidence does not establish that value as a universal requirement for every above-slab basement assembly (Americover’s vapor-barrier overview).
Thickness is most defensibly considered alongside resistance to installation damage. A thicker or reinforced sheet may be harder to tear or puncture during handling, particularly over a rough surface or beneath panels. The supplied evidence does not prove that every 10- or 20-mil product controls vapor better or lasts longer than every 6-mil product.
A 2007 engineering-forum discussion favored thicker sheeting mainly because of construction-damage resistance, but it supplied no validated service-life comparison for 6- and 10-mil material (Eng-Tips discussion of 6- versus 10-mil sheeting).
What to check on the product data sheet
Read the documentation for the actual product rather than relying on a retailer’s category description. Check:
- Stated application, including whether above-slab flooring use is listed
- Material and nominal thickness
- Published permeance
- Puncture, tear, or tensile properties, if provided
- Required slab condition and surface preparation
- Compatible tape, sealant, boots, and repair accessories
- Required laps and perimeter treatment
- Compatible flooring, adhesives, panels, and underlayments
- Support or load restrictions, where stated
- Rules for fasteners and penetrations
- Required moisture-test method and acceptance limit
- Warranty conditions
Polyguard identifies ASTM E1745 as a classification standard for plastic vapor retarders used beneath slabs in contact with soil or granular fill. That commercial summary does not establish above-slab approval. A product’s underslab classification should therefore not be treated as automatic authorization for a loose membrane beneath finished flooring (Polyguard’s discussion of ASTM E1745 and concrete floors).
Crawl-space recommendations provide only indirect context. In an archived Green Building Advisor discussion, participants generally recommended heavier liners where maintenance or storage traffic increased the risk of damage and saw less reason for added thickness in protected, inaccessible areas. That discussion concerns crawl spaces, not basement-floor requirements (crawl-space liner thickness discussion).
Choose thickness according to the actual product properties, approved application, and expected handling—not a promised universal lifespan.
Match the Barrier to the Finished Flooring
The moisture-control layer cannot be selected independently of the floor above it. First determine whether the finish will be floating, adhesive bonded, or mechanically fastened.
| Finished flooring | Possible approach | Directly over a loose membrane? | Main checks |
|---|---|---|---|
| Floating vinyl plank | Approved separate film or integrated vapor-control underlayment | Sometimes, when expressly permitted | Underlayment type, slab limits, flatness, joint support, and duplicate-layer restrictions |
| Laminate | Separate film or integrated underlayment | Often possible within an approved floating assembly | Cushioning limits, seams, slab conditions, and warranty language |
| Engineered wood | Separate barrier, integrated underlayment, or another specified system | Possible for some floating products; not assumed for bonded or fastened installations | Installation method, moisture limits, adhesive compatibility, and dimensional requirements |
| Hardwood | Manufacturer-designed floating, bonded, sleeper, or panel system | Loose film alone does not answer the assembly question | Slab limits, subfloor requirements, fastening, adhesive, and added height |
| Carpet | One possible assembly uses membrane, rigid panel, pad, and carpet | A supporting layer may be required; verify the selected system | Panel support, puncture control, attachment, pad compatibility, and transitions |
| Tile | Approved rigid or bonded tile assembly | Not over loose polyethylene unless the complete system specifically permits it | Rigidity, bondability, movement, mortar compatibility, and system approval |
Floating vinyl plank and laminate
These floors may be paired with separate polyethylene or an underlayment containing integrated vapor control. Do not assume both should be installed. Some products require a particular underlayment, restrict added cushioning, or prohibit unapproved layers.
Engineered wood and hardwood
“Wood over concrete” is not one assembly. Determine whether the floor is:
- Floating
- Adhesive bonded
- Mechanically fastened to sleepers or panels
- Part of a proprietary subfloor system
Then verify the required slab assessment, acceptance limit, underlayment, adhesive, and substrate. A loose sheet cannot be inserted into a direct-bond installation unless the complete bonded system is designed for it.
Mechanically fastened assemblies need particular attention because concrete screws used for panels or sleepers puncture sheet membranes. Avoid those penetrations, redesign the assembly, or use a detail expressly approved by the relevant system manufacturer. Do not assume ordinary fasteners seal themselves.
Carpet
Americover presents membrane, plywood, pad, and carpet as one basement-floor configuration. It is a representative commercial example, not a universal prescription, and the article does not provide a resolved sealing detail for concrete fasteners through the membrane (Americover’s representative carpet assembly).
A dimpled system may likewise require plywood or OSB where the finish needs more rigidity. Confirm panel type, support, seams, loads, and whether the panels are intended to float or require an approved attachment method.
Tile
Do not treat loose polyethylene as a direct tile substrate. Tile needs an assembly approved to provide the required support and bond surface.
Retailer guidance for dimpled membranes similarly says tile generally should not be installed directly on the flexible membrane and instead calls for a rigid, stable layer or suitable backer system. The exact build-up remains product-specific.
Account for the full build-up
Before ordering materials, total the thickness of:
- Membrane
- Underlayment
- Plywood, OSB, or another panel
- Backer or uncoupling layer
- Adhesive or mortar
- Finished flooring
Check the resulting elevation at doors, stairs, drains, cleanouts, appliances, equipment, base trim, and transitions to adjacent flooring. These are project constraints to verify; the available evidence does not supply universal clearance or transition dimensions.
Install a Continuous, Repairable Membrane
The following sequence is a planning outline, not a substitute for the selected product’s installation manual.
- Confirm compatibility. Verify that the membrane, accessories, overlying layers, and finish floor form a permitted assembly.
- Prepare the slab. Clean it, remove damaging projections, address specified defects, and meet the product’s required conditions.
- Plan sheet direction. Account for pipes, columns, posts, drains, doorways, stairs, and transitions before cutting.
- Cover the intended area. Avoid unexplained gaps within the area the assembly is supposed to protect.
- Join seams. Use the required lap and compatible tape, sealant, or proprietary closure.
- Detail edges and penetrations. Follow the documented procedure at walls, corners, pipes, posts, and other interruptions.
- Inspect and repair. Find open seams, holes, tears, and damage before concealment.
- Install approved layers above. Protect the membrane from tools, traffic, panel edges, and continuing work.
Continuity matters at seams, corners, pipes, columns, posts, drains, cleanouts, doorways, thresholds, and transitions. Use only tape, sealant, boots, patches, or other accessories documented as compatible with the membrane.
Overlaps and wall upturns
Generic dimensions vary. Polyguard gives an example of seams overlapping by at least 6 inches and material extending 6–12 inches at walls. MP Global Products describes a 2–3-inch wall extension for its flooring product (MP Global Products installation example).
Those measurements come from different commercial systems and are not interchangeable rules. Follow the current instructions for the selected membrane and flooring.
Do not leave uncontrolled folds beneath the finish.
Pipes, posts, drains, and cleanouts
At a pipe or post, use the product’s prescribed cutting, patching, boot, tape, or sealant detail. Complex penetrations may require multiple pieces installed in a specified order.
Do not cover them or invent a field-sealing arrangement unsupported by the membrane and plumbing details. Obtain a compatible transition for the actual products and fitting.
Fasteners and damage
Every fastener through a sheet creates a penetration. If panels, sleepers, partitions, or trim must be anchored through the membrane, use an approved assembly detail or redesign the installation. Ordinary screws and powder-actuated fasteners should not be treated as self-sealing.
Immediately before concealment, inspect for:
- Open or fish-mouthed seams
- Failed tape adhesion
- Tears and punctures
- Wrinkles that interfere with the next layer
- Unsealed cuts around penetrations
- Incomplete perimeter treatment
- Unsupported panel edges
- Covered drains or cleanouts
- Damage caused by tools, ladders, carts, or later work
Repair damage with accessories approved for the membrane.
Check Instructions, Warranties, Codes, and Project Limits
Applicable law and requirements of the authority having jurisdiction are mandatory project constraints. Within those constraints, the flooring, adhesive, membrane, underlayment, and warranty documents must form a mutually compatible system.
Use this review order:
- Identify the locally applicable code and authority requirements.
- Check the selected flooring and adhesive instructions.
- Check the membrane or underlayment instructions.
- Review the written warranty conditions.
- Resolve every conflict before purchasing or installing materials.
Legal compliance does not establish product compatibility, and warranty compliance does not replace legal requirements. For example, a loose membrane does not become suitable beneath a direct-bond floor merely because the membrane is approved for another application.
A commercial concrete-floor guide states that above-slab barriers are not always expressly required by national codes and advises checking local requirements and flooring warranties. Because the supplied evidence does not include current primary code provisions, no universal national rule should be inferred from this article.
Specifications, product manuals, and locally adopted code editions can vary. Generic advice about 6-mil film, a particular overlap, or a wall upturn cannot replace current project documents. Mortar Desk publishes general reference information and notes that specifications and codes vary by edition and locality (Mortar Desk’s editorial scope).
Obtain specialist input when the project involves active water entry, suspected groundwater or drainage problems, unresolved affected materials, uncertain slab or foundation conditions, or a proposed bonded floor that conflicts with a loose membrane.
Treat radon as a separate subject. One commercial vapor-barrier article makes a radon-related marketing claim, but the supplied evidence provides no radon-specific testing, material specification, sealing standard, or mitigation design. A generic flooring membrane therefore should not be represented as a verified radon-control system. If radon is a concern, seek appropriate radon-specific guidance before altering or covering the slab.
Purchase checklist
Before placing an order, record:
- [ ] Exact finish-floor product
- [ ] Floating, bonded, or mechanically fastened installation
- [ ] Applicable local requirements
- [ ] Permitted moisture-control layer
- [ ] Required slab test method
- [ ] Published acceptance limit
- [ ] Membrane’s stated above-slab application
- [ ] Published permeance
- [ ] Puncture, tear, or tensile properties, where relevant
- [ ] Approved seam tape, sealant, boots, and patches
- [ ] Required lap and perimeter treatment
- [ ] Need for plywood, OSB, backer, or another rigid substrate
- [ ] Approved treatment of unavoidable penetrations
- [ ] Total added floor height
- [ ] Effects on doors, stairs, drains, cleanouts, and transitions
- [ ] Current flooring, adhesive, membrane, and warranty documents
Frequently Asked Questions
Do I need an above-slab vapor barrier if there is already polyethylene beneath the basement slab?
Not automatically. Documented polyethylene beneath the slab may already limit ground-source vapor, and one archived expert discussion considered another sheet unnecessary for a basement with known underslab polyethylene and no significant reported water problem.
That case is not a general exemption. Check current slab conditions, required test results, and the instructions for the flooring, adhesive, membrane, and underlayment.
Is 6-mil polyethylene enough, or should I choose 10- or 20-mil material?
It depends on the actual product, expected handling, and floor assembly. Thicker or reinforced material may better resist construction damage, but the supplied evidence does not prove a universal service-life or vapor-control advantage for 10- or 20-mil products.
Compare stated application, permeance, physical properties, seam system, and flooring approval rather than thickness alone.
Will a basement-floor vapor barrier stop leaks or hydrostatic pressure?
No. An above-slab vapor-control layer is intended to limit vapor migration into the flooring assembly. It does not correct foundation leaks, flooding, failed drainage, plumbing leaks, or groundwater pressure.
Standing water, active seepage, recurring rain-related moisture, and persistently wet cracks should be investigated before flooring is installed.
Can vinyl plank, carpet, wood, or tile go directly over the membrane?
Sometimes, but only as part of an approved assembly:
- Floating vinyl plank and laminate may allow separate film or integrated vapor-control underlayment.
- One reported carpet configuration uses a membrane, rigid panel, pad, and carpet, but that is not a universal prescription.
- Engineered wood and hardwood depend on whether the installation is floating, bonded, or mechanically fastened.
- Tile should not be placed directly over loose polyethylene or an unsupported flexible dimpled membrane unless the complete tile system specifically approves it.
Does a standard flooring vapor barrier also mitigate radon?
Do not assume so. The evidence used for this article does not establish a generic flooring sheet as a tested, complete radon-control system. Radon concerns require separate, radon-specific evaluation rather than reliance on vapor permeance or polyethylene alone.
Choose the basement-floor assembly only after separating vapor transmission from active water entry, checking for documented underslab protection, assessing the slab, and reading the finish-floor requirements. Compare products by verified properties and compatibility rather than thickness or marketing claims alone, then protect continuity at every seam, edge, and penetration.
If the basement has seepage, standing water, wet cracks, unresolved drainage problems, or radon concerns, address those separately before concealing the slab. This is general building-material reference information, not individual waterproofing, contracting, engineering, environmental-remediation, code, or radon advice.