 MortarDesk
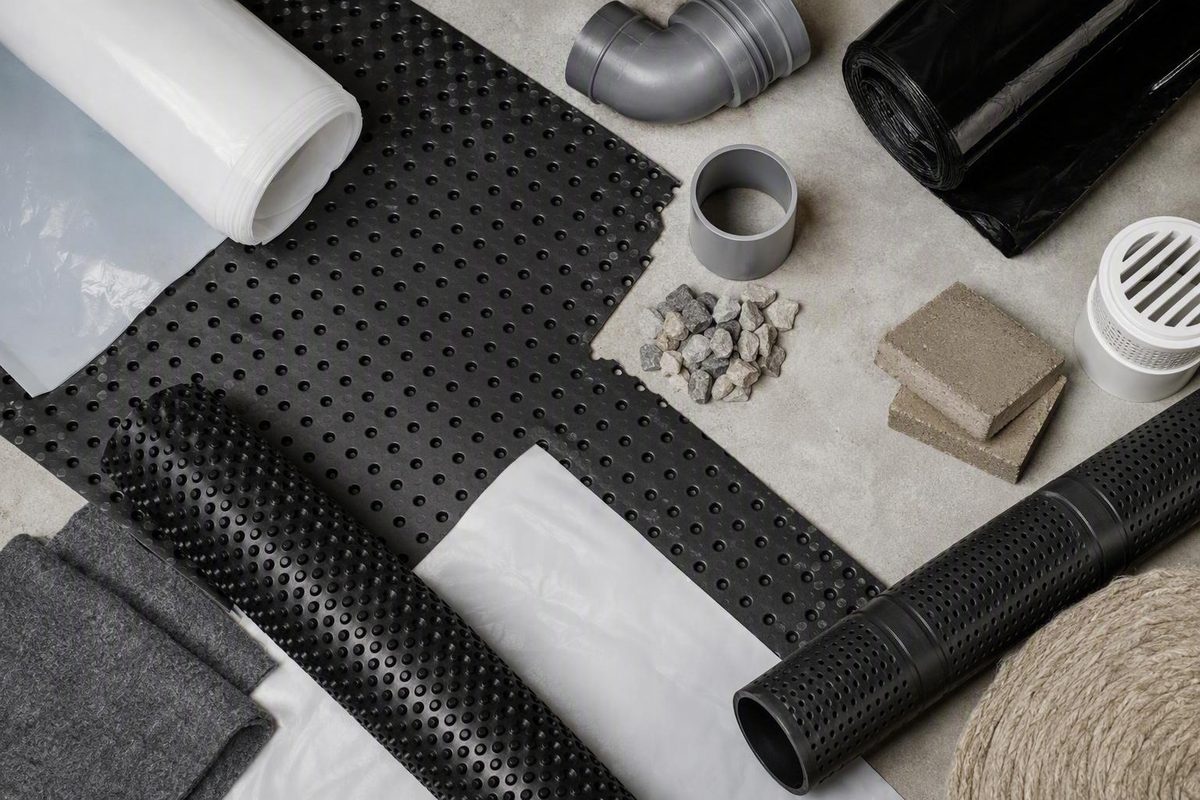
Crawl space drainage matting is not an automatic requirement for every encapsulation project. It earns its place when it protects a liner from rough ground, creates a continuous route for liquid water, or does both. In a smooth, dry space with little traffic, full-floor coverage may add cost without solving a real problem.
Start with the site rather than the product: What is the floor like? Is liquid water entering? Where can that water discharge? Only then should you compare roll widths, usable coverage, dimple height, drainage ratings, compression figures, seam instructions, application limits, and delivered cost.
Quick buying rule:
- Choose full coverage when broad areas need puncture protection or water must travel continuously beneath the liner.
- Choose a protected service path when the space is dry but regular access could damage the liner.
- Consider no matting when the floor is smooth, dry, and rarely entered.
- Do not rely on any coverage option until liquid water has a dependable drain, gravity outlet, or sump destination.
Updated September 5, 2026. Product specifications and prices below were transcribed from seller pages and were not independently tested. Commercial terms should be rechecked before ordering.
What drainage matting does—and what it does not do
The common floor product is a molded or embossed high-density polyethylene sheet with raised dimples. Those dimples hold the sheet away from the ground, creating a shallow gap between the crawl-space floor and the liner above.
A typical floor assembly has three layers, from bottom to top:
- Substrate: dirt, gravel, or concrete approved for the selected product
- Drainage matting: the dimpled underlayment
- Vapor barrier: a separately installed and sealed crawl-space liner
The connected drainage component is not a fourth floor layer. It is the perimeter drain, footing drain, suitable gravity outlet, or sump system that receives water from the mat’s channels.
This arrangement gives drainage matting two possible jobs.
The first is liquid-water movement. The dimple gap creates channels through which seepage or intermittent floodwater can move beneath the liner. This keeps the liner from lying directly against every wet patch, but it works only when the channels remain continuous and lead somewhere useful.
The second is physical protection. The mat buffers the liner from gravel, rocks, roots, rough soil, sharp debris, abrasion, and repeated crawling. A space can benefit from that protection even if it has no history of flooding.
Drainage matting and a vapor barrier are not normally interchangeable. A vapor barrier limits moisture-vapor migration from the soil; drainage matting creates space for liquid-water movement and provides physical separation. Commercial system guidance likewise treats vapor control and bulk-water drainage as distinct functions, even when both are part of the same encapsulation project in Americover’s comparison of vapor barriers and drainage mats.
Some proprietary products are sold as combined drainage-and-barrier materials. Do not assume that every dimpled sheet qualifies. Before using one as the vapor barrier, obtain its stated vapor permeance, applicable test information, seam instructions, wall-termination requirements, and written approval for the intended assembly. The typical dimple underlayments compared here require a separate sealed liner above them.
The mat also does not pump out, absorb, or dispose of water. It merely provides a route. If that route ends at a blocked outlet, isolated low pocket, or inoperative sump, water can remain beneath the liner.
Nor should drainage matting be treated as insulation. BaseShield, for example, is seller-listed with an R-value of zero, along with instructions to install a separate vapor-barrier liner above it on the BaseShield product page.
Product pages sometimes connect drainage matting with broad claims about waterproofing, mold, odors, health, energy savings, hydrostatic pressure, or structural protection. Those outcomes are not established merely by placing a dimpled sheet on the floor. They depend on the source of the water, drainage design, liner installation, foundation condition, crawl-space conditioning strategy, and continued operation of any sump equipment. Treat unquantified claims of this kind as marketing rather than specifications.
Decision guide: full coverage, a protected path, or no matting
Begin by identifying the underlayment’s intended purpose:
- Liner protection: shielding the vapor barrier from puncture and abrasion
- Bulk-water drainage: creating a continuous route beneath the liner
- Both: protecting the liner while directing intermittent or recurring water to a drain
The required coverage depends on which purpose applies.
When full coverage is worth considering
Full-floor matting is the strongest candidate when one or more of these conditions exist:
- Recurring seepage or seasonal flooding affects broad floor areas.
- A functioning perimeter drain or sump can receive water from the mat.
- Much of the floor consists of sharp gravel, exposed roots, rough soil, or uneven material.
- The project requires a continuous drainage plane rather than isolated protected areas.
- Technicians or occupants regularly cross substantial portions of the crawl space.
- Water enters at several points or shifts location with rainfall and seasonal groundwater.
Full coverage improves continuity but also increases material, cutting, freight, and labor. It cannot compensate for a missing outlet or failed drainage system.
When partial coverage may be enough
In a dry crawl space, puncture protection may be needed only where traffic occurs. A strip from the access opening to the furnace, air handler, plumbing equipment, or sump can act as a service catwalk. Additional pieces can protect the liner around frequently approached equipment or work areas.
Partial coverage is a protection strategy, not a floor-wide drainage system. Water outside the covered path will not necessarily enter or follow the mat. Separate pieces can also create isolated channels unless their relationship to the receiving drain has been planned.
When no matting may be reasonable
A smooth, dry, rarely entered crawl space with no history of liquid-water intrusion may not justify full-floor matting. That is condition-dependent vendor guidance, not a rule for every building. Crawl Space Ninja similarly distinguishes among full coverage, traffic-path coverage, and potentially no matting, depending on floor conditions and access frequency in its seller-authored guidance.
Before omitting underlayment, inspect the entire intended liner area—not only the part visible from the access opening. Look for embedded stone, cut wire, fastener ends, roots, broken masonry, sharp pier edges, and routes used for equipment servicing.
A concise decision tree
-
Is active or seasonal liquid water entering? - Yes: identify its source and proceed to the drainage-destination question. - No: assess puncture and traffic risk.
-
Is there a dependable drainage destination? - Yes: consider full coverage where a continuous route is needed. - No: resolve the drain, sump, or discharge design before relying on matting.
-
Is the floor broadly rough or puncture-prone? - Yes: full coverage may be justified for liner protection. - No: continue to access frequency.
-
Will people regularly crawl to equipment or a sump? - Yes: partial service-path coverage may be sufficient if floor-wide drainage is unnecessary. - No: matting may be unnecessary if the space is also dry and smooth.
Do not confuse managing residual water with fixing its source. Exterior grading, roof-water discharge, plumbing repairs, footing-drain rehabilitation, sump work, or other water-control measures may need to precede encapsulation.
Persistent flooding, suspected high groundwater, foundation movement, failed drains, plumbing leaks, or the absence of a safe discharge route should be investigated before the floor is concealed. Site conditions such as soil, water-table level, slope, drainage, and foundation exposure can materially change the appropriate design as this building-science discussion illustrates.
Plan where the water will go before buying the mat
The most important drainage-mat specification is not printed on the roll. It is the condition and location of the outlet.
Depending on the property and assembly, the mat’s channels may lead toward:
- An interior perimeter drain
- A footing or footer drain
- A gravity outlet where elevation, site conditions, and local discharge rules permit
- A sump basin and pump system
One contractor’s CleanSpace assembly, for example, places drainage matting beneath the liner and directs water toward a perimeter drain and sump system in its crawl-space drainage description. The underlying principle is simple: the mat conveys water; the drainage system receives and removes it.
An advertised flow capacity does not prove that a product will drain a particular crawl space. A high laboratory or seller-stated figure becomes irrelevant if:
- The floor contains low pockets disconnected from the outlet.
- A pier, curb, equipment pad, or transition interrupts the channel.
- The installed orientation or seam arrangement closes the drainage path.
- Sediment obstructs the cavities.
- The perimeter drain or outlet is blocked.
- The sump cannot accept or discharge the arriving water.
- Another system component has insufficient capacity for the incoming water.
Before ordering, prepare a floor map. Mark visible entry points, wet staining, floor elevations, depressions, piers, equipment pads, wall transitions, plumbing penetrations, the sump, existing drain lines, and the proposed direction of flow. Measurements or level readings can improve the map, but even a carefully annotated sketch is better than assuming the floor is flat or uniformly sloped.
At the drain or sump, the product-specific termination must let water enter the drainage system rather than trapping it at the edge or allowing it to bypass the intended receiver. The exact construction detail is not universal. It may depend on the mat profile, drain design, liner system, sump lid, radon strategy, and manufacturer instructions.
Site variables affecting the system choice include:
- Exterior grading and roof-water discharge
- Floor and site slope
- Local rainfall patterns
- Soil drainage characteristics
- Seasonal groundwater
- Existing footing-drain condition and location
- Access for excavation or drain repair
- The elevation and legality of a possible gravity outlet
- Sump availability, power, and maintenance access
Some properties may support gravity discharge; others rely on a sump. A general materials guide cannot determine pump capacity, backup arrangements, outlet location, or a lawful discharge route for a particular property.
The available product guidance also does not establish a universal minimum floor slope, pump capacity, or sump-termination detail. Obtain a site-specific assessment when water is persistent or substantial, the footing drain is uncertain, the foundation shows distress, or the discharge design remains unresolved.
Specifications that matter when comparing drainage mats
A useful comparison should include more than roll price and nominal square footage.
| Specification | What it tells you | What it does not prove |
|---|---|---|
| Material | The polymer or composite used, often HDPE | Suitability for every substrate or indoor application |
| Gross roll area | Width multiplied by length | Actual installed coverage |
| Usable coverage | Area remaining after seams and cuts | Whether the layout will drain correctly |
| Dimple height | Nominal depth of the formed profile | Field capacity at a particular property |
| Drainage capacity | Seller- or test-reported flow under stated conditions | Ability to handle the site’s actual water load |
| Compressive strength | Resistance reported in specified units and conditions | Comparability where methods or units differ |
| Test method | How a technical value was obtained | Independent certification or code approval by itself |
| Approved substrates | Whether dirt, gravel, concrete, walls, or other surfaces are permitted | Approval for unlisted assemblies |
| Seam method | Whether sections are butted, overlapped, interlocked, fastened, or otherwise joined | How the vapor-barrier seams must be sealed |
| Application restrictions | Limits involving concrete, below-slab use, coatings, fasteners, or walls | Approval beyond the written scope |
| Evidence quality | Whether a claim has a disclosed method or supporting document | That every seller claim has been independently verified |
Gross area versus usable coverage
Gross area is straightforward:
Roll width × roll length = gross roll area
A 4-foot-by-50-foot roll has 200 gross square feet. That number does not subtract overlaps, offcuts, irregular edges, pier cutouts, penetrations, damaged sections, or remnants too narrow to reuse. This is the same distinction that applies to many nominal-versus-usable building-material dimensions: the label is a starting point, not a finished-layout quantity.
Dimple height
Dimple height describes the physical depth of the formed profile. It can distinguish products, but a deeper profile does not guarantee that a mat will drain a particular site successfully. Field performance also depends on channel geometry, orientation, continuity, sediment, loading, outlet condition, and incoming water.
Drainage-capacity ratings
Some sellers express drainage capacity in gallons per minute per foot. That figure is most useful when the test setup, flow direction, hydraulic gradient, loading, and test method are disclosed. It should not be treated as a prediction of field performance without those conditions.
Compression figures
Compression values are comparable only when their units and test methods match. A value reported in pounds per square foot cannot be ranked directly against an unexplained figure such as “729 lbs/in.” The latter may omit a dimension, use nonstandard shorthand, or describe a different property.
The Crawl Space Ninja listing states an 8 mm dimple height, 18 gal/min/ft flow rate, and 7,590 psf compressive strength, with ASTM references attached to those seller-stated figures in its technical-data section. An ASTM reference on a sales page does not itself establish independent certification, code approval, or suitability for a particular project.
BaseShield is seller-listed with 8 mm dimples, 18 gal/min/ft drainage capacity, 5,515 psf compressive strength, and an R-value of zero. Its page does not identify test methods for the flow or compression figures in the displayed product specifications. The numbers may appear comparable to another product’s figures, but the disclosed evidence is not equally complete.
Some drainage systems incorporate a geotextile intended to limit soil particles entering the drainage space. If filtration is a concern, compare the complete composite and its approved orientation rather than adding fabric informally. The supplied evidence does not establish that geotextile filtration is mandatory in every crawl-space floor assembly.
A practical evidence label for each specification is:
- Seller-stated with test reference
- Seller-stated without disclosed test method
- Unclear units or method
- Not provided
That label is often more useful than a strength or performance ranking based on figures that were not measured on the same basis.
Product sizes and advertised material costs compared
The following prices and specifications were checked on September 5, 2026. They are seller-displayed examples, not guaranteed offers. Gross-area calculations and prices per square foot are rounded to the nearest cent.
| Product and seller-listed size | Gross area | Material and seller-stated technical data | Displayed price | Approx. price per gross sq. ft. | Evidence quality and buying notes |
|---|---|---|---|---|---|
| Whitecap, 2 ft × 50 ft | 100 sq. ft. | HDPE; no numeric dimple height, flow rate, or compression value supplied | $84.99 | $0.85 | Technical data largely not provided; narrow width may suit restricted access. Seller listing |
| Whitecap, 4 ft × 50 ft | 200 sq. ft. | HDPE; seller gives an unexplained “729 lbs/in” compression figure | $159.99 | $0.80 | Units and method are unclear, so the figure should not be normalized against psf ratings. Seller listing |
| BaseShield, 4 ft × 50 ft | 200 sq. ft. | Recycled HDPE; 8 mm dimples; 18 gal/min/ft; 5,515 psf; R-value 0 | $185 retail; $149 member | $0.93 retail; $0.75 member | Seller-stated values without disclosed test methods on the page; member price is conditional. |
| Crawl Space Ninja mat, 6 ft 9 in × 50 ft | 337.5 sq. ft. | Recycled HDPE; 8 mm dimples; 18 gal/min/ft; 7,590 psf | $264.99 | $0.79 | Seller-stated with ASTM references; request underlying reports if these values control selection. Seller listing |
| Koffler A1050 drainage mat, 6 ft 9 in × 50 ft | 337.5 sq. ft. | Gray HDPE; several dimensions lack clear units; “729 lbs/in” compression resistance | $450.84 | $1.34 | Three-roll minimum and oversized shipping are noted; unclear units prevent strength ranking. Seller listing |
Using the cited displayed prices, the nonconditional examples range from approximately $0.79 to $1.34 per gross square foot. BaseShield’s conditional member price is an outlier at approximately $0.75 per gross square foot.
These figures exclude overlap and cutting losses, freight, minimum-order effects, tape or fasteners, the overlying liner, perimeter drainage, sump equipment, electrical work, and labor.
Do not interpret the table as a ranking of the best, strongest, or most durable product. The published information is too inconsistent for that. Instead, compare:
- Whether the roll will fit through the crawl-space opening
- Whether its width reduces or increases cutting waste
- How complete and comparable the technical data are
- Whether the seam and orientation instructions suit the layout
- Whether the exact substrate and application are approved
- Whether a minimum order creates surplus material
- The delivered cost of complete rolls
- Return restrictions on large or oversized items
A narrow roll may cost more per square foot but be easier to handle around piers or through a small hatch. A wider roll may reduce the number of seams but create large offcuts in an irregular space.
Prices, inventory, discounts, freight, return terms, ratings, and marketplace badges can change. Verify all commercial terms immediately before ordering.
How much matting to order
Do not estimate from the house footprint unless it exactly matches the crawl-space floor area being covered. Start with a scaled floor plan and divide the intended coverage into measurable rectangles, triangles, or other simple shapes.
Mark:
- Foundation-wall offsets
- Piers and columns
- Equipment pads
- Sumps and drain openings
- Inaccessible or uncovered areas
- Large rocks or permanent obstructions
- Irregular perimeter edges
- Service-path-only coverage
- Locations requiring special transitions
Add the area of the intended coverage zones. Keep full-floor coverage separate from optional wall or vertical work.
Next, draw candidate roll widths over the plan. This catches problems that an area-only calculation misses. A 6-foot-9-inch roll may have a favorable gross-square-foot price but be difficult to move through a restricted opening. It may also leave more unusable material around closely spaced piers. A 2-foot roll creates more seams but may fit narrow bays efficiently.
For each candidate roll:
- Calculate gross area by multiplying width by length.
- Apply the manufacturer’s exact seam method to the layout.
- Determine the net usable area after required overlaps.
- Account for perimeter cuts and penetrations.
- Identify remnants that can realistically be reused.
- Add an allowance for damaged pieces and unavoidable layout losses.
- Round up to complete rolls.
Use one consistent calculation method:
Rolls required = (measured coverage area + perimeter, cut, penetration, and damage allowance) ÷ net usable coverage per roll
Then round up to the next whole roll.
In this formula, net usable coverage per roll already accounts for required overlaps. Do not add overlap consumption to the numerator and also subtract it from usable roll coverage, because that would count the same loss twice.
Do not apply one universal waste percentage. An open rectangular crawl space using butted seams has a different loss profile from an irregular floor with overlapping seams, many piers, narrow bays, and a difficult access hatch. Product width and seam rules can affect waste as much as total floor area.
Worked estimating method
Suppose a floor plan has three measurable zones and the proposed product comes in a 4-foot-by-50-foot roll with 200 gross square feet. Do not simply divide the combined floor area by 200.
Instead:
- Draw the 4-foot runs in the intended direction.
- Mark every overlap required by that product.
- Lay out cuts around piers and the sump.
- Determine whether offcuts from one bay fit another.
- Identify the number of full-length and partial runs.
- Calculate net usable coverage from that layout.
- Convert the runs into complete rolls.
This is intentionally a method rather than a universal final quantity. The answer changes with room geometry, roll direction, seam treatment, and reusable remnants.
Calculate delivered material cost as:
Complete-roll cost + freight + minimum-order surplus + required accessories
Advertised price per gross square foot is useful for initial screening, but complete-roll delivered cost is the better purchasing figure. A minimum order can dominate the economics of a small project even when the nominal unit price appears acceptable.
Estimate the overlying vapor barrier separately. Its quantity must account for wall turns, columns, liner seams, perimeter attachment, and sealing details that do not match the drainage-mat layout.
Installation sequence and the seam rules that vary by product
There is no universal rule that all crawl space drainage matting should face the same way or use the same seam treatment. Floor underlayments, wall membranes, exterior drainage boards, geocomposites, and below-slab products can differ.
A bounded installation sequence is:
- Resolve active leaks and establish the discharge plan.
- Address known water sources that must be corrected before encapsulation.
- Remove debris, sharp protrusions, and materials prohibited by the selected product.
- Prepare the floor to the manufacturer’s stated requirements.
- Dry-fit the layout around piers, pads, low points, and the outlet.
- Install the mat in the specified orientation.
- Join or position sections using the product-specific seam method.
- Connect the drainage path functionally to the approved drain or sump system.
- Install the separate vapor barrier above the mat.
- Seal liner seams and terminations as required by the liner system.
BaseShield and Crawl Space Ninja’s floor-underlayment guidance specify dimples facing down over dirt or gravel. Crawl Space Ninja also instructs users to butt adjacent sections for that product in its floor-underlayment guidance. Do not generalize that orientation or seam method to every mat or application.
Product-specific seam guidance
| Product or source | Seller-described seam treatment | Important limitation |
|---|---|---|
| Crawl Space Ninja floor underlayment | Butt adjacent mat sections | Applies to that seller’s floor product, not every dimple membrane |
| Whitecap floor matting | Overlap mat seams | Confirm the overlap amount and whether fastening is permitted |
| Koffler A1050 drainage matting | Mat seams are not intended to be taped; the overlying vapor barrier is taped | Do not confuse the drainage-mat seam with the liner seam |
| Crawl Space Ninja customer review | One reviewer suggested overlapping dimples and using a push fastener | Anecdotal technique that must not override written instructions |
Whitecap’s seller instructions call for overlapping seams and directing runs toward a sump or footer drain. Koffler, by contrast, states that its drainage-mat seams are not intended to be taped and that the separate vapor barrier above is the layer whose seams are taped.
These differences affect usable roll coverage and show why “tape every seam” is not a safe universal instruction. Tape could be unnecessary, incompatible, ineffective on the formed profile, or contrary to the written assembly.
Customer-review techniques are anecdotal. A reviewer’s success with a push fastener, overlap pattern, or particular tape does not establish product compatibility or drainage performance.
Keep two seam questions separate:
- How are the drainage-mat sections joined or positioned?
- How are the vapor-barrier seams sealed?
Even where mat seams remain untaped, the overlying liner may require tape, adhesive, welding, or another specified sealing method.
Preserve continuous channels around piers, low points, and transitions. Avoid layouts that leave isolated pockets from which water cannot reach the receiving drain. The exact termination detail cannot be inferred from the dimple pattern alone.
Before starting, check the selected product’s current written rules for:
- Mechanical fastening
- Wall attachment
- Floor cleaning or leveling
- Deliberate slope
- Compatible tapes and adhesives
- Permitted liner systems
- Treatment around drains and sump basins
- Direction of roll installation
- Maximum or concentrated loading
Do not assume installation will be quick merely because a roll is lightweight or flexible. Restricted access, active-water correction, rough substrate, drainage construction, and numerous obstructions can substantially increase the work.
Application limits, verification, and post-installation checks
“Drainage mat” describes a broad category rather than one universal assembly. Separate these applications before choosing a product:
- Crawl-space floor underlayment beneath a liner
- Interior foundation-wall drainage
- Exterior foundation-wall drainage
- Below-slab drainage
- Drain board associated with footing systems
A product marketed for several uses may require different orientation, filtration, attachment, termination, or protection in each application. Approval for a dirt-floor crawl space does not establish approval behind exterior backfill or beneath concrete.
The Koffler seller specifically says it does not recommend pouring concrete over its listed crawl-space drainage matting. Other sellers market broader applications, but that does not make every HDPE dimple mat interchangeable. Obtain written approval for the exact product and assembly before concrete placement.
The same rule applies to foundation walls, asphalt dampproofing, waterproofing membranes, adhesives, fasteners, and unusual substrates. Compatibility should be documented rather than inferred from a generic reference to “foundation use.”
Before purchasing, check:
- The current product data sheet
- The current installation manual
- Any underlying test report supporting critical values
- The written warranty and exclusions
- Approved substrates and orientations
- Application-specific limitations
- Compatible liners, tapes, adhesives, and fasteners
- The locally adopted building code
- Drainage-discharge and permitting requirements
One vendor article references IRC R408 and ASTM E1745 while discussing crawl spaces and vapor-retarder classifications. That reference does not establish that either document universally requires drainage matting or certifies any product compared here as the vendor’s code discussion indicates. Confirm the locally adopted code edition and interpretation.
Radon strategy, sealed sump lids, drainage-discharge rules, pump wiring, alarms, and electrical protection are related system issues. They require product-specific instructions and local verification rather than improvised details.
Before covering the mat
Inspect the installation while it remains visible:
- Confirm orientation against the current instructions.
- Check that seams match the selected product’s method.
- Make sure channels are not crushed, reversed, or isolated.
- Verify that cuts around piers and pads have not created trapped pockets.
- Confirm that the receiving drain or sump remains accessible.
- Remove debris that could damage the liner.
- Record important drainage transitions for future reference.
After installation
A concealed mat still depends on accessible, functioning system components. After installing the liner:
- Keep the sump, cleanouts, alarms, and outlet accessible.
- Test pumps and alarms according to their manufacturers’ instructions.
- Inspect exposed liner areas for punctures, open seams, or movement.
- Check an accessible exterior discharge point for blockage.
- Investigate recurring standing water instead of assuming the hidden mat is handling it.
Warning signs requiring follow-up include water that never reaches the drain, liner bulges, persistent pooled water, new punctures, blocked discharge, pump failure, or continuing foundation movement.
The practical purchase sequence is:
- Identify whether the goal is liner protection, liquid-water drainage, or both.
- Confirm a reliable destination for water.
- Choose full, partial, or potentially no coverage from actual site conditions.
- Compare only specifications with clear units and relevant test methods.
- Calculate usable—not merely nominal—coverage.
- Price complete rolls, freight, accessories, and minimum-order effects.
- Follow the selected manufacturer’s orientation, seam, substrate, and application rules.
If the water source or discharge route remains unresolved, correct or professionally assess that problem before concealing the floor beneath an encapsulation liner. Mortar Desk provides general building-material reference information, not individualized waterproofing, engineering, structural, radon, electrical, or code advice.
Frequently asked questions
Can crawl space drainage matting replace a vapor barrier?
Usually not. Typical dimpled floor underlayments create drainage space and protect the liner, while a separately installed and sealed vapor barrier controls moisture-vapor migration. Contractor system guidance likewise places drainage matting beneath a separate crawl-space liner in this example assembly.
A proprietary combined product should be treated as the vapor barrier only when its current technical documents provide suitable vapor-permeance data and written installation requirements for that use.
Should crawl space drainage mat dimples face up or down?
For the Crawl Space Ninja floor-underlayment example discussed here, the seller specifies dimples facing down. That direction is product- and application-specific. Do not automatically extend it to interior walls, exterior foundation drainage, geocomposites, or below-slab systems.
Can drainage matting stop standing water without a sump or perimeter drain?
Not by itself. Matting creates channels but does not remove water. Those channels need a continuous route to a functioning perimeter or footing drain, a suitable gravity outlet, or a sump system. Without a receiving outlet, water may remain in low areas beneath the liner.
Should drainage mat seams be taped, butted, or overlapped?
Follow the exact product instructions. Seller guidance conflicts: Crawl Space Ninja specifies butted sections, Whitecap describes overlaps, and Koffler states that mat seams are not intended to be taped while the overlying vapor-barrier seams are taped. Reviewer techniques are anecdotal and should not override written manufacturer directions.
Can crawl space drainage matting go beneath poured concrete?
Only when the exact product and assembly have written approval for concrete or below-slab use. The Koffler seller specifically advises against pouring concrete over its listed crawl-space matting in the product’s application information. Generic descriptions of other products as suitable below slabs do not transfer that approval to every dimpled HDPE mat.