 MortarDesk
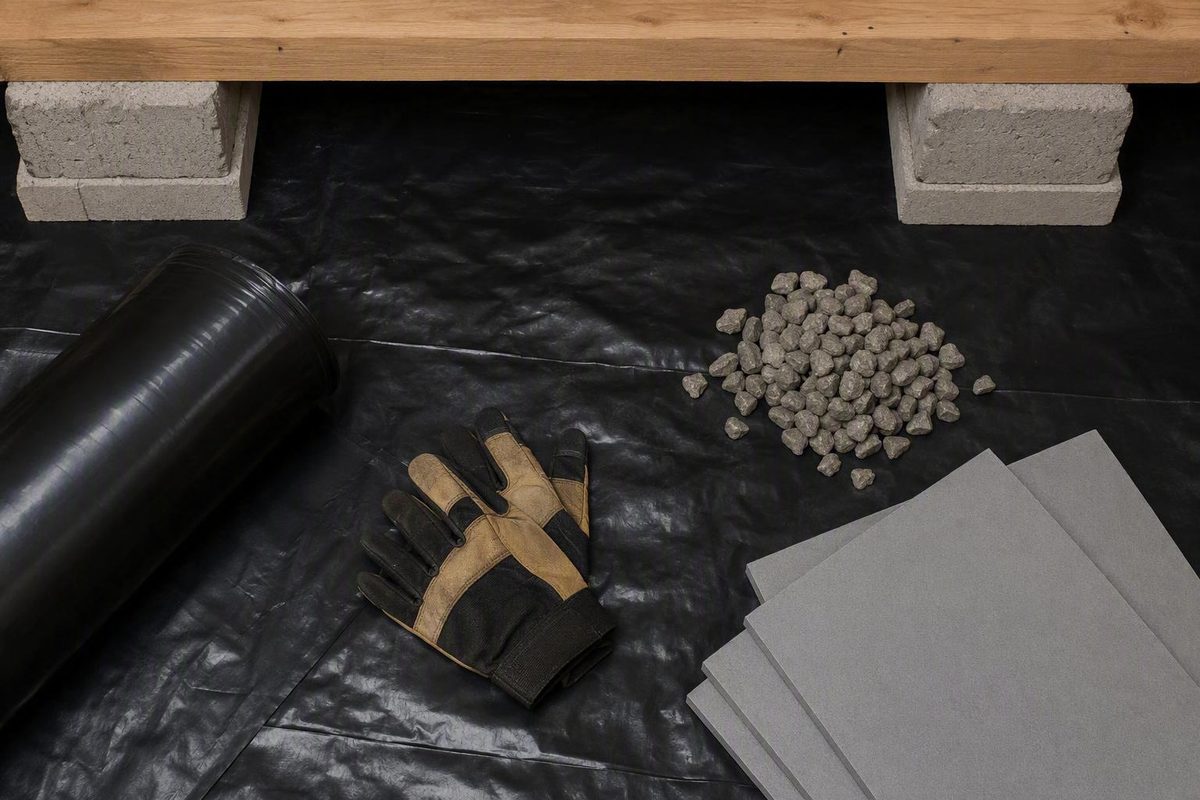
Vapor barriers for crawl space projects are easy to compare by thickness and harder to compare by what determines installed performance. A heavy liner may tolerate rough ground better than a light sheet, but it cannot compensate for standing water, open seams, incompatible tape, or an unsafe plan for sealing the crawl space. Conversely, a thinner membrane with documented low permeance may control soil vapor while remaining vulnerable to punctures during installation or later service work.
Treat the membrane as one part of a moisture-control system. First separate soil-vapor diffusion from leaks, runoff, groundwater, flooding, and condensation. Then choose the project scope and compare tested permeance, construction, reinforcement, mechanical exposure, roll dimensions, accessories, and installation requirements—not nominal thickness alone.
What a Crawl-Space Vapor Barrier Can—and Cannot—Control
A crawl-space ground membrane is sheet material installed over exposed soil to limit the migration of water vapor from the ground into the crawl space. The intended result is narrower than the word “waterproofing” suggests: the membrane interrupts a vapor pathway; it does not make the entire space immune to water or humidity.
That distinction begins with two forms of moisture:
- Water vapor can migrate from exposed soil into crawl-space air and may condense on cooler surfaces.
- Bulk water arrives as liquid from plumbing failures, roof runoff, poor grading, groundwater, flooding, or stormwater collecting at a low point.
A ground liner can limit soil evaporation, but it does not repair a leaking pipe, redirect runoff, lower groundwater, pump out standing water, or protect a crawl space from flooding. Manufacturer guidance similarly distinguishes ground-vapor control from runoff and plumbing leaks and presents the liner as one element in a broader moisture-management system (W. R. Meadows’ crawl-space vapor-barrier guide).
Other moisture pathways can remain after the soil is covered:
- humid outdoor air entering through vents or access openings;
- condensation on cool ducts, pipes, masonry, or framing;
- wet or sagging insulation;
- water entering through foundation walls;
- leaking supply, drain, or HVAC condensate lines;
- stormwater reaching low areas;
- moisture already stored in wood, insulation, or masonry.
A membrane also does not remove existing water, kill mold, restore wet insulation, or repair deteriorated framing. Covering the soil beneath a moldy crawl space is not mold remediation; the contamination and the moisture source require separate assessment.
Depending on the diagnosis and building design, the complete response may include exterior drainage improvements, an interior drainage route, a sump pump, insulation changes, dehumidification, ventilation changes, or conditioned air. None should be added automatically. Each addresses a different pathway and introduces its own design, maintenance, code, and safety considerations.
Diagnose and Correct Water Problems Before Buying a Liner
Do not begin product selection with “Which mil?” Begin with “Where does the water come from?” Inspect during dry weather and, if practical, again after prolonged or wind-driven rain. Photograph stains, low points, and damaged materials so conditions can be compared over time.
Moisture-source checklist
Outside the crawl space
- Are gutters blocked, damaged, or overflowing?
- Do downspouts discharge beside the foundation?
- Does exterior grade direct water toward the house?
- Are there depressions that hold water near the foundation?
- Does roof runoff concentrate beside an addition, porch, or roof valley?
- Are foundation penetrations or wall joints visibly admitting water?
- Does water appear only after storms, snowmelt, or irrigation?
Inside the crawl space
- Are there active plumbing, drain, or condensate leaks?
- Is water standing in low points?
- Are there tide marks, mineral deposits, or stains on foundation walls?
- Does water emerge through the soil or at the wall-floor edge?
- Are pipes or ducts sweating?
- Is insulation wet, compressed, stained, or hanging?
- Is there visible fungal growth or a persistent musty condition?
- Are joists, girders, posts, sill plates, or subfloor areas softened, split, sagging, or discolored?
- Is metal hardware corroded?
- Is wiring damaged, exposed, wet, or positioned where the work could disturb it?
Exterior drainage and grading should be investigated before interior encapsulation. Lowe’s overview describes grading, downspout discharge, exterior foundation water control, structural damage, wet insulation, and mold treatment as matters to evaluate before or as part of crawl-space remediation (Lowe’s encapsulation overview).
Remove standing water and allow the space and affected materials to dry before covering the ground. There is no reliable universal drying period: water volume, temperature, airflow, humidity, material saturation, and continuing leakage all affect the timeline. If water returns, its source remains unresolved.
Prepare the substrate, not just the room
Remove sharp rocks, roots, broken concrete, protruding wire, nails, metal scraps, and construction waste. These can puncture a membrane when people crawl over it or when tools press it against the ground. Smooth severe high points and address localized voids where practical. If embedded debris cannot reasonably be removed, consider a protective underlayment that is compatible with the selected liner.
This is also the point to determine whether the project exceeds reasonable DIY scope. Seek qualified assessment for:
- recurring or widespread standing water;
- water that appears to rise through the soil;
- extensive visible mold;
- softened, deformed, or otherwise damaged structural members;
- wiring or electrical equipment that is wet or unsafe to work around;
- drainage or sump requirements that need project-specific design;
- an area that cannot be entered, worked in, and exited safely.
Commercial installation guidance emphasizes assessing access, standing-water evidence, wall stains, debris, lighting, and substrate hazards before installation. It also recommends underlayment where sharp material cannot be removed (CrawlSpaceRepair installation guide).
Structural repair, mold-remediation design, main-electrical work, and drainage-system engineering are outside a membrane-installation tutorial. Do not conceal damaged framing or hazardous wiring beneath a new liner.
Floor-Only Coverage, a Sealed Ground Liner, and Full Encapsulation
“Vapor barrier” and “encapsulation” are often used as though they mean the same thing. They do not necessarily describe the same scope.
Floor-only coverage
A floor-only installation places membrane over exposed earth. It targets the soil-vapor pathway but leaves foundation walls, vents, piers, penetrations, and access openings untreated. Humid outside air, wall seepage, condensation, and leaks can therefore remain active.
Even a floor-only project should aim for continuous coverage rather than scattered sheets. Edges, seams, and transitions to concrete require deliberate detailing if the membrane is to function as a continuous layer.
Sealed ground-liner system
A sealed ground liner covers exposed soil continuously, joins sheets with compatible seam materials, and creates planned transitions at foundation walls, piers, posts, slabs, and service penetrations. Depending on the permitted system detail, its edges may turn partway up the walls and be sealed or mechanically terminated.
This approach is more complete than loose floor plastic but does not necessarily include full wall coverage, closed vents, insulated walls, active humidity control, or drainage equipment.
Full encapsulation
Full encapsulation describes a broader enclosure and moisture-control scope. It may include:
- membrane across the floor and foundation walls;
- sealed seams, penetrations, vents, and access openings;
- drainage channels or a sump pump;
- revised insulation placement;
- a sealed or insulated access door;
- dehumidification;
- mechanically supplied or conditioned air.
The important word is may. Encapsulation details depend on climate, crawl-space geometry, water exposure, insulation strategy, termite-inspection rules, equipment in the space, and local requirements. Polyguard’s comparison similarly characterizes encapsulation as broader than soil-only coverage and potentially involving walls, penetrations, drainage, a sump pump, and humidity control (Polyguard’s vapor-barrier and encapsulation comparison).
Do not close vents merely because a ground membrane is being installed. Vent treatment changes how the crawl space exchanges and manages air and therefore must be coordinated with the building design, insulation strategy, equipment, and locally adopted rules. Adding conditioned air is equally deliberate; it is not an automatic accessory to a liner.
Use this decision sequence:
- Identify the moisture sources. Separate soil vapor from leaks, runoff, groundwater, outdoor humidity, and condensation.
- Determine whether bulk-water control is required. Correct liquid-water problems before relying on a membrane.
- Assess the remaining pathways. Examine walls, vents, access openings, ducts, insulation, and penetrations.
- Check project constraints. Consider equipment, termite inspection, radon planning, wiring, and local requirements.
- Choose the narrowest complete scope. That may be continuous floor coverage, a sealed ground liner, or a designed encapsulation system.
How to Compare Mil Thickness, Permeance, and Reinforcement
One mil is 0.001 inch. A 10-mil liner is 0.010 inch thick, and a 12-mil liner is 0.012 inch thick. These conversions and the condition-based thickness recommendations below are described in commercially interested vendor guidance rather than an independent comparative standard (Crawlspace Depot’s thickness guide).
Commercial crawl-space membranes are available in multiple constructions, including plain polyethylene, reinforced film, woven-coated material, and laminated products.
Thickness is only one specification:
- Mil thickness describes physical thickness.
-
Permeance describes how readily water vapor passes through a material under a stated test.
-
Puncture and tensile data describe aspects of mechanical performance.
- Assembly quality depends on seams, penetrations, substrate preparation, attachments, and compatible accessories.
A commercial Polyguard guide describes Class I vapor retarders as having a permeance of no more than 0.1 perm. That figure should be treated as a specification benchmark to verify against the applicable test method, product documentation, and locally adopted code—not as proof that a product or installation is compliant (Polyguard’s installation and vapor-class overview).
Practical thickness comparison
The following table summarizes condition-based vendor guidance. It is not a universal code table, an independent durability ranking, or proof that any thickness is suitable without supporting product data.
| Nominal thickness or construction | Conditions where buyers commonly consider it | Main qualification |
|---|---|---|
| 6 mil | Smooth ground, minimal access, light-duty or limited-scope coverage | Greater concern about damage during installation or later service; verify permeance and local requirements |
| 10 mil | Smooth, prepared substrate with low service traffic | May be practical where mechanical exposure is modest; construction and test data still matter |
| Reinforced 12 mil | Occasional plumbing or HVAC access and projects seeking a balance between handling and durability | Commonly promoted for DIY projects but not inherently the best choice |
| Reinforced or woven 14–20 mil | Rougher ground, storage, frequent service access, tools, or greater abrasion exposure | Added thickness or reinforcement does not correct sharp debris, poor seams, or bulk water |
A reinforced 12-mil liner cannot be meaningfully compared with plain 12-mil film—or even another reinforced product—by thickness alone. Ask how the reinforcement is constructed and request actual puncture, tensile, and tear information. On rough ground, debris removal and compatible underlayment may provide more value than an increase in thickness alone.
Buyer’s specification checklist
Request and compare:
- tested water-vapor permeance and the test method used;
- stated vapor-retarder classification;
- nominal thickness and allowed tolerance;
- plain, reinforced, woven-coated, or laminated construction;
- puncture, tensile, and tear data with named test methods;
- roll width, length, weight, and usable coverage;
- seam-overlap requirements;
- approved seam tape and patch materials;
- approved wall adhesive, butyl, primer, mastic, termination bar, or fasteners;
- substrate-preparation requirements;
- installation-temperature and surface-moisture limitations;
- accessible test reports rather than unsupported compliance labels;
- warranty terms, exclusions, accessory requirements, and installer conditions.
Color may affect visibility. Color itself is not evidence of lower permeance or greater durability.
Likewise, warranty length, retailer ratings, marketplace badges, sales counts, popularity claims, and price are not technical performance tests. Compare documented properties and the installed assembly.
Code, Termite, Radon, and Safety Checks Before Sealing
The evidence available for this guide does not include an authoritative, edition-specific model-code text or a local adoption record. Consequently, no seam overlap, wall extension, termination height, termite gap, vent treatment, or attachment method in this article should be read as universally code compliant.
Commercial guidance often summarizes certain IRC-derived concepts for some unvented crawl spaces as follows:
- continuous Class I coverage over exposed earth;
- sealed or lapped joints;
- membrane edges extended to and sealed at foundation walls.
One commercial guide cites at least 6 inches for both seam overlap and wall extension, while also noting that local adoption and product requirements can differ. Because the guide does not identify the governing code for the reader’s address, these dimensions are planning references only, not a legal determination (Polyguard’s commercial code summary).
Other seller and manufacturer instructions call for overlaps or wall extensions of 6–12 inches, and some favor approximately 12 inches. The correct dimension must come from the membrane system’s instructions and the requirements accepted by the local building authority.
Before covering foundation walls, verify termite-inspection requirements. Some projects may require a visible strip near the top of the wall so concealed activity remains inspectable. Do not cover sill areas or eliminate inspection access until the permitted detail is known.
Radon is a separate design question.
Pause the membrane project and obtain appropriate help when the work could affect:
- a furnace, water heater, flue, or other fuel-burning equipment;
- exposed, damaged, or wet wiring;
- structural members showing decay, deformation, or loss of support;
- extensive mold or contaminated water;
- a space that cannot be accessed and exited safely;
- water that repeatedly returns through the soil.
These are precautionary stop-work boundaries, not remote diagnoses. Mortar Desk states that work involving gas, structural elements, or the main electrical supply belongs to licensed trades working under local code (Mortar Desk’s published scope).
Confirm chemical and physical compatibility across the entire system: membrane, seam tape, patches, butyl adhesive, mastic, primer, fasteners, termination components, and the masonry, concrete, wood, or insulation substrate. Product-specific instructions may be more restrictive than a general guide.
Measure the Space and Build a Complete Materials List
Measured floor area is only the starting quantity. Overlaps consume sheet width, while walls, piers, corners, trimming, and obstacles consume additional material. Nominal roll coverage is therefore not necessarily the same as effective installed coverage.
Field-measurement worksheet
Record dimensions for:
| Item | Measurements to record |
|---|---|
| Main floor sections | Length × width for each rectangle |
| Irregular floor areas | Sketch and divide into measurable shapes |
| Foundation perimeter | Length of every wall segment |
| Wall treatment | Intended turn-up or full coverage and permitted termination height |
| Wall height | Measure each area where height changes |
| Piers or columns | Count, width and depth or circumference, and wrap height |
| Concrete transitions | Length of each soil-to-slab or footing edge |
| Access openings | Width, height, threshold, and proposed transition detail |
| Penetrations | Count and approximate sizes of pipes, ducts, posts, wiring, and drains |
| Fixed obstacles | Equipment pads, stairs, supports, and inaccessible recesses |
| Low points | Location and approximate extent |
| Roll logistics | Access size, staging area, and maximum practical sheet size |
Estimating sequence
- Total the floor sections. Break an irregular plan into rectangles or other simple shapes and add their areas.
- Add permitted wall coverage. Multiply each wall length by its intended covered height.
- Add pier and column wrapping. Use perimeter multiplied by wrap height, with an allowance for closure seams and complex bases.
- Account for overlap loss. Effective sheet width equals nominal width minus the overlap consumed by the adjacent run.
- Add corner, penetration, and access details. These may require patches, boots, or extra cuts.
- Add a stated project allowance. Record the percentage used for trimming and irregular geometry rather than hiding it in the total.
One commercial seller suggests ordering 20% extra, but that is a planning heuristic rather than a validated universal allowance. A simple rectangle laid with wide rolls may need less; narrow bays, numerous piers, wall coverage, or awkward access may require more (Crawl Space Door Systems’ material guidance).
Plan sheet direction and seam locations before cutting. Favor long, manageable runs, avoid small patches in traffic areas, and place seams where they can be cleaned, pressed, and inspected. Verify that rolled or folded material can pass through the access opening. Large pieces reduce seam count but may be difficult to maneuver in a low crawl space.
Potential materials and tools
A complete list may include:
- selected ground and wall membranes;
- membrane-compatible seam tape;
- approved wall adhesive or butyl tape;
- primer or mastic where specified;
- termination bars or approved mechanical fasteners;
- compatible patch membrane;
- protective underlayment;
- cutting and measuring tools;
- lighting appropriate to the location and its hazards;
- personal protective equipment selected for observed conditions;
- humidity and moisture-monitoring tools.
Do not compare products only by roll price or nominal square footage. Calculate effective installed square footage after overlaps and waste, then include accessories, freight, underlayment, drainage work, labor, and any humidity-control equipment. Retail prices and availability change too quickly to serve as durable benchmarks.
Installation Sequence and Critical Sealing Details
The following is a high-level sequence for an otherwise suitable crawl space. It does not cover drainage-system design, structural repair, electrical alteration, radon-system design, combustion safety, vent conversion, HVAC supply, or dehumidifier sizing.
- Inspect and document conditions. Record leaks, stains, low points, damaged insulation, visible growth, equipment, wiring, and framing condition.
- Correct bulk-water sources. Repair leaks and address runoff, grading, wall entry, groundwater, or drainage defects.
- Remove standing water and dry the space. Confirm that water is not returning.
- Prepare the ground. Remove sharp debris, smooth severe irregularities, and install compatible underlayment where warranted.
- Measure and map the layout. Mark roll direction, seams, wall transitions, piers, slabs, and penetrations.
- Position the sheets. Cover exposed earth continuously without stretching the material tightly over depressions or obstacles.
- Seal overlaps. Clean and align the surfaces, form the specified overlap, and use the approved tape or sealant.
- Detail soil-to-slab transitions. Create a continuous sealed connection rather than ending loose plastic at the concrete edge.
- Turn material up walls where permitted. Prepare the substrate, apply specified sealants or adhesives, and mechanically terminate where required.
- Wrap piers and posts. Use planned cuts and closure seams rather than leaving open slots.
- Seal penetrations. Detail pipes, ducts, posts, conduits, and other interruptions individually.
- Inspect the completed membrane. Look for punctures, fish-mouths, wrinkles beneath tape, uncovered soil, and detached edges.
Continuous coverage matters more than merely having plastic present. Disconnected sheets, unsealed laps, or loose edges leave vapor pathways and make later disturbance more likely.
Commercial instructions commonly use at least 6 inches as a planning baseline for overlaps, while other seller instructions call for 6–12 inches or approximately 12 inches. These figures are not universal requirements; defer to the selected system and the locally accepted detail. Greater overlap consumes more material and cannot compensate for dirty surfaces or incompatible tape.
Do not assume ordinary duct tape is suitable. Its backing and adhesive may not be designed for polyethylene liners, damp masonry, or prolonged crawl-space exposure. Use seam material approved for the chosen membrane and application.
Detail the transitions separately
Walls: Remove loose dirt and friable material from the attachment zone. Apply the specified primer, butyl, adhesive, or mastic; press the membrane into the seal; and install a termination bar or approved fastener if required. Preserve any mandated termite-inspection access.
Corners: Avoid pulling a flat sheet tightly across an inside or outside corner. Fold or cut the material so it rests without tension, then seal the resulting laps according to the system instructions.
Piers and posts: Wrap the perimeter and close vertical cuts. Pay particular attention to the connection between the vertical wrap and floor membrane.
Pipes and penetrations: Make controlled cuts, fit patches or boots where specified, and seal to compatible surfaces. A large X-cut covered with unrelated tape is difficult to detail consistently.
Mixed soil and slab floors: Carry the ground membrane to the slab and create a deliberate sealed transition. Do not leave a loose edge that can curl, collect dirt, or expose soil.
Access doors and thresholds: Protect the liner from repeated foot traffic and keep the transition inspectable. In broader encapsulation work, the opening may also need separate air- and water-control detailing.
Rough floors: Remove debris first. If significant roughness remains, use compatible protective underlayment, a more mechanically durable liner, or both. Thickness alone does not prevent damage from concentrated loads.
Do not assume penetrations are harmless. Use only anchoring allowed by the selected system and accepted for the project.
Commissioning, Inspection, and When to Call a Professional
Installation is not complete when the final seam is taped. Carefully inspect the entire assembly and commission it as a system.
Check:
- continuous coverage of every exposed-soil area;
- full seam adhesion without wrinkles or lifted edges;
- secure and permitted wall termination;
- complete pier and post wrapping;
- sealed pipes, ducts, and other penetrations;
- access-door and threshold details;
- continuous transitions to concrete;
- absence of new punctures from tools, ladders, or fasteners;
- operation and discharge of any existing drainage equipment.
An intact ground liner can coexist with residual humidity. Moisture may remain stored in framing or masonry, enter with outdoor air, or form as condensation on cool services. Monitor conditions and investigate persistent dampness rather than assuming either that the membrane failed or that it solved every pathway. The evidence available here does not establish a universal relative-humidity target or dehumidifier size.
Inspect the liner periodically and after events or work likely to disturb it, including:
- severe storms or flooding;
- plumbing or condensate leaks;
- pest inspection or treatment;
- HVAC, electrical, or plumbing service;
- storage movement or other traffic;
- work involving sharp tools or ladders.
Look for punctures, abrasion, loose tape, open seams, detached wall edges, pooling water, recurring stains, condensation, damaged insulation, and new wood deterioration. Commercial installation guidance recommends annual inspection as well as checks after major weather or service events, particularly for punctures, failed seams, and detached wall seals.
For a localized defect, clean and dry the area as required, apply compatible patch membrane, and seal it with approved materials according to the system instructions. There is no universal patch dimension or replacement threshold for every product and condition.
Arrange professional assessment for recurring standing water, extensive mold, structural decay, unsafe wiring, fuel-burning equipment affected by the proposed work, radon concerns, inaccessible low-clearance areas, complicated drainage, or uncertainty about local requirements.
Choose a crawl-space membrane only after separating soil vapor from leaks, runoff, groundwater, condensation, and other sources. Compare documented permeance, construction, reinforcement, expected traffic, substrate condition, roll dimensions, and compatible accessories—not mil thickness alone. Plan continuous coverage and sealed transitions, then verify local code, termite, radon, ventilation, and safety requirements.
Mortar Desk provides general building-material reference information rather than contracting, engineering, or individualized project advice. Conditions concealed in a crawl space can materially change the appropriate specification and scope.
Frequently Asked Questions About Crawl-Space Vapor Barriers
Is 6-mil plastic enough for a crawl-space vapor barrier?
Sometimes, but “enough” depends on both the product’s documented properties and its mechanical exposure. A 6-mil product may provide light-duty soil coverage on smooth ground with little access if it has suitable documented permeance and is accepted for the project. Its practical limitation is greater vulnerability during installation and later service traffic.
Commercial vendors commonly characterize 6 mil as light duty, 10 mil as potentially suitable for smooth low-traffic spaces, reinforced 12 mil as a practical balance for occasional access, and 14–20 mil products as options for greater mechanical exposure. That is vendor guidance—not proof that 6 mil always fails or that a thicker product is universally required (Crawlspace Depot’s thickness comparison).
Should a crawl-space vapor barrier cover the walls as well as the soil?
It depends on the project scope and local constraints. Floor-only coverage addresses exposed-earth vapor but leaves walls, vents, penetrations, and access openings as possible moisture pathways. A sealed ground-liner system generally creates deliberate wall transitions, while full encapsulation may cover most of the foundation-wall area.
Before covering walls, verify attachment compatibility, wall-water conditions, insulation strategy, and termite-inspection requirements. Do not treat full wall coverage or vent closure as an automatic requirement for every crawl space.
How much should crawl-space vapor-barrier seams overlap?
Commercial instructions commonly cite at least 6 inches, 6–12 inches, or approximately 12 inches, depending on the source and system. These are planning conventions, not universally applicable legal requirements. Polyguard’s commercial guide uses at least 6 inches in its IRC-derived summary but also directs readers to verify local adoption and system requirements.
Use the overlap accepted locally and required by the selected manufacturer. Include the lost effective sheet width in the material estimate, and seal the overlap with compatible products on clean, prepared surfaces.
Will a vapor barrier fix standing water or eliminate the need for a dehumidifier?
No. A membrane limits evaporation from soil; it does not remove standing water or correct plumbing leaks, runoff, grading defects, groundwater, or flooding. Those problems need separate diagnosis and correction.
It also does not automatically eliminate the need for active humidity control. After ground sealing, humidity can remain because of outdoor air, wet materials, condensation, wall entry, or building operation. Monitor the completed space and assess dehumidification or conditioned air as part of the overall design rather than as a substitute for bulk-water correction.
Can a homeowner install a crawl-space vapor barrier?
A capable homeowner may be able to complete a small, accessible, uncomplicated floor-liner project after water and safety problems have been resolved. The work still requires accurate measuring, surface preparation, compatible sealing materials, appropriate lighting, and the ability to work and exit safely.
Professional assessment is appropriate where there is persistent water, extensive mold, deteriorated framing, unsafe wiring, fuel-burning equipment affected by the work, radon concerns, complex drainage, very low clearance, or uncertainty about code and vent treatment. DIY suitability depends more on hazards and system complexity than on floor area alone.