 MortarDesk
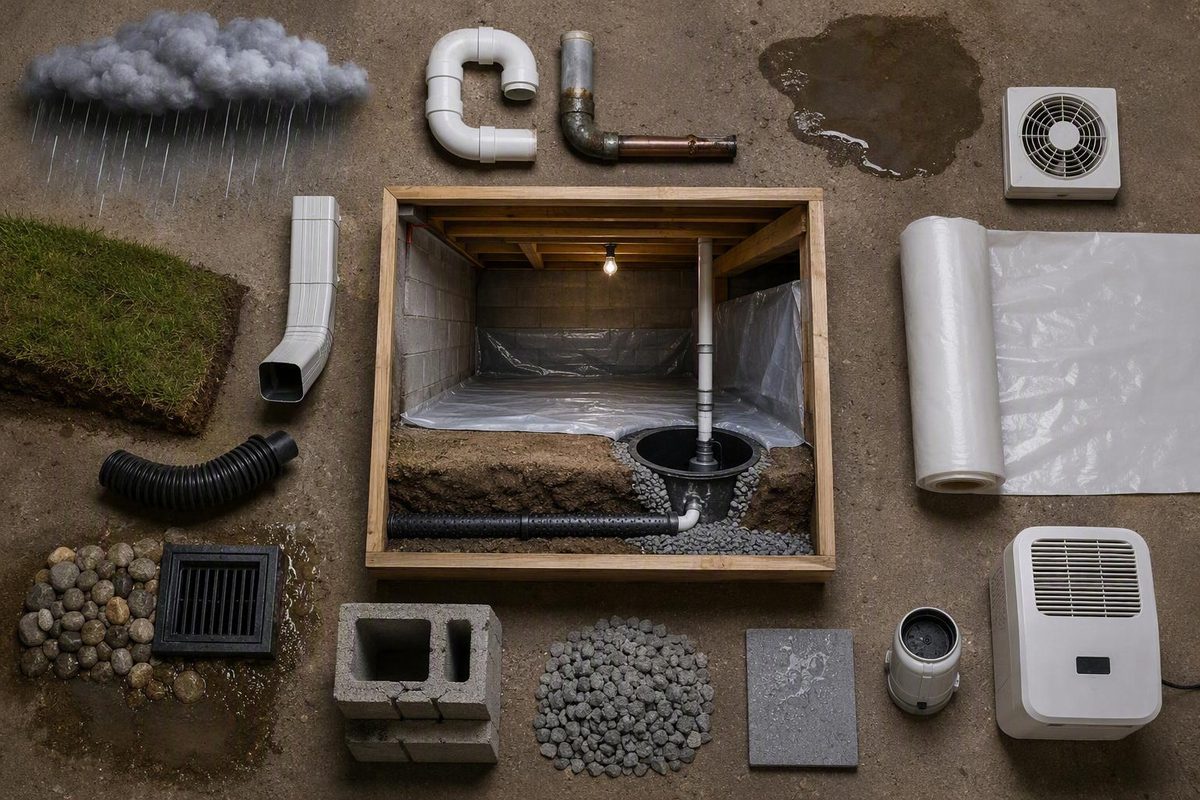
Waterproofing a crawl space is a diagnosis job before it is a product job. Note where moisture shows up and whether it follows rain, returns seasonally, sits near a pipe, rises from bare soil or beads on cool surfaces. That pattern tells you which layer to buy: runoff and grading correction for storm water, interior drainage and a sump for recurring groundwater, a plumbing repair for a wet spot under a valve, a ground vapor barrier for damp soil with no puddles, and airflow or dehumidification for condensation. Fix active leaks and electrical hazards first, control liquid water second, and add vapor and humidity controls last. A liner laid over a wet floor hides the problem and does not fix it.
Pick the moisture pattern you see; the likely source and first control appear beside it.
Crawl-Space Moisture Source Finder
Pick a pattern
The likely source, first control layer and what that layer cannot fix will appear here. With scripts off, open the pattern list below.
All Five Patterns
During or soon after storms
First control: correct roof runoff and surface drainage; evaluate cracks and penetrations. IRC R401.3 benchmark: 6 in fall in the first 10 ft, 2% slope on impervious surfaces.
Cannot fix: groundwater, structural movement, plumbing leaks.
Next: reinspect during heavy rain; if water still comes, evaluate seepage and drainage.
Floor water returns seasonally or persists in dry weather
First control: site-specific collection drain and sump assessment after exterior corrections.
Cannot fix: an exterior cause or a plumbing leak.
Next: record depth and entry points across seasons; test pump and discharge path.
Wet near a pipe, valve, drain or HVAC unit
First control: plumbing or equipment repair.
Cannot fix: soil vapor or rainwater entry.
Next: confirm the area dries afterward before adding any liner.
Floor mostly dry, exposed soil stays damp
First control: ground vapor barrier (seams overlapped at least 6 in and sealed); planned humidity control if needed.
Cannot fix: flooding, wall leakage, broken plumbing.
Next: monitor humidity, seams and odors.
Beads on ducts, pipes, masonry or framing in humid weather
First control: airflow, insulation and humidity diagnosis; vent sealing only with a humidity plan.
Cannot fix: groundwater or rain entry.
Next: check through seasonal changes and equipment cycles.
Sources: pattern table from this article; grade figures from 2024 IRC R401.3; electrical warning from Stego's DIY encapsulation guide. Diagnosis aid only, not a site design.
Timing and Location Point to the Source
A single symptom does not prove a cause. Wet soil after a storm could be runoff, groundwater or a hidden plumbing leak, so watch the space through changing weather before choosing a system.
| Moisture pattern | Likely source | First check |
|---|---|---|
| Water during or soon after storms | Overflowing gutters, disconnected downspouts, inward grade, window wells, vents, cracks, penetrations | Watch drainage during rain; trace the roof-water path |
| Floor water returns seasonally or persists in dry weather | High groundwater, subsurface flow, footing or wall seepage | Record depth and entry points; compare wet and dry seasons |
| Wetness near a pipe, valve, drain or HVAC unit | Supply, waste, condensate or equipment leak | Inspect plumbing and equipment above and beside the spot |
| Floor mostly dry, exposed soil stays damp | Vapor moving up from the ground | Look for uncovered soil or a torn, incomplete liner |
| Beads on ducts, pipes, masonry or framing in humid weather | Condensation on cool surfaces | Compare surface wetness with outdoor humidity and equipment cycles |
Inspect from the access opening before entering. Look for standing water, water lines, stains, white mineral deposits, rust, musty odor, mold-like growth, sagging or wet insulation, wood decay and pests, plus soft flooring above, wall cracks, failed supports and displaced masonry. Outside, check gutters, downspouts, grading, vents, doors, window wells and utility penetrations.
Do not enter a crawl space where standing water is near wiring, lights, receptacles, powered equipment or tools. Bringing powered tools or lighting into that environment can cause electrocution, as Stego’s encapsulation safety guidance warns. Loose wiring and wet electrical systems need a qualified evaluation before any cleanup starts.
The order of work is fixed regardless of which source you find:
- Stop plumbing leaks and address electrical, structural, mold or pest hazards.
- Control roof runoff and surface water at gutters, downspouts, grade, hardscape, wells and openings.
- Evaluate seepage and groundwater if water remains or returns.
- Collect and remove liquid water with site-appropriate drainage and pumping where justified.
- Control soil vapor and humidity only after active water is managed.
- Monitor after storms and seasonal changes.
Waterproofing, Vapor Control and Encapsulation Solve Different Problems
Waterproofing controls liquid-water entry or accumulation: runoff correction, drains, repair of leakage paths, foundation-water controls and sump pumping.
Ground-vapor control limits moisture diffusion from exposed soil with a vapor barrier or retarder. It collects nothing and removes no puddles.
Encapsulation is the broader enclosure. It covers the ground, may extend onto foundation walls and columns, seals selected openings and includes a planned humidity-control method, often dehumidification or another locally compliant conditioning strategy.
Do not encapsulate over active plumbing leaks, recurring seepage, standing water, rotted framing, substantial mold-like growth or termite damage.
| Condition | Likely control | What it cannot fix |
|---|---|---|
| Exposed damp soil, no liquid water | Ground vapor barrier; humidity control if needed | Flooding, wall leakage, broken plumbing |
| Storm-related wall seepage | Runoff correction; evaluate cracks, penetrations, drainage | Groundwater or structural movement |
| Recurring floor water | Collection drain and sump assessment | Exterior cause or plumbing leak |
| Moisture on cool surfaces in humid weather | Airflow, insulation and humidity diagnosis | Groundwater or rain entry |
| Localized plumbing leakage | Plumbing repair | Soil vapor or rainwater entry |
Some crawl spaces need every layer: exterior drainage to cut the load, interior drainage to collect residual seepage, a pump to remove it, a liner for soil vapor and equipment for humidity. Others need one reconnected downspout or a properly installed ground barrier. The observed condition sets the scope, not a package name.
Grade Should Fall 6 Inches in the First 10 Feet
Start outside. Clear blocked gutters, repair overflowing joints, confirm downspouts are connected and look for discharge concentrated beside the foundation. Find settled soil, planting beds, patios, walks and driveways that slope toward the house. Watch the site during rain; the path water actually takes beats any dry-weather guess.
The model-code benchmark is 2024 IRC Section R401.3: grade falls at least 6 inches within the first 10 feet away from foundation walls. Where lot lines, walls or slopes prevent that fall, the provision calls for drains or swales that carry water away. Impervious surfaces within 10 feet of the foundation slope at least 2% away, and surface drainage must reach an approved collection point without creating a hazard, per the 2024 IRC foundation chapter.
Those figures are a reference point, not a universal retrofit design or automatic permission. Confirm the code edition your jurisdiction has adopted, its amendments, permit and inspection requirements, property-line restrictions, easements, flood rules and approved discharge locations. There is no universal downspout or sump-discharge distance.
Grading has limits. It reduces surface runoff but cannot repair a pipe, stop condensation, correct foundation movement or guarantee control of a high water table. If water still appears after the obvious runoff defects are fixed, go back to diagnosis rather than adding more soil or another coating.
Persistent Floor Water Justifies Interior Drainage and a Sump
Recurring groundwater, heavy-rain intrusion or standing water that survives sensible exterior corrections justifies assessment of a collection-and-pumping system. That assessment does not mean every crawl space needs drainage matting, perimeter pipe, a sump and backup equipment.
A typical interior path: drainage matting or a collection channel receives leakage from the floor or wall area; perimeter pipe carries it to a sump basin; a pump lifts it into a discharge line; the line runs to a locally approved outlet. Matting beneath a liner preserves a route for liquid water to reach the perimeter drain. A commercial crawl-space drainage example shows that relationship, but it does not prove that matting or every listed component belongs in every space.
Terminology trips people up. An exterior French drain or swale intercepts or redirects water outside the house. An interior perimeter drain manages water after it has reached the foundation. Drain and pump design is site-specific; do not size a pump, basin or pipe from a generic article.
A pump depends on more than its nameplate: dependable power, unobstructed collection piping, an outlet that does not send water back to the foundation, protection against erosion, freezing and effects on neighboring land, and routine testing. Where an outage or pump failure would flood the space quickly, backup power and a high-water alarm are sensible resilience choices, not universal code requirements. The consequence of failure decides.
Install the Vapor Barrier Only After Liquid Water Is Handled
Once leaks, standing water and recurring seepage are resolved or given a deliberate drainage path, a ground vapor barrier can limit moisture diffusion from dirt. It cannot drain water, stand in for a sump or make flooding disappear.
Prepare the ground when it is safe. Remove abandoned polyethylene, wet insulation, sharp debris and obstructions. Smooth projections that would puncture the new sheet. Repair plumbing, electrical, rot and pest problems before covering the workspace.
For the liner itself: fit and seal patches around pipes and penetrations, cut and fold neatly around columns, overlap adjoining seams by at least 6 inches, seal seams with compatible system tape or sealant, seal the ground-to-wall transition as specified and mechanically secure wall-liner transitions where the system requires it. The 6-inch seam overlap and fastening details come from Stego’s encapsulation guide; the chosen liner’s instructions and locally adopted code control. No single liner thickness or reinforcement level fits every substrate, traffic level or service life.
Preserve any foundation area required for termite inspection. The exposed gap is jurisdiction- and system-dependent, so coordinate liner placement with the building official, pest professional and warranty conditions rather than applying a generic dimension.
Sealing vents converts a vented crawl space into a controlled enclosure. That change needs an intentional drying or humidity-control strategy and review of climate and seasonal moisture, insulation location and condition, HVAC and duct leakage, termite access, and local ventilation, conditioning and energy-code requirements. Choose equipment for the enclosure, moisture load, climate and drainage performance, then monitor the result rather than assuming installation proves success.
Where occasional liquid leakage must travel beneath the liner, drainage matting may provide a path toward perimeter collection. In a dry, well-drained space that extra layer may not be needed.
Standing Water Plus Electrical Hazards Ends the DIY Scope
Lower-risk homeowner work covers inspecting from a safe access point, cleaning gutters, checking downspout connections, watching runoff during rain, documenting stains and puddles, removing dry debris when conditions are safe, placing humidity sensors or water alarms, and patching minor liner damage per the system instructions.
Stop treating the project as ordinary DIY when standing water and electrical hazards coexist. Have loose wiring evaluated by an electrician and plumbing faults repaired by a plumber before work proceeds. Interior drainage excavation is better treated as professional work, and substantial mold-like growth warrants qualified assessment rather than untrained disturbance. Published crawl-space guidance recommends professional evaluation where there is mold, water damage, moderate-to-severe risk or uncertainty; the encapsulation instructions direct homeowners to get expert help for loose wiring, plumbing faults, wood rot and termite damage.
When comparing contractor bids, ask each bidder to put in writing the diagnosed moisture source and supporting observations, the exterior corrections included or excluded, drain location and cleaning access, pump, alarm and backup scope, the discharge route and required approvals, liner material, seam treatment, wall transition and fastening, termite-inspection access, the vent, insulation and humidity-control strategy, how plumbing, electrical, mold, pest and structural findings will be handled, exclusions, warranty terms and transfer, maintenance requirements and responsibility for permits. Compare diagnosed causes and system details rather than branded promises.
Project cost varies with area, clearance, access, water volume, drainage scope, pump requirements, liner construction, existing damage, labor, permits and region. The draft research produced no reliable universal price, and this article does not offer one.
Mortar Desk is a building-material reference site, not a waterproofing contractor or engineering adviser. This is planning information, not a design for a particular property.
Check Every Layer After Heavy Rain and at Season Changes
Installation is not the endpoint. Inspect after heavy rain, during extended wet periods and at seasonal transitions.
| Layer | What to check |
|---|---|
| Gutters and downspouts | Overflow, joints, extensions, outlets, erosion, water cycling back to the house |
| Grade, hardscape, exterior drains | Settlement, low spots, new inward slopes, blockages |
| Interior drain inlets | Sediment or obstruction in accessible sections |
| Sump pump, backup, alarm | Test per manufacturer procedure; replace batteries on schedule |
| Discharge system | Check valve, visible piping, outlet, erosion, icing, recirculation |
| Humidity equipment | Filters, drains, service as directed |
| Vapor barrier | Punctures, open seams, loose wall transitions, disturbed inspection gaps |
| Conditions | New odors, staining, rust, wet insulation, mold-like growth, returning puddles |
Common failures: clogged drains, power loss, a failed pump, a stuck check valve, a blocked discharge, water released where it returns to the foundation, torn liner, loose terminations, hidden plumbing leakage and humidity equipment that is absent or switched off.
Humidity sensors and water alarms add early warning, but they do not identify the source, and no universal humidity set point applies to every climate and crawl-space design. If water returns after installation, reopen the diagnosis: does it coincide with rain, seasonal groundwater, plumbing use, equipment cycling or humid weather? Do not apply another coating or bury the evidence under a second liner.
A Vapor Barrier Does Not Stop Water Entering a Crawl Space
A vapor barrier limits diffusion from exposed soil. It does not drain standing water or stop runoff, groundwater, foundation seepage or a plumbing leak. Correct or collect liquid water first, then install the barrier as the vapor-control layer.
The IRC Grade Benchmark Is 6 Inches of Fall in 10 Feet
2024 IRC R401.3 calls for at least 6 inches of fall within the first 10 feet from foundation walls, drains or swales where barriers prevent that fall, and at least a 2% outward slope for impervious surfaces within 10 feet. Check the locally adopted edition and amendments before applying those figures.
Sealing Vents Requires a Humidity Plan, Not Just Blocked Openings
Sealing vents changes the moisture and airflow design. Review local code, climate, insulation, HVAC, radon, termite access and any fuel-burning equipment, and pair the sealed design with a drying or humidity-control strategy.
Standing Water Near Wiring Means Do Not Enter
Stay out when the electrical condition is unknown or water sits near wiring, lights, receptacles, equipment or powered tools. Have the hazard isolated and evaluated by a qualified professional before treating the space as a work area; the cited encapsulation guidance warns that powered equipment or lighting in standing water can electrocute.
The sequence stands: document when and where moisture appears, eliminate plumbing and safety hazards, correct roof runoff and exterior drainage, assess persistent seepage or groundwater, add collection drainage and pumping where justified, install vapor and humidity controls only after liquid water is managed, then monitor and maintain every layer. Use qualified local professionals for structural, electrical, mold, pest, radon, flood, combustion-appliance or unresolved drainage concerns.