 MortarDesk
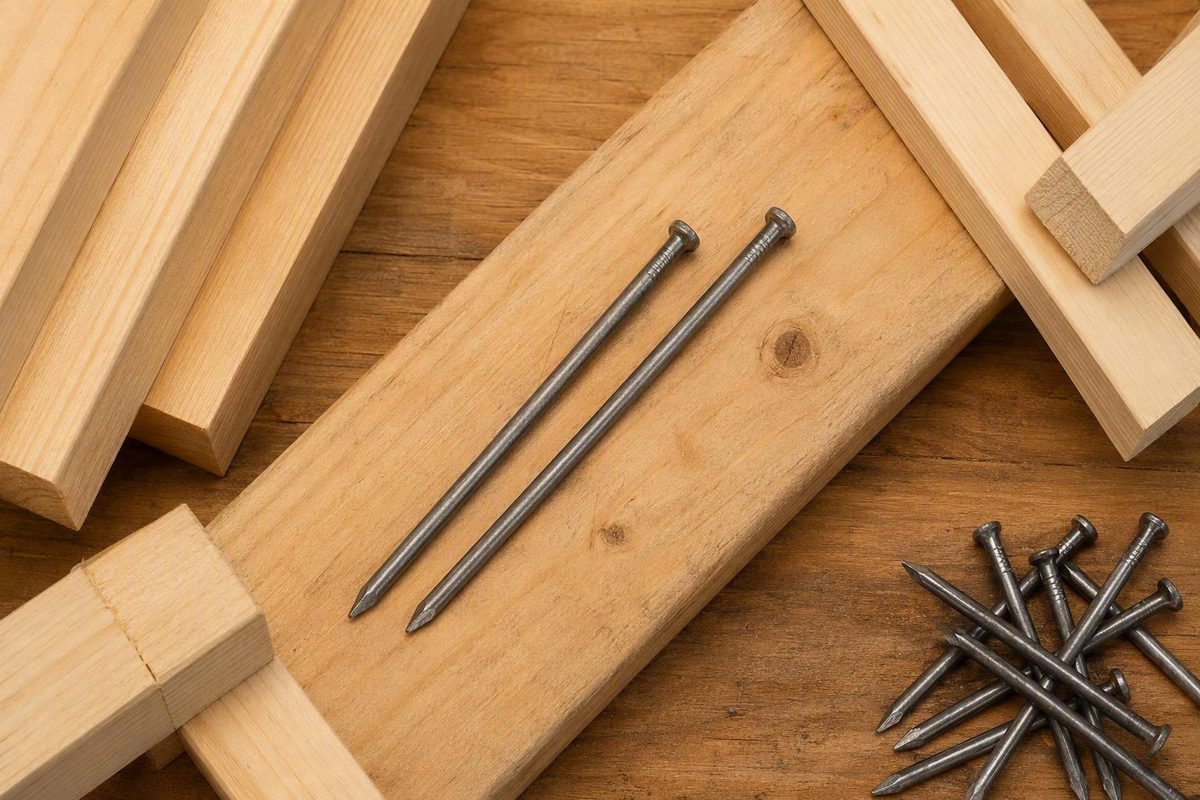
The short answer: framing nails are commonly 3 to 3.5 inches long
For ordinary residential dimensional-lumber framing, expect to encounter nails between 3 and 3.5 inches long. A 3.5-inch 16d common nail is the conventional reference for many wood-framing connections, including typical 2x4 and 2x6 wall framing, but it is not the required fastener for every connection. Commercial fastener guidance describes the usual residential range as approximately 3 to 3.5 inches while emphasizing project and tool compatibility (FastenerUSA’s framing-nail overview).
Pneumatic framing makes “use a 16d nail” an incomplete answer. Collated products commonly include 3-inch and 3.25-inch options, sometimes with smaller shank diameters than a traditional 16d common nail. A shorter pneumatic nail may be suitable only when the fastening schedule or other governing project document permits its actual length and diameter, together with the specified nail count, spacing, head configuration, finish, and installation method.
For shopping purposes:
- 3.5 inches: The conventional starting point when a connection calls for a full-size 16d common nail.
- 3.25 inches: Common among collated framing products and approximately the length of a 16d sinker, but not automatically equivalent to a 16d common nail.
- 3 inches: Used in some pneumatic framing connections when the applicable schedule accommodates the nail’s length and diameter.
- 2.5 inches: Associated with 8d nails and some thinner attachments, including certain panel applications, rather than every stud-to-plate connection.
These lengths are product categories, not approvals. Start by identifying the connection—such as stud to plate, stud to stud, blocking, sheathing to framing, or fastening into a metal connector—and then consult the plans, fastening schedule, component instructions, and locally applicable requirements.
Structural-work note: This guide is for product identification and purchasing orientation. Do not use it to override approved plans, local code requirements, engineered-component documentation, or connection-manufacturer instructions. If a document names a common nail, do not assume that a shorter or thinner collated nail is an equivalent substitute.
The practical distinction is between a conventional reference and a project specification. A 3.5-inch 16d common nail is a useful reference for wall framing. A complete specification identifies the nail type, actual dimensions, quantity, spacing, installation method, head and shank form, finish, and any required approval information.
Framing nail size chart: 8d, 10d, 12d, and 16d in actual dimensions
The letter d means “penny.” Penny size is convenient shorthand, but it does not completely identify a nail. Common, box, sinker, and collated nails carrying the same penny designation can differ in actual length or diameter.
The following inch dimensions come from Simpson Strong-Tie’s technical nail table, which recommends identifying structural nails by diameter and length to reduce ambiguity (Simpson Strong-Tie’s nail-size reference).
| Designation | Nail type | Length | Shank diameter | Bounded general-use note |
|---|---|---|---|---|
| 8d | Common | 2.5 in. | 0.131 in. | A shorter size associated with some panel attachments and thinner assemblies; the connection schedule still controls |
| 10d | Common | 3 in. | 0.148 in. | Commonly referenced for some framing, blocking, and toenailing connections |
| 12d | Common | 3.25 in. | 0.148 in. | A longer common nail encountered in some framing specifications |
| 16d | Sinker | 3.25 in. | 0.148 in. | Shorter and thinner than a 16d common nail |
| 16d | Common | 3.5 in. | 0.162 in. | The conventional full-size 16d reference for many dimensional-lumber connections |
These are dimensions, not universal application rules. An 8d common nail being 2.5 inches long does not establish that every sheathing panel requires that nail. Nor does the presence of a 16d common nail in the table mean that every connection involving a 2x4 requires one.
Why the penny label can mislead
The two 16d entries show the problem:
- A 16d common nail is 3.5 inches long with a 0.162-inch shank.
- A 16d sinker is approximately 3.25 inches long with a 0.148-inch shank.
The shared “16d” label therefore does not guarantee equal dimensions. A 16d box nail differs again, and a collated nail marketed with a penny-size description may not match the dimensions intended by a plan or schedule.
The same issue applies at 3 inches. A 10d common nail measures 3 inches by 0.148 inch, while a 3-inch collated nail may have a smaller diameter. Equal length does not make two fasteners identical.
For purchasing and plan review, use this format:
Nail type + actual diameter × actual length + head, shank, and finish
For example:
Common nail, 0.162 in. × 3.5 in., smooth shank, specified finish
That description is more precise than “16d” alone.
The published technical reference also contains an apparent metric-conversion anomaly in its 7d box-nail row: it pairs a 0.099-inch diameter with 25.1 mm. The inch values reproduced above are supported by the supplied table, but this anomaly is a reminder not to copy every conversion mechanically. Where a project depends on a standard’s exact dimensions, check the applicable edition of the underlying standard rather than relying on a secondary transcription.
Typical lengths by framing task
Different tasks create different connections. Face-nailing two framing members is not equivalent to driving through a panel into a stud, and neither resembles fastening through the holes in a metal connector.
The table below is an orientation tool based on general supplier guidance associating 16d nails with wall framing, 10d nails with some blocking and toenailing, and 8d nails with sheathing. It is not an edition-specific code schedule (Zeluga’s framing-nail size guide).
| Framing task | Commonly encountered reference | What to verify |
|---|---|---|
| Ordinary 2x4 or 2x6 wall framing | 3.5-inch 16d common as a conventional reference; some schedules may accommodate 3- or 3.25-inch pneumatic nails | Exact connection, diameter, nail count, spacing, nailing method, plans, and local requirements |
| Face-nailing dimensional lumber | Products in the general 3- to 3.5-inch framing range are commonly encountered | Member thicknesses, diameter, count, spacing, edge placement, and schedule |
| End-nailing | Often discussed within the general framing-nail range | The specific end-nailed connection, nail dimensions, quantity, and geometry |
| Toenailing | 10d nails around 3 inches are commonly suggested for some connections | Nail angle, dimensions, quantity, position, and the applicable schedule |
| Blocking | 10d nails around 3 inches are commonly referenced for some installations | Whether the blocking is face-nailed, end-nailed, or toenailed and what structural role it performs |
| Wall or roof sheathing | 8d nails around 2.5 inches are commonly referenced | Panel specification, edge and field spacing, framing material, shank type, design loads, and plans |
| Roof decking | General supplier guidance sometimes suggests 8d for 1/2-inch panels and 10d for 5/8-inch panels | Approved roof-deck schedule, panel specification, exposure, wind design, and edge zones |
Wall framing
For ordinary dimensional-lumber walls, the 3.5-inch 16d common nail remains the clearest conventional reference. If a project document accommodates a pneumatic alternative, that product may be shorter, but its diameter and installation pattern remain part of the comparison.
“2x4 framing” is too broad to identify one fastener. It can mean:
- Attaching a stud to a top or bottom plate
- Joining adjacent studs
- Laminating members around an opening
- Installing blocking or fire blocking
- Building a nonstructural partition
- Constructing a load-bearing or lateral-force-resisting wall
Those connections should not be assumed to share one nail specification.
Face-nailing, end-nailing, and toenailing
A fastening schedule may treat these methods differently. Reaching both pieces of wood is not enough to show that a nail is suitable for every driving direction.
Ten-penny nails around 3 inches are commonly suggested for some blocking and toenailing work, but that is only a product-category reference. Blocking that braces an assembly, supports panel edges, transfers load, or forms part of another specified system may have its own fastening detail.
Sheathing and roof decking
Eight-penny nails around 2.5 inches commonly appear in general guidance for wall and roof sheathing. That shorthand omits several variables, including panel thickness and rating, nail diameter and shank form, edge and field spacing, framing material, and design loads.
One manufacturer guide suggests 8d common or ring-shank nails for 1/2-inch roof decking and 10d common or ring-shank nails for 5/8-inch decking. These are explicitly general supplier recommendations, not a verified code schedule for every roof (Mid Continent Steel and Wire’s framing-nail guide).
Tasks that do not belong in a generic table
Do not assign fasteners to headers, built-up members, rafters, trusses, decks, engineered lumber, or high-wind or seismic assemblies solely from the table above. These systems may depend on engineered drawings, proprietary instructions, approved evaluation information, or connection-specific schedules not examined in this guide.
Also distinguish framing nails from other fastener categories:
-
Brad nails are intended for light attachment and trim work.
-
Framing nails are heavier fasteners used for specified wood connections.
A fastener’s ability to penetrate framing lumber does not establish that it is suitable for a structural connection.
Why 3-inch, 3.25-inch, and 3.5-inch nails are not interchangeable
A buyer may encounter all three of these products in a framing-nail aisle:
| Example fastener | Actual dimensions | Important distinction |
|---|---|---|
| Collated gun nail | 3 in. × 0.131 in. | Shorter and thinner than a 16d common nail |
| 16d sinker | 3.25 in. × 0.148 in. | Shorter and thinner than a 16d common nail |
| 16d common nail | 3.5 in. × 0.162 in. | Conventional full-size 16d common reference |
These dimensions appear in technical and community discussions about the difference between specified common nails and readily available collated products. The community material illustrates a purchasing problem, not proof that the products have equal structural performance (Green Building Advisor’s discussion of collated common nails).
A 3-inch by 0.131-inch collated nail may be suitable for a particular wall-framing connection only when the relevant schedule or approved project documentation accommodates that combination of length and diameter, along with its required count, spacing, and driving method.
Diameter changes the comparison
Reducing a shank from 0.162 inch to 0.148 or 0.131 inch is not merely a packaging difference. Diameter is part of the fastener description.
A schedule may offer different fastening options, but any change in quantity, spacing, or arrangement must come from the applicable documentation. Do not copy quantities from an online discussion and present them as universal requirements.
Informal field discussions mention 3-, 3.25-, and 3.5-inch nails and report varying local practices. That variation is precisely why forum recommendations or one person’s account of an inspector’s preference should not be treated as a nationwide rule (Garage Journal’s framing-nail discussion).
Installation method changes the connection
A face-driven nail follows a different path from a nail driven through a plate into the end of a stud. A toenail enters at an angle and engages the connected members differently.
When reviewing a fastening detail, identify:
- The members being connected
- The direction in which the nail is driven
- The actual nail length and diameter
- The required quantity or spacing
- Any edge, end, angle, or placement instructions
Do not assume that one nail works for every method merely because it is physically long enough to enter both members.
Substitution requires project-specific confirmation
If plans name common nails, treat box nails, sinkers, and dimensionally different collated nails as proposed substitutions rather than silent equivalents. Provide the approving party with the package information, including actual dimensions, head and shank form, finish, and any evaluation information.
Ask whether the specific product is acceptable for the specific connection. “Can I use 3-inch framing nails?” does not provide enough information for a defensible answer.
Length is only one part of the fastener specification
A framing nail is a collection of attributes. Length matters, but so do diameter, head, shank form, finish, material, quantity, spacing, and installation method.
Shank diameter
The supported 16d examples show why diameter cannot be omitted:
- 16d common: 3.5 inches × 0.162 inch
- 16d sinker: approximately 3.25 inches × 0.148 inch
Likewise, a 3-inch by 0.131-inch gun nail is not dimensionally identical to a 3-inch by 0.148-inch 10d common nail.
Head style
Collated framing products can have full-round, offset-round, or clipped-head configurations. Head style can affect whether a product fits the tool and whether it matches the project’s named fastener.
Do not assume that clipped heads are accepted everywhere or rejected everywhere. Without the applicable project documentation and tool specifications, the defensible shopping rule is simply to verify both:
- The head configuration accepted by the nailer
- The head configuration identified for the connection
Shank form
Common shank forms include:
- Smooth shank
- Ring shank
- Screw or spiral shank
Ring- and screw-shank nails generally offer greater withdrawal resistance than comparable smooth-shank nails. That does not make them automatic substitutes for a named structural fastener, because withdrawal is only one aspect of connection performance (Mid Continent Steel and Wire’s explanation of ring-shank nails).
Finish, coating, and material
Nails are sold in bright steel, coated, electro-galvanized, hot-dip galvanized, and stainless-steel configurations, among others.
Finish selection depends on the exposure, wood treatment, connector material, and project documentation. Avoid converting a general product description into a universal exterior or treated-lumber rule.
Nail count and spacing
A complete fastening detail may include:
- Number of nails per connection
- Spacing along a member
- Edge and end placement
- Staggering
- Panel edge and field patterns
- Driving direction or angle
Correct length with incorrect quantity or placement does not reproduce the described connection. If a smaller-diameter alternative is allowed, use the pattern specified for that alternative rather than improvising one.
Installation method
Hand-driven and pneumatically driven products may differ in dimensions, head configuration, and collation. The connection itself may also distinguish face-nailing, end-nailing, and toenailing.
Follow the tool instructions for loading, adjustment, operation, and drive depth. The nail head should be installed as required by the applicable product and project instructions rather than left improperly proud or driven without regard to the attached material.
Package-reading checklist
Before buying, record:
- Actual length
- Actual shank diameter
- Head style and dimensions, where specified
- Smooth, ring, or screw shank
- Finish or coating
- Base material
- Collation angle and carrier material
- Referenced approval or evaluation information
- Compatible tool series or model range
- Exposure limitations or warnings
The small-print dimensions are generally more useful than a large “16d,” “framing,” or “galvanized” label.
How to match collated nails to a framing nailer
A nail that fits and fires is not necessarily suitable for the connection. Conversely, a structurally specified nail is not useful in a particular nailer if the tool is not designed to drive it. Mechanical compatibility and structural suitability are separate checks.
Check the supported dimensions
Use the nailer manufacturer’s current manual or specifications to verify:
- Minimum and maximum nail length
- Permitted shank-diameter range
- Nail type
- Magazine configuration
- Accepted head profile
- Collation angle and carrier material
Do not infer diameter compatibility from length. A tool that accepts one 3.25-inch product does not necessarily accept every nail of that length.
Match the collation system
General collation categories include:
- Wire-coil systems
- Plastic-strip systems
- Paper-tape systems
A similar-looking strip or matching nominal angle is not enough to prove compatibility.
Do not test compatibility by forcing an unfamiliar strip into the magazine. Check the exact manual and package descriptions first.
Verify the head configuration
A nail strip may have the expected angle and length but an incompatible head arrangement. Verify the head twice:
- Does the nailer manufacturer permit it?
- Does it match the project specification?
Passing the tool-compatibility check does not establish structural suitability.
Follow the operating instructions
Read the manufacturer’s operating and safety instructions before connecting air, fuel, battery power, or another energy source. Follow the manual’s requirements for protective equipment, trigger mode, loading, clearing jams, and hand placement.
An archived community discussion recommends sequential firing rather than bump firing for first-time users and keeping the free hand clear of the fastening area. Treat this only as supplementary user advice, not as a replacement for the tool manufacturer’s safety instructions or training (Green Building Advisor’s first-time nailer discussion).
Before purchase, compare all three columns:
| Project documents | Nail package | Nailer manual |
|---|---|---|
| Connection and members | Product type | Supported fastener type |
| Required length and diameter | Actual length and diameter | Permitted dimensional range |
| Required head and shank | Head and shank | Permitted head configuration |
| Count and spacing | Collation angle and material | Required collation system |
| Finish or material | Finish and base material | Product restrictions |
| Approval requirements | Evaluation information | Operating instructions |
Buy only when one product satisfies both the project specification and the tool requirements.
Special cases: connectors, treated lumber, and exterior exposure
Metal connectors, treated wood, exterior exposure, and engineered assemblies should be separated from the generic question of nail length.
Joist hangers and other metal connectors
For joist hangers, straps, angles, post bases, and similar connectors, consult the fastening instructions for the exact connector model. Do not choose an ordinary framing nail merely because it fits through a hole. General fastener guidance likewise directs users to verify joist-hanger fasteners with the hardware manufacturer rather than selecting them by apparent fit (Zeluga’s connector-fastener guidance).
Connector documentation may identify:
- Fastener type
- Length and diameter
- Head configuration
- Finish or base material
- Holes to be filled
- Driving direction
- Permitted alternatives
- Substrate and member-thickness limits
This article does not include a verified first-party schedule for a particular connector, so it cannot prescribe a connector nail. Use the instructions for the exact product being installed.
Pressure-treated lumber and exterior exposure
Exterior and pressure-treated-wood applications generally call for attention to corrosion resistance and material compatibility. The appropriate product may vary with treatment chemistry, moisture exposure, connector material, and project requirements.
The supplied general guidance describes hot-dip galvanized coatings as thicker than electro-galvanized coatings. Thickness alone, however, does not establish compatibility with every wood treatment, connector, or exposure condition.
Do not assume either that:
- Every galvanized fastener is suitable for every treated-wood application; or
- Stainless steel is required for every treated-wood application.
Instead, compare:
- The treated-lumber end tag or accompanying literature
- The fastener manufacturer’s compatibility information
- The connector manufacturer’s instructions
- Approved plans and specifications
- Locally applicable requirements
- The expected service exposure
Where treated wood and a metal connector occur together, evaluate the connector and fastener instructions as a system rather than selecting each component independently.
Engineered and design-specific assemblies
Do not use a generic nail chart as the sole selection basis for:
- Engineered wood products
- Prefabricated trusses
- Built-up headers or beams
- Deck ledgers and other critical deck connections
- High-wind assemblies
- Seismic details
- Proprietary wall or roof systems
These cases may have their own drawings, manufacturer literature, evaluation information, or connection schedules. If the specified product is unavailable, request a project-specific substitution decision before installation.
A five-step method for choosing framing nails before you buy
A defensible purchase starts with the connection and ends with confirmation that the product matches both the project documents and the installation tool.
Step 1: Identify the exact connection
Write down:
- The materials being connected
- Their actual thicknesses
- Whether they are solid lumber, panels, engineered products, or metal connectors
- Whether the nail is face-nailed, end-nailed, or toenailed
- Whether the assembly is interior, exterior, or in contact with treated wood
- Whether the work is structural, nonstructural, temporary, or finish work
Replace “nails for a wall” with a description such as “stud to bottom plate, toenailed” or “wood structural panel to stud at panel edge.”
Step 2: Find the governing documents
Check whatever applies to the project:
- Approved construction plans
- Structural notes and details
- Locally adopted code and amendments
- Project fastening schedule
- Engineered-component documentation
- Connector instructions
- Product evaluation or approval information
If the documents appear to conflict or do not clearly cover the connection, ask the responsible designer, building official, component manufacturer, or licensed trade rather than choosing whichever nail is easiest to buy.
Step 3: Record the complete fastener description
Copy:
- Nail type
- Actual length
- Actual shank diameter
- Head style
- Shank form
- Finish or material
- Quantity per connection
- Spacing
- Edge or end placement
- Nailing method
Record penny size only as a secondary label. “0.162-inch-diameter by 3.5-inch common nail” is more precise than “16d.”
Step 4: Compare the requirement with the nailer
For a collated product, verify:
- Length
- Diameter
- Head configuration
- Collation angle
- Collation material
- Magazine compatibility
- Tool restrictions
A nail that fits the tool but not the project description is unsuitable. A nail that matches the project description but falls outside the nailer’s permitted range requires another suitable installation method or tool.
Step 5: Confirm exposure compatibility and substitutions
For treated lumber, exterior work, or metal connectors, confirm the required finish and material compatibility. If the available product differs in type, dimensions, head, shank, or finish, present it as a proposed substitution.
A useful request identifies the specified fastener, proposed product, exact connection, and installation tool. “Can I use my framing nails?” is too vague.
Compact decision tree
- Is the connection a joist hanger or another metal connector? - Yes: Consult the instructions for that exact connector. - No: Continue.
- Do approved plans or engineered details identify a fastener? - Yes: Match that description or request approval for a substitution. - No: Continue.
- Does an applicable fastening schedule cover the exact connection? - Yes: Record actual dimensions, count, spacing, method, and finish. - No or unclear: Ask the responsible designer, building official, or qualified trade.
- Is the proposed nail collated? - Yes: Check both the structural description and the nailer manual. - No: Confirm the complete fastener description and installation method.
- Is treated wood, exterior exposure, or a metal connector involved? - Yes: Verify corrosion and material compatibility. - No: Use the otherwise specified finish.
- Does the proposed product differ from the named fastener? - Yes: Obtain a project-specific decision before substituting. - No: Confirm quantity, spacing, and placement before installation.
Generic size guidance belongs at the bottom of this process. It is useful for recognizing products, not for overriding connection-specific documentation.
Mortar Desk is a building-material reference rather than a contractor or engineering adviser. When structural documents are unclear or a substitution is proposed, involve the building official, designer, engineer, connector manufacturer, or appropriately licensed trade.
Frequently asked questions
Are 3.5-inch nails required for all 2x4 framing?
No. A 3.5-inch 16d common nail is a conventional reference for many dimensional-lumber connections, but “2x4 framing” includes stud-to-plate, stud-to-stud, blocking, built-up-member, and panel connections.
Some project schedules may accommodate shorter pneumatic products with different dimensions or installation patterns. Check the exact connection rather than treating 3.5 inches as a universal minimum.
Can I use 3-inch by 0.131-inch nails for wall framing?
Possibly, but not solely because the package says “framing nails.” That product may be suitable for a particular connection only when the applicable documentation accommodates its length and diameter, count, spacing, and nailing method.
It is not dimensionally identical to either a 3-inch by 0.148-inch 10d common nail or a 3.5-inch by 0.162-inch 16d common nail. Treat it as a distinct product, not an automatic substitute.
Is a 3.25-inch 16d sinker the same as a 3.5-inch 16d common nail?
No. A 16d sinker is approximately 3.25 inches long by 0.148 inch in diameter, while a 16d common nail is 3.5 inches long by 0.162 inch in diameter. The shared penny designation does not make the dimensions identical (Simpson Strong-Tie’s technical nail table).
What length nails are commonly used for sheathing, blocking, and toenailing?
As general product references:
- Sheathing: 8d nails around 2.5 inches
- Blocking: 10d nails around 3 inches for some connections
- Toenailing: 10d nails around 3 inches in some general guidance
These are not universal specifications. Sheathing also depends on the panel, shank, edge and field spacing, framing, and design conditions. Blocking and toenailing depend on the connected members, structural role, driving method, and applicable schedule.
Can ordinary framing nails be used in joist hangers?
Do not select them merely because they fit the holes. Consult the fastening instructions for the exact hanger model and compare the specified type, length, diameter, head, finish, and placement with the proposed product.
If the documentation identifies a different fastener, treat an ordinary framing nail as a proposed alternative requiring project-specific confirmation.
The practical takeaway
For general dimensional-lumber framing, 3 to 3.5 inches is the practical range to expect, and a 3.5-inch 16d common nail is the conventional full-size reference. Shorter 3- or 3.25-inch pneumatic products may be appropriate for particular connections, but their actual diameter and installation pattern matter as much as their length.
Before buying, identify the connection and record the complete fastener description. Then compare the project documents, nail package, and nailer manual. For connectors, treated wood, exterior exposure, engineered components, or substitutions, use the relevant product documentation and obtain qualified clarification where necessary.