 MortarDesk
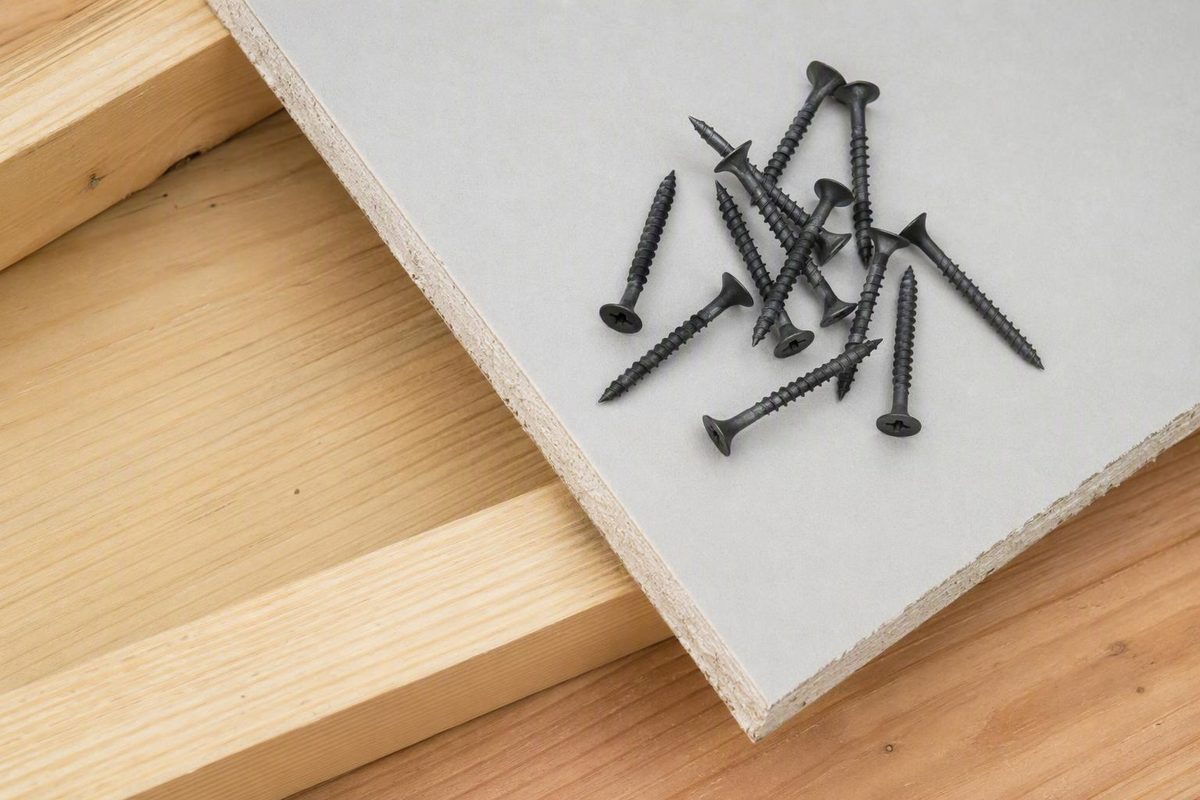
Quick answer: the default screw for 5/8-inch drywall
For an ordinary single layer of 5/8-inch drywall attached directly to wood studs or ceiling joists, the best-supported general purchase choice is a #6 × 1-5/8-inch coarse-thread drywall screw. SENCO gives that specification for 5/8-inch drywall on wood ceiling framing, while commercial fastener charts also use it more broadly for wood-framing applications. This is practical secondary-source guidance—not a universal code requirement for every project. See SENCO’s ceiling-specific recommendation.
| Installation | General starting specification |
|---|---|
| One 5/8-inch layer over wood framing | #6 × 1-5/8-inch coarse-thread Type W drywall screw |
| One 5/8-inch layer over light-gauge steel | Fine-thread Type S screw, commonly 1-1/4 to 1-5/8 inches, depending on the system |
| One 5/8-inch layer over steel 18 gauge or thicker | Assembly-appropriate self-drilling or drill-point screw |
| Multiple drywall layers or an overlay | Longer, assembly-specific screw sized for the complete attachment path |
The light-gauge-steel range reflects a genuine difference among commercial tables: Newport Fasteners lists a 1-1/4-inch Type S screw for one 5/8-inch panel over light-gauge metal, while other guidance lists 1-5/8 inches. Compare the Newport Fasteners chart.
For heavier steel, commercial guidance distinguishes ordinary light-gauge applications from steel 18 gauge or thicker, where a suitable self-drilling fastener is specified instead of a conventional sharp-point Type S screw. Zoro’s chart makes that distinction.
Do not shop by length alone. A complete purchase specification identifies:
- Screw gauge: commonly #6 for a standard single-layer installation
- Overall length: such as 1-5/8 inches
- Thread: coarse for wood or fine for suitable light-gauge steel
- Point: sharp point or drill point, depending on the substrate
- Head: a drywall-appropriate bugle head
- Coating or material: suitable for the exposure
- Intended substrate: wood, light-gauge steel, or heavier steel
- Fastening schedule: the required screw locations and spacing
Before buying: Check the instructions for the exact panel, the framing-system documentation where applicable, any listed fire- or sound-rated design, and requirements recognized locally. A generic chart is a starting point, not a substitute for the documents governing a special assembly.
Why 1-1/4-inch and 1-5/8-inch recommendations conflict
Screw selection starts with the total material thickness between the screw head and the intended substrate. The fastener must pass through that material and provide the engagement required by the applicable installation instructions. The longest available screw is not automatically the best choice.
For one 5/8-inch panel over wood, secondary guidance does not give a unanimous answer. The broader commercial recommendation is 1-5/8 inches, but one drywall contractor recommends a 1-1/4-inch Type W screw.
That contractor’s calculation is:
- Drywall thickness: 5/8 inch
- Screw length: 1-1/4 inches
- Nominal screw length remaining beyond the panel: approximately 5/8 inch
The contractor attributes that engagement figure to GA-216. Because the current underlying standard was not supplied for direct review, that interpretation should be treated as the contractor’s position rather than an independently verified universal requirement. The same guide acknowledges that many installers prefer 1-5/8-inch screws for additional margin. Review the contractor’s stated calculation and qualification.
Several factors can produce different recommendations even when the panel thickness is the same:
- Nominal subtraction does not describe the entire installation. The panel must be held tightly to the framing, and the head must be recessed without breaking the face paper.
- Recommendations may address different conditions. Guidance written for a ceiling, wall, particular framing product, or listed assembly should not automatically be generalized to every installation.
- Commercial charts may favor additional penetration margin. That can explain why 1-5/8 inches appears frequently as a general buying recommendation.
- Intervening materials change the attachment path. Existing finishes, furring, clips, and resilient channel can make a direct-to-framing recommendation irrelevant.
- Special assemblies can specify their own fasteners. Fire-rated, sound-rated, and multilayer systems must be checked as complete assemblies.
The evidence does not establish that 1-1/4-inch screws are universally prohibited for 5/8-inch drywall over wood. It does provide broader support for 1-5/8 inches as the general-purpose purchase choice when no more specific instructions apply.
Moving up to a 2-inch screw is not automatically an improvement. Some general commercial guidance includes screws as long as 2 inches within its range for 5/8-inch board, but that does not show that 2 inches is required for every ordinary single-layer installation. MaxXT presents 1-5/8 to 2 inches as a broad range rather than a universal specification.
The practical conclusion is therefore qualified:
- 1-1/4 inch appears in contractor guidance for direct attachment over wood.
- 1-5/8 inch has broader support as a general wood-framing choice.
- A 2-inch screw may appear in broad guides, but extra length is not an automatic upgrade.
- No screw length replaces the applicable fastening schedule or assembly instructions.
Match the thread and point to the framing
The material behind the drywall determines the thread and point style. A package labeled only “drywall screws” is not specific enough if it does not identify the intended substrate.
Wood studs and ceiling joists
For wood framing, use a coarse-thread Type W drywall screw. The wider-spaced thread is the standard choice for wood across the supplied manufacturer and commercial guidance.
For one 5/8-inch layer attached directly to ordinary wood framing, the general purchase specification is:
#6 × 1-5/8-inch coarse-thread Type W, sharp-point drywall screw
Do not substitute a fine-thread screw merely because its nominal length is correct. Fine-thread Type S screws are ordinarily selected for appropriate steel framing, not as the default for wood.
Light-gauge steel framing
For suitable light-gauge steel studs or furring, use a fine-thread Type S drywall screw. The supplied commercial recommendations for one 5/8-inch panel range from 1-1/4 to 1-5/8 inches, as reflected in the opening table.
Do not settle that difference by choosing the longest fine-thread screw in a generic chart. Identify the steel-framing product and panel system, then follow their instructions or the applicable listed design. Screw length, point geometry, steel thickness, and head style must work together.
Steel 18 gauge or thicker
Commercial guidance calls for an appropriate self-drilling, drill-point, S-12, or Tek-style drywall fastener when the steel is 18 gauge or thicker. An ordinary sharp-point Type S screw should not be assumed suitable for that condition.
“Self-drilling” describes the point’s ability to enter the steel. It does not independently establish the correct screw length, diameter, head, or compatibility with a particular assembly.
Screw gauge is not steel gauge
Two different gauge systems can appear on the same shopping list:
- #6 or #8 identifies the drywall screw’s nominal diameter.
- 18, 20, or 25 gauge identifies the steel framing.
The numbers are not interchangeable. A #6 screw is not intended for “6-gauge steel,” and a package marked for 20-gauge studs is not describing the screw diameter.
A #8 screw is thicker than a #6, but thicker does not automatically mean more appropriate. The required diameter must come from the applicable product instructions, fastening schedule, or assembly specification.
Purchase-label checklist
Before placing a box in the cart, confirm:
- [ ] Drywall-screw gauge: such as #6
- [ ] Overall length: such as 1-5/8 inches
- [ ] Thread: coarse or fine
- [ ] Point: sharp point or self-drilling/drill point
- [ ] Intended substrate: wood, light-gauge steel, or heavier steel
- [ ] Head: drywall-appropriate bugle head
- [ ] Coating or material: approved for the exposure
General-purpose deck, wood, or construction screws should not be assumed equivalent merely because they have the same nominal length.
Walls versus ceilings: length is only part of the decision
A ceiling does not automatically require a longer screw solely because the panel is overhead. For one 5/8-inch sheet attached directly to wood ceiling joists, SENCO’s bounded example uses #6 × 1-5/8-inch drywall screws, as cited above.
What may change between walls and ceilings is the fastening schedule: where the screws go, how closely they are spaced, how panel edges are supported, and whether adhesive is part of the specified method. Those requirements cannot be replaced by selecting a longer fastener.
A longer screw does not correct:
- Missing the stud or joist
- Spacing fasteners more widely than permitted
- Leaving an edge unsupported
- Driving the head through the face paper
- Using the wrong thread or point
- Departing from a specified adhesive-assisted method
- Failing to follow a listed assembly
Manufacturer diagrams commonly distinguish between the panel field and edges:
- The field is the interior portion of the panel, away from its perimeter.
- A panel edge is part of the sheet perimeter, where a separate fastening pattern may be shown.
- Long factory edges may be tapered for finishing.
- Cut ends and factory ends may be treated differently in a layout, so the installation diagram should be read rather than reduced to one memorized spacing figure.
General guides publish different spacing figures for walls, ceilings, fields, and edges, but those figures are not universal. Panel orientation, framing layout, adhesive use, panel product, substrate, local requirements, and rated construction can all affect the schedule.
For that reason, this guide does not prescribe one screw-spacing number for every installation. Use the current panel instructions or the schedule attached to the applicable assembly. If the diagram separates field and edge fasteners, follow both patterns.
Forum anecdotes may help identify common questions, but they do not establish requirements for an unrelated project. A spacing figure reported by one installer may reflect local practice, a particular assembly, or incomplete project information.
Use this sequence instead:
- Select the screw type and length for the panel and substrate.
- Check whether the wall or ceiling condition invokes different instructions.
- Locate the applicable field and edge schedule.
- Confirm framing layout and panel orientation.
- Seat each screw correctly without breaking the face paper.
Longer screws for two layers, overlays, and resilient channel
When drywall is not attached directly to framing, account for every material the screw passes through before reaching its intended attachment point. That may include another drywall panel, an existing finish layer, furring, or a resilient-channel flange.
The correct calculation is not simply total thickness plus an arbitrary amount. The screw must be compatible with the intended substrate and follow the attachment path established for the assembly.
Two layers of 5/8-inch drywall over wood
Two 5/8-inch panels create a nominal drywall thickness of 1-1/4 inches before a face-layer screw reaches the framing. The supplied recommendations for the face layer range from approximately 2 to 2-1/2 inches, but that range is not a universal specification.
The source-specific recommendations differ:
- The contractor guide cited earlier lists a 2-inch coarse-thread Type W screw for the face layer.
- A Newport Fasteners chart lists a 2-1/2-inch coarse-thread screw for double 5/8-inch drywall over wood.
- Installer discussions also divide between 2-inch and 2-1/2-inch preferences, illustrating why forum consensus cannot replace assembly documentation.
The same commercial chart specifies a 2-1/4-inch coarse-thread screw for a 5/8-inch panel installed over an existing 1/2-inch layer on wood framing. These multilayer and overlay figures can be checked in the Newport Fasteners size chart.
Verify the complete system rather than selecting the face-layer screw from total thickness alone.
A 5/8-inch overlay over existing 1/2-inch drywall
The 2-1/4-inch commercial-chart specification is a useful shopping reference, but an existing wall or ceiling is not automatically equivalent to the base layer in a newly built multilayer assembly.
Before treating the installation as a simple overlay, determine:
- Whether the existing layer is securely attached
- Where the studs or joists are
- What substrate the new screws must engage
- Whether another material lies between the layers
- Whether the existing construction is part of a rated assembly
- Whether the added thickness affects boxes, trim, doors, or other details
If the actual construction differs from the charted condition, use the instructions applicable to the real assembly.
Resilient channel
Resilient channel changes the intended attachment path. Do not size the drywall screws by adding panel thickness to a preferred amount of framing penetration. Instead, use the screw type, length, and location specified by the channel or assembly documentation.
Verify:
- The channel manufacturer and product
- Channel orientation and attachment
- The number and thickness of panel layers
- The required screw for each layer
- Permitted screw locations on the channel flange
- Whether contact with framing is prohibited
- Any applicable sound- or fire-rated design
A generic 2-to-2-1/2-inch multilayer range cannot establish the correct resilient-channel fastener. If the system documents are unavailable, do not improvise from a direct-to-stud chart.
Type X, fire-rated, sound-rated, and moisture-prone assemblies
A panel’s 5/8-inch thickness or Type X designation does not by itself create one universal screw schedule.
Some commercial charts list #6 × 1-5/8-inch screws for a single 5/8-inch Type X panel, using coarse threads over wood and fine threads over suitable light-gauge steel. This is useful preliminary buying guidance, not proof that the fastener can be substituted into every rated design. One fastener-vendor guide likewise recommends 1-5/8-inch screws for 5/8-inch fire-rated board while warning that locally applicable requirements may differ. See the Fastener Systems guidance.
For a fire-rated, sound-rated, or otherwise tested system, locate documentation for the exact assembly and verify all controlled details, which may include:
- Screw gauge, length, thread, and point
- Fastener locations and spacing
- Panel product and thickness
- Number and order of layers
- Joint placement and staggering
- Framing type and layout
- Insulation or other cavity materials
- Resilient-channel type and orientation
- Treatment of edges, joints, perimeters, and penetrations
Without a primary listing or manufacturer document for the actual system, a generic chart cannot determine whether a substitution preserves the intended rating. Treat the assembly documentation as the purchasing and installation specification.
Coating and moisture exposure
Standard black-phosphate drywall screws are described by commercial fastener guidance as products for dry interior use. They should not be assumed suitable for damp, wet, exterior, or corrosion-prone exposure. Newport Fasteners identifies black-phosphate screws with dry indoor applications.
There is no single corrosion-resistant coating that can be prescribed for every moisture-prone installation. Suitability may depend on:
- The panel product
- The type and duration of moisture exposure
- The substrate
- Dissimilar-material compatibility
- The fastener manufacturer’s exposure designation
- The applicable assembly documentation
- Requirements recognized locally
Do not choose a screw solely by its color. Confirm that its manufacturer identifies it for the actual substrate, panel system, and exposure.
Verification sequence for a special assembly
Before purchasing fasteners for Type X, fire-rated, sound-rated, resilient-channel, or moisture-prone construction:
- Identify the exact panel product.
- Locate the manufacturer’s assembly instructions or applicable listed design.
- Confirm the framing material and steel gauge, if relevant.
- Confirm the number, thickness, and order of panel layers.
- Identify any channel, clips, furring, or existing finish that changes the attachment path.
- Match the specified screw gauge, length, thread, point, head, and corrosion resistance.
- Follow the required field, edge, and perimeter fastening schedule.
- Check the required treatment of joints, penetrations, and terminations.
If the site conditions do not match the documentation, stop before substituting a fastener that merely appears close.
How to seat the screw without weakening the attachment
Correct screw selection does not help if the screw head is driven through the panel’s face paper. A drywall screw’s bugle head should create a shallow dimple slightly below the panel surface, leaving a recess for joint compound while keeping the paper intact.
The intended result is:
- The head is not proud of the surface.
- The panel is held tightly against its intended substrate.
- The paper remains intact around the head.
- The gypsum is not crushed into a deep crater.
- The screw has not spun or stripped in the substrate.
Commercial installation guidance consistently describes seating the head just below the surface without tearing the paper. Timothy’s Toolbox gives that same drive-depth instruction.
If the paper breaks around the head, do not count that location as a correctly seated attachment. Follow the applicable panel instructions for correcting an over-driven screw, including the permitted position of a replacement fastener.
Drive depth, length, spacing, and screw type solve different problems:
- Length allows the screw to pass through the required layers and reach its intended substrate.
- Drive depth clamps the panel while preserving the face paper.
- Spacing distributes attachment points across the panel.
- Thread and point make the screw compatible with the substrate.
A longer screw cannot correct an over-driven head, a missed framing member, or an incorrect fastening pattern.
Final pre-installation checklist
Before hanging the first sheet, confirm:
- [ ] Framing material: wood or steel
- [ ] Steel gauge: where applicable
- [ ] Panel thickness: including every intervening layer
- [ ] Number of layers: single, double, or overlay
- [ ] Location: wall or ceiling
- [ ] Assembly status: ordinary, fire-rated, or sound-rated
- [ ] Resilient channel or clips: present or absent
- [ ] Exposure: dry interior or another condition
- [ ] Screw label: gauge, length, thread, point, head, and substrate
- [ ] Fastening schedule: confirmed for panel fields and edges
- [ ] Drive-depth control: adjusted to preserve the face paper
- [ ] Current documents: panel, framing-system, and assembly instructions checked
Frequently asked questions
Can I use 2-inch screws for one layer of 5/8-inch drywall?
A 2-inch drywall screw may fall within a broad commercial length range for 5/8-inch board, but the supplied evidence does not show that it is required for every single-layer installation. One general guide lists 1-5/8 to 2 inches for 5/8-inch drywall. See the published range.
For an ordinary single layer over wood, #6 × 1-5/8-inch coarse-thread screws remain the clearer general purchase choice. Use 2-inch screws when the applicable product or assembly instructions call for them, not simply because they are longer.
Are 1-1/4-inch screws acceptable for 5/8-inch drywall over wood?
One contractor guide recommends 1-1/4-inch Type W screws, reasoning that approximately 5/8 inch remains beyond a 5/8-inch panel. The underlying standards interpretation was not independently verified from a current primary document, so it should not be treated as a universal rule. The contractor explains that calculation here.
The available evidence does not establish that 1-1/4-inch screws are universally prohibited. However, 1-5/8 inches has broader support as a general wood-framing purchase choice and provides additional nominal penetration margin.
What screw size should I use for 5/8-inch drywall on metal studs?
For suitable light-gauge steel, use a fine-thread Type S drywall screw. Commercial tables differ on the length, commonly listing either 1-1/4 or 1-5/8 inches for a single 5/8-inch panel, so the panel and framing-system instructions should settle the choice.
For heavier steel, use the assembly-appropriate self-drilling or drill-point drywall fastener specified for that framing. Confirm the screw diameter, length, head, and stated steel-thickness range rather than relying on the words “metal screw” alone.
Does 5/8-inch Type X drywall require special screws?
Not solely because it is Type X. General guidance often lists #6 × 1-5/8-inch drywall screws for one 5/8-inch Type X panel, with coarse threads for wood and fine threads for suitable light-gauge steel. Fastener Systems provides that 1-5/8-inch general recommendation.
If the wall or ceiling must match a particular fire- or sound-rated design, verify that design’s complete fastening specification. Panel thickness alone cannot establish the required screw, spacing, layer order, or attachment method.
Should I use #6 or #8 drywall screws?
Use #6 screws for an ordinary single layer of 5/8-inch drywall when that matches the panel and assembly instructions. It is the diameter most consistently paired with the general 1-5/8-inch wood-framing recommendation in the supplied guidance.
A #8 screw is thicker, but greater diameter does not automatically make it a suitable substitute. #6 and #8 are both recognized drywall-screw gauge designations, and the application specification should determine which one is appropriate. Timothy’s Toolbox identifies both as common gauges.
For a basic direct-to-wood installation, the final purchase rule is #6 × 1-5/8-inch coarse-thread drywall screws. Stop and verify the system before buying if the framing is steel, the installation includes multiple layers or resilient channel, or the wall or ceiling must match a listed fire- or sound-rated design. Correct thread, point, spacing, and seating matter as much as nominal length.
Mortar Desk publishes general building-material reference information rather than individual contracting or engineering advice. Specifications change and locally recognized requirements vary, so compare this guidance with current manufacturer documents and the standard edition or assembly documentation used for the project, consistent with Mortar Desk’s reference-information scope.