 MortarDesk
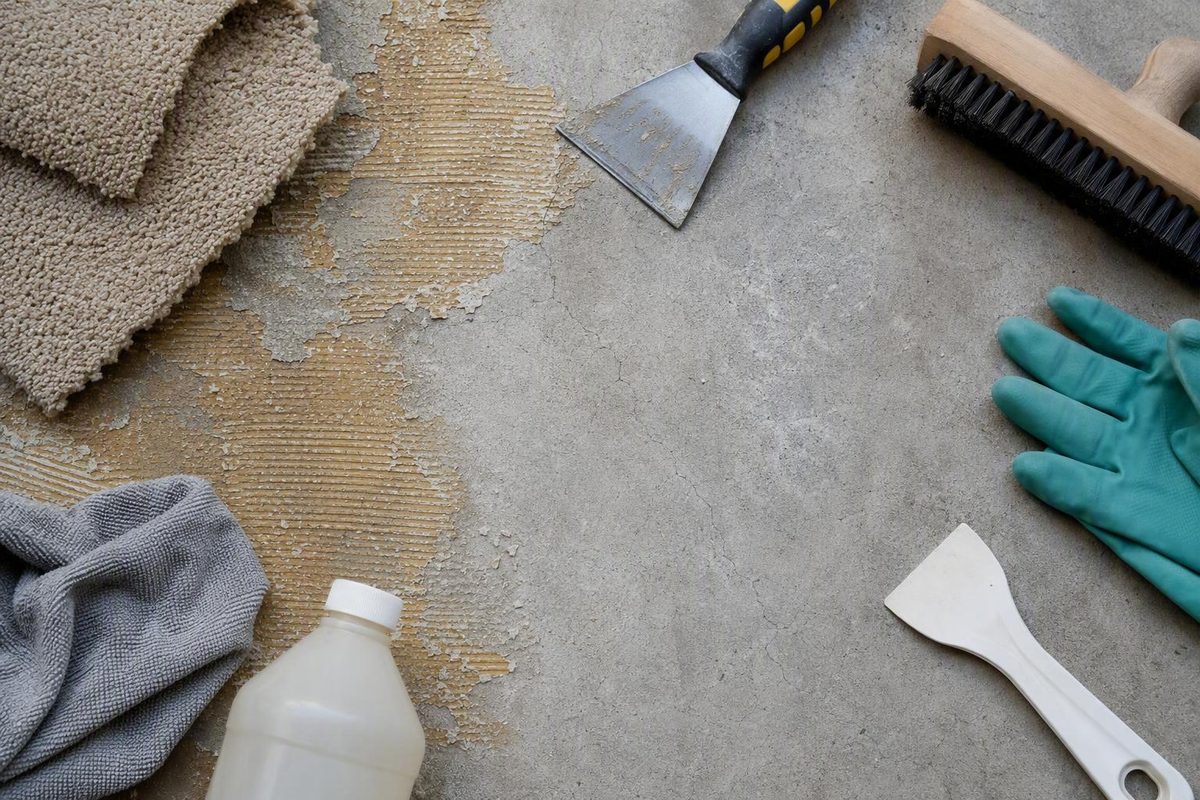
Cleaning carpet glue from concrete is rarely a one-product job. Adhesives vary in chemistry, age, thickness, and condition, while the acceptable result depends on what will cover—or reveal—the slab afterward.
The practical approach is sequential: stop if the material may be hazardous, define what the planned finish requires, test a small area, scrape away bulk residue, and escalate only when the results justify it. Water, steam, chemical remover, powered scraping, and grinding can all be useful, but none is the universal first choice.
This is general reference information, not project-specific environmental, occupational-safety, engineering, or contracting advice. Product instructions and the requirements that apply where the property is located take precedence.
Before You Disturb the Glue: Check the Risk and Define the End Goal
Stop before scraping, heating, sanding, or grinding old black, very dark brown, or otherwise suspect legacy adhesive. Some older cutback adhesives may contain asbestos, and disturbing suspect material can spread contaminated dust or debris. Concrete Network similarly advises against manually scraping or grinding suspected asbestos-containing black cutback adhesive before the risk has been addressed (guidance on old black cutback adhesive).
Color is a warning clue, not a diagnosis. Texture, odor, apparent age, and the estimated installation date are also clues only. None can establish the adhesive’s chemistry or prove that it is asbestos-free.
Do not improvise a sampling or abatement procedure from a flooring article. Consult the hazardous-material authority that applies where the property is located or engage a qualified asbestos or environmental professional. That is particularly important when the floor’s history is uncertain, several old coverings are present, or the proposed work would involve sanding or grinding.
Once the material has been appropriately assessed and is considered suitable to disturb, identify the intended finish. The destination determines how aggressive removal should be and what “clean” means:
- Penetrating stain: Adhesive in the pores can prevent uniform penetration or reaction. Grinding marks and changes in porosity may also become part of the final appearance.
- Exposed or clear-finished concrete: Scratches, gouges, aggregate exposure, shadowing, patches, and color variation may remain visible.
- Paint or epoxy: The slab must meet the selected coating manufacturer’s requirements for cleanliness, soundness, moisture, and surface profile.
- Bonded tile: The substrate must comply with the selected mortar, primer, membrane, and tile-system instructions. A floor that feels smooth is not necessarily bond-ready.
- Leveling compound: Residue, cleaner film, porosity, moisture, primer compatibility, and substrate strength may all affect acceptance.
- Floating flooring: Firmly bonded discoloration may be tolerable, but only when the flooring and underlayment instructions permit it and the surface remains sufficiently flat and stable.
Penetrating and clear decorative finishes are especially unforgiving. Adhesive may block a stain even where the slab feels smooth, while aggressive grinding can expose aggregate or leave swirls that absorb stain differently. Decorative-concrete guidance illustrates the tradeoff: stripping and scrubbing may preserve the original surface better, but stubborn contamination can still require limited grinding or a compatible resurfacing approach (preparing glue-covered concrete for acid stain).
For any bonded system, appearance is secondary to the selected manufacturer’s acceptance criteria. A generic instruction to “remove most of the glue” does not override the current directions for a particular thinset, epoxy, paint, primer, sealer, membrane, or leveling compound.
Use this least-aggressive-first sequence:
- Confirm that the material is appropriate to disturb.
- Establish what the next finish requires.
- Make a small test patch.
- Scrape away loose and raised adhesive.
- Test controlled water or steam if the residue appears water-sensitive.
- Use a concrete-compatible, label-approved remover only when needed.
- Escalate to powered scraping or purpose-suited grinding only when the area, residue, and finish requirements justify the added risks.
Not every floor needs every step. A brittle patch may scrape clean. A water-sensitive film may respond to steam. A hardened, room-sized layer may eventually justify mechanical preparation. The test patch tells you whether to stop, repeat, or escalate.
Read the Adhesive Without Pretending to Identify It by Sight
You may not know which product was installed, but the residue’s behavior still offers useful method-selection clues. Examine several parts of the floor rather than assuming one corner represents the entire room.
Record whether the residue is:
- Brittle or tacky: Brittle material may fracture beneath a sharp blade. Tacky glue tends to stretch, roll, or smear.
- A thin film or raised ridges: Ridges provide an edge for a scraper. A thin film may contain less material but be harder for a blade to engage.
- Isolated or continuous: Perimeter spots require a different tool plan from full-spread adhesive across a basement.
- Soft or crystallized: Dense, aged deposits may resist liquid softeners but respond to controlled scraping or mechanical preparation.
- Stable or smeary under pressure: Smearing warns that an ordinary sander may redistribute the adhesive and load the abrasive.
Published descriptions group flooring adhesives into categories such as water-based, pressure-sensitive, solvent-based, urethane, contact cement, and cutback. These categories help explain why one method can work on one slab and fail on another, but homeowners commonly lack the original container or installation records. Commercial contractor guidance describes tan water-based residues, tacky pressure-sensitive products, and dark cutback adhesive while treating appearance as an indicator rather than a conclusive field test (overview of carpet-adhesive conditions).
Tan, beige, yellow, dark brown, and black appearances can therefore suggest possibilities without proving them. Dirt, degraded padding, previous cleaners, moisture, and overlapping flooring products can also change how the surface looks.
If the material is not suspect and is appropriate to disturb, conduct a controlled water-response test in an inconspicuous place:
- Remove loose debris.
- Apply a small amount of warm, soapy water to a limited spot.
- Keep the liquid within the test area.
- Allow enough contact to determine whether the residue changes.
- Try wiping, brushing, and scraping the spot.
- Collect the resulting liquid and adhesive.
Bosch’s general removal guidance likewise suggests checking a small exposed area to see whether the adhesive responds to water and washing-up liquid before choosing a more aggressive method (water-response testing for carpet adhesive).
Interpret the result narrowly. If the glue softens and becomes easier to lift, a larger—but still controlled—wet-method test may be worthwhile. If the residue remains unchanged, repeatedly flooding the slab is unlikely to make that particular method effective. Lack of response does not identify the adhesive; it shows only that the test did not produce useful progress.
Tackiness is also informative. A gummy film can smear ahead of a blade and clog sanding or polishing media. Hard, brittle material may instead fracture beneath a scraper or suit purpose-selected mechanical preparation. Neither behavior proves what the adhesive contains.
For each test patch, record six outcomes:
- Softening: Did water, steam, or remover noticeably change the adhesive?
- Scraping effort: Did the treatment reduce the force or number of passes required?
- Smearing: Did the glue lift cleanly, roll into clumps, or spread into a thinner film?
- Discoloration: Did the treatment darken, bleach, or otherwise alter the slab?
- Concrete damage: Did the blade or machine scratch, gouge, expose aggregate, or remove surface paste?
- Finish compatibility: Does the treated area remain suitable for the planned stain, coating, mortar, primer, leveler, or floating-floor assembly?
The best result is not necessarily the patch that became bare fastest. A method that removes the glue but leaves an oily film, deep scratches, or altered stain absorption has exchanged one problem for another.
Set Up the Work Area and Choose the Core Tools
Prepare for the form of waste each method will create. Dry scraping produces chips and flakes. Wet softening produces contaminated liquid. Chemical removal produces softened adhesive and product residue. Grinding creates fine dust and can load the tooling.
A practical core-tool kit includes:
- A sharp floor or razor scraper with replaceable blades
- A smaller hand scraper or putty knife for edges and corners
- Spare blades and a safe storage container
- A stiff nylon brush
- A shop vacuum for non-hazardous loose chips and debris
- A squeegee
- A wet vacuum only where both the equipment and collected material are compatible
- A rubber-edged dustpan or similar collection tool
- Suitable containers for collected waste
- Protective coverings for walls, doors, trim, and adjacent finishes
A general shop vacuum may collect ordinary loose debris after the material has been judged suitable to disturb. Do not treat it as adequate source control for concrete grinding.
Divide the floor into manageable sections. The exact dimensions matter less than control: soften only as much adhesive as you can scrape before it changes condition, and apply only as much remover as you can contain and collect. Treating the entire room at once can leave dried remover, cooling glue, widespread slurry, or contaminated footprints.
Protect adjacent finishes and keep chips, liquid, and slurry away from drains. The appropriate containment arrangement depends on the room, doorways, ventilation, occupants, and selected method, so there is no universal design. Decide where the waste will be collected before opening a remover or carrying hot water into the room.
Match the tool to the scale:
- Small patches and edges: Hand scraper or putty knife
- Open areas with raised adhesive: Long-handled floor scraper
- Large areas with scrapable residue: Powered floor scraper or suitable rental machine
- Persistent hardened film: Purpose-suited concrete-preparation equipment
- Appearance-critical concrete: Controlled hand work or professional decorative-concrete preparation
Tool preference also depends on body position, blade angle, and floor condition. In one homeowner’s basement, hand scrapers offered more control than a long-handled floor scraper, while a wallpaper steamer treated more area than a small cleaning steamer. Those are project-specific observations, not universal tool rankings (one homeowner’s removal tests).
Before starting, perform a label-first safety check:
- Use eye protection appropriate to the expected chips, splashes, or dust.
- Select hand protection according to the remover’s current label and safety information.
- Provide the ventilation required by the product documentation.
- Keep skin away from steam and hot water, and establish a stable carrying route.
- Use hearing protection when the equipment instructions and exposure call for it.
- Follow the applicable safety guidance for dust-generating mechanical work.
- Store and discard sharp blades without leaving exposed edges.
- Keep other occupants and pets out of the work area.
Do not assume that a generic mask protects against every possible exposure. Respiratory protection, where required, must be selected for the actual hazard under the applicable safety guidance. If you cannot identify and implement the controls required for a proposed method, do not proceed with that method.
Step 1: Scrape Off the Bulk Adhesive
Once the material is considered appropriate to disturb, begin by removing loose, raised, or brittle glue mechanically. Starting dry avoids turning easily collected chips into sticky slurry.
Fit a sharp, undamaged blade. Hold the scraper at a shallow angle so its edge travels between the adhesive and the slab instead of digging downward. A steeper angle may catch a ridge, but it also increases the chance of scratching or gouging the concrete.
Work in short, controlled passes:
- Select a small section.
- Start at a broken edge, ridge, crack in the adhesive, or perimeter.
- Push the blade beneath the residue rather than chopping into it.
- Collect loosened pieces before they obstruct the next pass.
- Inspect the blade and concrete regularly.
Do not compensate for a dull blade by leaning harder on the tool. Replace blades that are dull, bent, nicked, or no longer tracking predictably. Excessive force increases fatigue and reduces control.
If the blade repeatedly gouges the slab, stop and adjust. Try a shallower angle, a narrower scraper, a fresh blade, or a different direction. Weak surface paste or previously damaged concrete may require more care than sound areas elsewhere in the room.
Collect non-hazardous loosened material frequently. Debris beneath the scraper can prevent full blade contact, scratch the floor, or be carried into cleaned sections. Use the smaller hand scraper at walls, columns, corners, door jambs, and other places where a long handle cannot achieve a useful angle.
Watch how the glue fails:
- If it fractures or peels, continue scraping.
- If it rolls into clumps, clean the blade frequently.
- If it smears into a thinner film, stop treating extra pressure as the answer.
Smearing is a reason to test a controlled softening method, not an automatic reason to attach an ordinary sanding disc.
Scraping may be sufficient for a floating-floor installation whose manufacturer accepts the resulting condition. It is not automatically sufficient for penetrating stain, bonded tile, epoxy, paint, primer, membrane, or leveling compound. Those systems may reject a slab that appears mostly bare but still contains a thin film or contaminated pores.
Step 2: Test Steam or Hot Water on Water-Sensitive Residue
Steam and hot water are options for adhesive that responds to moisture and heat. They are not universal carpet-glue removers.
Start with the smallest practical test area. Apply controlled steam or hot water, wait only long enough to observe whether softening occurs, and scrape while the adhesive remains workable. Repeat only if each cycle produces meaningful progress without creating unacceptable liquid, damage, or cleanup.
A workable sequence is:
- Remove as much dry residue as possible.
- Protect nearby finishes and contain the liquid.
- Treat a small section.
- Observe whether the glue swells, softens, releases, or remains unchanged.
- Scrape or brush while it is softened.
- Collect the adhesive and liquid immediately.
- Inspect the concrete after the section dries.
Steam and poured hot water create different work patterns. Steam concentrates treatment and can limit pooled liquid, which may suit edges and smaller sections. Poured hot water can cover a broader patch but creates more contaminated liquid and may carry softened glue beyond the treatment area.
One homeowner informally compared steam, boiling water, household cleaners, and a commercial remover on an old basement floor. On that particular floor, steam and boiling water loosened the glue about as effectively as the remover tested, while a wallpaper steamer covered more area than a small cleaning steamer. This was one uncontrolled project, not proof that water methods perform as well as chemical removers generally.
Keep cords, hoses, containers, and the work path organized. If pouring hot water, keep the container low and pour slowly rather than tipping it from standing height. Concrete Camouflage gives the same basic burn warning and advises lowering the container before pouring (hot-water removal and burn precautions).
Collect softened glue and liquid with a squeegee, compatible wet vacuum, rubber-edged dustpan, scraper, or another controlled collection tool. Use a wet vacuum only if its documentation and the documentation for any chemical present allow collection of that material.
Stop adding water when:
- The glue shows little or no response.
- Each cycle creates mostly wastewater rather than additional removal.
- Water begins spreading beneath walls, cabinets, coverings, or adjacent flooring.
- Added moisture would create a project-specific problem.
- The next finish’s required drying conditions would become harder to achieve.
More water is not necessarily more effective. Once a contained test shows that the residue does not respond, flooding a larger area mainly increases the cleanup burden.
Step 3: Use a Compatible Adhesive Remover Only When Needed
A chemical adhesive or mastic remover may help when scraping leaves a persistent film and water or steam is ineffective or impractical. It should not be the automatic first step. Removing bulk residue mechanically first reduces product use and the amount of liquefied adhesive that must be collected.
Choose a product whose current label permits use on concrete and addresses the relevant type of flooring residue. Do not select a remover by scent, broad marketing language, or an online ranking alone. Performance can vary with adhesive chemistry, age, buildup, temperature, slab porosity, and the intended finish.
Follow the current product label and safety information for:
- Application rate
- Permitted substrates and residue types
- Contact or dwell time
- Ventilation
- Personal protection
- Whether the product may be kept from drying
- Agitation and scraping
- Rinsing, neutralization, or other cleanup
- Collection and disposal
There is no defensible universal dwell time. A thin, compatible film may soften quickly, while an old, dense deposit may require repeated applications or longer label-permitted contact. A particular remover may also fail to affect the adhesive.
Before treating the full floor, make a controlled test patch. Check whether the remover:
- Lifts the glue rather than merely making it slippery
- Darkens or discolors the concrete
- Leaves an oily, waxy, or soapy film
- Spreads residue into the pores
- Alters the appearance or absorption of the planned finish
- Requires cleanup that can realistically be completed in the room
A product that dissolves adhesive is not automatically compatible with the next floor. Concrete Network recommends testing remover compatibility and checking for darkening or interference with later stain penetration before treating the entire slab (chemical-remover compatibility considerations).
Complete the entire removal cycle within each section:
- Apply the product as labeled.
- Prevent premature drying only if the label permits it.
- Agitate or scrape the softened adhesive.
- Collect the material rather than pushing it into another section.
- Repeat only within the product directions.
- Complete the specified rinse, neutralization, or cleanup.
- Allow the test area to dry before evaluating it against the next finish.
Do not assume a smooth, dark patch is clean. It may be permanent discoloration, adhesive remaining in the pores, or remover residue. The planned flooring system’s preparation procedure or a representative finish test may be necessary to distinguish acceptable shadowing from contamination.
Do not use MEK, xylene, acetone, mineral spirits, denatured alcohol, or similar volatile solvents as routine improvised DIY remedies. Their suitability, exposure controls, fire precautions, residue effects, and disposal requirements cannot be established generically. If the selected flooring system specifies a chemical process, follow that documented process rather than substituting a different solvent.
Avoid declaring one branded remover “best.” Available comparisons are largely product-specific, anecdotal, or published by commercially interested parties. A small compatibility test on the actual slab is more useful than a broad ranking.
Step 4: Escalate to Powered Scraping or Grinding Carefully
Powered methods become reasonable when residue is extensive, hardened, persistent, or impractical to remove manually—and when the next finish can tolerate or requires the resulting preparation.
The machines are not interchangeable:
- Powered scraper: Drives a blade beneath raised or hardened material without intentionally abrading the whole slab.
- Rotary floor machine: Uses a selected pad or attachment for agitation or surface work; suitability depends on the adhesive and accessory.
- Ordinary sander: Uses coated abrasives that may load rapidly when glue remains tacky.
- Concrete grinder: Abrades both contamination and concrete and can create a deliberate surface profile.
- Polishing equipment: Is not automatically suitable for mastic removal; adhesive can load tooling designed for another purpose.
If a sanding disc becomes coated almost immediately, treat that as diagnostic information. Return to bulk scraping, test a compatible softening method, or switch to purpose-suited equipment. Continuing with loaded discs can generate heat, smear glue, waste consumables, and leave an uneven surface. Users in one community discussion reported abrasive clogging as a common practical limitation, although their preferred alternatives varied (mechanical-removal experiences).
Powered scraping can reduce effort where a room-sized layer has enough thickness or edge for a blade to engage. Grinding can remove thin, hardened residue and prepare a profile for certain coating systems. Neither benefit makes the method appropriate for every floor.
Once a machine contacts the concrete, it can cause:
- Scratches and swirl marks
- Gouges at starts, stops, or high spots
- Exposed aggregate
- Loss of surface cement paste
- Changes in porosity
- Uneven texture
- A visibly different response to stain or clear finish
For acid-stained or clear-finished concrete, slower stripping and scrubbing may preserve appearance better than immediate grinding. Conversely, an opaque coating may require mechanical preparation to produce a specified surface profile. Follow the selected coating, primer, mortar, membrane, or leveling-system documentation rather than inventing a universal machine, tooling, or abrasive specification.
Grinding concrete can generate hazardous airborne dust. Do not rely on an ordinary cleanup vacuum or an unspecified mask. The required source controls, work-area measures, cleaning procedures, and personal protection must be selected for the actual operation under applicable safety guidance. Community discussions about concrete preparation also caution that abrasive work creates inhalation hazards and requires appropriate controls, although such discussions are not substitutes for current occupational-safety requirements (mechanical preparation and dust cautions).
A small machine test should answer two questions:
- Does the selected tooling remove the residue efficiently?
- Does it leave a surface acceptable for the planned finish?
Inspect the test under raking light. For decorative concrete, also evaluate it through the intended stain, dye, or finish sample procedure.
Seek qualified help when:
- The adhesive or an underlying flooring layer is suspect.
- Required dust or chemical controls cannot be identified or implemented.
- Extensive grinding is needed in an occupied building.
- The slab is weak, spalled, cracked, or heavily patched.
- The intended finish will expose every preparation mark.
- The equipment cannot be tested without risking an important visible area.
- The selected system’s preparation requirements cannot be achieved with available tools.
Professional preparation does not necessarily mean aggressive grinding. Depending on the floor and finish, it may involve controlled stripping, powered scraping, grinding with purpose-selected controls, repair, a compatible overlay, or a documented encapsulation system.
Clean Up and Decide Whether the Slab Is Ready
Removal is not complete merely because the largest ridges are gone. It is complete when the remaining slab condition satisfies the next flooring system.
Collect waste as it is generated, including:
- Dry adhesive chips and carpet remnants
- Softened glue
- Slurry and rinse liquid
- Used scraper blades
- Loaded discs, pads, and grinding media
- Contaminated coverings and absorbents
- Chemical-remover residue and containers
Do not spread softened adhesive over cleaned concrete. Follow the remover’s current label and safety information, then ask the appropriate local wastewater or waste authority how the collected material must be handled. Requirements can depend on the product, contamination, and location; a cleaning-service guide addressing adhesive removal likewise emphasizes containment and warns that disposal procedures are not universal (adhesive-removal waste precautions).
After wet or chemical work, complete every product-specified cleanup step. Then let the concrete dry enough for inspection and for the next flooring system. There is no universal drying period because slab conditions, room conditions, water use, and the next product’s moisture limits vary.
Inspect the dry floor for:
- Loose film or flakes
- Tacky or softened areas
- Oily, waxy, or soapy residue
- Dust and abrasive debris
- Glue in joints, cracks, pits, and perimeter areas
- Uneven texture
- Areas altered by grinding or chemical treatment
Distinguish discoloration from confirmed residue. A smooth, non-tacky shadow may be a permanent stain rather than removable glue, but appearance alone cannot prove that the pores are clean. Conversely, a pale or bare-looking area may still contain an invisible bond-inhibiting film.
Apply finish-specific stopping criteria:
- Penetrating stain: The pores must be sufficiently unobstructed, and the appearance after preparation must be acceptable. Test the actual stain system because glue, chemical shadowing, and grinding can alter the result.
- Exposed or clear-finished concrete: Scratches, aggregate exposure, repairs, and color variation become part of the finished floor. Evaluate them before sealing.
- Tile, epoxy, paint, primer, membrane, or leveling compound: Meet the selected manufacturer’s requirements for cleanliness, soundness, moisture, porosity, and profile.
- Floating flooring: Firmly bonded discoloration may remain only when the flooring and underlayment manufacturers accept the condition and it does not create unacceptable unevenness.
Touch and appearance alone cannot certify a slab for a bonded finish. If the selected system calls for a moisture evaluation, bond test, primer trial, porosity check, or surface-profile assessment, use that documented procedure.
Once the adhesive has been removed, inspect the concrete itself for:
- Cracks
- Pitting
- Spalling or weak surface paste
- Moisture-related discoloration
- Old patches
- Tack-strip holes
- High and low areas
- Failed joints or edge damage
These are separate preparation issues. Removing glue does not repair concrete, stop moisture movement, or make an uneven slab suitable for every flooring material.
If compliant preparation cannot be achieved without unacceptable damage, reconsider the assembly. Professional preparation, a compatible resurfacing overlay, or a manufacturer-approved encapsulation approach may be possible. None is universally suitable, and no primer, overlay, or flooring product should be used merely to conceal contamination unless its manufacturer expressly accepts the substrate condition.
Can boiling water remove carpet glue from concrete?
Sometimes. Very hot or boiling water may soften water-sensitive adhesive enough to scrape or scrub, but it will not remove every carpet glue. Test a small, contained area before treating the room.
If the glue softens, work in sections and scrape while it remains workable. Collect the liquid and softened adhesive instead of spreading them across the slab.
Boiling water can cause severe burns. Keep the container low, pour slowly, maintain a clear route, and avoid creating hot pools where you must kneel or walk (hot-water removal precautions).
Does black carpet adhesive need to be tested before removal?
Black or very dark legacy adhesive should be treated as suspect until its potential hazard has been appropriately assessed. Do not scrape, heat, sand, or grind it merely because it appears to be ordinary carpet glue.
Color cannot confirm that asbestos is present, but it also cannot establish that the material is safe. Installation dates and appearance are clues rather than clearance criteria. Commercial flooring guidance likewise warns that older dark cutback adhesive may contain asbestos and should be assessed before disturbance (cutback-adhesive warning).
Consult the hazardous-material guidance that applies where the property is located or engage a qualified professional. This article does not provide DIY sampling, abatement, or clearance instructions.
Is it better to scrape, sand, or grind carpet glue?
Scraping is normally the first choice for loose, raised, or brittle adhesive because it removes bulk material without intentionally abrading the entire slab. Hand tools suit patches and edges, while long-handled or powered scrapers may be more practical over larger areas.
Ordinary sanding is often a poor first response to tacky glue because the adhesive can smear and load the abrasive. Grinding is more suitable for some hardened films and coating-preparation projects, but it also removes concrete and can leave scratches, swirls, exposed aggregate, or altered porosity.
The better method is the least aggressive one that produces the substrate required by the next finish. Test before committing the whole floor.
Does every visible glue stain have to disappear before installing a new floor?
Not necessarily. Smooth, non-tacky discoloration may be acceptable beneath some opaque or floating systems, but only when the selected manufacturer permits the remaining condition. A visible shadow is not automatically active adhesive, and a bare-looking area is not automatically contamination-free.
Penetrating stains and clear finishes are less forgiving because pore contamination and preparation marks can remain visible. Bonded tile, coatings, primers, membranes, and leveling products must meet their manufacturers’ substrate requirements.
Do not continue aggressive grinding solely to erase color until you have determined whether the color represents removable residue or permanent discoloration.
How should glue-contaminated water and chemical-remover waste be handled?
Contain and collect it at the work area. Keep softened adhesive, slurry, rinse liquid, used blades, loaded abrasives, and contaminated coverings separate from clean sections of the slab.
Follow the remover’s current label and safety information, then obtain disposal instructions from the appropriate local wastewater or waste authority. Do not assume that drain disposal, evaporation, absorbent material, or ordinary trash is acceptable for every product or location (wastewater and collection cautions).
The final decision sequence is straightforward: stop for suspect legacy adhesive; establish what the next finish requires; test a small patch; scrape first; use steam or hot water only when the glue responds; apply a concrete-compatible, label-approved remover only when necessary; and reserve powered preparation for residue that justifies its dust and surface-damage risks. The project is complete only when the slab is sound, clean, non-tacky, free of bond-inhibiting residue, sufficiently dry, and accepted by the manufacturer of the next flooring system.