 MortarDesk
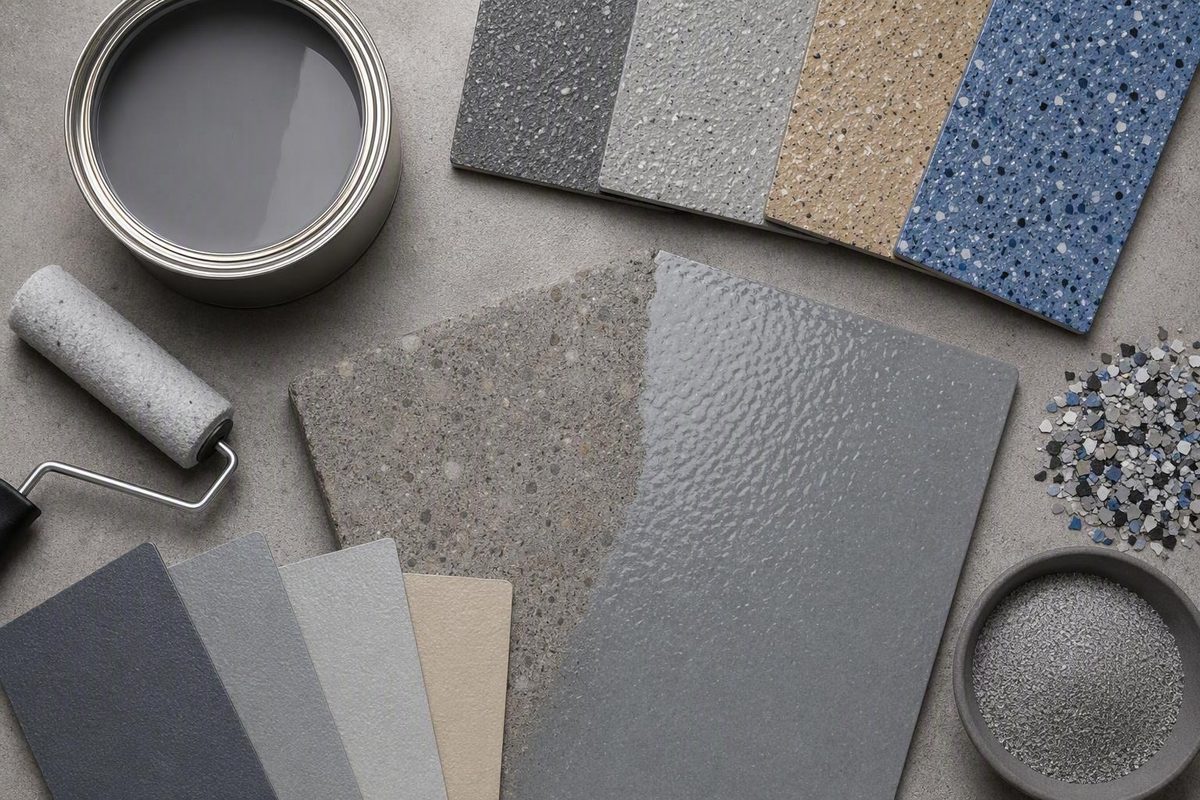
Choosing a non slip epoxy coating for concrete is not simply a matter of finding “non-slip” on a label. The resin, texture, concrete profile, moisture tolerance, topcoat, traffic rating, installation window, and cleaning routine all influence how the finished floor performs.
Start with the floor rather than the container. Identify who or what moves across it, which contaminants are likely, how water drains, how the floor is cleaned, whether sunlight reaches it, and how long the area can remain out of service. Then compare complete, compatible systems and request slip-test documentation for the exact proposed installation.
This guide is therefore a vendor-specification and purchasing framework, not a safety certification or compliance determination. The available evidence consists mainly of manufacturer, seller, retailer, and contractor material. It does not include independent numerical slip-test reports, authoritative moisture-testing criteria, or jurisdiction-specific acceptance requirements for the systems discussed.
Above all, slip-resistant does not mean slip-proof.
What makes an epoxy coating slip-resistant?
A smooth epoxy film should not be treated as inherently slip-resistant. Epoxy can form a hard, seamless surface, but traction normally comes from deliberately adding texture with aggregate, grit, sand, flakes, or another textured finish. The appropriate texture depends on traffic, contaminants, drainage, footwear, and maintenance—not merely whether the cured floor looks rough.
There are four common ways to create texture:
- Integrated aggregate: Aggregate is supplied with or mixed into the coating before application. This can create a relatively uniform, mild profile for products intended for pedestrian or barefoot areas.
- Aggregate broadcast into wet epoxy: Grit is scattered over uncured coating, sometimes followed by rerolling. Particle size, quantity, timing, and distribution affect the result.
- Full-broadcast system: Aggregate is broadcast to saturation into a wet basecoat. After curing, loose material is removed and the textured layer receives a specified topcoat.
- Decorative flake system: Flakes add visual and physical texture, but flakes alone do not establish adequate or tested wet traction. Broadcast density, flake size, topcoat, wear, and the complete coating build still matter.
A full broadcast is more involved than adding a small amount of grit to a roller tray. In the named Resin Grip system, installers apply a wet epoxy basecoat, broadcast aggregate until the surface appears dry with no glossy basecoat showing, allow the layer to harden, remove loose aggregate, and roll on the specified epoxy topcoat. Its guide also states that topcoats thicker than the specified minimum produce a less aggressive profile, showing why topcoat thickness is a texture-control variable rather than only a durability or appearance choice (Resin Grip installation guide).
Decorative flakes require particular caution. A densely flaked floor may feel textured before it is sealed, but a smooth, heavy clear coat can change the finished profile. Visible flakes should never be treated as a substitute for test results covering the installed basecoat, flakes, topcoat, and film thickness.
Texture can also change in service. Slope, drainage, footwear, walking speed, maintenance, and localized wear therefore belong in the selection process.
The product evidence available here contains qualitative traction claims but no independent numerical slip-test results for the named systems. That does not prove that no test reports exist. It means buyers should obtain the applicable report instead of inferring performance from terms such as “anti-slip,” “non-skid,” or “heavy duty.”
Choose the texture by traffic, contamination, and cleaning method
Texture should be selected for actual service conditions. A mild profile may suit barefoot traffic and routine cleaning, while a ramp exposed to oily contamination may lead the project specifier toward a more pronounced profile. The roughest surface is not automatically the safest: a coarse floor can be uncomfortable, difficult to clean, and capable of retaining contamination.
Use the following matrix to establish a specification direction. The entries are questions and shortlist prompts, not universal product prescriptions.
| Use area | Traffic | Expected contaminant | Texture direction to evaluate | Cleaning implications | Essential specification checks |
|---|---|---|---|---|---|
| Locker room or shower approach | Bare feet and pedestrians | Water, soap, body-care residue | Mild, uniform texture with comfort considered | Must tolerate frequent wet cleaning without retaining excessive residue | Barefoot suitability, wet test conditions, cleaner compatibility, drainage, exterior exposure |
| Kennel or animal area | Foot traffic, claws, permitted carts | Water, waste, detergents | Mild-to-medium profile | Must suit the actual sanitation and rinsing method | Traffic restrictions, chemical table, moisture limits, topcoat compatibility |
| Gym, corridor, or walkway | Light-to-moderate foot traffic | Water, dust, tracked debris | Low-to-medium profile | Should remain compatible with the planned mop or scrubber | Wet and dry test data, wear documentation, cleaning method, repair plan |
| Residential garage | Cars and pedestrians | Water, oil, road residue, automotive fluids | Medium profile only if the complete system is vehicle-rated | Texture may complicate wiping up oil | Rubber-wheel rating, chemical table, vehicle return time, interior or exterior approval |
| Service bay | Vehicles and wheeled equipment | Oil, grease, hydraulic fluid, cleaners | Product-specific medium or higher profile | May require mechanical cleaning and prompt spill removal | Tested chemicals and exposure periods, wheel rating, impact and abrasion data |
| Forklift aisle or warehouse | Repeated powered traffic | Dust, debris, oil | Documented heavy-traffic or full-broadcast option | Must suit the facility’s actual cleaning equipment | Forklift type, wheel material, turning and braking conditions, repair method |
| Ramp | Pedestrians, vehicles, or both | Water, oil, tracked residue | Project-specific profile | Drainage and contaminant removal are critical | Slope, direction of travel, wet or contaminated test conditions, vehicle type |
| Loading dock | Heavy foot and wheeled traffic | Rain, mud, grease, debris | Higher-profile or full-broadcast option to investigate | Coarse finishes may require powered cleaning | Exterior exposure, wheel and load documentation, edge details, closure plan |
For locker rooms, kennels, gyms, and pedestrian walkways, a mild integrated-aggregate coating may be worth evaluating. E1016, for example, is marketed as a water-based satin system with included aggregate and a tennis-court-like texture for barefoot and light-to-moderate pedestrian areas. Its manufacturer expressly says that it is not designed for regular wheeled, vehicle, or forklift traffic and warns that the finished system may still be slippery when wet or contaminated (E1016 product specifications).
For a garage or service area, do not extrapolate from a pedestrian product. Require explicit written suitability for cars, rubber wheels, or the relevant equipment. Watco, for example, markets its cited high-build system for interior industrial floors carrying foot and rubber-wheel traffic, subject to its preparation and curing conditions.
Forklift aisles, loading docks, and ramps may lead buyers to investigate higher-profile or full-broadcast systems, but category labels are only starting points. One vendor separates low-profile pedestrian, high-profile general-traffic, and ultra-profile heavy-traffic coatings. That classification does not establish suitability for a particular vehicle or floor without product-specific documentation (Garon product categories).
For powered traffic, ask the manufacturer or project specifier to address:
- Vehicle and wheel type
- Load and traffic frequency
- Turning, braking, and acceleration areas
- Expected contaminants
- Slope and drainage
- Cleaning machinery
- Aggregate grade and loading
- Topcoat product and thickness
- Inspection and localized repair procedures
Texture also creates a maintenance tradeoff. Mild texture may be more comfortable and easier to mop. A more pronounced profile may require brushes or powered equipment capable of reaching between aggregate peaks. The correct balance depends on what reaches the floor and whether the maintenance program can remove it.
Cleaning should therefore be part of the floor specification. Record the detergent, dilution, rinse procedure, brushes or scrubbers, spill-response method, and inspection frequency. A pronounced profile that cannot be kept clean may be a poor match for the facility.
Before committing to a large area, install a representative test patch with the proposed preparation method, primer, basecoat, aggregate loading, topcoat, and application tools. Evaluate appearance, cleaning effort, comfort where relevant, and adhesion. Wet-grip observations may help identify obvious concerns, but a site patch does not replace recognized slip testing, quantified moisture testing, or professional assessment where required.
Compare waterborne, high-build, and full-broadcast epoxy systems
No formulation is universally best. Shortlist systems by traffic, contaminants, environmental exposure, installer capability, and closure time.
| System class | Typical purchasing advantages | Main questions or limitations | What to verify |
|---|---|---|---|
| Waterborne integrated-aggregate epoxy | Mild, relatively uniform texture; some products make lower-odor and water-cleanup claims | Traffic may be restricted; product-specific moisture and cure limits still apply | Permitted traffic, preparation, wet test data, cleaner compatibility |
| High-build 100%-solids epoxy | Greater stated film build; some products are positioned for industrial or rubber-wheel traffic | Working windows may be short; preparation and outgassing control remain important | Required thickness, interior or exterior approval, vehicle and chemical documentation |
| Heavy textured epoxy | Deliberately coarse profile for specified service conditions | Cleaning and consistent application may be more demanding | Aggregate method, coverage, tested coating build, maintenance equipment |
| Full-broadcast aggregate system | Deliberate aggregate bed with a controllable topcoat | More preparation, labor, broadcast control, cleanup, and application skill | Aggregate grade and loading, topcoat thickness, pot life, complete-system test report |
AQUA TUFF is marketed as a two-component waterborne epoxy supplied with traction material. The seller also claims low odor, low volatile-organic-compound content, and soap-and-water cleanup during application. Those features may matter in an occupied or odor-sensitive setting, but they do not independently establish traffic capacity or wet-slip performance (AQUA TUFF product page).
E1016 represents another waterborne, integrated-aggregate direction: a satin pedestrian surface positioned for barefoot use rather than regular cars or forklifts. The distinction is important because “aggregate included” does not establish a heavy-duty traffic class.
Watco High Build Epoxy 100 Anti-Slip is described as a two-component, high-gloss, 100%-solids coating for interior industrial floors, including rubber-wheel traffic. Its stated build and traffic positioning may make it a more relevant candidate for some garages or industrial interiors than a pedestrian coating, but the current technical requirements still need verification.
ArmorPoxy markets a textured, two-component epoxy for concrete and steel in wet, high-traffic indoor and outdoor settings. The seller lists roller, squeegee, and trowel application and makes broad resistance and compliance claims. Those remain manufacturer claims unless the relevant technical data, test reports, and certification documents are supplied (ArmorPoxy product page).
A full-broadcast system provides a deliberate aggregate bed rather than sparse grit. Its suitability still depends on the documented system, but installation normally involves more steps: mechanical preparation where specified, rapid basecoat placement, uniform broadcasting, curing, removal of loose aggregate, inspection, and controlled topcoating. Short pot life and a large floor leave less time to correct sequencing or application problems.
A practical installer-selection framework is:
Potentially approachable for a prepared DIY installer
- Small, uncomplicated floor
- Concrete that meets the product’s moisture and condition requirements
- No persistent oil or incompatible existing coating
- Integrated-aggregate roller system
- Manageable product-specific working time
- Simple edges and no critical slope
- Low consequence if corrective work becomes necessary
Better referred to an experienced installer or project professional
- Uncertain slab history or moisture behavior
- Extensive grinding, shot blasting, or scarification
- Oil-contaminated concrete
- Moving cracks or complex joints
- Short working time or large batches
- Full aggregate broadcast
- Ramps, loading docks, forklift aisles, or commercial wet areas
- Tight shutdown and return-to-service deadlines
Obtain the current technical data sheet and safety data sheet before buying. Sales pages can omit substrate limits, dew-point rules, induction time, aggregate instructions, and test conditions. Where a sales page conflicts with another document, ask the manufacturer to identify the controlling document and revision in writing.
Concrete preparation checklist before coating
Coating selection cannot be separated from substrate acceptance. Oil in the pores, weak concrete, residual dust, incompatible sealer, or moisture outside the system’s limit can prevent satisfactory adhesion even when the finish coat is applied neatly.
Use this sequence:
- Inspect the slab. Map existing paint, curing compound, sealer, adhesive, oil, grease, tire contamination, laitance, dusty or weak concrete, efflorescence, cracks, joints, spalls, and visibly damp areas.
- Identify the selected system’s requirements. Confirm the required surface profile, moisture test and acceptance limit, slab age, compatible repair products, primer, temperature range, humidity limit, and dew-point margin.
- Remove incompatible material. Existing paint, sealers, curing compounds, or weak surface layers may require removal rather than ordinary cleaning.
- Clean and degrease. Remove loose debris and use cleaners compatible with both the contaminant and the proposed coating. Rinse and dry as directed.
- Repair defects. Use compatible materials for spalls, divots, and cracks classified as stable.
- Resolve moving features. Ask the system manufacturer or project professional how moving cracks and control joints must be treated. Do not assume they can be rigidly bridged.
- Create the specified profile. Use the required grinding, shot-blasting, scarification, or product-permitted etching procedure. Profile repairs as well as the original slab.
- Remove dust. Vacuum and inspect the surface using the method required for the system.
- Assess moisture. Note dampness and efflorescence, then perform the quantified test named by the coating manufacturer.
- Confirm environmental conditions. Check air, slab, and material temperatures as applicable, along with humidity, ventilation requirements, and condensation risk.
- Establish a hold point. Do not mix the coating until repairs, profile, cleanliness, moisture results, temperature, humidity, and dew-point conditions have been accepted.
Requirements vary by system. Resin Grip’s product-specific instructions call for removal of paint and sealers with a diamond grinder and specify a Concrete Surface Profile of CSP 2–3. The same guide directs new concrete to harden for 28 days before preparation. Those requirements illustrate why a named system’s instructions should not be generalized to unrelated coatings (Resin Grip preparation requirements).
Generic DIY guidance sometimes recommends acid etching. Some products permit it in defined circumstances, while other coating builds require grinding, scarification, or shot blasting. Etching should not be substituted merely because it is easier when the selected product requires mechanical profiling.
Cracks also require classification rather than indiscriminate filling. Product-specific guidance may allow static cracks and divots to be patched while requiring moving cracks or control joints to receive different treatment. Ask for a written joint detail when movement is possible.
There is no universal waiting period for new concrete. The cited product instructions range from at least two weeks for AQUA TUFF to 28 days for Watco and Resin Grip and 30 days for E1016 and the featured DRYLOK guidance. Use the requirement for the selected coating together with its moisture criteria, not the shortest interval found online (DRYLOK application guide).
A plastic sheet taped to the floor can serve as a basic screen for visible condensation, but it does not provide the quantified result required by many coating specifications. Treat it only as an early warning and use the manufacturer’s named moisture test and acceptance limit for the actual installation (basic preparation guidance).
Moisture, contamination, dust, and weak concrete should therefore be treated as substrate-acceptance issues rather than problems to conceal with a heavier finish coat.
Primer, aggregate, and topcoat decisions
“Does this floor need primer?” has no universal yes-or-no answer. The answer can change with concrete porosity, smooth or power-troweled surfaces, outgassing risk, exposed steel, repairs, remaining contamination, and the design of the coating system.
ArmorPoxy says primer may improve adhesion on marginally prepared surfaces and help protect exposed steel. Watco describes primer as optional but recommends it for several bare, porous, smooth, hard, or power-floated concrete conditions, including circumstances in which outgassing is a concern. These are product-specific statements, not rules for every epoxy.
Aggregate can enter the system in several ways:
- Included in the kit: Helps reproduce the manufacturer’s intended mixture, but the installer must confirm when to add it and how to maintain even suspension.
- Mixed into the coating: Convenient for rolling, although the application procedure must address settling and consistent distribution.
- Broadcast onto wet epoxy: Allows texture to be developed at the surface, but distribution, timing, and quantity must follow the system instructions.
- Broadcast to saturation: Forms a complete aggregate layer, followed by removal of loose material and application of a compatible topcoat.
Do not use a universal aggregate quantity. Resin Grip lists a typical full-saturation loading of 1.2–1.5 kg/m², but that value belongs to its named aggregate and basecoat design rather than to epoxy coatings generally.
The topcoat must retain the aggregate without burying the intended profile. More resin is not automatically better if it changes the texture represented in the slip documentation. Follow the specified film thickness and verify that the basecoat, aggregate, loading, and topcoat correspond to the tested system.
Interior and exterior selection must also be separated. Some products are marketed for both environments, while Watco’s cited High Build Epoxy 100 Anti-Slip is specified for interior use only. For exterior work, require written suitability for the complete system rather than assuming that texture makes an interior coating weather-compatible.
E1016’s manufacturer warns that the epoxy yellows under ultraviolet exposure and suggests a compatible aliphatic urethane topcoat where improved UV and color stability are needed. That topcoat can also change gloss, texture, chemical behavior, recoat requirements, and cure scheduling, so it must be evaluated as part of the complete system.
Confirm the full stack in writing:
- Repair material
- Moisture-control layer, if required
- Primer
- Epoxy basecoat
- Aggregate mineral, size, grade, and loading
- Intermediate coat, if any
- Topcoat and required thickness
- Recoat window between every layer
- Interior or exterior approval
- Cleaning chemicals
- Inspection and repair procedure
Do not mix products from unrelated manufacturers without written compatibility confirmation.
Coverage, quantity, and realistic cost per square foot
Container price is a poor basis for comparison. A thin waterborne coating, a high-build 100%-solids epoxy, and a full-broadcast system with separate resin layers do not perform the same role. Their advertised coverage cannot be compared without film thickness, coat count, substrate condition, and auxiliary materials.
Use this calculation framework:
- Measure the gross floor area.
- Subtract only areas that will definitely remain uncoated.
- Calculate each coat separately.
- Divide each coat’s area by the manufacturer’s stated coverage at the required film thickness.
- Adjust for the product’s permitted allowance for rough concrete, vertical returns, edges, repairs, and textured surfaces.
- Round up to whole packages while respecting fixed mix ratios and package life.
- Calculate primer, basecoat, aggregate, intermediate coat, and topcoat separately.
- Add repairs, preparation equipment, dust extraction, mixing tools, applicators, personal protective equipment, labor, waste handling, and downtime.
For a uniform coating:
Required quantity = net floor area × number of coats ÷ stated coverage at required thickness
For a broadcast system, calculate the basecoat by its required thickness, aggregate by the named system’s mass-per-area instruction, and topcoat by its specified coverage over the textured layer. Do not collapse those components into one smooth-floor formula.
Published coverage figures show why context matters. AQUA TUFF states approximately 250 ft² per gallon kit for colors (AQUA TUFF coverage). Watco lists approximately 133 ft² per gallon at 12 mils or 100 ft² per gallon at 16 mils (Watco specifications). Resin Grip lists approximately 4 m²/L at 250 microns for its basecoat. These figures describe different products, thicknesses, and system roles rather than directly comparable yields.
Some listings are internally inconsistent. ArmorPoxy gives one coverage range in its description and another in its specifications. E1016’s specification table lists 114–160 ft² per gallon, while its FAQ gives a substantially higher range (E1016 coverage and specifications). Do not choose whichever figure produces the lowest shopping-cart total.
Request a current written technical data sheet. If the substrate is rough and no project-specific consumption test is available, use the lower defensible coverage when budgeting. Do not add an unsupported universal waste percentage; use a contingency accepted by the manufacturer and suited to the floor geometry and application method.
Use a comparison table such as this:
| Product or system | Package size and mix ratio | Coverage at stated thickness | Required coats | Primer, aggregate, and topcoat | Traffic class | Conflicts or unanswered questions |
|---|---|---|---|---|---|---|
| Candidate A | ||||||
| Candidate B | ||||||
| Candidate C |
Then convert each quote to installed cost per square foot:
Installed cost per ft² = materials + preparation + labor + equipment + downtime ÷ net coated area
Include:
- Surface preparation and dust control
- Crack, joint, and spall work
- Moisture testing or mitigation
- Primer and repair materials
- Basecoat, aggregate, and topcoat
- Tools and protective equipment
- Skilled labor
- Waste handling
- Lost production or alternative access
- Future inspection and localized repair requirements
A lower-priced kit can become the more expensive installation if it requires extra coats, has lower defensible coverage, demands more preparation, or extends the closure period.
Mixing, application, downtime, and jobsite safety
Two common workflows illustrate the difference between an integrated-aggregate coating and a full-broadcast system.
Integrated-aggregate workflow
- Accept the prepared substrate.
- Condition materials to the permitted temperature.
- Premix components if instructed.
- Combine resin and hardener at the exact ratio.
- Add the supplied aggregate at the specified stage.
- Mix with the required equipment and for the required time.
- Transfer or “box” the material if directed.
- Apply at the specified spread rate with the permitted roller, brush, or squeegee.
- Maintain consistent aggregate distribution.
- Protect the floor through the recoat and traffic-return milestones.
Full-broadcast workflow
- Accept the prepared substrate.
- Mix only a manageable basecoat batch.
- Place the basecoat at the required thickness.
- Broadcast aggregate immediately and uniformly.
- Continue to the specified loading or visual saturation.
- Allow the layer to cure.
- Sweep, scrape, and vacuum loose aggregate as directed.
- Inspect and correct deficient areas only by an approved method.
- Apply the specified topcoat at controlled thickness.
- Keep the area isolated through every return-to-service stage.
Pot life is the usable window after components are mixed. It is not necessarily the amount of time a large batch can remain in a container and still apply normally. Resin Grip provides a product-specific example: its listed pot life changes from 40 minutes at 15°C to 20 minutes at 25°C and 10 minutes at 35°C.
Plan batches backward from the achievable application rate. Stage aggregate, tools, edges, exits, and team responsibilities before mixing. Do not thin a product, split kits by eye, or continue using mixed material beyond the manufacturer’s stated working window.
Separate downtime into distinct milestones:
- Recoat: When another compatible layer can be applied under the stated conditions
- Touch-dry: When the surface no longer feels wet
- Light foot traffic: Limited pedestrian access
- Vehicle or heavy load: Cars, forklifts, racks, equipment, or concentrated loads
- Full cure or hardness: The final stated cure milestone
These times are product-specific. ArmorPoxy states light foot traffic after 24 hours and vehicle use after 72 hours at 75°F (ArmorPoxy cure schedule). Watco states 10 hours for light foot traffic and 48–72 hours for vehicle traffic under its specified conditions. Its page also lists a 60-minute pot life in one place and a 20-minute working time in another, so the controlling document should be confirmed before scheduling the closure (Watco application details).
Temperature, slab temperature, humidity, condensation risk, batch size, ventilation, and film thickness may affect flow, recoat timing, and cure. Confirm whether each stated limit applies to the air, slab, material, or all three.
Read the current safety data sheet before opening any product. Use the gloves, eye protection, protective clothing, ventilation, and respiratory protection specified for the actual components and application conditions. Resin Grip’s guide identifies its Part B as Class 8 corrosive and directs installers to use protective clothing, goggles, and gloves. Keep washing facilities available, isolate the work area, and follow applicable disposal instructions.
Keep occupants, pets, customers, vehicles, and equipment off the floor until the current product instructions permit the relevant type of access. Touch-dry does not mean vehicle-ready, and light-traffic permission does not mean full cure.
Verify slip, chemical, and compliance claims before purchase
“Non-slip” is a marketing description, not a complete performance specification. Request documentation for the exact installed system—not a different aggregate, an unsealed basecoat, or an alternative topcoat.
Ask for:
- Named slip-test method and edition
- Measured wet and dry results
- Liquid or contaminant used in wet testing
- Slope or test geometry where relevant
- Footwear, slider, or contact material
- Aggregate mineral, particle size, and grade
- Aggregate loading or broadcast method
- Basecoat and topcoat products
- Topcoat thickness
- Cure age at testing
- Report date
- Laboratory or testing body
- Exact substrate and installed coating build
- Wear conditioning or aging performed before testing
If a contract, insurer, workplace rule, accessibility requirement, or local code applies, ask the responsible authority or project professional which test and acceptance criterion govern. A generic coefficient, dry-only result, or unrelated standard should not be assumed to satisfy the project.
Marketing language alone does not establish ADA, OSHA, military, CFIA, USDA, FDA, LEED, or local-code compliance. ArmorPoxy, for example, advertises ADA, OSHA, and military-specification claims, but the supplied product page does not include the supporting reports or numerical slip results. Those claims remain unverified unless the applicable documents are produced.
Chemical resistance requires similar scrutiny. Match the coating to:
- Exact substance
- Concentration
- Liquid temperature
- Floor and ambient temperature
- Exposure frequency
- Splash, intermittent spill, immersion, or vapor exposure
- Dwell time before cleanup
- Cleaner and rinse procedure
- Acceptable changes in color, gloss, hardness, or structure
A phrase such as “resistant to many solvents” is insufficient for specification because it does not identify the chemicals, concentrations, temperatures, or exposure periods involved.
Before ordering, reconcile:
- Sales page
- Current technical data sheet
- Current safety data sheet
- Written manufacturer guidance for the project
- Third-party test report or certification where required
Red flags include:
- No named slip-test method
- Results for a different texture or coating build
- Dry-only results for a floor expected to become wet
- No tested contaminant identified
- Aggregate loading omitted
- Topcoat product or thickness unspecified
- Compliance logos or claims without supporting reports
- Conflicting coverage, cure, temperature, or working-time information
- Broad chemical claims without concentration and dwell time
- Traffic descriptions that do not identify relevant wheels or conditions
Product specifications can change, and code or workplace requirements vary by location and use.
Frequently asked questions
Can non-slip epoxy coating be used on outdoor concrete?
Yes, but only when the complete system is intended for exterior service. Verify the primer, epoxy base, aggregate, topcoat, and repair materials for the expected sunlight, rain, standing water, and temperature conditions. Do not assume an interior coating becomes suitable outdoors merely because it has a textured finish.
Some coatings are marketed for both indoor and outdoor use, while others are expressly interior-only. Standard epoxy may also yellow under ultraviolet exposure. If a compatible UV-stable topcoat is proposed, confirm that it preserves the intended texture and that any slip documentation covers the completed system.
How long should new concrete cure before epoxy is applied?
Use the selected manufacturer’s current requirement. The cited products do not support one universal waiting period, and slab age alone does not establish readiness.
The concrete must also meet the coating’s requirements for moisture, profile, strength, cleanliness, and environmental conditions. A slab can reach the stated age and remain unsuitable because of moisture transmission, curing compounds, laitance, contamination, or weak surface material.
Is non-slip epoxy suitable for cars and forklifts?
Some systems are marketed for wheeled traffic, while others are expressly limited to pedestrians. Require written confirmation for the exact vehicle and coating build.
For cars, verify rubber-wheel suitability, expected automotive-fluid exposure, and vehicle return time. For forklifts, provide the manufacturer or project specifier with the wheel material, loading, traffic frequency, turning and braking conditions, cleaning equipment, and proposed aggregate and topcoat build. “Heavy duty” alone does not establish forklift suitability.
Does anti-slip aggregate make epoxy difficult to clean?
It can make cleaning more demanding. As the profile becomes more pronounced, mops or brushes may not reach every recess, and contaminants may remain unless the maintenance equipment matches the texture.
Evaluate a representative test patch with the actual detergent, rinse method, mop, brush, or scrubber. Also verify cleaner compatibility because retained detergent or rinse residue can alter traction.
Do I need to grind concrete before applying non-slip epoxy?
Often, but not universally. The selected product specification governs. Some systems require diamond grinding, shot blasting, or scarification, while others permit etching under defined conditions.
Grinding may be specified to remove coatings, sealers, laitance, weak material, or surface irregularities and to create a required mechanical profile. Etching is not an automatic substitute, particularly over painted or sealed concrete. Whatever preparation method is permitted, finish by removing dust and confirming that the profile, cleanliness, moisture results, and environmental conditions meet the coating requirements.
A reliable shortlist starts with the service conditions: traffic, contaminants, slope, drainage, cleaning method, sunlight, and acceptable downtime. Select a compatible texture and resin system, confirm the substrate profile and moisture limits, calculate the full installed quantity and cost, and obtain current technical, safety, chemical-resistance, and slip-test documents.
The right purchase is the documented complete system that fits the floor—not the container with the strongest “non-slip” label.