 MortarDesk
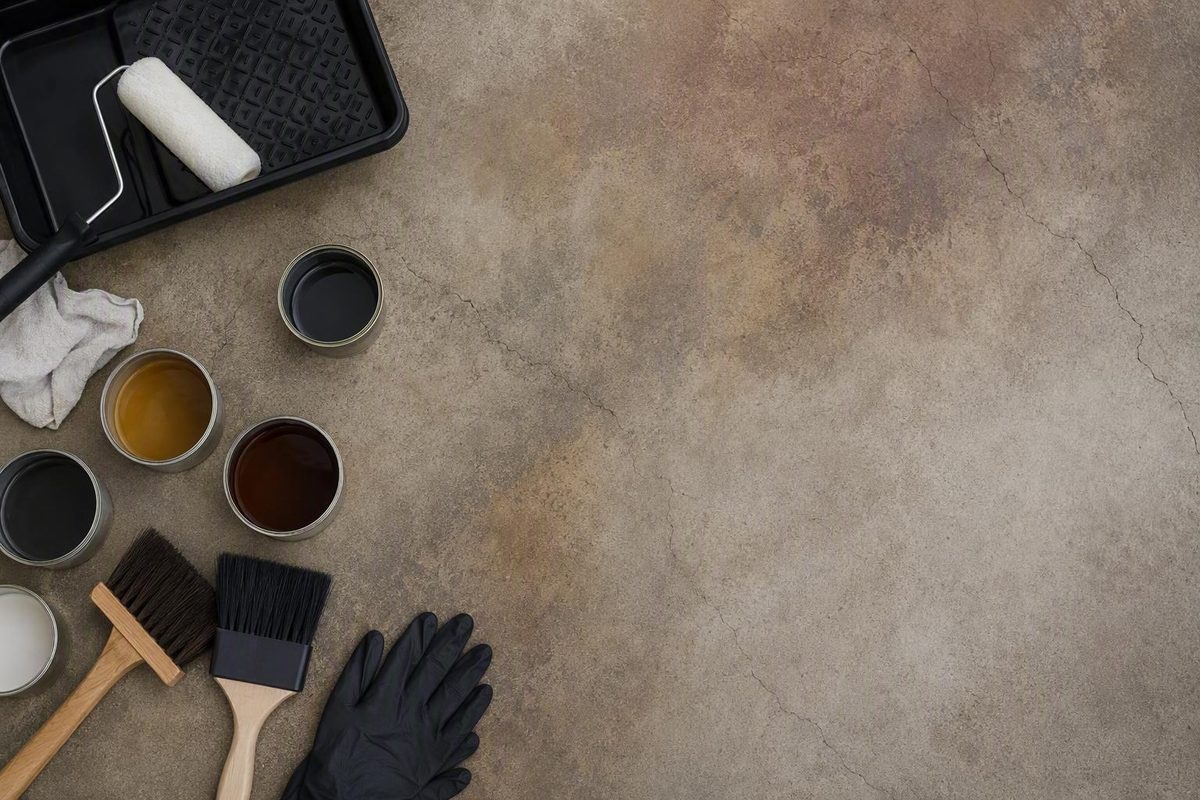
Stained concrete basement flooring can turn an exposed slab into a finished surface while preserving the concrete’s natural character. That advantage is also its main limitation: stain tends to reveal the floor you already have. Cracks, patches, adhesive shadows, rough texture, discoloration, and absorption differences may remain visible—or become more noticeable.
Color selection should therefore come late in the decision. First determine whether the basement has active water problems, whether the slab meets the moisture limits of the proposed finish, and whether old coatings or contaminants can be removed. Then test the complete color-and-sealer system on the actual floor.
This is general reference information, not individual contracting, waterproofing, structural, or engineering advice. Mortar Desk is a building-material reference site, not a contractor or engineering adviser. Structural concerns and unresolved water entry require appropriately qualified local help.
What stained concrete basement flooring is—and where it fits
“Concrete stain” is a broad retail category, not one uniform chemistry. Products sold for indoor concrete include reactive acid stains, non-reactive water-based stains, concrete dyes, tinted or colored sealers, and solid-color products that behave more like coatings. Their color mechanisms, preparation requirements, hazards, and finished appearances differ.
The principal categories are:
- Acid-reactive stain: Reacts with components in the concrete and usually creates translucent, mottled, slab-dependent color.
- Water-based stain: Deposits or bonds color without the mineral reaction associated with acid stain. Depending on the product, it may be translucent, semi-transparent, or comparatively opaque.
- Concrete dye: Adds color without an acid reaction. Dye chemistry and carrier vary; some systems use acetone.
- Colored sealer: Combines topical color with a protective film and therefore depends directly on adhesion.
- Solid or opaque concrete color: Produces a more uniform, paint-like appearance and conceals more variation, but should not be confused with translucent stain.
Product manufacturers distinguish these systems by whether the intended result is natural variation, uniform color, or a marbled effect and by whether neutralization and sealing are required. Those distinctions are useful, but ease-of-use and performance descriptions remain product-specific vendor claims, as shown in this comparison of indoor concrete color systems.
Stain changes color, not surface geometry
A translucent stain preserves the slab’s texture and much of its visual history. It does not create the smooth, continuous protective film associated with epoxy, and it does not provide the reliably opaque coverage of floor paint. If the slab is rough, patched, or visibly repaired before staining, it will generally remain so afterward.
That can be attractive in a family room, office, bar, or entertainment area where natural variation is part of the design. It is less suitable when the owner expects a perfectly uniform floor or wants extensive repairs to disappear.
Room use should guide the choice:
- Family room or office: Stain may work where a natural appearance is welcome and rugs can be used selectively.
- Home gym: Surface smoothness, joints, transitions, and equipment placement matter. Stain will not correct roughness.
- Laundry or utility area: Moisture history, spills, cleaning products, and equipment movement should inform the sealer choice.
- Workshop: Abrasion, dropped tools, oils, and chemicals may justify a more protective coating if the slab meets that coating’s moisture and adhesion requirements.
- Storage area: A simple system may suffice, but rolling loads, shelving, and the possibility of future water exposure still matter.
Color and protection are separate decisions
The material producing the color and the layer protecting it may wear differently. Reactive color can remain in the concrete while a topical clear sealer scratches, dulls, clouds, whitens, or loses adhesion. Non-reactive stains and colored sealers may have additional failure modes because more of their color depends on a surface-applied component.
This distinction prevents a common misunderstanding: a claim that a color treatment will not peel does not mean the finished floor is peel-proof. The complete floor includes the slab, color treatment, sealer, and sometimes wax. Each component has separate compatibility and maintenance requirements.
Exposed concrete is also hard and can feel colder than carpet. Rugs, furniture pads, or activity mats can improve comfort in selected areas, but the supplied evidence does not support precise thermal or acoustic claims for every basement assembly.
The go-or-no-go slab check: moisture and structural warning signs
Do not begin by asking which stain color looks best. Begin by asking whether the slab should receive a decorative finish at all.
Step 1: Look for active water entry
Inspect the floor and wall perimeter, preferably after wet weather. Look for:
- Active leaks or seepage
- Persistently damp areas
- Water entering at cracks or wall-floor joints
- Recurrent puddling
- A history of flooding
- Dampness associated with an unresolved drainage problem
- White deposits that repeatedly return after cleaning
Active water entry is a stop sign. Stain, sealer, paint, and epoxy cannot diagnose or repair the source of basement water. Resolve the underlying condition before covering the evidence with a decorative finish.
Step 2: Recognize efflorescence
Efflorescence is salt residue associated with moisture moving through concrete and evaporating at or near the surface. It often appears as white powder. Moisture and salts may also contribute to white or cloudy areas beneath certain stains or sealers.
Efflorescence is therefore not merely dirt to sweep away. Clean it for assessment, but investigate why it returns. Moisture-related symptoms in decorative concrete can include white residue, clouding, blistering, peeling, and color changes, while the acceptable moisture condition depends on the exact finish manufacturer’s limits (decorative-concrete moisture guidance).
Step 3: Use a plastic sheet only as a warning screen
A practical preliminary check is to tape a clear plastic sheet tightly to the slab and leave it undisturbed for at least 48 hours. Seal the edges so room air cannot circulate freely underneath. Visible condensation or darkening beneath the sheet is a warning that further evaluation is needed (basement slab preparation guide).
This is not definitive approval. The sheet tests a limited location under one set of indoor and outdoor conditions. It does not prove that the entire floor meets the moisture tolerance of a particular stain and sealer, nor does it fully characterize moisture within or moving through the slab.
Step 4: Match testing to the proposed system
If the basement has a moisture history, condensation under plastic, recurring efflorescence, persistent dampness, or a high-consequence installation, obtain an appropriate quantitative evaluation. The relevant result is not simply “dry” or “wet.” It must be compared with the acceptance criteria for the exact stain, primer, repair material, and sealer.
There is no responsible universal moisture threshold for every basement or finish. Different products have different tolerances, and the most restrictive component may control. Obtain current technical documentation and determine:
- Which moisture measurement the manufacturer accepts
- What limit applies to the exact product
- Whether that limit applies to the stain, sealer, or complete system
- What preparation and environmental conditions the limit assumes
- How test locations and results should be documented
- Whether patches, resurfacing products, or leveling materials impose separate limits
Do not respond to a failed moisture check by assuming a “breathable” sealer or heavy epoxy will correct the source. Vapor permeability may influence finish selection, but it does not repair seepage, drainage defects, or other sources of water.
Moisture-related symptoms to anticipate
Excess moisture may affect different systems in different ways:
- Reactive-stain color may become lighter, uneven, or shifted.
- Non-reactive color may develop dark spots, bubbles, blisters, flaking, or peeling.
- Efflorescence may emerge as powder or become visible beneath a finish.
- A sealer may turn cloudy, white, or gray.
- Adhesion may weaken.
- A topical layer may bubble, crack, chip, flake, or delaminate.
These symptoms are not self-diagnosing. Similar defects can result from residue, contamination, poor preparation, incompatible products, premature recoating, or application outside specified conditions.
Step 5: Stop for structural warning signs
Those conditions call for evaluation by an appropriately qualified local professional before grinding, filling, staining, or coating. A commercial basement-floor guide similarly identifies heaving and bowed walls as warning signs requiring further investigation rather than cosmetic treatment (slab-warning discussion).
The decision path is straightforward:
- Proceed to surface assessment when there is no active seepage or unresolved structural warning sign and the proposed system’s moisture requirements are met.
- Pause for further testing or moisture investigation when condensation, recurring efflorescence, persistent dampness, or uncertain moisture conditions remain.
- Stop cosmetic work and seek qualified evaluation when the slab is heaving, cracks appear active, or walls are bowed.
Acid stain, water-based stain, dye, or colored sealer?
Choose a coloring system according to the desired appearance, slab condition, available ventilation, skill level, and required cleanup—not according to a claim that one category is the only “real” stain.
| System | Color mechanism | Likely appearance | Predictability | Application and residue removal | Ventilation concerns | Sealing | Main limitations |
|---|---|---|---|---|---|---|---|
| Acid-reactive stain | Reacts with components in concrete | Translucent, mottled, variegated | Low to moderate; slab-dependent | More involved; commonly includes reaction time, neutralization, residue removal, and drying | Product-specific chemical and vapor precautions | Normally sealed | Repairs and dense areas may react differently; exact colors are difficult to predict |
| Water-based stain | Non-reactive color deposited on or bonded to the surface | Translucent to comparatively uniform, depending on product | Generally more predictable than acid stain | Often simpler cleanup; coat and drying rules vary | Frequently marketed as lower odor, but the label and safety data control | Commonly sealed | Can reveal absorption differences; some products rely substantially on surface adhesion |
| Concrete dye | Non-reactive colorant | Often vivid or controllable; product-dependent | Usually more controllable than reactive stain | Often applied in thin, controlled passes | Carrier chemistry is critical; acetone systems require strict vapor and ignition precautions | Normally protected by a compatible finish | May highlight porosity differences; solvent hazards can be substantial |
| Colored acrylic sealer | Topical film provides color and protection | More uniform than many translucent stains | Relatively predictable if adhesion is uniform | Applied as a coating system | Water- or solvent-based hazards vary | Color and sealer are combined | Moisture and adhesion problems can affect both color and protection |
| Solid or opaque concrete color | Surface-applied opaque color | Paint-like and comparatively uniform | Higher visual predictability | Coating-style preparation and application | Product-specific | May be self-sealing or require a topcoat | Conceals more variation but can wear or lose adhesion as a topical system |
Acid-reactive stain
Acid stain is selected primarily for variation. The result depends on the concrete’s composition, age, finishing history, porosity, repairs, existing color, and exposure. Two adjacent areas can react differently even when the same product and technique are used.
It is also a process rather than a single color application. The installer must account for chemical handling, reaction, neutralization where directed, repeated residue removal, drying, and compatible sealing. It is a poor choice for anyone who requires an exact match to a printed color sample.
Water-based stain
Water-based stains are commonly positioned by product guides as easier to apply indoors, lower in odor, and more predictable than acid-reactive products. Those descriptions help compare vendor product lines, but they do not establish that every water-based product is harmless or suitable for every basement.
Some water-based stains are translucent and preserve substantial slab variation. Others produce stronger or more uniform color. Read the product’s transparency description rather than relying on the word “stain.”
Concrete dye
Dye is a separate coloring option, not acid stain under another name. Its appearance and application depend on the carrier and formulation.
Acetone-based dye requires particular care because acetone is highly flammable. Ventilation and ignition control must follow the current product label and safety data sheet; a manufacturer’s basement guide specifically warns about those precautions for acetone dye (dye and sealer comparison).
Colored sealer
A colored acrylic sealer combines color and topical protection. That can simplify the product stack, but it changes the character of the finish. Color continuity and appearance rely on a film adhering to the slab, so moisture, contamination, wear, and future recoating remain central considerations.
Before buying any system, obtain the current:
- Technical data sheet
- Application instructions
- Safety data sheet
- Surface-preparation requirements
- Moisture acceptance criteria
- List of compatible primers and sealers
- Recoat and cure conditions
- Indoor ventilation requirements
- Cleaning and maintenance instructions
Some answers may require direct clarification from the manufacturer. Compatibility should be explicit, not inferred because two products are sold in the same aisle.
What stain will reveal: porosity, patches, cracks, glue, and old coatings
Translucent stain adds color. It does not level the slab, fill low spots, smooth rough aggregate, or reliably hide cracks, repairs, adhesive shadows, discoloration, and uneven absorption.
Expect repaired areas to look different
A repair may be structurally and cosmetically sound yet absorb non-reactive stain differently or react weakly with acid stain. Sanding a patch flush can improve the physical transition without guaranteeing a color match.
Decide before treating the whole room whether that variation is acceptable. If it is not, consider a more opaque coating or a new decorative topping.
Identify everything that can interfere
Before staining, locate and remove incompatible or appearance-altering materials, including:
- Floor paint
- Old clear sealer
- Carpet or tile adhesive
- Wax
- Curing compound
- Grease and oil
- Drywall mud
- Construction residue
- Embedded dirt
- Loose or dusty concrete
- Cleaning-product residue
Use a removal method appropriate to both the contaminant and the proposed finish. Do not assume a slab is bare merely because it looks gray.
Use water to check absorption
After cleaning and rinsing, place clean water on several representative areas. Include the room center, perimeter, discolored locations, patches, and areas where coverings were removed.
- Prompt, relatively even darkening or soaking suggests that the surface is absorbent.
- Beading may indicate sealer, wax, curing compound, contamination, or dense concrete.
- Very slow or uneven absorption suggests that additional stripping, cleaning, or profiling may be necessary.
This is a comparative check, not a universal timed test. Repeat it after further preparation.
Match preparation to the problem
Preparation should create a clean, sound, compatible, absorbent surface without unnecessarily damaging the concrete.
- Routine cleaning: Appropriate when the slab is genuinely bare, absorbent, sound, and free of oil and construction residue.
- Stripping: Needed where paint, sealer, wax, or adhesive remains. The stripper and cleanup process must be compatible with the proposed stain.
- Profiling or sanding: May help with dense surfaces, isolated patches, or light treatments that inhibit absorption.
- Mechanical grinding: May be necessary for stubborn coatings, severe contamination, very smooth concrete, or widespread adhesive.
- Resurfacing or microtopping: Worth considering when the goal is to mask extensive repairs, create a more uniform decorative substrate, or improve a surface that stain alone cannot correct.
A microtopping creates a new bonded decorative surface over the existing slab rather than merely coloring the original concrete. Manufacturer literature presents it as an option for resurfacing damaged floors, although suitability still depends on substrate stability, preparation, moisture, and system instructions (decorative concrete options).
Both preparation extremes create risk. Insufficient work can lead to weak color, beading, uneven absorption, or poor sealer adhesion.
Make the test area representative
A useful test is not a tiny spot hidden in an unusually clean corner. Where possible, it should include:
- Original clean concrete
- A representative patch
- A discolored area
- An area that previously held adhesive or coating
- The planned application method
- The intended number of applications
- All required neutralizing and cleaning steps
- The proposed sealer at the intended sheen
Evaluate the sample under the lighting the finished room will use. A stain can look substantially different under warm artificial light than beside a temporary work lamp.
If the representative test is unacceptable, stop and reconsider the system. Do not assume the full floor will become more uniform.
The complete project sequence: assess, prepare, test, stain, and inspect
The reliable order of work is:
- Inspect for active water and structural warning signs.
- Perform suitable moisture screening or testing.
- Compare the results with the exact system’s limits.
- Remove incompatible coatings, adhesive, wax, and contamination.
- Clean and rinse the slab.
- Repair acceptable cracks and surface defects.
- Profile or grind where necessary.
- Remove dust and residue.
- Repeat the water-absorption check.
- Prepare a representative test area.
- Apply the color treatment.
- Neutralize and remove residue if required.
- Allow the floor to dry or cure as directed.
- Inspect the color and surface.
- Apply a compatible sealer.
- Keep the floor out of service until the complete system has hardened as directed.
Allow new concrete to become eligible for finishing
General guides commonly use roughly four weeks as a planning reference before staining new concrete, but the exact stain, repair products, sealer, slab conditions, and project specifications control (concrete-staining guide).
Curing age and finish readiness are not the same. A slab may be old enough to finish yet still fail the selected system’s moisture requirements.
Test color, technique, and coat buildup
Color charts cannot account for:
- Cement and aggregate composition
- Existing discoloration
- Patches and repair materials
- Surface density
- Prior cleaning or grinding
- Moisture
- Application rate
- Tool pattern
- Number of applications
- Sealer color enhancement and sheen
Apply the complete system to the test area. A clear sealer may deepen the color or change how variation reads, so judging the stain alone is incomplete.
Choose tools according to the product
Common application tools include sprayers, rollers, brushes, and sponges:
- Sprayer: Can distribute thin applications and create diffuse variation, but only when approved for the product and chemistry.
- Roller: Efficient across open areas but capable of leaving lap, direction, or pressure patterns.
- Brush: Useful around edges and fixed objects; brush marks may remain visible through translucent products.
- Sponge: Can create a mottled hand-applied effect, although consistency depends heavily on technique.
No tool is universally best. Follow the label, divide the room into manageable sections, and avoid letting an edge dry where the next section must blend into it. Use thin, controlled applications where directed and observe specified drying periods between coats.
Additional applications can deepen color, but translucent stain is difficult to lighten or reverse. In one documented homeowner project, applying a darker semi-transparent stain over an existing lighter stained floor produced a streaky result rather than an even correction; the authors eventually used opaque floor paint. That anecdote does not predict every project, but it shows why darker restaining should not be treated as a reliable fix (documented restaining result).
Acid stain adds several checkpoints
For acid-reactive stain, allow the reaction specified by the current instructions. Then neutralize if directed and remove residue repeatedly. Do not rely on appearance alone: residue left on the surface may interfere with the sealer.
After cleaning, allow the slab to become sufficiently dry for the next component. Reaction, rinsing, dryness, and waiting requirements vary by product and site conditions.
Establish a pre-sealer approval gate
Do not seal merely because color application is complete. Before opening the sealer, confirm that:
- The color is acceptable across the entire room.
- Dark and light variation is within expectations.
- There are no unacceptable roller marks, spray patterns, or lap lines.
- Acid-stain residue has been completely removed where applicable.
- Cleaning residue is gone.
- The floor meets the sealer’s dryness and moisture requirements.
- The stain and sealer are documented as compatible.
- The proposed sheen is acceptable.
- Any specified traction treatment is approved for that sealer.
Sealing can deepen color, reduce porosity, and make later correction much harder. Inspect from multiple angles and under the room’s intended lighting.
Do not build the schedule around a generic “weekend project” promise. Add together the requirements for moisture evaluation, stripping, repairs, profiling, staining, neutralization, drying, sealing, and final hardening. Temperature, humidity, air movement, and limited basement ventilation can extend the work.
Sealer selection and basement application safety
A sealer is a separate system component. It may enhance color, reduce the penetration of dirt and routine spills, and protect the stained surface from ordinary wear. It also becomes the maintainable layer most directly exposed to foot traffic, equipment, cleaners, and moisture.
Even when reactive color remains in the concrete, the sealer can scratch, scuff, dull, cloud, whiten, bubble, peel, or require renewal.
Sealer-selection checklist
Before choosing a finish, confirm:
- Explicit stain compatibility: Is the sealer approved over the exact color treatment?
- Moisture tolerance: Does the tested slab meet the manufacturer’s stated limit?
- Vapor permeability: Is the product appropriate for the assessed slab conditions?
- Chemistry: Is it water-based or solvent-based, and what precautions does that require indoors?
- Odor and ventilation: Can the basement be ventilated as directed?
- Sheen: How will matte, satin, gloss, or wet-look finishes affect appearance?
- Traffic: Is the product intended for the room’s foot traffic, rolling furniture, or equipment?
- Spill exposure: What cleaners, laundry products, oils, or workshop substances may contact it?
- Traction: Does the finished surface meet the room’s needs, and does the manufacturer offer an approved traction option?
- Repairability: Can local wear be renewed, or must the entire floor be recoated?
- Future maintenance: Does the system permit wax, and under what conditions?
Some commercial basement guides favor water-based or more vapor-permeable sealers, but that is a product-guide preference rather than a universal rule. The selected sealer must match the tested slab, the stain, and the complete manufacturer instructions.
Wax is similarly conditional. Some systems permit a compatible sacrificial wax to take routine wear. A commercial basement-floor guide advises against waxing moisture-affected slabs because another layer may impede drying or complicate the finish (moisture and wax cautions). Do not add wax unless the system permits it and the assessed slab conditions support it.
Do not add generic grit to an unverified sealer. If traction is a concern for the intended room, use only a particle type, size, loading, and application method approved for that finish.
Basement application safety plan
- Isolate the work area and protect adjacent surfaces.
- Use the personal protective equipment specified by the current label and safety data sheet.
- Provide the ventilation required for the exact cleaner, stain, dye, or sealer.
- Keep occupants away while the product instructions require restricted access.
- Where flammable vapors are possible, follow the product’s ignition-control instructions.
- Do not combine cleaning, neutralizing, staining, or coating chemicals unless the instructions explicitly require it.
General staining guidance calls for protective equipment and ventilation when using staining chemicals, but the exact equipment and airflow requirements remain product-specific (application safety guidance).
Acid products require chemical-specific handling. Solvent-containing sealers require precautions appropriate to their formulation. Broad descriptions such as “low odor,” “low VOC,” “safe,” or “eco-friendly” do not establish that a particular product is harmless; the current label and safety data sheet control.
Stain vs. epoxy, paint, and resurfacing—and what to budget
The right system depends on the slab, desired appearance, room use, preparation burden, moisture risk, and tolerance for future maintenance.
| Option | Appearance | What it does well | Main constraints | Consider it when |
|---|---|---|---|---|
| Stained concrete with sealer | Preserves slab texture and variation; sheen comes largely from the sealer | Adds decorative color without hiding the concrete | Does not smooth roughness or conceal extensive repairs; the sealer still wears | The slab is visually acceptable and a natural, varied finish is desired |
| Ordinary floor paint | Opaque, comparatively uniform color | Provides a simple visual transformation and conceals color variation | Topical adhesion is critical; scratching, wear, or peeling may occur | A paint-like appearance is desired and future recoating is acceptable |
| Epoxy coating | Usually smoother and more uniform; often glossy | Provides a more substantial protective surface for abrasion or chemical exposure, depending on product | Preparation is intensive; moisture or poor adhesion can cause failure | A dry, well-prepared workshop or utility space needs greater surface protection |
| Microtopping or resurfacing | Creates a new decorative surface | Can mask widespread repairs and establish a more uniform substrate | Adds material, labor, preparation, and compatibility requirements | The existing slab is too visually inconsistent or rough for stain alone |
Stain versus epoxy
Stain may suit family rooms, offices, entertainment areas, and other spaces where visible concrete character is desirable. Epoxy may better suit workshops or utility rooms exposed to demanding abrasion or chemical contact, provided the slab satisfies the coating’s moisture and adhesion criteria.
Epoxy should not be treated as a cure for a wet basement. It is a relatively low-permeability coating, and slab moisture above the product’s limits can contribute to bubbling, blistering, peeling, or delamination. A manufacturer’s stain-versus-epoxy comparison similarly treats the choice as room-dependent and makes epoxy performance conditional on a sufficiently dry, properly prepared slab (basement stain and epoxy comparison).
For a gym, office chair, or room with rolling storage, look beyond chemical durability. A stained rough slab remains rough. Surface smoothness, joints, transitions, equipment pads, and localized loads may matter more than color.
Treat paint reports as anecdotes
Homeowner reports about ordinary paint and epoxy conflict. Some describe periodic scratching and repainting; others report epoxy peeling where preparation or adhesion was poor. A community discussion contains both kinds of experiences, so it is useful as anecdotal context rather than a controlled comparison (homeowner paint and epoxy discussion).
The practical lesson is not that one anecdote proves a category superior. It is that topical systems depend on substrate moisture, surface soundness, cleanliness, profiling, compatibility, and correct application.
Build a process-based budget
Avoid estimating the project from the stain container alone. Account for:
- Moisture screening or professional evaluation
- Cleaner and degreaser
- Efflorescence assessment and cleaning
- Paint or sealer stripper
- Adhesive removal
- Profiling or grinding equipment
- Dust control
- Crack and patch materials
- Patch-finishing tools
- Stain or dye
- Neutralizer where required
- Compatible sealer
- Trial kits or sample materials
- Sprayers, rollers, brushes, sponges, trays, and extension poles
- Protective sheeting and masking materials
- Label-directed protective equipment
- Ventilation equipment
- Manufacturer-approved traction additive, if selected
- Wet vacuum or residue-removal equipment
- Labor
- Waste handling
- Future wax or sealer renewal
- Contingency for hidden coatings or an unacceptable test area
Retailer container sizes and advertised coverage can help estimate initial quantities. Actual usage depends on porosity, technique, waste, and coat requirements. Current prices, inventory, ratings, and product filters do not establish total installed cost or basement performance.
DIY or professional installation?
DIY may be reasonable when:
- The slab has no active water problem.
- Moisture compliance is straightforward and documented.
- The concrete is bare, clean, absorbent, and sound.
- Repairs are limited and stable.
- The representative test looks acceptable.
- Required ventilation is achievable.
- The homeowner accepts natural variation.
Professional help becomes more valuable when:
- Seepage or recurring efflorescence remains unexplained.
- Extensive paint, adhesive, or sealer must be removed.
- Mechanical grinding is required.
- The slab has widespread patches or contamination.
- Acid-stain handling and residue removal exceed the homeowner’s experience.
- Ventilation is limited.
- An unacceptable finish would be expensive to remove.
- Cracks appear active, sections are heaving, or walls are bowed.
When requesting proposals, ask the installer to identify the moisture evaluation, preparation method, stain and sealer products, compatibility documentation, test-area procedure, maintenance requirements, and warranty exclusions.
Maintenance and troubleshooting after the floor is finished
Routine maintenance is generally uncomplicated:
- Sweep or vacuum grit before it abrades the finish.
- Damp mop with a mild cleaner confirmed compatible with the sealer.
- Clean spills promptly.
- Use protective pads beneath furniture and equipment where appropriate.
- Avoid unapproved abrasive pads, harsh cleaners, and solvents.
- Follow the sealer manufacturer’s maintenance instructions.
No single resealing interval applies to every floor. Traffic, moisture, sealer chemistry, cleaning practices, sunlight, equipment movement, and room use all influence wear.
Signs that the protective finish needs evaluation include:
- Dullness or loss of sheen
- Scuffing
- Reduced water repellency
- Localized traffic-lane wear
- Cloudiness or whitening
- Flaking
- Peeling
- Exposed or differently colored areas
Symptom guide
| Symptom | Possible explanation | First response |
|---|---|---|
| White powder on the surface | Efflorescence associated with moisture carrying salts through concrete | Do not simply coat over it; investigate moisture and recurrence |
| White or cloudy area beneath the finish | Trapped moisture, salt residue, premature sealing, or a sealer problem | Identify the affected layer and moisture condition before recoating |
| Bubbles or blisters | Moisture, contamination, poor adhesion, incompatible products, or unsuitable application conditions | Stop adding finish and determine the cause |
| Peeling or flaking | Adhesion loss, moisture, weak concrete, residue, or incompatible layers | Assess how widely the bond has failed |
| Dark spots or uneven color | Absorption differences, contamination, moisture, repairs, or application variation | Compare the symptom with slab history and evaluate moisture where appropriate |
| Stain beads during application | Dense concrete, old sealer, wax, curing compound, or contamination | Stop and restore suitable porosity before continuing |
| Streaks after darker restaining | Prior sealer or uneven absorption interfering with recoloring | Do not assume another coat will equalize the result |
| Localized dullness | Wear in the protective layer or incompatible cleaning | Confirm the maintenance or renewal procedure for that sealer |
Diagnosis should precede recoating. More stain cannot correct a sealed, non-absorbent surface, and more sealer can trap residue or worsen moisture-related clouding.
Where color reacted with or entered the concrete, it may remain after a topical sealer fails. Repair may therefore involve the protective layer rather than complete recoloring. There is no universal removal or renewal procedure; the correct method depends on sealer chemistry, condition, underlying stain, slab moisture, and manufacturer instructions.
Recoloring an already stained floor is particularly unpredictable. A prior sealer can block absorption, while stripped and worn areas may accept color at different rates. Darker color is easy to add unintentionally and difficult to remove. Test any proposed recovery process before committing to the entire room.
Recurring efflorescence, active seepage, widespread delamination, moving cracks, heaving, or bowed walls requires investigation beyond a cosmetic touch-up.
Frequently asked questions
Is a plastic-sheet test enough to prove a basement floor is dry enough to stain?
No. The tightly taped plastic-sheet screen described earlier can reveal visible condensation and provide a useful preliminary warning. It does not characterize every relevant moisture condition or prove that the entire slab complies with the selected stain and sealer.
If condensation appears—or the basement has recurring efflorescence, dampness, or previous water entry—obtain an evaluation appropriate to the proposed products. Compare the results with the current acceptance limits for every component rather than applying a universal threshold.
Can I stain a basement floor that was previously painted, sealed, waxed, or covered with carpet glue?
Potentially, but only after incompatible material has been removed and the underlying concrete is clean, sound, and sufficiently absorbent. Remaining paint, sealer, wax, or adhesive may cause beading, weak or uneven color, or poor sealer adhesion.
Removal may involve stripping, scraping, sanding, or mechanical grinding. Afterward, clean and rinse the floor, repeat water-absorption checks in several locations, and test the complete stain-and-sealer system. Adhesive shadows or penetrated contamination may remain visible even after technically adequate removal.
Will concrete stain hide cracks, patches, rough areas, and discoloration?
Translucent stain generally will not. It changes color without smoothing the floor or creating an opaque layer. Cracks, patches, aggregate exposure, grinding marks, rough texture, adhesive shadows, and discoloration may remain visible.
Repairs can also color differently from the original concrete. If the goal is a more uniform surface rather than visible slab character, compare an opaque coating with resurfacing or microtopping. Test representative original and repaired areas before deciding.
Is acid stain or water-based stain easier for an indoor DIY project?
Water-based stain is commonly presented by product guides as the more manageable indoor DIY category because it is generally lower in odor, more predictable, and simpler to clean up than acid stain. That does not make every water-based product safe or suitable for every beginner.
Acid stain is usually more involved because the appearance depends on the slab’s reaction and the process may include chemical handling, neutralization, repeated residue removal, drying, and sealing. Choose it for a tested variegated effect, not because of an unsupported claim that it is the only genuine stain.
Does a stained basement floor need to be sealed and periodically resealed?
Most decorative stain systems call for a compatible sealer, although the exact requirement comes from the stain manufacturer. The sealer can enhance color, reduce dirt and liquid penetration, and protect the surface from routine wear.
That protective layer remains maintainable. It may dull, scratch, whiten, cloud, flake, or peel even when reacted color remains in the concrete. Evaluate and renew it according to observed wear, slab conditions, traffic, cleaning practices, and current manufacturer instructions rather than following one universal schedule.
The preparation-first decision
Do not buy stain until active water problems are absent, the slab has been assessed against the proposed system’s moisture limits, incompatible materials can be removed, and a representative test area produces an acceptable result.
If those checks pass, choose the color system according to the desired degree of variation, follow the complete stain-and-sealer instructions, and budget for preparation and future finish maintenance. If seepage, recurring efflorescence, extensive contamination, heaving, moving cracks, or bowed walls remain, pause the decorative project and address the underlying condition with an appropriately qualified local professional.