 MortarDesk
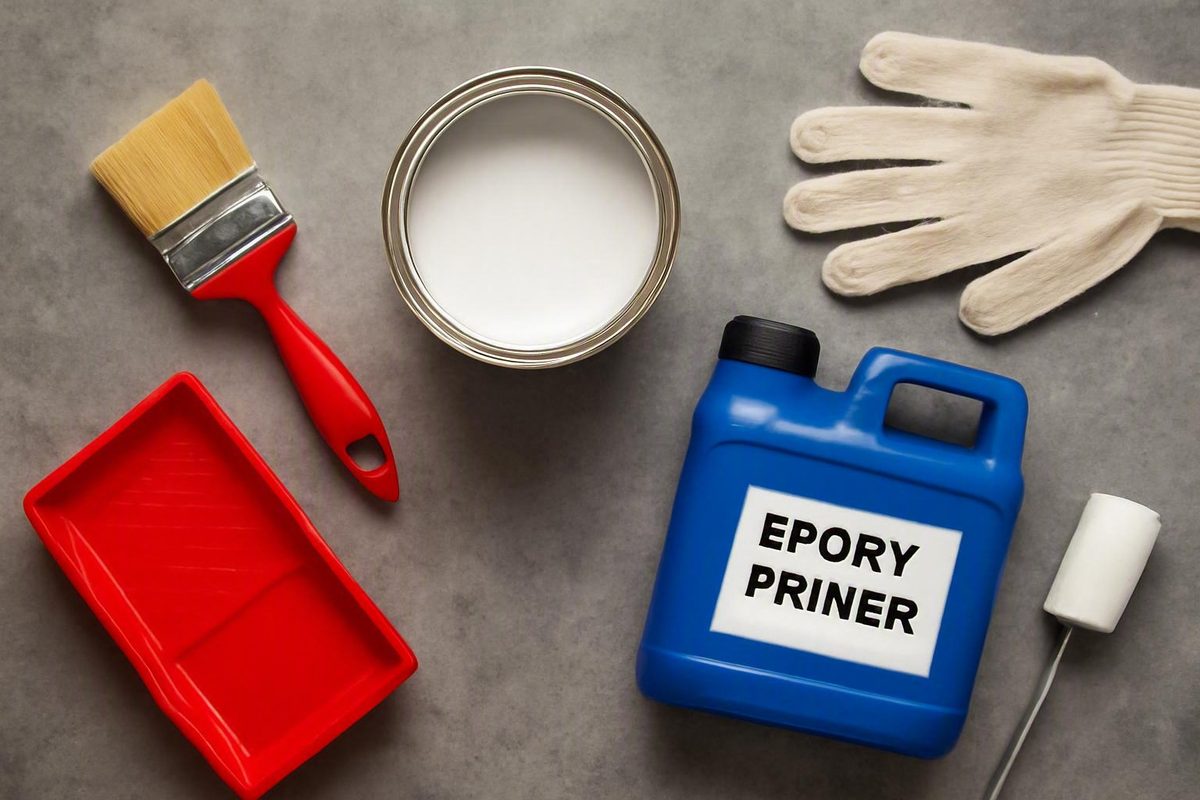
An epoxy primer for concrete should not be selected by chemistry, price, or marketing label alone. The useful question is not “Which primer is best?” but “What does this slab—and the intended coating system—require?”
Start with the complete assembly. Document the concrete’s soundness, porosity, moisture condition, existing treatments, repairs, required surface profile, expected exposure, and intended topcoat. Then decide whether the project calls for an ordinary penetrating primer, a water-based or low-VOC formulation, a high-solids base coat, a bonding primer, or a documented moisture-mitigation system.
It can improve the interface between a suitable slab and a compatible coating, but only within the selected product’s preparation, temperature, mixing, moisture, and recoating limits.
The numerical examples below come from seller or manufacturer product pages, not independent comparative testing. Use them to understand how specifications vary, then verify the current technical data sheet (TDS) and safety data sheet (SDS) for the exact product before purchasing or applying it.
What an epoxy concrete primer does—and what it cannot fix
An epoxy concrete primer is a preparatory layer applied between concrete and a compatible floor-coating system. Manufacturers commonly describe primers as materials that wet or penetrate prepared concrete, seal pores, reduce uneven topcoat absorption, and establish an adhesion layer for the next coat.1
Sealing pores may also reduce air release from porous concrete while a coating cures. Some products are therefore marketed as reducing outgassing bubbles or pinholes. “Reduce” is the important word: the available evidence does not support a guarantee that primer will eliminate those defects.
Primer is not interchangeable with every other product used on concrete:
- A high-build topcoat or body coat develops film thickness and may carry color, decorative flakes, traffic, or chemical exposure. A thin primer is not generally intended to perform all those jobs.
- A penetrating sealer may enter concrete without forming the bonding layer required by a resinous floor system.
- A densifier alters the concrete surface matrix. It is not automatically compatible beneath epoxy.
- A crack or spall repair material fills or rebuilds defects. Primer does not reconstruct missing concrete or address continuing movement.
- A finished wear surface is intended to receive traffic and cleaning. Many primers must be protected by a topcoat.
Some formulations have more than one permitted role. One product may be approved as a primer, pigmented base coat, dust-proofing treatment, or light-duty finish. Another may be expressly unsuitable as the primary garage-floor finish. The use classification for the exact product controls; the words epoxy primer do not establish whether it may remain exposed.
Primer also does not compensate for:
- Oil, grease, silicone, tire residue, or chemical contamination
- Dust left after mechanical preparation
- Laitance or weak surface paste
- Chalky, flaky, or otherwise unsound concrete
- Moisture outside the coating system’s documented limits
- Curing compounds, sealers, or densifiers that obstruct adhesion
- An existing coating that is peeling across substantial areas
- Unrepaired deterioration or continuing structural movement
Claims about improved durability, adhesion, moisture blocking, or failure prevention should be treated as manufacturer or seller guidance unless supported by relevant test data. Primer may contribute to a successful floor, but substrate evaluation, preparation, installation control, and system compatibility remain essential.
Do you need primer? Start with the slab and the complete coating system
Not every epoxy, polyurethane, urethane, or polyaspartic system requires a separate primer. Some products are described as self-priming, while others require a dedicated primer or permit the first coat to serve as both primer and base coat. Begin with the current documentation for the intended topcoat.
1. Does the topcoat require or permit a separate primer?
- Required: Use one of the specifically approved primers.
- Optional: Decide from slab condition, expected absorption, installation risk, and written system guidance.
- Not listed: Do not insert a generic primer without compatibility confirmation.
- Unknown: Stop and obtain current documentation before buying.
2. Is the concrete sound?
Inspect representative areas, including edges, repairs, cracks, traffic lanes, and locations exposed to fluids.
- Sound concrete: Continue to porosity, profile, and moisture checks.
- Chalky, flaky, dusty, or weak concrete: Remove defective material and evaluate what remains. Do not prime loose material in place.
- Severely pitted or deteriorated concrete: Repair missing or unsound areas first. A high-solids primer or base coat may be specified afterward, but it does not replace necessary repair.
ArmorGarage, for example, markets different products for different conditions: a penetrating primer for prepared porous or poor-condition concrete, a high-solids option for badly pitted floors, and a bonding primer for a sound but worn existing coating. It states that its ordinary primer is not the primary garage-floor finish.2 These are system-specific recommendations, not universal product rankings.
3. How porous is the slab?
A sound but porous slab is a common candidate for a compatible penetrating or pore-sealing primer. Sealing the pores may make the following coat more uniform, but highly absorbent concrete can consume more material than the optimistic end of a published coverage range.
4. Is the concrete polished or unusually smooth?
Do not rely on primer to bond to an unprepared polished surface. Profiling is normally needed to remove the polish and create the surface condition required by the selected primer.
5. Is there an existing coating?
A firmly bonded coating may be eligible for cleaning, abrasion, and a system-approved bonding primer. First confirm that:
- The old coating is compatible with the proposed system.
- It remains firmly bonded throughout the floor.
- Contamination can be removed.
- The surface can be uniformly abraded.
- A representative test patch achieves acceptable adhesion.
Peeling, blistering, soft, or extensively delaminated coatings are not candidates for simple overcoating. Failed material must be removed, and widespread failure may justify complete removal.
6. Is the concrete new?
Verify the selected system’s minimum cure age, moisture limits, pH limits, and preparation requirements. Do not impose one waiting period on every product.
For example, the E77 seller requires new concrete to cure for at least 28 days. That is an E77-specific condition, not a universal rule for every primer or coating.3
7. Are there unresolved unknowns?
Stop before coating if the slab has:
- An unidentified paint or coating
- A suspected curing compound, sealer, or densifier
- Widespread oil or chemical contamination
- Unexplained dark or damp areas
- Efflorescence or recurring moisture
- Uncertain repair materials
- Moisture results outside the proposed system’s limits
- Conflicting requirements among the primer, repairs, and topcoats
Resolve those conditions through records, testing, removal, a representative test patch, or written manufacturer guidance. Primer should be the result of the investigation, not a substitute for it.
Primer types compared by jobsite condition
Terms such as water-based, standard-VOC, low-VOC, and high-solids describe formulation or regulatory characteristics. Terms such as bonding primer and moisture-mitigation primer describe intended roles. These labels are not mutually exclusive and do not establish universal performance rankings.
The product figures below are seller-published examples. A “product-specific” entry means the category alone does not establish a reliable number.
| Primer category | Best-fit slab condition | Intended role | Common limitations | Compatibility to verify | Published coverage example | Application temperature example | Recoat example |
|---|---|---|---|---|---|---|---|
| Ordinary penetrating epoxy primer | Sound, prepared, porous concrete | Seal pores and establish an adhesion layer | Not repair mortar, a wear coat, or an automatic vapor barrier | Exact epoxy, polyurethane, urethane, or polyaspartic system | ArmorPoxy: about 220–320 sq. ft./gal.4 | Standard-VOC ArmorPoxy: 40–90°F4 | Standard-VOC ArmorPoxy: 4–6 hours4 |
| Water-based or low-VOC epoxy primer | Interior work where odor or VOC requirements affect selection; slab must still meet the specification | Pore sealing and system-specific adhesion | The label does not mean hazard-free or ventilation-free | Approved topcoats and restrictions on moisture or exposure | One Stop: 200–250 sq. ft./gal. for porous-concrete priming5 | One Stop: 55–90°F5 | One Stop: within 24 hours without sanding5 |
| Solvent-based primer | Only where the exact formulation and system permit it | Product-specific penetration and adhesion | May carry product-specific flammability, odor, VOC, ventilation, or sales restrictions | Named substrate, topcoat, and exposure | Product-specific | Product-specific | Product-specific |
| High-solids primer or base coat | Properly repaired, worn, rough, or pitted concrete where more build is specified | Primer plus body- or base-coat function | Does not restore structural integrity or eliminate removal of weak concrete | Film thickness, topcoat, broadcast, and finish requirements | Product-specific | Product-specific | Product-specific |
| Bonding primer | Sound, firmly bonded existing coating after cleaning and abrasion | Promote adhesion to an approved existing film | Not a remedy for widespread peeling, softness, or incompatibility | Existing coating and new topcoat as one assembly | Product-specific | Product-specific | Product-specific |
| Documented moisture-mitigation primer | Slab with measured moisture within the product’s documented limits | Reduce vapor transmission as part of a specified system | Not automatically suitable for hydrostatic pressure or every damp slab | Test method, measured result, thickness, topcoat, and warranty conditions | Product-specific | Product-specific | Product-specific |
ArmorPoxy illustrates why category labels are insufficient. Its page lists standard- and low-VOC versions with different application temperatures, dry-to-touch times, and recoat periods. The low-VOC version is described as water-based, while the standard formulation has different published characteristics. Those distinctions apply to that product family, not to epoxy primers generally.4
Water-based and low-VOC products may be attractive where indoor odor or VOC requirements influence purchasing. Neither label proves that a material is nonirritating, nonflammable, suitable without ventilation, or appropriate for every occupied environment.
A high-solids primer or base coat may create a more uniform layer over properly repaired worn or pitted concrete. It cannot consolidate deeply unsound material or replace repairs.
A bonding primer has an equally limited role: it may be an option over a sound, compatible, uniformly abraded coating. It is not permission to bury widespread peeling.
Reserve moisture-mitigation primer for a product whose current documentation identifies applicable test methods, quantitative limits, required thickness, approved topcoats, and installation conditions. General phrases such as “helps block moisture” are not enough.
Moisture testing: ordinary primer is not automatically a vapor barrier
Surface appearance is not a substitute for the test method required by the primer and topcoat documentation.
An ordinary pore-sealing or adhesion primer primarily prepares the interface for another coating. A moisture-mitigation product has a more demanding role and should have documentation connecting measured results with installation thickness, environmental conditions, and approved topcoats.
Two methods appear in the supplied E77 product specification:
- ASTM F1869, described there as a calcium-chloride moisture-vapor-emission test
- ASTM F2170, described there as an in-slab relative-humidity test
Use the method required by the complete coating system.
As a bounded example, the E77 seller specifies no more than 3 pounds per 1,000 square feet per 24 hours under ASTM F1869 and less than 80% relative humidity under ASTM F2170. It also publishes substrate-pH and dew-point conditions. These requirements apply to E77 and cannot be generalized to another primer or topcoat.3
A manufacturer overview of epoxy coatings warns that a non-breathable epoxy film can trap moisture and may peel or blister when applied to damp concrete.6 That does not establish that every observed blister has the same cause; site conditions and the complete coating system must be investigated.
Do not assume that a generic primer resists:
- Negative-side moisture drive
- Hydrostatic pressure
- Recurring water intrusion
- A missing or ineffective under-slab vapor retarder
- Leaks, drainage defects, or groundwater conditions
- Moisture readings above its published limits
Likewise, do not infer waterproofing or vapor-control performance from broad phrases such as moisture blocking, waterproof, or seals concrete.
If results are high, the slab history is uncertain, or different test methods create conflicting implications, pause the purchase. Review current technical documents for the primer, repairs, and topcoats, then obtain written system guidance. A documented moisture-mitigation assembly may be appropriate only if its stated limits and installation requirements match the measured condition.
Prepare the concrete for adhesion, not just appearance
A floor can look clean while remaining unsuitable for coating. Preparation has two distinct objectives:
- Remove materials that interfere with adhesion.
- Create the concrete surface profile required by the selected product.
Vacuuming removes loose dust. Degreasing addresses some oils and soils.
Use this inspection sequence before choosing equipment:
- Dry debris and dust: Inspect edges, joints, cracks, penetrations, and open pores.
- Oil and grease: Identify the source and likely depth. A clean-looking surface does not prove that absorbed contamination is gone.
- Laitance and weak paste: Look for chalking, powdering, scaling, or material released by scraping.
- Paint and coatings: Map sound, worn, soft, blistered, and peeling areas.
- Sealers, curing compounds, and densifiers: Review records and test suspicious areas.
- Repairs: Identify patching materials, feather edges, bond failures, and incompatible products.
- Cracks and joints: Determine which defects need repair and which joints must remain functional.
- Unknown treatments: Stop and investigate instead of assuming they can be coated.
When a product specification requires mechanical preparation, that requirement takes priority. The E77 seller, for example, specifies a CSP-2 or CSP-3 profile produced by shot blasting or diamond grinding.3 This is a product-specific target, not a universal profile for every epoxy primer.
Sanding may be suitable where a product permits it or where an existing coat requires intercoat abrasion. The correct question is not merely whether a method roughens the floor, but whether it removes interfering material and achieves the specified profile.
ArmorGarage permits acid etching or diamond grinding in its application guidance.2 That does not make acid etching interchangeable with mechanical profiling. The supplied page does not provide a complete, independently reviewed procedure for chemical handling, ventilation, containment, neutralization, or disposal. Do not treat a partial online recipe as general jobsite safety guidance; use the current product instructions, SDS, equipment requirements, and applicable local rules.
Remove unsound concrete and extensively peeling coatings before priming. Complete repairs with products approved for the floor system, then observe their cure, moisture, preparation, and overcoating requirements.
Where the substrate history is unknown, treatments may remain, or products from different manufacturers are being combined, install a representative test patch. Polyestershoppen’s retailer guide likewise recommends an adhesion test when substrate suitability is uncertain.7
Preflight checklist
Before opening a container, confirm:
- [ ] The remaining concrete is sound.
- [ ] Oil, grease, dust, laitance, and incompatible treatments are removed.
- [ ] The specified concrete surface profile has been achieved.
- [ ] Cracks, spalls, and defective repairs have been addressed.
- [ ] New concrete and repairs meet the applicable cure requirements.
- [ ] Moisture testing used the required method and passed the relevant limit.
- [ ] Substrate pH is within range if the product specifies one.
- [ ] Surface, material, and ambient temperatures are acceptable.
- [ ] The slab meets any stated dew-point separation.
- [ ] Humidity, ventilation, and weather conditions comply with the instructions.
- [ ] A representative test patch has been completed where uncertainty remains.
Coverage and quantity planning for porous concrete
Calculate primer quantity from the spread rate published for the exact product and intended use.
Required mixed gallons = floor area ÷ published coverage in square feet per gallon
If the product gives a range, calculate both ends. The higher coverage figure produces the lower material estimate; the lower coverage figure produces the more conservative estimate.
For a hypothetical 500-square-foot floor and a selected primer rated at 200–250 square feet per gallon:
- At 250 square feet per gallon: 500 ÷ 250 = 2.0 gallons
- At 200 square feet per gallon: 500 ÷ 200 = 2.5 gallons
The unadjusted planning range is therefore 2.0–2.5 mixed gallons. It is not yet an order quantity. Account for absorption, profile, repairs, edges, application loss, kit size, and whether partial kits may be divided accurately.
Published consumption can therefore vary with slab condition and preparation.
Seller-published examples show why there is no reliable generic coverage figure:
- E77: 120–150 square feet per gallon3
- One Stop water-based primer: 200–250 square feet per gallon for porous-concrete priming5
- ArmorPoxy: approximately 220–320 square feet per gallon4
One Stop publishes lower coverage figures when the same product is used as a grind-and-seal body coat or a two-layer light-duty finish. Coverage must therefore be matched to the permitted role, not merely to the product name.5
ArmorGarage’s page contains an unresolved conflict: one passage gives approximately 550 square feet per two-gallon set, while another states up to 600 square feet.2 Do not select package quantity from the more favorable number without checking the current TDS or obtaining written confirmation.
Do not add water or solvent merely to stretch coverage. One Stop permits a limited water addition only for a stated first-coat densifying use on very weak concrete, not for ordinary priming.5 A dilution allowance for one product and one use does not authorize thinning another material.
Order by package and mixing constraints:
- Calculate the conservative mixed-gallon requirement.
- Identify available kit sizes.
- Confirm whether partial kits are allowed.
- If they are, verify the specified ratio and whether both components can be measured accurately.
- Add a reasonable project allowance while considering storage and shelf-life limits.
- Keep material from the same batch or color lot where appearance matters.
A theoretical requirement of 2.5 gallons may require a three-gallon package, three one-gallon kits, or another available configuration. Package size and component ratio can matter as much as the calculated volume.
Mix and apply two-component primer within its working limits
A two-component epoxy primer contains a resin or base, commonly called Part A, and a hardener or activator, commonly called Part B. Combining them starts the curing reaction. There is no universal mixing ratio.
Published examples show the variation:
- ArmorGarage instructs users to combine equal portions of Parts A and B.2
- E77 is listed as a 4:1 ratio by volume.3
These ratios are not interchangeable. Follow the exact product’s stated ratio and measurement basis—by volume or by weight.
A disciplined sequence is:
- Condition unopened material within the permitted temperature range.
- Select a batch size that can be placed within the stated working time.
- Premix individual components when required, especially pigmented Part A.
- Measure components accurately if partial batches are permitted.
- Combine them in the exact ratio.
- Use the specified mixer, paddle, speed, and mixing time.
- Scrape the sides and bottom where the instructions require it.
- Transfer or remix only if the published procedure calls for it.
- Begin placement promptly.
Do not improvise the ratio, thinner, mixing method, or batch size.
Pot life is the usable period after the components have been combined. It is not the same as dry-to-touch time, recoat time, full cure, or return to service.
E77, for example, lists a pot life of 45–60 minutes at 75°F.3 That figure applies to the stated product and condition; it is not a general epoxy-primer working time.
Retailer guidance also warns that larger mixed quantities can cure faster and recommends prompt application or division into smaller batches.7 Follow the exact product instructions because permitted batch sizes and handling procedures vary.
The common application objective is a thin, even, continuous film:
- Cover the prepared concrete without bare areas.
- Avoid puddles in depressions, joints, and repairs.
- Do not leave excessively thick roller edges.
- Watch porous areas for rapid absorption.
- Inspect for missed areas before the film advances too far.
Use only application tools approved for the formulation. Depending on the product, permitted tools may include a roller, brush, squeegee, sprayer, or squeegee-and-back-roll sequence. A method allowed for one water-based primer may not suit another formulation.
Keep the current instructions at the mixing station. Record batch start times, surface and ambient temperatures, and the approximate area covered. These records can help identify consumption or timing problems before the topcoat is installed.
Recoat windows, cure milestones, and topcoat compatibility
Floor-coating schedules contain several different milestones:
- Pot life: Working time after Parts A and B are mixed.
- Dry-to-touch or tack-free time: The film no longer transfers readily under the stated conditions.
- Earliest recoat time: The soonest an approved next layer may be applied.
- Maximum unsanded recoat interval: The latest time another coat may be applied without additional abrasion.
- Full cure: The manufacturer’s stated cure endpoint.
- Foot-traffic time: When the complete system may accept the defined pedestrian use.
- Vehicle-traffic time: When the complete system may accept vehicles under stated conditions.
These terms are not interchangeable. A primer may feel dry while still being too early—or too late—for the preferred intercoat bond. Permission for light foot traffic does not mean the system is ready for vehicles, washing, chemicals, or full service.
Published schedules vary materially:
- ArmorGarage states 4–6 hours before topcoating and a 20-hour maximum unsanded interval.2
- One Stop permits recoating within 24 hours without sanding.5
- E77 lists a 3–12 hour recoat range at 75°F.3
These examples demonstrate why there is no defensible universal epoxy-primer schedule.
After ArmorGarage’s stated maximum interval, its instructions require light sanding with 100-grit abrasive before recoating.2 One Stop similarly directs users who exceed its window to sand, vacuum, and perform its specified cleaning procedure.5 Follow the recovery procedure for the exact product rather than assuming another coat will restore adhesion.
Within the approved window, the next layer may rely on the intercoat condition created by the curing primer. After that window, specified abrasion is commonly used to prepare for mechanical adhesion. This distinction helps with scheduling but does not replace the manufacturer’s procedure.
Temperature, film thickness, and other jobsite conditions may alter cure and recoat timing. Treat published times as conditional specifications, not guarantees.
Before topcoating, verify that the primer is approved beneath the intended:
- Epoxy
- Polyurethane or urethane
- Polyaspartic
- Decorative flake base coat
- Metallic system
- Clear finish
Generic chemistry labels do not establish compatibility.
When combining manufacturers, obtain written compatibility confirmation or install a full-system test patch. Also consider whether mixing brands affects any available product warranty.
Exterior use requires separate confirmation. A UV-resistant finish does not automatically make the underlying primer, repairs, or complete assembly suitable for sunlight, moisture, thermal cycling, and outdoor traffic.
Safety, failure checks, and the final buying checklist
Compare complete systems rather than marketing labels.
Buying checklist
- [ ] Exact product name, formulation, color, and version
- [ ] Approved topcoat and complete layer sequence
- [ ] Required moisture-test method and quantitative limit
- [ ] Required concrete surface profile
- [ ] Solids content and intended film thickness
- [ ] VOC information and regional sales restrictions
- [ ] Part A-to-Part B ratio and whether it is by volume or weight
- [ ] Permitted partial-batch procedure
- [ ] Pot life at relevant conditions
- [ ] Coverage for the intended use
- [ ] Surface, material, and ambient temperature limits
- [ ] Humidity and dew-point restrictions
- [ ] Earliest and maximum recoat times
- [ ] Full-cure and return-to-service milestones
- [ ] Whether the primer may remain exposed
- [ ] Approved application tools and dilution rules
- [ ] Package sizes and storage requirements
- [ ] Current TDS
- [ ] Current SDS
- [ ] Written compatibility confirmation where needed
Water-based or low-VOC labeling does not remove the need to review ventilation, personal protective equipment, skin and eye protection, storage, spill response, and disposal requirements. The supplied commercial pages do not provide a complete safety program, so the current SDS and applicable workplace and local requirements must control.
Preparation and application can introduce different hazards. Polyestershoppen’s guide notes substantial dust from mechanical sanding and lists protective equipment for its procedure.7 The E77 seller identifies that product as flammable, directs users to protective equipment and the SDS, and permits only a specifically named thinner within its stated conditions.3 These product-specific statements should not be generalized into a complete procedure for another material.
The following table is a screening aid, not a remote diagnosis:
| Symptom | Possibilities supported by the supplied guidance | Immediate response |
|---|---|---|
| Pinholes or bubbles | Porous concrete or outgassing; One Stop markets pore sealing as a way to reduce these defects5 | Pause and follow the exact product’s defect-repair procedure before recoating |
| Peeling or blistering | Damp concrete beneath a non-breathable epoxy film; inadequate preparation or incompatible layers may also warrant investigation6 | Do not bury the failure; determine whether removal, moisture review, or system redesign is required |
| Soft or tacky primer | Improper mixing or conditions outside the product instructions are possibilities identified in seller guidance1 | Isolate the area and obtain product-specific corrective instructions |
| Intercoat failure | A missed recoat window or failure to complete the specified abrasion and cleaning procedure5 | Stop application and verify the required recovery process |
| Puddles or slow thick areas | Excessive primer thickness is identified as an application error in manufacturer guidance1 | Do not topcoat until the product manufacturer confirms the corrective method |
Stop rather than overcoat if the primer remains soft, develops widespread defects, lifts during an adhesion check, or separates from the concrete. Another coat may conceal the symptom while making removal more difficult.
Finished-floor safety also depends on the topcoat. A manufacturer overview warns that high-gloss epoxy can be slippery when wet unless a compatible texture is incorporated, and that unprotected epoxy can yellow or degrade in sunlight.6 Any texture additive must be approved for the specified coating system, and exterior suitability must be confirmed for every layer.
Frequently asked questions
Can epoxy primer be applied over an existing painted or epoxy-coated concrete floor?
Sometimes. The existing coating must be sound, firmly bonded, clean, compatible, and capable of being uniformly abraded. A system-approved bonding primer may then be an option.
Do not prime over widespread peeling, blistering, softness, or contamination. Remove failed material and investigate the cause. If the old coating cannot be identified—or products from different manufacturers will be combined—obtain written compatibility guidance and complete a representative test patch.
Is epoxy primer the same as a moisture barrier?
No. An ordinary epoxy primer may seal pores and improve adhesion without being a documented moisture-mitigation system.
Treat a product as moisture mitigating only when its current documentation identifies the required test methods, quantitative limits, installation thickness, approved topcoats, and relevant restrictions. Do not infer waterproofing, hydrostatic-pressure resistance, or vapor control from general moisture-blocking language.
Can epoxy primer be left as the finished garage floor?
Only when the exact product documentation permits that use. Some formulations are approved as standalone coatings or light-duty finishes. Others require a topcoat or are expressly unsuitable as the primary garage-floor finish.
Even where standalone use is permitted, verify traffic, chemical, cleaning, slip-resistance, UV, and appearance requirements. Coverage and film thickness may differ when the material is used as a finish rather than a primer.
What should I do if I miss the primer’s recoat window?
Stop and read the exact recovery procedure. Depending on the product, it may require abrasion, thorough vacuuming, and specified cleaning before another coat is applied.
Confirm the permitted abrasive, cleaning material, and revised timing. If the primer is soft, contaminated, or otherwise defective, sanding alone may not be an adequate correction.
Is water-based epoxy primer better than solvent-based primer?
Not universally. Water-based or low-VOC products may be attractive where indoor odor, VOC rules, or cleanup influence selection. Other formulations may have different temperature, penetration, or recoat characteristics within their approved systems.
Choose the formulation that matches the prepared slab, measured moisture, intended topcoat, jobsite conditions, regulatory requirements, and installation capabilities. Neither label proves superior adhesion, durability, safety, or moisture resistance.
The final decision should follow the slab evidence: document soundness, moisture results, required profile, intended topcoat, and jobsite conditions; estimate from the exact product’s conservative spread rate; and keep pot life, recoat timing, full cure, and traffic milestones separate.
If the slab is damp, unsound, contaminated, or covered by an unknown treatment, resolve that uncertainty before purchasing or applying primer. Mortar Desk provides general building-material reference and procurement screening. It is not a contractor or engineering adviser, and current manufacturer instructions and project-specific professional judgment take priority.8
-
Duraamen, “Concrete Primers: The Key to Long-Lasting Epoxy Coatings” ↩↩↩
-
ArmorGarage epoxy flooring primer product and application guidance ↩↩↩↩↩↩
-
E77 fast-cure epoxy concrete primer and base-coat product specification ↩↩↩↩↩↩↩↩
-
ArmorPoxy standard- and low-VOC epoxy-primer specifications ↩↩↩↩↩
-
One Stop water-based epoxy-primer specifications and instructions ↩↩↩↩↩↩↩↩↩↩
-
PROSOCO overview of concrete sealer and epoxy-coating limitations ↩↩↩
-
Polyestershoppen concrete- and cement-floor priming guide ↩↩↩