 MortarDesk
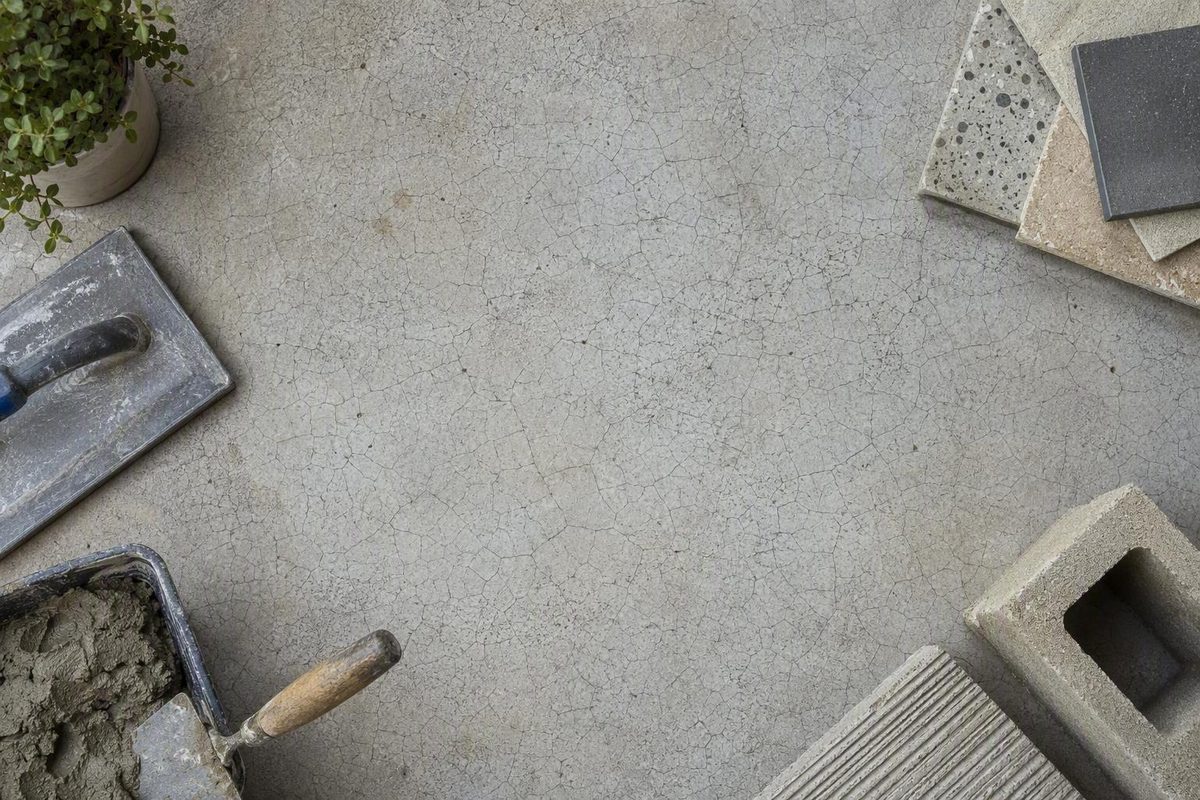
A web of hair-thin lines across a garage floor, patio, driveway, wall, or polished slab can look alarming. When those lines form a dense pattern of small, irregular cells, the condition may be concrete crazing: shallow cracking caused when a thin surface layer shrinks more than the concrete beneath it.
True, surface-confined crazing is generally an appearance issue rather than a structural failure, but that conclusion depends on more than the visible pattern. Depth, movement, vertical displacement, leakage, flaking, dusting, and surface soundness all matter.
Before sealing or covering the concrete, determine whether the lines appear stable and surface-confined—or whether they may represent another cracking or deterioration mechanism.
What concrete crazing is—and what it looks like
Concrete crazing is a close network of fine, shallow cracks confined to the surface. It develops when a thin near-surface layer contracts substantially relative to the concrete below it. The underlying concrete restrains that contraction, causing the surface to divide into small cells instead of producing one dominant crack through the slab. This definition follows the diagnostic terminology in the Federal Highway Administration’s archived petrographic manual, which remains useful for classification but is not a current project specification or acceptance standard (FHWA).
The pattern is commonly described as:
- A close network of narrow, interconnected lines
- Small irregular polygons or roughly hexagonal cells
- A map-like, webbed, or alligator-skin appearance
- Randomly oriented cracks rather than a few long parallel lines
- Cracking visible across the mortar or paste at the surface
Craze cracks often develop early. Industry guidance reports that they may be apparent the day after placement or by the end of the first week. The same guidance describes them as generally shallow—often within the first few millimetres—but that observation is not a universal depth limit for every slab (CIP 3 guidance).
The network may initially be difficult to see. Wetting followed by partial drying can increase the contrast, while dirt or polishing may reveal lines that were already present. The date a pattern was first noticed is therefore not necessarily the date it formed.
Crazing can occur on exposed concrete and on surfaces cast against formwork. Some industry guidance suggests that particular form faces may affect incidence, but formwork type should not be treated as a proven cause in an individual case. The defining feature is a change in properties or moisture conditions near the surface relative to the concrete behind it (Concrete Society).
Use generic depth descriptions cautiously. A statement that craze cracks are “only a few millimetres deep” can help distinguish the concept from full-depth cracking, but it cannot establish the depth of a specific defect or prescribe how much material to remove.
A practical field-recognition checklist is:
- Pattern: Fine cracks form many connected, closed or nearly closed cells.
- Apparent depth: The lines look confined to the surface rather than passing through the slab.
- Level: No step or vertical offset is apparent from one side of a line to the other.
- Activity: The network is not obviously widening or extending over time.
- Surface condition: Mortar is not peeling, flaking, or releasing loose aggregate.
- Context: The pattern may become clearer during partial drying or after dirt collects in the lines.
These are screening observations, not proof.
Why the surface develops a craze pattern
The basic mechanism is differential shrinkage. The near-surface layer loses moisture or develops different physical properties from the concrete below it. As that thin layer contracts, the underlying concrete restrains the movement. Fine tensile cracks then divide the surface into small cells.
Several conditions can contribute to that difference.
Rapid surface-moisture loss
Heat, wind, direct sun, low relative humidity, and high concrete-surface temperature can accelerate evaporation. If the surface dries much faster than the concrete immediately below it, the resulting moisture gradient and shrinkage can contribute to crazing.
Weather alone does not establish the cause. A slab placed on a hot or windy day may have been protected and cured effectively. A slab placed in mild weather may still develop a paste-rich or poorly cured surface. Placement records and finishing history are needed before assigning rapid drying as the explanation for a particular slab.
Excess water, paste, and fines at the surface
An overly wet mixture may bleed or segregate more readily. Excessive floating or other surface manipulation can depress coarse aggregate and leave a higher concentration of cement paste and fine particles at the top. That surface layer may then shrink differently from the better-proportioned concrete beneath it.
Water added at the job site can also change mixture behavior. Water used directly on the surface to make finishing easier may create a locally wetter layer that no longer represents the intended concrete mixture.
Crazing does not prove that too much water was added. It is one possible contributor among several, and identifying it requires delivery information, observations, and placement records.
Finishing while bleed water remains
Fresh concrete commonly releases bleed water as solid particles settle. Finishing while visible bleed water remains can work that water back into the top layer, raising the local water-to-cement ratio and producing a weak surface. That layer may be vulnerable not only to crazing but also to dusting or scaling.
Do not sprinkle dry Portland cement over bleed water to absorb it. Do not add water to the surface as a finishing aid. Both practices alter the surface layer instead of correcting the conditions that produced the water.
Excessive or hard steel troweling
Steel troweling can create a smooth, dense finish, but premature, repeated, or excessively hard troweling may concentrate fine paste at the surface. If that layer later dries and contracts more than the concrete below it, a craze network can develop.
This does not mean every steel-troweled floor will craze. Timing, pressure, repetition, mixture behavior, bleeding, evaporation, and curing all interact. A smooth, dense finish may also make fine lines more conspicuous.
Inadequate or delayed curing
Curing helps retain the moisture needed for continued cement hydration after finishing. If curing starts late, is interrupted, or permits repeated early wetting and drying, the top layer may lose moisture too quickly.
Prompt and continuous curing reduces the surface-to-interior moisture gradient. It can significantly reduce the risk of crazing, but it cannot guarantee a completely craze-free surface.
No single visual clue can identify which factor controlled an individual slab. A credible investigation may consider:
- Batch or delivery information
- Water added before or during placement
- Air and concrete temperatures
- Wind, humidity, and sun exposure
- Bleed-water timing
- Floating and troweling sequence
- Curing method and start time
- The condition of the hardened surface
Is crazing cosmetic or a sign of a larger problem?
True crazing is generally cosmetic because it remains within a thin surface layer rather than dividing the concrete into independently moving sections. The diagnosis becomes less reliable when cracks are deep, active, leaking, displaced, or accompanied by deterioration. Guidance on concrete-crack diagnosis similarly separates stable surface patterns from full-depth, active, or vertically displaced cracking (Sakrete).
Two questions should be considered separately:
- Is the slab or concrete element structurally adequate?
- Is its surface sound and suitable for the intended use or finish?
A concrete element may be structurally adequate while its top layer is weak, dusty, paste-rich, peeling, or otherwise unsuitable for a bonded coating or floor covering. Conversely, a visually prominent craze pattern may exist on a hard, stable surface that remains suitable for its intended use.
The visible pattern does not prove that the concrete beneath it is sound. Practices associated with crazing—such as excess water, premature finishing, or delayed curing—may coexist with other problems. Crazing alone does not prove that those practices occurred, but it justifies checking the surface before installing a demanding finish.
Seek an on-site assessment when any of the following conditions are present:
- Cracks continue to widen, lengthen, or change seasonally.
- A crack appears to penetrate substantially into or through the slab.
- Water leaks through a crack or persistent dampness follows it.
- One side of a crack is higher than the other.
- The slab shows settlement, rotation, curling, or heaving.
- Surface mortar peels, flakes, blisters, or releases loose aggregate.
- Deterioration extends beyond a fine, stable surface network.
- The concrete supports significant structural or concentrated loads.
- A moisture-sensitive or high-performance bonded finish is planned.
- The crack mechanism remains uncertain after initial screening.
For initial documentation, record:
- The location and approximate extent of the affected area
- The typical cell pattern and approximate crack width
- Any visible indication that cracks extend below the surface
- Any elevation difference across prominent lines
- Dust, loose mortar, peeling, or exposed aggregate
- Moisture, staining, or leakage
- Changes in the pattern over time
- The slab’s use, loading, exposure, and intended finish
Do not use crack width alone to decide whether a defect is cosmetic or structural. A narrow crack with vertical displacement can be more consequential than a wider but stable and shallow line. Depth, movement, surrounding deterioration, loading, and context must be considered together.
These observations are not substitutes for formal testing. Where the decision is consequential, use the tests required by the proposed flooring or repair system and obtain qualified interpretation.
Mortar Desk publishes independent general reference information. As explained on the About Mortar Desk page, it is not a contractor and does not provide individual engineering advice. Structural questions and uncertain crack mechanisms require qualified on-site evaluation.
Crazing versus other concrete cracks and surface defects
A map-like pattern is a clue, not a complete diagnosis. Compare geometry with timing, apparent depth, movement, displacement, and the condition of the surrounding mortar.
| Condition | Typical pattern | Usual timing | Depth and movement | Surface flaking | Likely significance |
|---|---|---|---|---|---|
| Crazing | Dense network of fine, interconnected polygonal cells | Often noticed soon after placement, but may become visible later | Very shallow and normally stable; no vertical offset | Not part of simple crazing | Usually cosmetic when the slab and surface are otherwise sound |
| Plastic-shrinkage cracking | Longer, more widely spaced cracks; sometimes roughly parallel or crow’s-foot shaped | Before final set, while concrete is plastic | May be deeper and less densely interconnected | Not the defining feature | Often nonstructural, but depth and exposure still require consideration |
| Drying-shrinkage cracking | More distinct cracks dividing larger slab areas | After final set as hardened concrete dries | May extend substantially into or through the slab | Usually absent unless another defect exists | Significance depends on restraint, depth, movement, joints, and use |
| Scaling | Irregular patches where surface mortar flakes or peels away | Becomes evident during exposure or service | Surface material is physically detaching | Yes | Surface deterioration requiring investigation |
| Active or full-depth cracking | One or more dominant cracks rather than a fine cellular network | May appear or change at different ages | Changes over time or penetrates deeply | May or may not occur | Requires diagnosis before cosmetic treatment |
| Settlement or heaving | Crack accompanied by a step, tilt, depression, or raised area | During construction or later service | Vertical displacement is present | Secondary deterioration may occur | Indicates movement or support-related concerns |
Plastic shrinkage versus crazing
Plastic-shrinkage cracks form before final set, when water evaporates from the surface faster than bleed water replaces it. High concrete or air temperatures, wind, low humidity, and sun exposure can increase evaporation. These cracks tend to be longer, more widely spaced, and less densely interconnected than a craze pattern (Penn State).
The two conditions can share environmental contributors, but they are not interchangeable. Crazing describes differential shrinkage within a thin surface layer and produces a close polygonal network. Plastic-shrinkage cracking occurs while the concrete has not yet developed significant strength.
Drying shrinkage versus crazing
Drying-shrinkage cracks occur after final set as hardened concrete loses moisture and contracts while restrained. They may cross larger areas, follow stress concentrations, or extend much deeper than the surface.
A crack that appeared after hardening should not automatically be called crazing merely because it has branches or neighboring lines. The dense, shallow cellular pattern remains important to the distinction.
Scaling versus crazing
Scaling is localized flaking or peeling of surface mortar. The physical distinction is straightforward: simple crazing leaves the surface in place, while scaling involves detachment or loss of material.
A paste-rich surface can craze and later begin to break away. Once mortar is peeling, flaking, or releasing aggregate, treat the condition as surface deterioration requiring investigation—not as an appearance issue alone.
Active or full-depth cracking versus crazing
A dominant crack that continues to lengthen, changes width, leaks, or appears to pass through the slab belongs in a different diagnostic category from a stable surface network. Applying a coating or grout over it does not establish why it formed or stop movement.
Settlement or heaving versus crazing
Compare the elevations on both sides of prominent cracks. A detectable step or change in plane is inconsistent with ordinary crazing and may indicate settlement, heaving, rotation, or loss of support.
This is only a screening observation. It does not identify the cause or quantify structural significance. Covering the line with grout, coating, or resurfacer does not correct underlying movement.
Other deterioration mechanisms can also produce map-like patterns. If the cells are comparatively large, the cracks are deep, material loss is progressing, or the concrete is exposed to unusual conditions, resemblance to crazing is not enough to rule out another cause.
How to prevent crazing during a concrete pour
Prevention should follow the sequence of construction: mixture and placement, the bleed-water period, finishing, and curing. Curing matters, but it cannot fully correct a surface that has already been altered by poor finishing practices.
1. Mixture and placement
Use concrete designed for the required strength, exposure, placement method, and finish without unnecessary water. The objective is a cohesive mixture that does not bleed or segregate excessively.
Do not treat a generic slump recommendation as a universal specification. Required workability depends on the mixture design, placement equipment, reinforcement, weather, and project requirements. If more workability is needed, consult the concrete supplier rather than automatically adding water.
Place and consolidate the concrete without repeatedly manipulating the top in a way that drives coarse aggregate downward and draws paste and fines upward. Avoid excessive floating and unnecessary surface working.
Plan for the weather before placement begins. When wind, sun, low humidity, or high concrete or air temperature may increase evaporation, have suitable wind and sun protection, coverings, curing materials, and other specified controls ready. Evaporation control is difficult to improvise after the surface begins drying.
2. Bleed-water period
After strike-off and initial floating, allow bleeding to run its course before final finishing. Do not trap or work visible bleed water back into the slab.
If water remains on the surface:
- Delay finishing.
- Do not sprinkle dry Portland cement over the water.
- Do not add water to make the surface easier to finish.
- Do not repeatedly float the slab to hide the water.
- Address accumulated water without incorporating it into the paste.
The disappearance of visible water is not the only timing consideration. The concrete must also be sufficiently stiff for the planned finishing operation. Experienced finishers assess surface response, footprint depth, and equipment behavior rather than relying only on elapsed time.
3. Finishing
Use only the operations required to produce the specified surface. Excessive floating can enrich the top layer with paste and fines. Premature or hard steel troweling can produce a concentrated surface layer that later contracts relative to the substrate.
Finishing should not be used to compensate for an overly wet mixture, excessive bleeding, or uncontrolled evaporation. Correcting the underlying process is preferable to repeatedly reworking the surface.
4. Curing
Start curing promptly after finishing, as soon as the selected method can be applied without damaging the surface. Supported approaches include:
- Continuous moist curing
- Damp coverings kept continuously moist
- Other coverings used in a manner compatible with the specified finish
- A suitable membrane-forming curing compound
One industry technical guide recommends at least three days of continuous moist curing, or the use of a liquid membrane-forming curing compound, while warning against intermittent early wetting and drying. Project specifications, mixture requirements, exposure, and product instructions may require a different period or method.
A damp covering that dries out is not continuous moist curing. A curing compound must be selected and applied according to its coverage and timing requirements. Its compatibility with future coatings, adhesives, stains, or other treatments should also be confirmed.
Adequate curing significantly reduces crazing risk but does not guarantee prevention. Mixture composition, finishing, evaporation, and near-surface variability can still affect the result.
What to do when concrete is already crazed
Start with a decision sequence rather than a product:
- Confirm that the pattern appears shallow and stable.
- Check for vertical displacement, leakage, widening, or settlement.
- Look for dusting, peeling, flaking, hollow or loose areas, and exposed aggregate.
- Determine whether consequential surface testing is required for the intended use.
- Define the goal: monitor, reduce absorption, reduce visibility, create a new finish, or remove weak material.
- Select a treatment only after the objective and substrate condition are understood.
Leave it alone and monitor it
No treatment may be the best option when the slab is level, the network appears shallow and stable, and the surface is hard and intact. This is especially reasonable where appearance is acceptable and the concrete will remain exposed.
Take dated photographs from consistent locations under similar lighting and moisture conditions. Watch for widening, new dominant cracks, detachment, leakage, or elevation changes. Monitoring avoids committing to a cosmetic system that may be unnecessary or incompatible with a future finish.
Apply a penetrating sealer to reduce absorption
A penetrating sealer may be considered when the goal is to reduce water absorption while retaining a largely natural appearance. It enters the pore structure rather than creating a thick crack-bridging film.
Suitability depends on the exposure, existing contaminants, moisture condition, desired appearance, and compatibility with future materials. Test the product in a representative area and follow its preparation, temperature, coverage, and curing instructions.
Use grout to reduce visual contrast
Epoxy- or latex-based grout may make fine lines less noticeable, particularly as part of a polishing process. Complete concealment should not be promised. Differences in absorption, color, aggregate exposure, and polishing can leave the network visible.
Equipment-supplier guidance likewise presents grinding and grouting as ways to remove or disguise crazing rather than guaranteed concealment (Floorex).
Apply a coating or floor covering
A coating or floor covering may conceal the pattern when the substrate is sound and the system is properly selected and installed. Preparation may include cleaning, contaminant removal, mechanical profiling, and removal of weak surface material.
A coating is not a structural repair. Active, displaced, leaking, or full-depth cracks require diagnosis before installation. The selected system’s instructions should control preparation, moisture evaluation, primers, application conditions, and curing.
Install a thin cementitious resurfacing layer
A resurfacer or micro-topping can create a more uniform appearance where the remaining concrete is sound. Thin materials depend heavily on substrate preparation and bond. Loose, dusty, flaking, contaminated, or moisture-troubled concrete should not simply be hidden.
The repair manufacturer’s instructions control mixing, priming, surface profile, thickness, temperature, application, and curing. A generic recommendation cannot establish compatibility with every slab.
Grind away the affected layer
Grinding may remove a shallow crazed or weak surface layer, but the required removal depth must be established on the individual slab. Do not assume that a standard number of passes or a predetermined depth will remove every line.
Consequential work should account for the floor system, slab configuration, edge conditions, dust control, and the amount of sound material that can safely be removed.
If the surface is peeling or weak, preparation or removal must address the unsound material—not merely make the pattern look fainter. Grinding the top does not repair active or full-depth cracks.
Before polishing, staining, epoxy, tile, or another floor covering
Decorative and bonded finishes introduce two separate questions:
- Will the finish bond and remain serviceable?
- Will the final appearance be acceptable?
A satisfactory answer to the first does not guarantee a satisfactory answer to the second.
Polishing does not necessarily cause or worsen crazing, but it can increase visual contrast between fine cracks and the surrounding paste.
An opaque coating may conceal the initial pattern, but it cannot compensate for a weak substrate or continuing crack movement.
Before installation:
- Verify that the concrete element and its surface are sound.
- Look for active, deep, leaking, or vertically displaced cracks.
- Remove loose mortar, weak paste, curing residue, grease, and other contaminants.
- Assess the slab’s moisture condition using the selected system’s prescribed method.
- Create the surface profile required by the coating, adhesive, or overlay.
- Confirm compatibility among preparation methods, primers, membranes, adhesives, and finishes.
- Treat non-crazing cracks as required by the selected system.
- Construct a representative test area before approving appearance.
Grinding or shotblasting may prepare a sound surface by removing contaminants and creating profile. Those operations do not establish structural adequacy or prove that a crack is inactive.
Use the current requirements of the selected system and the project specification. Where failure would be consequential, testing and interpretation should be performed by a qualified person.
A test area should contain representative crazing rather than an unaffected corner. Evaluate it after the full proposed sequence, which may include preparation, repair or grout, stain or dye, polishing, coating, and curing.
A practical inspection and action checklist
Use this checklist before discussing responsibility, selecting a treatment, or covering the concrete.
Step 1: Photograph the condition
Take:
- Wide photographs showing distribution across the slab
- Close-ups with a ruler or scale
- Images under low-angle light
- Images of the dry surface
- Images while a wetted surface is partially drying
- Close-ups of flaking, exposed aggregate, leakage, or displacement
Use consistent locations and lighting when making later comparisons.
Step 2: Map the affected areas
Sketch the slab and mark where the cellular pattern occurs. Note whether it is concentrated near doors, exposed edges, sunny areas, columns, drains, finishing transitions, or sections placed at different times.
Mark dominant cracks separately. A long crack crossing a craze network may be a different defect superimposed on the surface pattern.
Step 3: Record timing
Note:
- Placement date
- When the network was first observed
- Whether it appeared after wetting, cleaning, or polishing
- Whether it has changed since discovery
- Dates of leakage, unusual loading, or flooring installation
Early appearance supports a crazing diagnosis but does not confirm it.
Step 4: Check physical symptoms
Screen for:
- Vertical offset
- Widening or seasonal change
- Apparent extension below the surface
- Moisture or leakage
- Loose, peeling, or flaking material
- Dust produced during normal use
- Loose aggregate
- Depressions, raised areas, or other changes in level
Informal checks cannot conclusively establish crack depth, internal bond, or surface strength. Avoid destructive probing unless the owner and responsible professionals have agreed on a suitable method.
Step 5: Record use and exposure
Identify whether the concrete is:
- Interior or exterior
- Exposed to vehicles, abrasion, water, salts, or freezing conditions
- Supporting heavy or concentrated loads
- Intended to remain exposed
- Scheduled for polish, stain, epoxy, tile, or moisture-sensitive flooring
These conditions do not prove that crazing has caused a performance problem. They help determine whether further evaluation is justified before selecting a treatment.
Step 6: Gather construction records for new work
If available, collect:
- Delivery tickets and mixture information
- Records of water added before or during placement
- Placement sequence and approximate timing
- Air and concrete temperature, wind, humidity, and sun conditions
- Observations of bleeding
- Timing of floating and final finishing
- Curing method and start time
- Product data for curing compounds or finishing materials
- Dated progress photographs
These records can make discussions with the concrete supplier, finisher, general contractor, or owner more productive. They do not, by themselves, prove fault. Similar patterns can result from combinations of material behavior, environment, finishing, and curing.
Step 7: Match the symptom to the next action
| Observed condition | Reasonable next action |
|---|---|
| Fine, stable, shallow polygonal pattern; level slab; hard, intact surface | Document and monitor, or test a goal-specific cosmetic treatment |
| Sound slab but unacceptable appearance | Test grout, sealer, coating, polishing, or resurfacing in a representative area |
| Dusty, weak, peeling, or flaking surface | Investigate surface deterioration and address unsound material before selecting a finish |
| Movement, substantial depth, leakage, vertical offset, settlement, or heaving | Obtain an on-site professional assessment before repair or covering |
| Demanding bonded or moisture-sensitive finish planned | Have an experienced installer evaluate moisture, profile, cleanliness, soundness, and system compatibility |
| Structural or heavily loaded element involved | Consult a qualified concrete professional or engineer |
A chip beside a saw-cut control joint should be recorded as a separate defect.
Structural concerns belong with a qualified concrete professional or engineer. Coating, tile, polish, or flooring suitability should be reviewed by an installer experienced with the selected system and its required tests. Specifications, acceptance criteria, and local requirements vary by project.
Frequently asked questions
Does crazing mean the concrete slab is structurally unsafe?
Usually not. True crazing is a shallow surface network and rarely compromises structural integrity. That answer applies only when the lines are stable and surface-confined, with no displacement, substantial depth, leakage, continuing growth, settlement, or widespread deterioration (SINAK).
The surface still requires separate consideration. A slab may be structurally adequate while its top layer is dusty, weak, peeling, or unsuitable for a bonded finish.
How soon after pouring does concrete crazing appear?
It often becomes apparent the day after placement or during the first week. The lines may be noticed later if wetting, drying, dirt, staining, or polishing increases their contrast.
The time the network was first observed therefore cannot, by itself, establish when it formed or what caused it.
Will sealing concrete make craze cracks disappear?
No. A penetrating sealer may reduce water absorption, but it does not fill, bridge, erase, or structurally repair craze cracks.
Test any appearance-sensitive treatment in a representative area.
Can I epoxy, polish, stain, or install flooring over crazed concrete?
Potentially, if the slab and its surface are sound and satisfy the selected system’s requirements. Check for active or displaced cracks, loose or weak material, contamination, and unsuitable moisture conditions before installation.
Polishing and staining may accentuate the network. Epoxy or another opaque finish may conceal it initially, but no finish substitutes for diagnosing movement or preparing a weak substrate.
Can crazing be completely removed?
Grinding may remove an affected surface layer, but complete removal cannot be promised without establishing the actual depth and condition of the slab. Grinding also changes aggregate exposure, texture, flatness, elevation, and appearance.
Grout, sealer, stain, polish, coatings, and thin overlays generally reduce contrast or conceal the pattern rather than remove it. Active, displaced, or full-depth cracks require a different repair strategy.
The practical decision rule
A fine, stable, shallow polygonal network on sound, level concrete is usually an appearance issue, so monitoring or a cosmetic treatment selected for a specific goal may be appropriate. Stop treating the condition as simple crazing when there is movement, vertical displacement, substantial depth, leakage, flaking, loose material, or settlement; those signs belong to more consequential diagnostic categories (Sakrete).
Document warning signs and obtain an on-site assessment before covering or repairing the concrete. For new work, prevention rests on controlling surface water and evaporation, waiting until bleeding has ended, avoiding unnecessary paste enrichment, finishing at the correct time, and curing promptly and continuously.