 MortarDesk
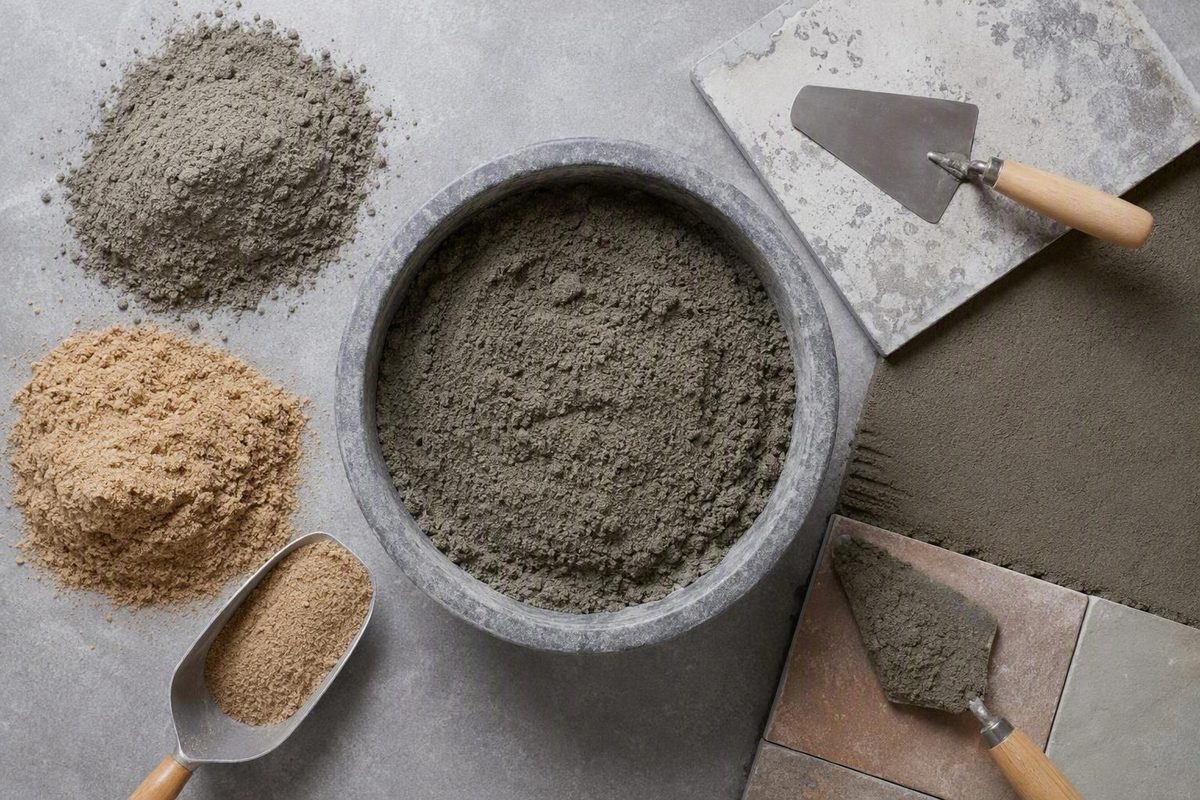
Dry pack mortar is not one universal recipe. It is a family of stiff, low-water cement-and-sand mixes used for shower pans, tile beds, bonded toppings, floor leveling and confined concrete repairs.
The name alone does not determine the mix ratio, water quantity, bed thickness, bonding method, reinforcement, waterproofing or curing time. Those decisions depend on the complete assembly. This guide therefore explains general selection and placement principles—not a standards-approved specification for any particular project.
Successful work starts by identifying the application, selecting documented materials, controlling consistency and compacting the mortar firmly before it begins to set.
Safety first: Portland-cement products require precautions for dust, skin and eye exposure. Review the current safety data sheet for the exact cement, aggregate or packaged mortar before handling it. Follow its instructions for protective equipment, dust control, ventilation, washing and first aid. Do not rely on generic PPE advice in place of the product SDS.
What dry pack mortar is—and what the related names do not guarantee
Dry pack mortar is a stiff, low-moisture, non-flowing mixture of Portland cement and clean sand or graded fine aggregate. Instead of being poured like wet concrete or spread as creamy mortar, it is placed slightly high, packed firmly, screeded and shaped.
Typical deck mud omits the coarse stone found in ordinary concrete. Its fine aggregate and low water content produce a damp-sand texture that can retain a slope or edge during placement. A correctly moistened handful should cohere when squeezed firmly, release no free water and break apart when poked or deliberately disturbed.
That field behavior distinguishes dry pack from wetter materials:
| Material behavior | Dry pack | Wetter mortar or concrete |
|---|---|---|
| Moisture | Low enough to remain stiff | Sufficient to produce more plastic or flowing workability |
| Shape | Retains a packed shape or slope | Tends to settle, spread or slump more readily |
| Placement | Distributed, compacted and screeded | Placed, spread, consolidated or poured as appropriate |
| Texture | Comparable to damp sand | More paste-like or fluid |
| Aggregate | Deck-mud versions typically use fine aggregate only | Concrete normally includes coarse aggregate |
These are practical distinctions, not guarantees of strength, shrinkage, density or permeability. Those properties depend on the formulation, substrate and installation.
The names dry pack, deck mud and floor mud overlap in trade use. “Sand/topping mix” may be a packaged-product label rather than a separate technical category. Similar names do not establish an identical formulation or approved use.
For example, Flextile describes its dry pack as Portland cement with specially graded aggregates. A retailer describes one Quikrete Sand/Topping Mix as a blend of Portland cement, commercial-grade sands and other ingredients. The governing principle is therefore simple: specify by application and current documentation, not by nickname.
Before selecting a material, identify whether the job is a:
- shower mortar bed;
- tile underlayment;
- bonded topping;
- unbonded or floating floor bed; or
- confined concrete repair.
Choose the ratio and product by application
Ratios such as 1:3, 1:4 and 1:5 express parts of cement to parts of sand, generally by volume in the site-mixed guidance available here. They are not interchangeable formulas.
Commercial and practitioner guides describe leaner mixtures around one part Portland cement to four or five parts sand for shower and floor-bed work. Repair-oriented guidance describes richer mixtures near 1:3, with one repair glossary discussing 1:2.5 for selected higher-strength work. These are application-specific references, not universal specifications.
| Application | Commonly described proportion | Questions the specification must settle |
|---|---|---|
| Shower pan or tile mortar bed | About 1:4 to 1:5 in commercial and practitioner guidance (Fine Homebuilding) | Drain and waterproofing method, slope, thickness, substrate and reinforcement |
| Floor leveling or topping | Often around 1:4 in general construction guidance (Brick & Bolt) | Bonded or unbonded method, permissible thickness, movement, finish covering and cure |
| Confined concrete repair | Often near 1:3; one repair glossary discusses 1:2.5 for selected higher-strength repairs (TarmacView) | Cavity geometry, parent concrete, bond coat, depth, aggregate requirements, exposure and structural significance |
Use the matrix only to narrow the material search. A project specification or documented packaged system takes priority over a generic ratio. In particular, do not transfer a rich repair formulation into a shower-bed specification simply because it contains more cement.
Site mixing versus packaged mortar
Site mixing permits measurement of a specified cement-to-sand proportion. It also makes the installer responsible for obtaining clean, suitably graded sand, measuring consistently, blending completely and accounting for the sand’s existing moisture.
A packaged product supplies a defined formulation and may provide water, yield, thickness, additive, curing and safety information. That documentation—not an assumed quality advantage—is the reason to consider it. The words “sand mix,” “floor mud” or “deck mud” still do not prove suitability for every mortar-bed application.
Published examples show how products differ:
- Flextile Dry Pack Mortar Mix is described as a premixed Portland-cement and graded-aggregate product for thick mortar beds, sloped shower beds and concrete leveling. Its stated maximum of 51 mm (2 inches) applies specifically to leveling concrete.
- A retailer’s Quikrete Sand/Topping Mix listing identifies the product as a 3-to-1 blend and limits concrete repair and topping to surfaces less than 2 inches thick. The listing does not establish that limit for every other use.
- Home Depot separately lists a Quikrete Deck Mud product as an underlayment and leveling material for floor and countertop installations. That distinction shows why the exact product matters.
Do not assume every packaged sand/topping mix works unchanged as deck mud. Conversely, do not assume every packaged mix is unsuitable. Compare:
- documented formulation or ratio;
- approved applications;
- water instructions;
- required additives;
- compacted yield;
- minimum and maximum thickness;
- bonded or unbonded installation details;
- curing and covering times;
- technical and safety data; and
- compatibility with the substrate, membrane, drain, tile adhesive or next layer.
If a product page is incomplete, obtain the current technical data sheet and SDS. Do not fill missing instructions with a generic online recipe.
Get the moisture level right without relying on a universal water recipe
There is no reliable universal “cups of water per batch” rule for dry pack. Initial sand moisture, grading, absorption, packaged formulation, additives, batch size and jobsite conditions all affect water demand.
Use a controlled sequence:
- Measure the specified materials. Use the same units and method throughout the batch.
- Dry-blend completely. Eliminate cement streaks and pockets before adding water.
- Add water in small increments. Distribute each addition instead of pouring it into one spot.
- Remix thoroughly. Include material at the bottom and corners.
- Test a representative handful.
- Repeat cautiously if needed. Adding a small amount is easier than correcting an over-wet batch.
For the squeeze or “snowball” test, compress a handful firmly. A workable sample should:
- hold together as a coherent ball;
- release no visible free water;
- leave the hand relatively clean rather than wet or heavily smeared; and
- break apart when poked or deliberately disturbed.
A contractor’s shower-pan workflow demonstrates this hold-then-break behavior, dry blending and gradual wetting, while noting that the sand’s initial moisture changes water demand.
Signs the mixture may be too wet
- It smears like plastic mortar.
- The ball slumps instead of retaining its shape.
- Water can be squeezed out.
- The hand is visibly wet after release.
- Screeded surfaces deform readily instead of holding the intended plane.
Signs the mixture may be too dry
- It will not form a cohesive ball after firm squeezing.
- Packed edges immediately unravel.
- It cannot be compacted into a stable mass.
- Dry cement or unevenly blended streaks remain visible.
The hand test is only a field consistency indicator. It does not prove compliance with a technical specification, water-cement limit, strength criterion or warranty condition.
Do not add water to mortar that has begun hardening in an attempt to restore workability. General dry-pack guidance advises prompt use and warns against retempering after hardening begins. Make batches small enough to place, compact and finish within the working time stated for the selected product.
Decide between a bonded and an unbonded mortar bed
A bonded mortar bed is attached directly to a suitable, properly prepared substrate. A compatible Portland-cement slurry or thinset mortar is used as a bond coat, and the dry pack is placed and compacted while that coat remains fresh.
“Fresh” is not one universal number of minutes. Product chemistry, substrate absorption, temperature and jobsite conditions affect open time. Follow the bond-coat manufacturer’s compatibility and timing instructions. Do not place dry pack over a coat that has skinned, dried or become contaminated.
An unbonded mortar bed, sometimes called a floating bed, is deliberately separated from the substrate by a cleavage membrane or slip sheet. This changes how the assembly relates to substrate movement and may require internal reinforcement.
Do not substitute reinforcing materials based on casual terminology. The available secondary guides inconsistently use terms such as welded wire mesh, metal lath, expanded lath and wire lath. They are not automatically equivalent. The governing installation method must identify the required material, placement, laps, support and fastening—or state that reinforcement is not required.
The choice between bonding and separation depends on:
- substrate type and soundness;
- available bed depth;
- expected movement;
- cracks and joints;
- loading and service conditions;
- moisture or weather exposure;
- finish material; and
- the selected tile, topping, repair or waterproofing method.
One commercial article states a 1.5-inch minimum for an unbonded bed and a 3/4-to-3-inch range for bonded beds. These are source-specific assertions, not verified universal standards, and must not be transferred to another assembly without checking the governing method (Built With Foam).
Stop and obtain qualified guidance if the substrate has active cracks, structural movement, extensive delamination, major concrete deterioration, unknown layers or uncertain load capacity. General construction guidance identifies structural or active cracks, moving joints and major concrete damage as conditions requiring professional or engineered assessment. Dry pack does not solve an unidentified structural problem.
Pack, screed and finish the mortar before it begins to set
Dry pack becomes a stable bed through placement and compaction. It cannot simply be poured into position and expected to consolidate itself.
A bounded general workflow is:
- Confirm the assembly. Resolve bed type, elevations, slope, thickness, reinforcement, joints, penetrations and edge details before mixing.
- Prepare the base. Remove dust, weak material, oils and contamination. Install the specified fresh bond coat or separation layer.
- Dry-blend the batch.
- Add water gradually and test consistency.
- Distribute the mortar slightly high. Allow enough material for compaction and screeding.
- Compact firmly. Work against edges, around penetrations and through the bed rather than tamping only the surface.
- Establish guides. Perimeter screeds, rails, marked elevations or other fixed references define the intended flat or sloped plane.
- Screed between guides. Move the straightedge gently back and forth while drawing excess material away.
- Correct low areas immediately.
- Float and finish without overworking.
For a low spot, do not dust loose mortar over the depression and skim it. The contractor method is to rake out loose material, refill slightly high, compact again and rescreed while the batch remains workable.
A wood float can remove minor ridges and high spots and close small imperfections. A restrained steel-trowel pass can embed loose surface particles and produce a tighter working surface. The objective is not a thick, polished paste layer.
Poor compaction is associated with weak, dusty, hollow or friable work, but compaction alone cannot guarantee performance. Proportioning, aggregate quality, moisture, substrate preparation, working time, bond, thickness and curing also matter. A TRID bibliographic abstract of a 1993 Concrete International article likewise emphasizes mechanical compaction and notes that a bonding slurry may be needed because low-water dry pack does not supply abundant bonding moisture (TRID abstract).
Placement checklist
- Review the exact product’s technical data and SDS before starting.
- Have measuring containers, mixing tools, buckets, straightedges, floats, trowels, levels and cleaning tools ready.
- Establish elevations before mixing.
- Make batches small enough to place continuously.
- Keep proportions and water additions consistent from batch to batch.
- Join adjacent fresh batches without leaving loose seams.
- Do not retemper mortar that has begun setting.
- Protect finished work from premature drying, traffic, contamination and damage.
- Follow the selected product’s curing requirements before applying the next layer.
Use dry pack correctly in a shower-pan assembly
A shower mortar bed provides support and establishes slope. It is not the waterproofing layer. The mortar, drain and waterproofing must form one documented, compatible assembly.
Commercial, manufacturer and practitioner guides commonly use approximately 1/4 inch of fall per horizontal foot toward the drain as general shower guidance (Sakrete). The selected system, current industry method, plumbing requirements and local code must confirm the required slope.
Calculate nominal elevation change from the farthest horizontal wall-to-drain distance:
Elevation change = run in feet × 1/4 inch per foot
For a farthest run of 3 feet:
3 ft × 1/4 in. per ft = 3/4 in.
A contractor’s illustrated method uses the same 36-inch run and 3/4-inch elevation change. If the drain reference elevation is fixed, a level perimeter screed would therefore be about 3/4 inch higher at the wall for that run.
Walls closer to the drain have shorter runs but the same elevation change, so those areas become steeper. That is a geometric result of keeping the perimeter level.
Traditional liner-and-weep-hole assembly
At a general level, a traditional two-stage assembly proceeds as follows:
- Prepare the subfloor and install any separation or reinforcement required by the approved method.
- Form a pre-slope directing water toward the drain.
- Install the compatible pan liner and connect it to the clamping drain as directed.
- Protect the liner from punctures and preserve the required upturns, corners and transitions.
- Keep the drain’s weep path unobstructed.
- Place and compact the upper mortar bed.
- Install the tile finish with the specified setting materials.
Sakrete’s manufacturer project guide treats the pre-slope, liner and upper mortar bed as separate parts of a traditional assembly. It describes clean gravel or crushed tile around the drain as a way to keep mortar from blocking the weep holes. That is a detail for the guide’s traditional drain method, not a universal instruction for every drain.
Surface-applied waterproofing assembly
It manages water differently from a traditional buried-liner and weep-hole assembly. The membrane and drain connection must follow their own approved system details.
Do not combine the liner placement from one method, drain details from another, membrane from a third and cure schedule from a fourth unless the relevant manufacturers provide a documented hybrid method. Changes at the drain, curb, bench, corner or penetration can alter the water-management path.
Before building a shower base, obtain current instructions for the:
- dry-pack or mortar product;
- drain;
- liner or surface membrane;
- bonding and sealant materials; and
- tile-setting system.
Verify the current applicable ANSI method, TCNA Handbook detail, plumbing code and local amendments with the appropriate authority or qualified installer. The supplied evidence does not verify those current primary requirements, and this article is not a complete shower specification.
Treat thickness, curing and waterproofing timing as system-specific
Thickness values are meaningful only when attached to a named product, application and assembly. A maximum for concrete leveling does not automatically apply to a shower bed, and a minimum asserted for an unbonded floor does not necessarily control a bonded topping.
| Application and source | Published statement | Proper interpretation |
|---|---|---|
| Flextile Dry Pack Mortar Mix—leveling concrete | Maximum 51 mm (2 inches) (Flextile) | Applies to leveling concrete with that named product; the page does not identify it as a universal shower-bed maximum |
| Quikrete Sand/Topping Mix retailer listing—concrete repair and topping | Less than 2 inches (Master Wholesale) | Applies to the named uses on that retailer page, not automatically to shower or tile beds |
| Bonded bed—commercial article | 3/4 to 3 inches | Source-specific assertion, not a verified standards requirement |
| Unbonded bed—same commercial article | 1.5-inch minimum | Source-specific assertion that requires verification against the selected method |
| Shower beds—manufacturer and commercial guides | Different stated minimums and preferred depths | Do not combine them into a universal range; verify the mortar, drain and waterproofing assembly |
Flextile directs users of its named product to mix it with Flextile 43 Mortar Additive for exterior or wet-area applications. That is a product-specific instruction, not a rule that every dry pack requires latex or another additive.
Published curing guidance conflicts. The supplied articles range from roughly 24 hours to several days or longer before tile or waterproofing. These figures may reflect different mortar formulations, additives, bed thicknesses, temperatures, humidity levels, membrane chemistry and intended exposure. They do not support one universal wait time.
Use this as a verification workflow:
- Obtain the current mortar data sheet and identify its curing and covering limits.
- Obtain the membrane or tile-setting manufacturer’s minimum substrate-cure requirements.
- Check whether the instructions change for liquid versus sheet membranes, wet areas, exterior work, thick sections, additives or cool conditions.
- Confirm that the products and sequence constitute an approved, compatible system.
- If instructions conflict, seek written confirmation from the relevant system manufacturers or project professional. Do not assume that merely waiting longer resolves incompatibility.
- Confirm applicable standards and code requirements.
Surface hardness alone does not prove that the bed is ready for waterproofing. Conversely, do not impose an arbitrary multi-day delay if the complete approved system expressly permits an earlier step. Current system instructions and governing requirements take priority over generic online schedules.
Diagnose weak, sandy, cracked or hollow dry pack cautiously
Appearance can identify a symptom but rarely proves a single cause. A slightly sandy surface may reflect the character of a lean mortar bed and does not by itself establish failure. Easy erosion, widespread friability, significant cracking or broad hollow areas require evaluation before the work is covered.
| Symptom | Plausible causes to investigate | What to verify |
|---|---|---|
| Friable, dusty or easily eroded material | Too little or too much water; poor compaction; incomplete blending; unsuitable or contaminated sand; delayed placement; retempering; poor curing | Depth of weakness, cohesion below the surface, batching, aggregate, compaction and cure conditions |
| Broad hollow areas or debonding | Dirty or weak substrate; dried or incompatible bond coat; insufficient contact; substrate movement; inappropriate bonded method | Extent of the hollow area and whether failure lies in the mortar, bond line or substrate |
| Cracks | Excess water; rapid moisture loss; movement; restraint; inadequate support; incorrect assembly or reinforcement | Whether cracks are stable, active, isolated or aligned with substrate joints |
| Low spots or standing water | Incorrect elevations; inadequate screeds; poor compaction; disturbance during finishing; unverified slope | Plane and drainage path using suitable straightedges or levels |
| Blocked drainage | Mortar or debris obstructing a traditional weep path; incompatible drain details; missing pre-slope; membrane error | Drain type and its intended drainage path |
| Leakage or trapped water | Membrane damage, failed seam or transition, poor drain integration or mixed assembly details | Stop covering and inspect or test using the waterproofing manufacturer’s procedure |
Water errors can fail in opposite ways. Excess water can produce smearing and slump during placement. Too little can prevent formation of a cohesive mass. Uneven distribution can leave weak pockets even when the batch’s average consistency appears acceptable.
A failed bond is not necessarily a mix-ratio problem. The substrate may be dusty, weak, smooth, moving or contaminated. The bond coat may have dried before placement or may be incompatible with the substrate or mortar.
When to stop rather than patch immediately
Pause before applying tile or membrane if:
- material can be readily swept or scraped away beyond a superficial film;
- friability extends broadly or through meaningful depth;
- significant cracks have appeared;
- large areas sound hollow or have visibly debonded;
- the bed does not drain;
- a traditional drain’s weep path appears blocked;
- waterproofing is punctured or incorrectly connected to the drain; or
- the substrate or assembly cannot be identified.
These are evaluation triggers, not conclusive diagnoses. General dry-pack guidance connects poor compaction with weak, hollow, dusty or cracked work and directs structural cracks, active movement and major concrete damage to professional assessment.
A localized patch may be suitable in some documented systems, but appearance alone cannot establish that it will work. Nor does every blemish require full replacement. First determine the cause, depth, bond, movement, bed type and waterproofing condition. Structural cracks, active movement, major deterioration and uncertain substrates require an engineer or qualified repair professional.
Before covering dry pack, verify:
- the required plane or shower slope;
- surface cohesion and integrity;
- bond or floating-bed condition;
- drain and weep-path operation where applicable;
- membrane condition and drain integration;
- required cure time; and
- compatibility of the next adhesive, membrane, tile, topping or finish.
Frequently asked questions
Is dry pack mortar waterproof?
No. Dry pack shapes and supports the assembly but is not a complete waterproofing system. In a shower, use an approved liner or surface-applied membrane connected to a compatible drain. Traditional systems generally depend on a pre-slope and unobstructed drainage details under the selected approved method; Sakrete’s traditional shower guide, for example, treats the mortar beds, membrane and drain drainage as separate assembly components.
Do not rely on tile, grout or the mortar bed alone to contain water.
What is the best dry pack mortar ratio for a shower pan?
There is no universal best ratio. Commercial and practitioner shower guides commonly describe approximately one part Portland cement to four or five parts clean sand; the Fine Homebuilding contractor guide uses a 1:5 preference, while other general guidance describes 1:4 (Fine Homebuilding).
These are references, not substitutes for the mortar product, drain, waterproofing system and governing installation method. Do not transfer richer 1:3 or 1:2.5 repair formulations into a shower specification merely because they contain more cement.
Can I use a packaged sand/topping mix as deck mud?
Sometimes—if the exact product documentation approves the use or an approved method explains how to adapt it. Packaged formulations vary. One retailer identifies a named Quikrete Sand/Topping Mix as a 3-to-1 dry-pack blend, while other products are sold specifically as deck mud or thick-bed mortar.
Check the formulation, approved uses, water demand, compacted yield, additives, thickness, curing and technical data. Do not assume every sand/topping mix works unchanged, and do not reject every packaged mix merely because it is preblended.
How long should dry pack mortar cure before waterproofing or tile?
Use the time required by the complete approved system. The supplied guidance ranges from about 24 hours to several days or longer, which is evidence of variation—not a basis for a universal 24-, 48- or 72-hour rule.
Reconcile the current mortar data sheet with the waterproofing or tile manufacturer’s substrate requirements, taking account of bed thickness, additives, temperature and humidity. If the requirements conflict, obtain written system-manufacturer or project-professional confirmation instead of assuming that the longer interval makes the products compatible.
Why does cured dry pack mortar feel sandy or crumble?
A mildly sandy surface does not necessarily mean the whole bed has failed. Dry pack is leaner and drier than conventional plastic mortar, and loose surface grains may remain if the finish was not tightened.
Easy erosion, widespread crumbling, deep friability, significant cracks or broad hollow areas may be associated with water errors, poor blending, contaminated sand, insufficient compaction, retempering, delayed placement, curing problems or failed substrate bonding. Do not diagnose the cause from appearance alone. Determine the depth and extent of weakness and whether the bed, bond line, substrate, drainage or waterproofing is affected before choosing repair or replacement.
The final decision is specification-first:
- identify the exact application and waterproofing assembly;
- verify the product ratio, approved use, thickness, yield, water, bonding or separation method, reinforcement and cure requirements;
- mix to a cohesive low-water consistency;
- compact and screed before setting begins; and
- do not cover the work until slope, drainage, surface integrity, cure and membrane compatibility are confirmed.
Mortar Desk publishes general reference information about building materials, is not a contractor, and does not provide engineering advice Mortar Desk · Sizes, gauges and mixes, checked before you buy.. Learn more about its editorial scope on the About Mortar Desk page. Current product instructions, applicable standards, local code and qualified professional assessment govern the work.