 MortarDesk
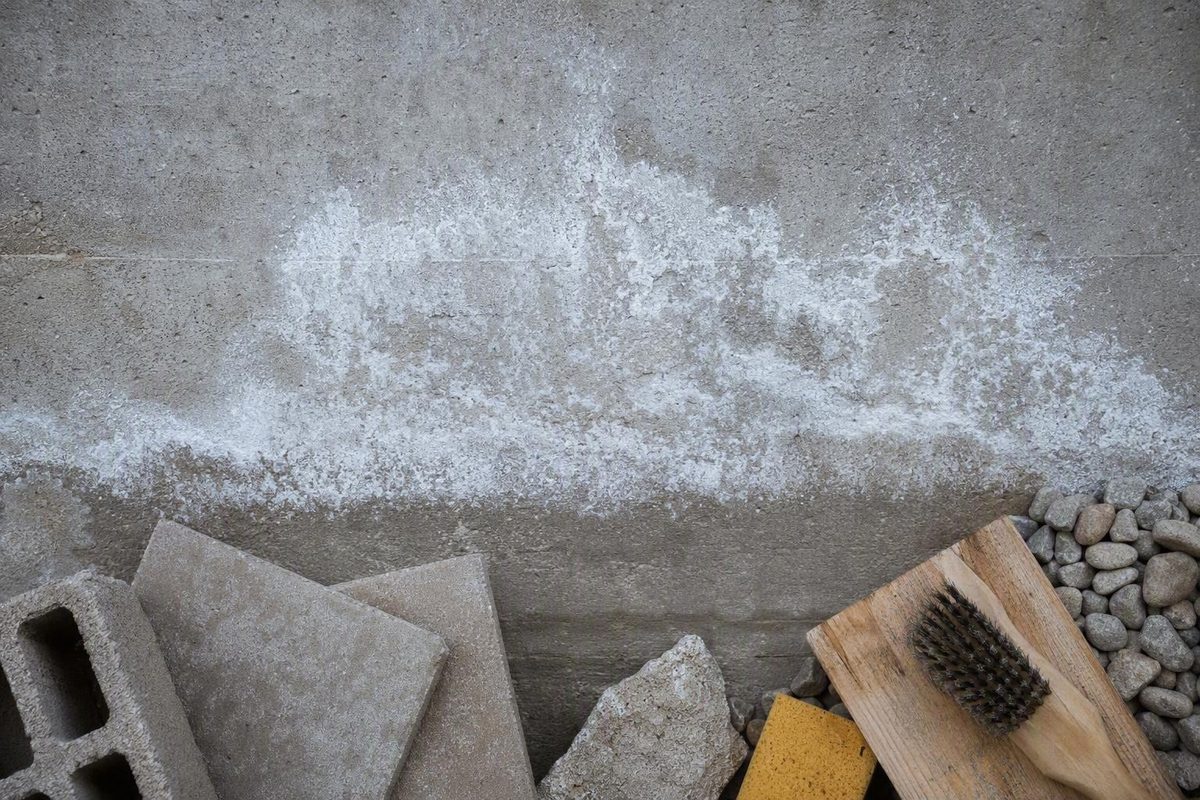
A white powder, haze, or crystalline crust on a basement wall is often efflorescence: mineral salts left behind when moisture moves through concrete or masonry and evaporates. It is usually a surface deposit, not mold and not automatic evidence that a foundation is failing. It does, however, show that salt-bearing moisture has moved through or within the material.
Cleaning the wall, identifying the moisture pathway, and deciding whether the basement is ready to paint or finish are separate tasks. A clean wall is not necessarily a dry wall, and efflorescence alone cannot tell you whether the moisture came from construction, condensation, exterior runoff, damp soil, a crack, or plumbing.
Use a staged approach:
- Identify the material cautiously.
- Photograph and document the affected area.
- Check for dampness, damage, or other warning signs.
- Clean only a dry, sound surface, beginning with the least aggressive suitable method.
- Investigate likely moisture sources.
- Confirm that the condition is controlled before coating or concealing the wall.
What basement efflorescence is
Efflorescence is a nonliving deposit of soluble salts. It develops when moisture travels through porous concrete, concrete block, brick, mortar, stone, or another mineral material. The moisture dissolves salts, carries them toward an exposed surface, and evaporates. The water leaves as vapor; the salts remain.
Three conditions are necessary:
- Soluble salts in the concrete, masonry, mortar, surrounding soil, or another material in contact with the assembly.
- Enough moisture to dissolve and transport those salts.
- An evaporation surface where the moisture can leave and the salts can crystallize.
Masonry guidance describes efflorescence as a white or grayish crystalline deposit that can appear as powder, haze, or surface buildup. It also distinguishes deposits associated with initial construction moisture from those caused by later moisture movement (Nitterhouse Masonry’s overview of efflorescence).
In a basement, efflorescence may look like:
- A thin white or gray chalky film
- Dust resembling flour
- Fine or sparkling crystals
- A fluffy, frost-like deposit
- Streaks beneath a joint or crack
- A hard or uneven crust
- A pale haze over concrete or block
- Powder along the wall-floor joint
- Material emerging through failing paint
Its appearance depends on the salts, substrate, available moisture, and evaporation conditions. A thin haze and a thick crystalline patch can result from the same basic process, although they may reflect different moisture patterns or durations.
Visible liquid water is not required. Small amounts of moisture can move through pores in concrete or masonry and evaporate before droplets, seepage, or standing water become visible. A basement can therefore develop mineral deposits even when no one has observed flooding or a wet wall (Ottawa Citizen’s discussion of low-volume moisture migration).
Efflorescence confirms salt-bearing moisture movement, but it does not establish:
- How much moisture moved
- Whether movement is continuing
- Whether the source was indoors or outdoors
- Whether moisture crossed the full wall thickness
- Whether there is a bulk-water leak
- Whether a visible crack is carrying water
- Whether the underlying condition is minor or serious
- Whether the wall is ready for a coating or finish assembly
Timing matters. A deposit can reflect water present while concrete or masonry was manufactured, cured, stored, or installed. It can also result from later rain, saturated soil, condensation, or leakage. A single undated patch may be historical. A patch that returns after cleaning—particularly in connection with rain, snowmelt, plumbing use, or humid weather—is stronger evidence that both moisture and soluble salts remain available.
Before disturbing the deposit, photograph the whole wall and take close-ups. Record the patch boundary, date, recent weather, visible dampness, odors, coating failure, and nearby damage. This provides a baseline for determining whether the condition is stable or recurring.
Efflorescence, mold, and other white deposits
Efflorescence and mold are fundamentally different.
Efflorescence is mineral residue. It is nonliving and occurs mainly on mineral substrates such as concrete, block, brick, stone, and mortar.
Mold is biological growth. It can colonize damp organic materials such as wood, drywall paper, cardboard, fabric, and some insulation products. Mold and efflorescence can occur in the same basement because both may be associated with moisture.
A dry, chalky, crystalline, crumbly, or powdery deposit on bare masonry favors efflorescence. Fuzzy or irregular growth, a persistent musty odor, staining on wood or drywall, and growth extending across organic materials raise concern about mold or a mixed moisture problem. Visual appearance alone may still be inconclusive, especially on painted, dirty, deteriorated, or partly concealed surfaces (ServiceMaster Restore’s comparison of efflorescence and white mold).
Treat the following as screening clues rather than a diagnosis:
| Observation | Favors efflorescence | Raises concern about mold or another problem |
|---|---|---|
| Substrate | Bare concrete, block, brick, stone, or mortar | Wood, drywall, cardboard, fabric, or insulation |
| Appearance | Chalky film, crystals, crust, or powder | Fuzzy, irregular, spotty, or colony-like growth |
| Condition | Dry and crumbly | Damp, embedded, smeared, or associated with water damage |
| Odor | Usually no distinctive odor | Persistent musty odor |
| Pattern | Along joints, pores, or evaporation areas | Across organic materials or concealed finishes |
Color is not decisive. Efflorescence is commonly white or gray, but dirt, rust, paint residue, and other minerals can change its appearance. Mold can also appear in multiple colors. A photograph cannot reliably settle every case.
Some commercial inspection guidance describes an informal water check in which raw crystalline salts may dissolve while biological growth remains or mats down. The same guidance notes that the check may not work when a deposit is emerging through paint. It is not laboratory confirmation and should not be treated as conclusive (Environix on the water-dissolution screening check).
Seek an appropriate assessment when the deposit:
- Is extensive
- Appears on wood, drywall, fabric, or insulation
- Is inside a finished wall
- Accompanies a persistent musty odor
- Occurs with substantial water damage
- Cannot be distinguished confidently from biological growth
Inspect the surrounding materials as well. A mineral deposit may be limited to the masonry while dampness or biological growth affects:
- A wood sill or rim area
- Studs or furring strips
- Drywall facing
- Insulation
- Carpet backing
- Cardboard boxes
- Fabric stored against the wall
- Dust and debris in a concealed cavity
Identifying one patch as efflorescence does not establish that the entire room is unaffected by moisture.
Where the moisture may be coming from
Do not assume every basement deposit has the same cause. Organize the investigation into five groups: exterior runoff, ground moisture, wall openings, plumbing, and indoor condensation.
Exterior runoff
Start outside, especially if the deposit appears or expands after rain or snowmelt.
Check for:
- Gutters that overflow, leak, or discharge water near the wall
- Disconnected or blocked downspouts
- Downspouts that terminate close to the foundation
- Low areas that hold water beside the house
- Soil or paving that slopes toward the foundation
- Roof valleys or hard surfaces that concentrate runoff
- Sprinklers that repeatedly wet the wall or nearby soil
- A deposit located below an obvious runoff problem
The purpose is not to assume that a gutter or grading defect caused the deposit. Look instead for a repeatable relationship between exterior water loading and the affected area.
Ground moisture
Soil around and beneath a basement can supply moisture without producing an indoor stream or puddle. Moisture may move through pores in walls or floors by capillary action and then evaporate at the exposed surface.
A deposit concentrated near the wall-floor joint or on the slab may justify reviewing site drainage, past water problems, and the condition during prolonged wet weather. It does not by itself prove that a footing drain has failed or that a sump system is required.
Wall openings and material defects
Inspect visible cracks, utility penetrations, mortar joints, form-tie locations, and transitions between materials. Note whether deposits are concentrated around one feature and whether staining, dampness, peeling paint, or material deterioration is also present.
Not every crack is structurally important, and not every crack carries water. Record its location, shape, and apparent condition rather than choosing a repair method immediately.
Plumbing
Consider plumbing when the affected area is near:
- A water-supply line
- A drain or cleanout
- A sink, shower, toilet, or laundry area
- A water heater, boiler, or appliance
- An exterior hose connection
- Piping concealed above or behind the wall
A plumbing-related pattern may change independently of weather or worsen after a fixture or appliance is used. Look for drips, staining, damp insulation, leaking valves, and moisture traveling from above. Concealed or pressurized-pipe leakage calls for plumbing investigation rather than an assumed foundation repair.
Indoor humidity and condensation
Warm, humid indoor air can condense on cool basement masonry. This can produce surface dampness without moisture entering through the wall from outside.
Possible clues include:
- A recurring warm-weather pattern
- Condensation on other cool basement objects
- Generally elevated indoor humidity
- Dampness spread across exposed cool surfaces rather than concentrated around one opening
Dehumidification may help when condensation is the identified mechanism. It does not correct runoff, saturated soil, a plumbing leak, or active water entry through the wall.
Keep a moisture diary
A simple record is often more useful than a one-time guess. Include:
- Dated overview and close-up photographs
- The deposit boundary and whether it is expanding
- Recent rain, snowmelt, or dry weather
- Indoor relative humidity, if available
- Visible dampness or color changes
- Odors
- Plumbing or appliance use
- New peeling, blistering, staining, or corrosion
- Changes after gutter, grading, plumbing, or humidity work
Monitor through conditions relevant to the suspected source. There is no universal monitoring period that proves a wall is dry or that a moisture problem has been corrected.
A practical triage: clean, investigate, or stop work
Classifying the condition before choosing a remedy helps avoid both overreaction and premature cosmetic work.
1. Isolated dry residue
This is a small, dry patch with no visible dampness, musty odor, coating failure, nearby material damage, or known recurrence.
A reasonable response is to:
- Photograph and mark the boundary
- Check the immediate interior and exterior area
- Clean it cautiously if the deposit is reasonably identified and the surface is sound
- Allow any cleaning moisture to dry
- Monitor the area during relevant weather and seasonal changes
The deposit may be historical, but that is a working interpretation—not proof that the wall is permanently dry.
2. Recurring dry residue
If the deposit returns after cleaning or grows beyond the documented boundary, moisture and soluble salts remain available. This does not necessarily mean there is a high-volume leak, but repeated cosmetic cleaning is unlikely to stop recurrence while salt transport continues.
Use the pattern to guide further investigation:
- Recurrence after storms suggests checking runoff, saturated soil, drainage, and wall openings.
- A weather-independent patch near piping suggests checking plumbing.
- Broad surface dampness during humid periods suggests investigating condensation.
These observations identify possibilities, not definitive causes.
3. Persistent dampness
A wall that remains damp, darkened, or wet-looking deserves further investigation even when no water is flowing. The same applies when efflorescence occurs with peeling coatings, corrosion, a musty odor, suspected mold, or repeated rain-related recurrence. Commercial basement guidance identifies these accompanying conditions as reasons to look beyond a cosmetic deposit (warning signs associated with recurring basement efflorescence).
Pause plans to paint, insulate, frame, or store moisture-sensitive materials against the wall until the moisture behavior is better understood.
4. Active water entry
Visible seepage, dripping, recurring puddles, standing water, or water entering through a crack or wall-floor joint is not a routine efflorescence-cleaning project. Protect belongings where this can be done without entering a hazardous area, and obtain an evaluation suited to the apparent source.
5. Material or structural warning signs
Stop cosmetic work when you observe:
- A widening or displaced crack
- A bowed or visibly moving wall
- Crumbling concrete, block, brick, or mortar
- Loose sections of masonry
- Significant or increasing corrosion
- Repeated material loss rather than removable surface powder
Efflorescence itself does not diagnose structural failure. These separate physical symptoms are what change the scope from surface cleaning to material or structural assessment.
An old-looking deposit or a long history without flooding may be reassuring only when the wall remains dry, the patch is stable, and no related damage is present. Appearance alone cannot confirm when the deposit formed or whether its original moisture source has been corrected.
Most importantly, white residue alone does not justify a sump pump, perimeter drain, crack injection, waterproof coating, or exterior excavation. Each intervention addresses a different condition and should follow diagnosis.
How to remove efflorescence without mistaking cleanup for repair
Before cleaning, stop and reassess if you are dealing with:
- Active water entry
- Material that may be biological growth
- Crumbling or unstable masonry
- A visibly moving or displaced crack
- Loose or unknown coatings
- Dampness extending behind finished materials
If the surface is dry, sound, and bare masonry—and the deposit is reasonably identified as efflorescence—begin with the least aggressive method suitable for that material.
Start with limited dry cleaning
For a small deposit on sound masonry:
- Photograph the patch and surrounding wall.
- Move or cover nearby belongings so loosened residue does not spread onto them.
- Gently loosen the deposit with a nonmetallic brush suitable for the masonry.
- Collect the loosened material rather than dispersing it around the basement.
- Inspect the exposed surface for cracks, dampness, erosion, or coating failure.
- Record the cleaned boundary for later comparison.
Avoid aggressive abrasion as a default. A forceful method may alter a weak or soft surface and can make it harder to distinguish removable residue from actual material loss.
If cleaning would create substantial airborne dust, disturb an unknown coating, or affect a large area in an occupied basement, stop and obtain task- and material-specific guidance rather than relying on a generic procedure.
Use as little water as practical
Large amounts of water can dissolve and remobilize salts. Indoor water-based cleaning also creates rinse water that must be controlled and requires the wall to dry fully afterward. Manufacturer guidance therefore recommends beginning with the least aggressive approach and limiting water because added moisture can restart salt movement (W. R. Meadows’ efflorescence-removal guidance).
Do not transfer an exterior cleaning procedure to an occupied basement without confirming that it is suitable for the substrate, surrounding materials, drainage, and product instructions.
Escalate only to a compatible cleaner
If gentle brushing is insufficient:
- Identify the substrate: poured concrete, block, brick, mortar, stone, or a coated surface.
- Choose a cleaner whose label specifically permits use on that material and in the intended setting.
- Read the complete label and safety documentation.
- Test a small, inconspicuous area.
- Protect adjacent materials as directed.
- Follow the stated application, ventilation, protection, rinsing, and drying requirements.
- Stop if the surface changes unexpectedly, softens, becomes rough, or begins shedding material.
A cleaner suitable for dense exterior concrete may not be appropriate for old brick, soft mortar, colored concrete, or a painted basement wall.
Treat acid-based cleaning as a specialist escalation
Acid-based treatment is not a default DIY recipe. It can change the color, texture, or surface profile of concrete, and residual acid can interfere with later coatings. Where an acid product is considered, follow that specific product’s label and safety documentation rather than a general dilution or neutralization formula.
Concrete-treatment guidance calls for thorough neutralization, rinsing, drying, and pH checking where directed before coating an acid-treated surface. It also warns that treatment can alter appearance and that residues must be controlled appropriately. Those requirements make acid treatment a poor candidate for improvisation, particularly indoors.
After any cleaning, photograph the area again. Successful cleanup means that the visible residue was removed. It does not prove that moisture movement stopped. If the deposit returns at or beyond the recorded boundary, treat that recurrence as information about the wall’s moisture behavior.
Match the correction to the moisture pathway
Surface cleaning and source correction are different jobs. Cleaning removes salts that have already reached the surface. It cannot prevent new deposits while moisture continues to transport salts.
Begin with observable, relatively low-disruption causes:
- Repair confirmed plumbing leaks.
- Clear or repair defective gutters.
- Reconnect blocked or disconnected downspouts.
- Direct roof runoff away from the foundation where appropriate.
- Correct soil or paving that channels water toward the building.
- Prevent sprinklers from repeatedly soaking the foundation area.
- Manage indoor humidity when condensation is implicated.
- Evaluate an identified opening or deteriorated joint for a material-compatible repair.
Even simple measures must match the evidence. Extending a downspout will not fix a leaking supply pipe, and running a dehumidifier will not repair a rain-carrying crack.
Cracks and joints
A crack may require observation, sealing, injection, repointing, drainage correction, or structural evaluation. The appropriate response depends on:
- Wall type and material
- Crack width, shape, and location
- Whether the sides are displaced
- Whether movement appears to be continuing
- Whether water enters through the crack
- Whether the crack is in the wall or only in a finish
- Whether access is available from the interior or exterior
Avoid a generic “seal every crack” approach. First determine whether the feature is stable, moving, carrying water, or limited to a surface finish.
Dehumidification
A dehumidifier controls indoor humidity. It may reduce condensation on cool surfaces and help the basement dry after a corrected leak. It is not foundation waterproofing and does not repair exterior runoff, saturated soil, plumbing leakage, or active bulk-water entry.
Interior drainage and sump systems
Interior perimeter drains and sump systems may be appropriate when investigation confirms that water is collecting at the foundation or repeatedly entering at the wall-floor joint. They are not automatic responses to a dry white patch.
An expert-moderated building-science discussion similarly treats added drainage as conditional on whether a bulk-water problem remains, rather than as a requirement created by old efflorescence alone (Green Building Advisor discussion of drainage before basement finishing).
Such systems manage collected water.
Exterior drainage and waterproofing
Exterior work may be appropriate when the identified problem is adverse grading, concentrated runoff, failed drainage, damaged below-grade protection, or a wall defect best accessed from outside. The scope can range from surface water management to excavation and replacement of drainage or waterproofing components.
Because excavation is disruptive, it should follow a clear diagnosis. No system should be accepted merely because it is presented as a universal or permanent cure for efflorescence.
Interior coatings and sealers
A coating may be suitable in some assemblies, but its performance depends on:
- Masonry type and condition
- Moisture direction
- Moisture frequency and pressure
- Existing coatings or curing compounds
- Surface cleanliness and condition
- Product limitations
- Required preparation and drying
- The intended finished-wall assembly
Coating guidance recommends correcting the moisture source and delaying painting when efflorescence continues because recurring moisture and salts can undermine the finish (Sherwin-Williams’ efflorescence troubleshooting guidance). An interior coating is not a universal substitute for correcting runoff, drainage, plumbing, or wall-opening problems.
When comparing repair proposals, ask:
- What moisture mechanism has been identified?
- What observations support that diagnosis?
- How does the proposed work address that mechanism?
- Which possible sources does it not address?
- How will performance be checked afterward?
- What maintenance or access will the system require?
- What is the next step if dampness or deposits return?
A proposal should explain the failure mode, not merely name a proprietary system.
Before painting, sealing, insulating, or finishing the basement
Removing visible salts does not establish that the wall is ready for paint, sealer, insulation, studs, drywall, cabinets, flooring, or stored organic materials.
If moisture continues, salts may return and coatings may blister, bubble, peel, or lose adhesion. Concealing the wall can also make recurrence harder to observe while placing wood, drywall paper, dust, cardboard, or other organic materials near a moisture-prone surface.
Before covering the wall, work through this checklist:
- [ ] The original deposit has been photographed and its boundary recorded.
- [ ] The material has been identified with reasonable confidence.
- [ ] The deposit has been removed without obvious substrate damage.
- [ ] Active seepage and standing water have been ruled out or corrected.
- [ ] Gutters, downspouts, grading, and exterior runoff have been reviewed.
- [ ] Nearby plumbing and appliances have been checked.
- [ ] Cracks, penetrations, mortar joints, and coating failures have been inspected.
- [ ] Indoor humidity and possible condensation have been considered.
- [ ] Drainage conditions have been reviewed where the pattern suggests ground moisture.
- [ ] The cleaned area has been observed during conditions relevant to the suspected source.
- [ ] Nearby wood, drywall, insulation, flooring, and stored materials have been inspected.
- [ ] The proposed coating or wall assembly has been evaluated for the substrate and actual moisture conditions.
Do not rely on a universal number of “dry days.” A wall that looks dry during a short rain-free period may behave differently during prolonged rain, snowmelt, humid weather, or nearby plumbing use.
A single moisture-meter percentage is also not a universal pass-or-fail result. A reading is meaningful only when the procedure and interpretation are defined.
An informal plastic-sheet check has similar limits. Condensation beneath or around plastic may provide a clue, but it does not necessarily identify the complete moisture route or establish whether a particular coating, insulation, or vapor-control assembly is suitable.
If efflorescence has recurred, dampness remains unexplained, or the basement will receive moisture-sensitive finishes, obtain project-specific building-envelope or design guidance before concealing the wall. Finishing readiness is a separate building-assembly decision—not the automatic result of successful cleaning.
When professional evaluation is warranted
Pause DIY cleaning or finishing and seek an assessment when there is:
- Active seepage or flowing water
- Recurring standing water
- Persistent unexplained dampness
- A widening or displaced crack
- A bowed or visibly moving wall
- Crumbling concrete, block, brick, or mortar
- Significant or increasing corrosion
- Widespread or uncertain biological growth
- A persistent musty odor
- Dampness behind drywall, insulation, paneling, or other finishes
- Recurrence consistently associated with rain or snowmelt
- Repeated coating failure
- An unresolved source before a basement-finishing project
Choose expertise according to the apparent problem:
- Plumber: Supply, drain, fixture, appliance, or concealed-pipe leakage
- Masonry professional: Deteriorated mortar, block, brick, concrete, or material-compatible repairs
- Building-envelope specialist: Uncertain pathways involving runoff, condensation, vapor, drainage, and wall assemblies
- Qualified mold assessor: Uncertain or widespread growth, especially on concealed or organic materials
- Structural professional: Wall movement, bowing, displacement, major cracking, or suspected structural distress
Before accepting a proprietary waterproofing package or major excavation proposal, ask for the moisture mechanism to be identified and connected explicitly to the proposed work. Efflorescence is evidence of salt-bearing moisture movement; it is not, by itself, a repair specification.
Mortar Desk provides general building-material reference information, not an individual inspection, contracting recommendation, or engineering opinion.
Is efflorescence in a basement dangerous?
Identified efflorescence is generally described as a nonliving mineral deposit with little direct health significance. That narrow statement does not mean an unknown white material—or the moisture condition associated with it—should be assumed harmless. Dampness may coexist with mold on nearby organic materials or with deterioration and corrosion elsewhere in the assembly.
Avoid unnecessarily disturbing an unidentified deposit. If it is fuzzy, musty, extensive, located on wood or drywall, or difficult to identify, stop and seek an appropriate assessment.
Can efflorescence form without a visible basement leak?
Yes. Small amounts of moisture can move through porous concrete or masonry and evaporate before visible droplets, seepage, flooding, or standing water develop. The remaining salts may be the only obvious evidence.
The deposit shows that salt-bearing moisture moved, but it does not establish the volume, timing, route, or current severity. Construction moisture, ground moisture, condensation, and low-volume leakage are all possible contributors.
Why does efflorescence return after I brush it away?
Brushing removes salts already deposited at the surface. If moisture continues to dissolve and transport soluble salts, new residue can form when that moisture evaporates.
Compare the returning patch with dated photographs and look for a relationship to rain, snowmelt, indoor humidity, plumbing use, or other conditions. Repeated cleaning without source investigation treats the visible result rather than the process producing it.
Can I paint or seal over basement efflorescence?
Do not paint or seal directly over loose efflorescence. The deposit can interfere with adhesion, while continuing moisture and salt movement can contribute to renewed deposits or coating failure.
Clean and inspect the substrate first, investigate the moisture source, and confirm that the selected coating is compatible with the wall and expected moisture conditions. A clean surface may be necessary, but cleanliness alone does not prove readiness.
Does efflorescence mean I need a sump pump or perimeter drain?
No. Efflorescence alone does not establish the need for either system. A sump pump or perimeter drain may be appropriate when investigation confirms recurring water collection, groundwater conditions, or entry at the wall-floor joint that the system is designed to manage.
The practical sequence is to identify the deposit cautiously, document its location and timing, check for urgent warning signs, clean a dry and sound surface with the least aggressive suitable method, and investigate runoff, ground moisture, openings, plumbing, and condensation. Correct the identified source rather than only the residue, then verify performance before covering the wall. Efflorescence is not automatically a crisis or a structural diagnosis, but recurring salts are useful evidence of moisture movement and should not simply be hidden behind a cosmetic finish.