 MortarDesk
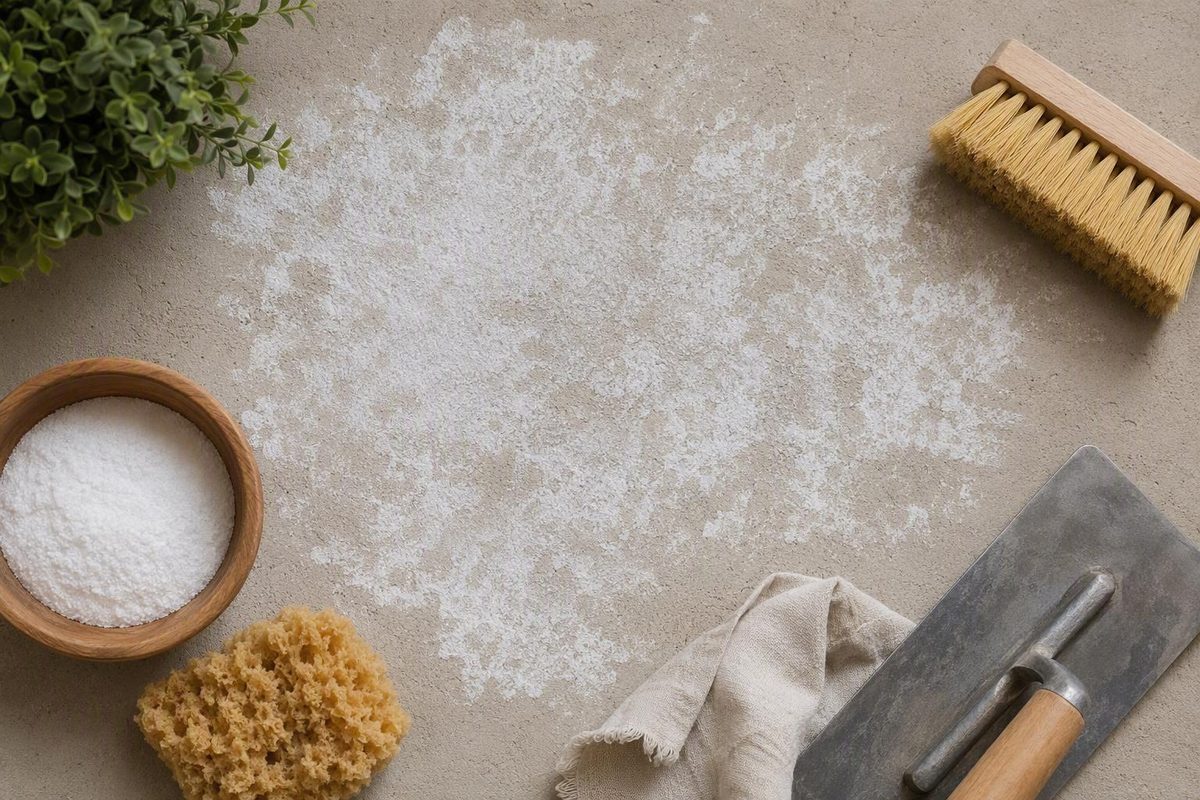
A white bloom on stucco is often efflorescence: mineral salts left behind after moisture moves through or across a cement-based surface and evaporates. The residue is usually an appearance issue, but the process that produced it deserves attention because it confirms that water transported dissolved minerals to the surface.
A sensible response follows five steps:
- Check whether the material is consistent with efflorescence.
- Inspect plausible moisture sources and drainage paths.
- Clean a small, sound area with the least aggressive compatible method.
- Monitor the wall after rain, irrigation, or other relevant wetting.
- Seek qualified help if the deposit returns rapidly or the wall shows deterioration.
The goal is not simply to make the white mark disappear. It is to understand why it appeared without damaging the stucco in the process.
What efflorescence looks like—and what it means
Efflorescence on cement-based stucco is usually a white or grayish deposit. It may look powdery, chalky, gritty, crystalline, or crust-like. Loose deposits can resemble flour or dust; more persistent ones may form hard specks, streaks, bands, or a rough bloom at or near the surface.
The term refers to the mineral residue, not to a biological organism. Water dissolves soluble salts in or around the wall, transports them, and leaves them behind when it evaporates. Stucco manufacturer Omega Products describes efflorescence as a usually white crystalline deposit on portland-cement plaster and notes that it can recur whenever the necessary moisture and salts remain available—not only immediately after construction. See Omega Products’ technical explanation of stucco efflorescence.
The visible salt is generally treated as cosmetic rather than direct proof that a wall is structurally damaged. An unattractive surface deposit is not the same thing as detached plaster, corroded metal, decayed sheathing, or a failing coating.
That does not make the deposit meaningless. Efflorescence demonstrates that moisture has moved through or across mineral-bearing material. Persistent moisture can coexist with cracking, coating failure, corrosion, rot, or deterioration elsewhere in the wall assembly even when the salt itself is not causing those conditions.
Think of the white bloom as evidence of a process, not a complete diagnosis. It tells you that salts, moisture, a transport route, and evaporation came together. It does not reveal whether the water came from rain, irrigation, condensation, plumbing, curing moisture, groundwater, or another source.
A single patch also does not automatically prove defective workmanship, a concealed leak, or structural failure. New stucco can develop efflorescence from construction and curing moisture. An otherwise sound wall may be wetted by unusual weather, concentrated runoff, or sprinkler overspray. Location and timing provide clues, but neither is conclusive by itself.
Before cleaning, look beyond the color:
- Is the stucco bare, painted, integrally colored, or covered with another finish?
- Does the material sit loosely on the surface or appear to emerge through a coating?
- Is the wall dry and firm, or damp, soft, cracked, bulging, or loose?
- Is the bloom isolated or spread over a large area?
- Did it appear after construction, rain, irrigation, cold weather, or plumbing use?
- Has it returned to exactly the same place?
These observations help distinguish routine surface maintenance from a moisture investigation or repair problem.
How moisture and salts create the white bloom
Efflorescence forms through four connected stages.
First, soluble salts must be present. Cementitious ingredients can contain compounds capable of dissolving in water. Salts may also come from mixing water, aggregates, underlying brick or concrete block, soil, groundwater, environmental exposure, or contaminants left by previous cleaning.
Second, water dissolves some of those salts. The moisture may originate in the stucco during construction, or it may enter later through rain, condensation, irrigation, plumbing, capillary movement, or another source.
Third, the salt-bearing solution moves. Cement stucco is porous rather than completely impermeable. Liquid can travel through connected pores and may also use hairline cracks, shrinkage voids, penetrations, gaps, or poorly performing construction details. These are possible transport routes; their inclusion in a general list does not mean every bloom proves incorrect installation.
Fourth, the water evaporates. As moisture reaches an evaporation zone, the dissolved material crystallizes. If evaporation occurs at the face of the stucco, the salts become visible as a surface bloom. If evaporation occurs below the face, deposits may remain within or just beneath the surface.
Porosity affects how readily salt-bearing water can move, while humidity and other drying conditions affect where deposition occurs. Building-material supplier Pebble Junction explains that more porous material can permit easier migration and that evaporation conditions may leave salts either at the face or beneath it. These are general material behaviors, not a way to diagnose the concealed condition of a particular wall. Read Pebble Junction’s overview of porosity and salt deposition.
The chemistry is not identical in every case. One documented example involves calcium hydroxide produced during portland-cement hydration. It can dissolve, migrate through capillaries, and react with carbon dioxide in the air to form calcium carbonate. Other soluble compounds can also contribute, so efflorescence should not be assumed to have one universal composition. Omega Products identifies several possible carbonates, sulfates, chlorides, nitrates, and related compounds in reported deposits.
This variation helps explain why one deposit brushes away easily while another adheres stubbornly. A soft, newly formed bloom may consist largely of loose crystals. A more strongly bonded or repeatedly wetted deposit may resist gentle cleaning. Its cleaning behavior alone does not establish its chemical composition.
The process also explains why cleaning is not necessarily a cure. Brushing removes crystals produced at the final stage, but it does not remove every remaining salt, close every transport route, or stop the water. If the wall becomes wet again, another salt solution can move toward an evaporation surface and form a new bloom.
Water used during cleaning can contribute to that cycle. It may dissolve part of the deposit and carry it back into the pores, allowing salts to return as the wall dries. Water cleaning is not always unsuitable, but it should be compatible with the finish and limited to what is necessary.
Primary versus secondary efflorescence—and why weather matters
Efflorescence is commonly divided into primary and secondary forms, although the terms describe broad circumstances rather than a precise timetable.
Primary efflorescence is associated with moisture present during manufacture, installation, construction, or curing. It is therefore more likely to be noticed on relatively new cement-based work. Moisture already in the stucco carries available salts toward an evaporation surface as the material dries.
Secondary efflorescence develops after the stucco has cured and is exposed to later wetting. Rain, irrigation, leaks, condensation, groundwater, or repeated wet-and-dry cycles can dissolve remaining salts and transport them to the surface.
Published descriptions do not use a consistent hour, month, or year at which primary efflorescence becomes secondary. A rigid cutoff is therefore not a reliable diagnostic tool. The useful question is whether the bloom reasonably corresponds with initial construction moisture or with later, continuing exposure to water.
Weather can make both moisture movement and the resulting deposit more noticeable. Prolonged rain supplies water, while cool, wet conditions may slow drying and keep the material moist longer. When drying resumes, salts carried toward the face can crystallize. Repeated wetting and drying may build successive deposits.
Condensation can produce a similar cycle where surface or internal temperatures permit water to collect. In climates with freezing conditions, freeze-thaw cycles may also affect moisture movement and surface condition. Omega Products reports that efflorescence is often observed during wet, cold periods while emphasizing that it can recur whenever the underlying conditions remain.
An early bloom on otherwise firm, intact new stucco may diminish as initial moisture leaves and readily available salts are depleted. That is a reasonable condition to document and monitor. It is not a guarantee that every new wall will clear within a particular number of months or years.
Context changes the response. A small bloom soon after installation, with no abnormal dampness or deterioration, may call for observation and a conversation with the installer or finish manufacturer. A deposit that suddenly appears on established stucco—or repeatedly returns in the same place after rain—deserves closer attention to ongoing wetting.
Weather can be a trigger without being the root cause. A deposit after a storm might result from ordinary saturation of an exposed cement finish, concentrated roof runoff, wind-driven rain around a window, or a concealed drainage problem. “It happened after rain” narrows the timing, but not the diagnosis.
Efflorescence or mold? Use clues, not a one-step diagnosis
Efflorescence and mold are fundamentally different. Efflorescence is deposited mineral material. Mold is biological growth that can develop where moisture and suitable nutrients are present.
Their appearances can overlap, particularly at a distance or on a dirty, painted, or damp wall. Use several clues together rather than relying on color alone.
| Preliminary clue | More consistent with efflorescence | More consistent with mold |
|---|---|---|
| Texture | Dry, chalky, powdery, gritty, crystalline, or crust-like | Fuzzy, matted, thread-like, slimy, or irregular |
| Odor | Usually odorless | May be associated with a musty odor |
| Light brushing | Loose crystals may crumble or brush away | Material may smear, mat down, stain, or remain attached |
| Small water-response check | Raw soluble material may temporarily dissolve | Usually does not dissolve in the same way |
| Typical setting | Cement stucco or adjacent mineral masonry | Damp material with available organic matter, including accumulated dirt or nearby wood and paper-faced products |
These are screening clues, not definitive tests. Commercial mold-inspection provider Mold Pros Phoenix describes efflorescence as commonly chalky, crystalline, or gritty and mold as potentially soft or fuzzy, while acknowledging that paint and collected dirt can complicate the comparison. See its mold-and-efflorescence comparison.
If the surface is sound and the check will not damage the finish, a tiny loose sample may crumble like mineral powder. A small amount of plain water may cause a raw salt deposit to disappear temporarily as it dissolves. Mold generally will not dissolve in the same fashion. The result can nevertheless be unclear when salts sit beneath paint, a deposit contains dirt, or biological growth and efflorescence occur together.
Do not use bleach as a diagnostic test. A color change after chemical exposure does not reliably identify the material, and it does not explain the moisture path.
Do not assume every white mark on bare stucco is efflorescence. Other possibilities include irrigation residue, coating-related discoloration, construction residue, dirt, or mixed contamination. The available visual clues do not reliably distinguish every look-alike.
Professional assessment is appropriate when:
- the material remains ambiguous after a cautious visual check;
- the area stays damp or repeatedly becomes wet;
- there is a musty odor;
- the deposit is near wood, drywall, insulation, or another potentially affected organic component;
- staining is visible inside the building;
- occupants have a reason to avoid disturbing unknown material; or
- cleaning reveals deterioration rather than a stable mineral surface.
A qualified mold assessor can address uncertainty about biological growth. A stucco contractor or building-envelope specialist is better suited to questions about how water enters, drains from, or moves through the wall. Some situations require both kinds of expertise.
Trace the water path before treating the stain
Start outside and work from obvious, accessible causes toward concealed ones. You are looking for correlations and visible defects—not trying to infer the entire wall condition from one patch.
Check water delivery from above
Inspect:
- roof edges and runoff patterns;
- gutters for blockage, overflow, separation, or poor alignment;
- downspouts and their discharge points;
- walls repeatedly exposed to wind-driven rain;
- visible flashing conditions that can be checked without dismantling the wall; and
- concentrated streaks beneath roof intersections, scuppers, balconies, or projections.
Deposits beneath a roofline suggest checking runoff, gutters, downspouts, and flashings. They do not prove that any one component is the cause.
Check windows, doors, and penetrations
Look around:
- window and door perimeters;
- exterior lights;
- vents and exhaust outlets;
- hose bibs;
- plumbing penetrations;
- electrical boxes;
- utility entries; and
- transitions between stucco and dissimilar materials.
Cracked, separated, missing, or poorly bonded sealant can admit water, but not every joint should be caulked. Some flashing and drainage details must release water rather than trap it. A deposit below a window is a reason to inspect perimeter sealant, head and sill details, flashing, and intended drainage—not proof that the window itself leaks.
Check conditions near grade
At the base of the wall, inspect:
- soil or paving that slopes toward the building;
- low areas where water collects;
- downspouts that discharge too close to the wall;
- soil, mulch, or paving placed high against the stucco;
- rain splashback;
- irrigation patterns;
- groundwater or capillary wetting where relevant; and
- drainage openings at the bottom of the wall.
Where a weep screed or another intended drainage outlet is present, check whether paint, caulk, soil, paving, or debris has obstructed it. Do not seal these openings indiscriminately. Home-improvement guidance from Rosie on the House specifically warns against caulking a stucco weep screed because it is intended to remain open for drainage. Review its stucco drainage guidance.
White bands near grade may justify checking splashback, sprinklers, grading, groundwater conditions, and wall-base drainage. The pattern identifies candidates, not the concealed cause.
Check irrigation and plumbing
Run irrigation zones one at a time and observe whether spray reaches the wall. Look for recurring wet arcs, mineral spotting, damaged emitters, or irrigation operating too close to the building.
Consider plumbing when deposits correspond with hose-bib use, fixture use, known supply or drain routes, or unexplained wetness. If a supply or drain leak is suspected, a plumber—not more exterior cleaning—is the appropriate next step.
Consider condensation and indoor humidity
Not all moisture arrives as visible exterior liquid water. Interior humidity can move toward colder parts of an assembly, and condensation may form where temperature conditions permit. This possibility becomes more relevant when the bloom corresponds with cold periods, elevated indoor humidity, poor ventilation, or interior moisture-generating activities.
Document before cleaning
Photograph the deposit from several distances before disturbing it. Include a fixed reference point so you can find the same area later. Record:
- the date;
- recent rain or snow;
- irrigation timing;
- cold-weather conditions;
- plumbing use, if relevant;
- unusual indoor humidity or condensation;
- whether the wall felt dry or damp; and
- the approximate size and position of the deposit.
After cleaning, photograph the same area following the next relevant rain or irrigation cycle. If the bloom returns only after one sprinkler zone operates, that is useful evidence. If it appears after wind-driven rain but not ordinary rain, exposure direction becomes relevant.
Patterns narrow an investigation but do not establish what lies behind the stucco. Cracks, windows, plumbing, drainage, gutters, and humidity are all plausible contributors to moisture symptoms, but exterior observation cannot confirm concealed damage. Stucoflex summarizes these potential moisture pathways and associated wall symptoms.
A homeowner can usually document timing, redirect a sprinkler, clear an accessible gutter, observe runoff, and inspect visible sealant. Removing stucco, opening a wall, conducting invasive moisture testing, rebuilding flashing, or diagnosing a concealed drainage plane is different work and may require a qualified stucco contractor or building-envelope professional.
A least-aggressive-first cleaning sequence
DIY cleaning is best limited to a small deposit on a sound, stable surface. Do not begin if the stucco is bulging, loose, crumbling, persistently saturated, extensively cracked, or showing signs of concealed deterioration.
Traditional cement stucco, painted stucco, acrylic finishes, and synthetic exterior systems should not be assumed to tolerate the same brush, cleaner, water volume, or technique. If you cannot identify the surface, consult the installer or finish manufacturer before proceeding.
Step 1: Record and assess the condition
Photograph the deposit before cleaning and note recent weather or water exposure. Inspect the immediate area for:
- paint or another coating;
- hairline or larger cracks;
- loose or detached material;
- softness or surface erosion;
- peeling or blistering;
- discoloration unrelated to the bloom; and
- persistent dampness.
If the stucco is painted, salts may be beneath or within a failing coating rather than simply resting on top. Cleaning the visible surface may reveal adhesion failure that requires separate preparation and repair.
Step 2: Begin with dry removal
Wait until the wall and deposit are dry. Use a soft, non-damaging brush suitable for the finish. Work gently across a small area rather than scrubbing aggressively into the texture.
Collect loosened material where practical instead of immediately washing it down the wall. Dry brushing avoids supplying more water that could dissolve salts and move them back into the pores.
Do not default to a wire brush. It may scratch a coating, remove texture, expose aggregate, leave residue, or erode a soft surface. Use one only if the applicable finish manufacturer expressly permits it.
Step 3: Consider minimal clean water only if compatible
If loose material remains and the stucco or coating manufacturer permits water cleaning, test a hidden or inconspicuous area first. Use the minimum amount of clean water needed and do not saturate the wall.
Watch the test area for:
- color change;
- texture loss;
- softening;
- coating lift;
- streaking;
- uneven appearance; or
- delayed reappearance of salts.
Water may dissolve soluble salts rather than remove them completely. If the solution is drawn back into the surface, another bloom can develop while the wall dries. Pebble Junction’s masonry guidance therefore distinguishes dry brushing from washing and cautions that wash water can carry soluble salts back into porous material.
Step 4: Let the area dry and reassess
Allow the area to dry under suitable weather conditions. Do not judge success solely by how the surface looks while wet; water can temporarily hide a pale deposit and deepen the color of the finish.
Once dry, compare the cleaned and uncleaned areas. Check:
- whether the salt is gone or merely less visible;
- whether surface color or texture changed;
- whether paint remains firmly adhered;
- whether the area stays damp; and
- whether the bloom returns after the next rain or irrigation event.
Stop if the surface deteriorates
Discontinue DIY cleaning if the stucco:
- crumbles or sheds sand;
- releases or detaches material;
- loses its original texture or color;
- remains wet;
- exposes peeling or failing paint;
- bulges;
- develops significant or widespread cracks; or
- releases pieces during brushing or rinsing.
A resistant deposit does not justify automatically escalating to stronger acid, a harder brush, or more pressure. Hard deposits may require a compatible specialty treatment selected according to current instructions from the stucco, finish, coating, and cleaner manufacturers. Professional treatment may be preferable where the finish is uncertain, extensively coated, historically significant, or already deteriorated.
Keep four tasks separate:
- Salt removal addresses the visible residue.
- Moisture correction addresses unnecessary wetting or a defect.
- Drying and monitoring show whether the condition is stable.
- Finish restoration addresses lasting color or coating damage.
Combining them into one hurried cleaning-and-painting project can hide evidence needed to understand the wall.
Why pressure washing, acids, and premature coatings can backfire
Generic advice for concrete, brick, or masonry is not automatically suitable for every stucco wall. Traditional cement plaster, integrally colored finishes, painted surfaces, acrylic finishes, and synthetic systems may respond differently.
Pressure and powered washing
A pressure washer can remove more than salt. Depending on the finish and its condition, powered washing may erode the surface, alter texture or color, dislodge material, damage a coating, or add substantial moisture to the wall. Rosie on the House cautions that pressure washing can damage stucco and advises stopping if pieces become dislodged.
No single pressure, nozzle, or working distance can be presented as safe for every stucco system. A setting used successfully on concrete or brick is not automatically compatible with a textured finish coat.
If powered cleaning is contemplated, identify the wall system, consult the applicable manufacturers, and test an inconspicuous area. Stop if material becomes dislodged, appearance changes, or visible defects allow water into the assembly.
Acids, etchers, and vinegar
Acidic cleaners can dissolve mineral deposits, but they can also attack calcium compounds in portland-cement materials, alter appearance, erode the surface, or damage adjacent materials. Chemical handling and runoff create additional safety concerns. Pebble Junction’s guidance warns that acid can discolor masonry, erode mortar, and attack calcium compounds in portland-cement products. Review its acid-cleaning cautions.
Vinegar is still a chemical cleaning option. Its familiarity as a household product does not establish compatibility with stucco, paint, sealants, metals, or surrounding finishes.
Manufacturer instructions for formulated removers or etchers apply only to the specified products and substrates. QUIKRETE, for example, warns that concentrated cleaner may etch a masonry surface and calls for an inconspicuous test and protective equipment. See QUIKRETE’s cleaner precautions.
Do not improvise an acid dilution or neutralization process from generic masonry advice. Concentration, protective equipment, pre-wetting, contact time, rinsing, neutralization, runoff control, and compatibility are product- and system-dependent. A stubborn deposit may be better left to a qualified professional.
Paint, sealers, and waterproof coatings
Painting over active salts may briefly hide the bloom while leaving moisture movement unchanged. Deposits can reappear beneath or through the coating, and continuing moisture may be followed by staining, peeling, blistering, or loss of adhesion.
The same caution applies to sealers, elastomeric coatings, and generalized “waterproofing.” Atlas Stucco warns that incorrect sealing can trap moisture and worsen the condition. A coating suitable for one wall may interfere with drainage or drying in another. Review its discussion of sealing and recurring efflorescence.
Visible cleanliness is not proof that a wall is ready for coating. Nor is a surface that feels dry to the hand. Moisture may remain below the face, salts may still be present, and the coating system may require specific preparation or substrate conditions.
Sherwin-Williams advises correcting the moisture source and delaying painting while efflorescence continues. The eventual coating process should follow current instructions for the actual stucco finish, primer, and topcoat rather than a generic schedule. See Sherwin-Williams’ troubleshooting guidance.
Avoid caulking every visible opening. Compatible repair of failed perimeter sealant or a genuine surface defect may be appropriate, but weep screeds, joints, vents, and other intended drainage or movement details must remain functional. Effective moisture management depends on controlled drainage and drying, not on making the exterior face indiscriminately impermeable.
Prevention, monitoring, and signs that call for a professional
Complete prevention cannot be promised. Cement-based materials contain pores and potentially soluble compounds, while buildings remain exposed to weather and ordinary moisture. The practical objective is to reduce unnecessary wetting, preserve drainage, and respond to recurring patterns.
Useful maintenance measures include:
- redirecting sprinklers away from the wall;
- repairing damaged irrigation components;
- keeping gutters clear and aligned;
- ensuring downspouts discharge appropriately;
- correcting obvious roof or plumbing leaks;
- reducing persistent splashback;
- improving drainage and grading where appropriate;
- maintaining compatible exterior sealant at joints intended to be sealed;
- repairing suitable surface defects with materials compatible with the stucco system; and
- keeping intended weeps and drainage outlets unobstructed.
Do not treat “more sealant” as a universal preventive measure. A finish crack, an intentional joint, a drainage outlet, and a window perimeter are not interchangeable details.
After cleaning a small area, monitor it through subsequent rain or irrigation cycles. Dated photographs are more useful than memory. Record whether the deposit returns quickly or only after a particular event, whether it grows in area, and whether the stucco remains firm and dry between wetting events.
A small, early bloom on sound new stucco may reasonably be monitored. Repeated deposits on an established wall deserve closer moisture investigation, especially when recurrence is concentrated beneath a window, roofline, penetration, or near grade.
Stop routine maintenance and seek qualified assessment when you observe:
- widespread or rapidly returning efflorescence;
- persistent dark or wet areas;
- soft, sandy, or crumbling stucco;
- bulging, detachment, or delamination;
- significant or widening cracks;
- peeling or blistering paint;
- rust staining or exposed corroding metal;
- suspected rot;
- interior staining or dampness;
- musty odors;
- uncertain biological growth; or
- suspected plumbing leakage.
Match the professional to the problem:
- Finish or coating manufacturer: compatibility, approved cleaning, preparation, and recoating requirements.
- Qualified stucco contractor: surface deterioration, cracks, detachment, or installation concerns.
- Building-envelope specialist: recurring or concealed water paths, flashing and drainage questions, moisture mapping, or invasive inspection.
- Plumber: suspected supply, drain, or fixture leakage.
- Qualified mold assessor: ambiguous growth, musty odors, or potentially affected organic materials.
Mortar Desk publishes general building-material reference information. It does not inspect walls, select site-specific repairs, or provide contracting or engineering advice, as explained in its description of Mortar Desk’s role and limitations.
Frequently asked questions about efflorescence in stucco
Does efflorescence mean my stucco wall is leaking?
Not necessarily. Efflorescence confirms that moisture dissolved and transported salts, but it does not identify the source. Water may come from curing moisture, rain absorbed at the surface, roof runoff, sprinklers, condensation, groundwater, plumbing, or a concealed leak.
A recurring patch on established stucco—especially one associated with a particular rain direction, irrigation zone, or plumbing use—justifies investigation. A single patch does not by itself prove a construction defect or concealed wall leak.
Will efflorescence damage stucco or create a health hazard?
The visible mineral residue is generally treated as cosmetic and is nonbiological. That limited description should not be extended into a guarantee about every unknown white deposit or the condition surrounding it.
Persistent moisture can accompany coating failure, corrosion, softening, rot, or biological growth elsewhere in an assembly. Avoid disturbing ambiguous material until you are reasonably confident that it is a mineral deposit, particularly when damp organic materials or musty odors are present.
Why does efflorescence return after I brush or wash it away?
Brushing removes deposited crystals but does not necessarily remove remaining salts or stop water movement. If moisture again dissolves salts and carries them toward an evaporation surface, another bloom can form.
Washing may also redissolve salts and move them into the pores, allowing them to reappear during drying. Recurrence is therefore a reason to trace wetting and drainage rather than to clean more aggressively.
Can I paint or seal stucco after removing efflorescence?
Possibly, but not merely because the visible residue is gone. First address the moisture source, allow suitable drying, confirm that the substrate and existing coatings are stable, and follow the current preparation requirements for the actual stucco, finish, primer, and paint system.
Behr’s coating-preparation guide directs users to remove efflorescence before recoating, but removal is only one part of readiness. See Behr’s preparation guidance. Do not block weep screeds or other drainage openings, and do not assume a generic sealer or waterproof coating is suitable for the wall.
When should recurring efflorescence be professionally assessed?
Arrange an assessment when deposits are widespread, return rapidly, or occur with persistent dampness, soft or detached stucco, bulging, significant cracking, peeling paint, rust, suspected rot, interior staining, musty odors, possible mold, or suspected plumbing leakage.
Professional assessment is also prudent when the stucco system is unknown, the wall is extensively painted or coated, cleaning changes the texture, or diagnosis would require opening the assembly. Recurrence alone does not prove concealed damage, but it shows that the salt–moisture–transport cycle remains active.
The practical decision path is straightforward: determine only whether the material is consistent with efflorescence, document where and when it appears, check plausible water sources, and gently dry-brush a small deposit if the stucco is sound and the method is compatible with its finish. Then monitor the area after the next relevant wetting event.
If the bloom returns, treat recurrence as a reason to investigate moisture—not as a reason to clean more aggressively. Stop DIY work when identification is uncertain or the wall shows persistent dampness, coating failure, cracking, softness, detachment, interior staining, rust, rot, or possible mold.