 MortarDesk
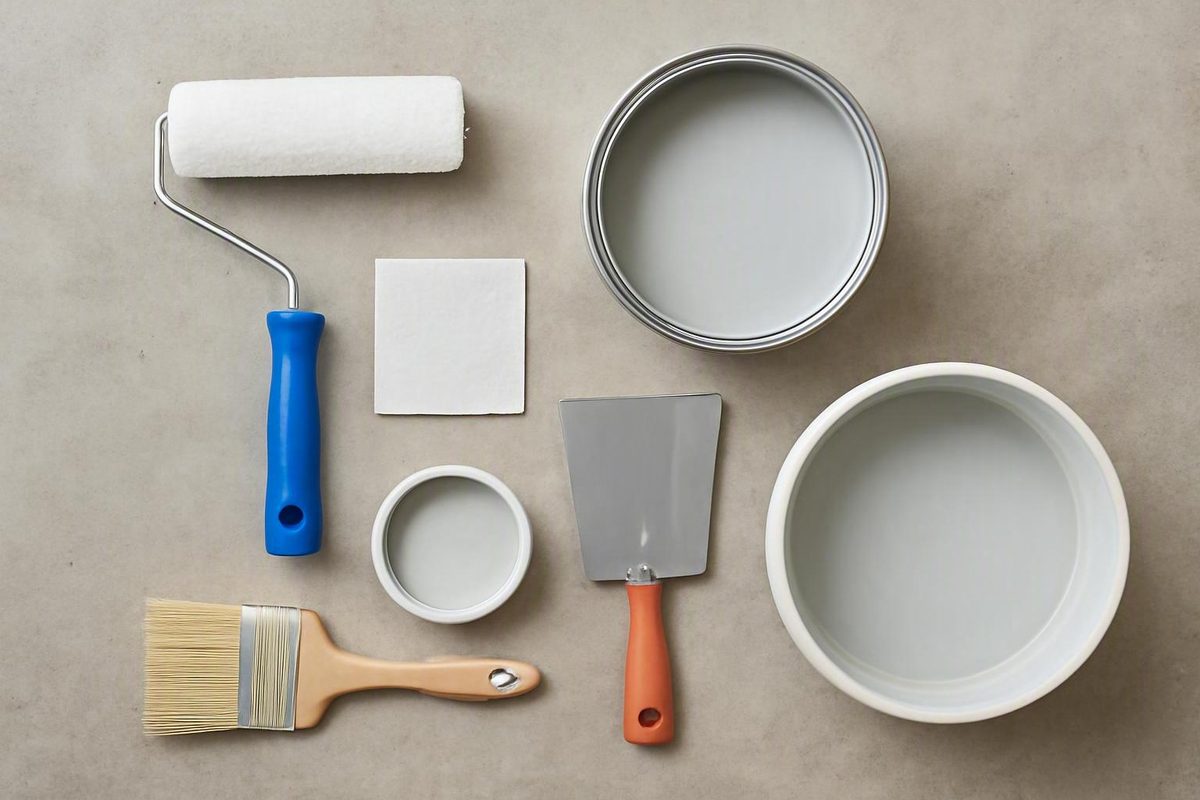
An epoxy floor primer is the first coating applied between a prepared substrate and the remaining layers of a flooring system. Depending on its formulation, it may penetrate porous concrete, improve adhesion, reduce absorption of the build coat, and make some outgassing defects less likely.
That does not mean every epoxy floor needs a separate primer. Some multilayer systems require one, while some single-coat or self-priming products are designed for direct application. Nor does the word “epoxy” establish compatibility between a primer and every epoxy, polyurethane, polyaspartic, flake, or metallic coating.
The safest buying rule is to choose the complete coating system first and then follow its current technical data sheet, product label, and safety data sheet. Substrate condition, moisture, preparation, film thickness, working time, and the recoat window all affect whether the system succeeds.
What an epoxy floor primer does—and what it cannot fix
A floor primer is a foundational layer. On concrete, it is commonly formulated to wet or penetrate the prepared surface and provide a suitable base for later coats.
Manufacturers, retailers, and flooring vendors generally attribute four related functions to epoxy primers:
- Promoting adhesion. The primer creates the intended interface between the prepared substrate and the build coat.
- Sealing pores. It can reduce the movement of air from porous concrete into a later, thicker coating.
- Limiting finish-coat absorption. An absorbent slab can draw resin from the next layer, potentially producing uneven appearance or build.
- Reducing outgassing defects. Sealing pores may lower the likelihood of bubbles or pinholes caused by air escaping from concrete.
These are common product and vendor claims, not independent proof that every primer delivers the same improvement. One industry author describes adhesion, reduced finish-coat absorption, and fewer bubbles as reasons to prime, while also warning that primer does not make a floor bubble-proof in this discussion of epoxy-floor priming.
Bubbles and pinholes can have several causes. Air leaving porous concrete is one possibility, but moisture, contamination, poor mixing, excessive film thickness, and unsuitable application conditions can also contribute. Primer may reduce one pathway without correcting the others.
Primer can also expose a problem without solving it. If a freshly applied coat forms fisheyes, pulls away, changes appearance, or refuses to wet part of the floor, contamination may remain.
Most importantly, primer is not a substitute for sound concrete and proper preparation. It cannot:
- reattach a peeling coating to the slab;
-
remove oil or other contamination;
-
create the required mechanical surface profile;
- compensate for an incorrect resin-to-hardener ratio;
- make incompatible coating chemistries compatible.
Pore sealing is not automatically moisture mitigation
Ordinary pore sealing and moisture-vapor mitigation are different functions. A standard primer may close surface pores and reduce air movement yet have no documented capacity to tolerate vapor moving through a slab.
Product categories themselves make this distinction. Concrete Floor Supply lists a general-purpose primer separately from a product marketed specifically for moisture mitigation, but its category-page material does not provide a universal numerical performance limit for the moisture-mitigating product.
Without a published test method, numerical acceptance limit, required thickness, and complete installation instructions, terms such as “moisture resistant,” “moisture blocking,” or “vapor reducing” are not enough to treat a primer as an engineered vapor-control layer.
Do you need a separate primer? Start with the coating system
Before buying epoxy floor primer, find the current instructions for the base coat, garage-floor kit, or multilayer assembly you intend to install. Those documents should say whether a primer is required, optional, integrated into the first coat, or not approved.
This system-first approach resolves much of the apparent disagreement in primer advice:
- A multilayer system may depend on a dedicated penetrating primer beneath a high-build epoxy.
- A single-coat epoxy/primer product may be formulated for direct application.
- A garage-floor kit may include its own preparation product and omit primer.
- A bonding primer may be intended for sound existing coatings rather than bare concrete.
- A documented moisture-mitigation layer may be required when measured slab conditions exceed the ordinary coating’s limit.
A kit-specific example appears in a Bunnings community discussion. A team member said that the Dymark epoxy kit under discussion used its supplied etching agent and did not require a separate primer; the same response cautioned against inserting an unspecified primer beneath that named kit in the Dymark preparation discussion. That is not a rule for every Dymark product or every epoxy floor. It illustrates why the exact kit instructions matter.
Adding an unapproved generic primer creates another interface that can fail. A water-based epoxy primer, solvent-based epoxy, one-part epoxy paint, polyurethane, and polyaspartic should not be assumed compatible merely because they are all sold for floors.
Stay within a documented manufacturer system when practical. If you intend to mix brands, request written confirmation covering the exact primer, base coat, and topcoat. Where compatibility is not documented, a representative test area can serve as an informal trial if the manufacturers permit it.
A compact primer decision tree
1. The selected system requires a primer
Use the named primer or an explicitly approved alternative. Follow its preparation, film-thickness, environmental, and recoat requirements.
2. The system says no separate primer is required
Do not insert one merely because another brand recommends primer. Follow the direct-to-concrete or self-priming procedure.
3. The instructions omit primer or are unclear
Ask the coating manufacturer for written guidance. Confirm whether the base coat is intended for direct application and whether slab porosity or an existing finish changes the recommendation.
4. The substrate has moisture or contamination concerns
Do not treat ordinary primer as a convenient workaround. Determine the required moisture-testing or contamination-removal procedure before selecting a coating assembly.
This article provides general reference information, not a project-specific suitability determination. Mortar Desk is an independent information site, not a contractor or engineering adviser, and coating specifications can change.
Match the primer type to the substrate and planned topcoat
Primer selection begins with the floor that actually exists, not simply the finish you want. Classify the substrate, identify the proposed coating layers, and then investigate a primer category that addresses both.
| Floor condition | Primer category to investigate | What must be verified | Reasons not to proceed |
|---|---|---|---|
| Sound, porous bare concrete | Low-viscosity or penetrating primer | Approval for the concrete and planned build coat; required profile, moisture limit, coverage, and film thickness | Weak concrete, laitance, oil, active moisture, or undocumented topcoat compatibility |
| Old, pitted, or badly deteriorated concrete | Higher-build primer, resurfacing layer, or separate repair system | Maximum defect depth, repair compatibility, cure time, and required profile | Assuming a thin primer will rebuild lost concrete or level major damage |
| Sound existing paint or coating | Bonding primer approved for both old and new finishes | Existing-coating adhesion, chemical compatibility, abrasion method, test area, and recoat procedure | Peeling, blistering, softening, widespread adhesion loss, or unknown contamination |
| Peeling or poorly bonded coating | Usually removal rather than encapsulation | Extent of sound material after removal and preparation required for what remains | Applying primer over a failing layer |
| Suspected slab vapor drive | Documented moisture-mitigation system | Test method, numerical limit, thickness, preparation, and compatible subsequent layers | Relying on an unquantified moisture claim |
| Oil-stained floor | Oil-blocking system or specialist remediation process | Permitted contamination level and preparation method | Deeply absorbed oil with no documented treatment procedure |
| Masonry or prepared plywood | System-specific primer assembly | Explicit substrate approval, undercoats, joints, movement, and topcoat sequence | Inferring suitability from concrete instructions |
Sound, porous bare concrete
For sound but absorbent bare concrete, investigate a low-viscosity or penetrating primer intended beneath the planned two-part, high-solids, or 100%-solids build coat.
Penetration alone is not the selection criterion. The product must also be approved for the topcoat, slab condition, required surface profile, and expected exposure.
A very porous slab may consume more material than the advertised spread rate suggests. It may also require a second application if the system explicitly permits or requires one. Do not add another coat merely to create a glossy surface; excess material can produce puddles or an overbuilt film outside the specification.
Pitted or deteriorated concrete
A thin primer should not be treated as a resurfacer. Deeply pitted, eroded, or extensively repaired concrete may need a higher-build primer, compatible patching material, epoxy mortar, or separate resurfacing layer.
The goal is not to hide defects beneath resin. It is to produce a sound, properly shaped substrate that the specified primer can coat at a controlled thickness. If concrete continues to crumble during preparation, pause the coating work and assess the weak material and repair requirements.
Existing coatings
A sound existing coating may sometimes be recoated, but only after its adhesion and compatibility are established. Remove loose material, clean the surface, abrade it uniformly, remove the resulting dust, and apply a representative test area when directed.
The proposed bonding primer must be approved for both the existing finish and the new topcoat. Retail listings can be narrow on this point. Seal-Krete Lock-Down, for example, is described as a bonding primer for bare or previously painted concrete and specifically as a base for one-part epoxy garage-floor coatings in the Home Depot listing. That description does not establish compatibility with a two-part epoxy, polyurethane, polyaspartic, or metallic system.
If the old finish is peeling, blistering, soft, or poorly bonded, primer cannot re-establish adhesion underneath it. Remove unsound material instead of encapsulating the failure.
Moisture and oil concerns
Moisture-mitigation and oil-blocking primers are distinct categories, not simply stronger versions of ordinary primer. Each needs documentation relevant to the actual problem.
Evidence that a product seals pores does not establish its vapor tolerance. Likewise, the available product material does not establish one universal procedure for treating deeply absorbed oil.
For suspected moisture vapor, select a system only after testing the slab by the method required by that system. For oil, determine whether contamination is superficial and removable or sufficiently deep to require a documented specialist treatment.
Masonry and plywood
Some products permit masonry or prepared plywood, but those possibilities are system-specific.
One proprietary Stone Coat assembly, for example, requires plywood to be cleaned, patched, sanded, and coated with two undercoats before its moisture primer. Its instructions then say to omit that moisture primer for a metallic floor over plywood in the published installation sequence. “Suitable for plywood” is therefore not permission to improvise a layer sequence.
In every case, verify the complete assembly: one-part epoxy, two-part epoxy, polyurethane, polyaspartic, decorative flake, or metallic. Compatibility cannot be inferred from the primer’s chemistry alone.
Prepare the floor before opening the primer kit
Use this preparation sequence:
Inspect → test → clean → repair → profile → vacuum → reassess → dry
Do not mix the primer until preparation is complete, tools are staged, and the application area is ready.
1. Inspect
Record the floor’s condition before coating:
- static and apparently active cracks;
- spalling, scaling, pitting, and weak edges;
- laitance or dusty surface material;
- oil, grease, tire residue, silicone, paint, and adhesive;
- previous coatings and their adhesion;
- damp areas, efflorescence, staining, or earlier moisture-related failure;
- transitions, drains, joints, and vertical surfaces that will be coated.
An apparently clean floor can still have a weak surface or contamination. Follow the inspection with the tests required by the selected system.
2. Test
Test moisture as specified by the coating manufacturer. On an existing coating, establish that the finish is firmly bonded and apply a representative compatibility test where directed.
If the existing finish is unidentified, solvent-sensitive, soft, or readily scraped away, do not assume a bonding primer will isolate it from a stronger topcoat. The proposed layer sequence should be confirmed before the whole floor is coated.
3. Clean
Remove dry debris, then use the cleaning and degreasing procedure specified for the contaminants present.
Profiling does not replace cleaning, and cleaning does not create the mechanical profile required for coating adhesion. Complete both operations when the system calls for them.
Rinse or neutralize only as directed by the selected cleaner or etching product. Do not invent a neutralization method or assume that every cleaner, acid, or preparation product follows the same procedure.
4. Repair
Repair static cracks and defects with a material compatible with the primer and finish system. Finish repairs flush unless the coating instructions require another geometry.
Moving joints and apparently active cracks require system-specific treatment. The available product guidance does not establish a universal repair method for movement, so do not rigidly fill every joint by default.
5. Profile
Grinding, shot blasting, sanding, and acid etching are preparation methods, not interchangeable guarantees of the same result.
- Diamond grinding can remove coatings and laitance while creating a mechanical profile. Edge work and dust collection require planning.
- Shot blasting can profile larger areas efficiently, although access, equipment, and the required finish affect its suitability.
- Sanding or abrasion may be appropriate for sound existing coatings or particular smooth surfaces.
- Acid etching is permitted by some systems for suitable bare concrete, but the acid product, slab condition, rinsing or neutralization, and drying instructions all matter.
Several vendors favor mechanical preparation, while other product instructions permit acid etching. Cross-brand guidance also recommends an adhesion trial when compatibility is uncertain in this manufacturer discussion of primer preparation. The controlling requirement is the acceptable preparation method and surface profile in the primer and topcoat documents, not a universal preference.
Do not copy an acid dilution from an unrelated product. Acid concentration, slab porosity, required reaction, rinsing, neutralization, drying, and disposal instructions vary.
6. Vacuum
Vacuum the entire floor thoroughly, including:
- perimeter edges;
- cracks and repair boundaries;
- joints and saw cuts;
- areas around columns, drains, and thresholds;
- wall edges that will receive coating.
Do not rely on sweeping alone. The surface should meet the selected coating system’s cleanliness requirement before primer is applied.
7. Reassess
After profiling and vacuuming, inspect the floor again. Preparation can expose deeper staining, weak aggregate, pinholes, unfilled defects, or poorly bonded patches. It may also remove enough of an existing coating to change the appropriate primer selection.
If the surface still powders, feels greasy, retains loose edges, or shows unexplained dampness, do not proceed merely because preparation equipment is no longer available.
8. Dry
Commercial guidance commonly requires new concrete to cure for about four weeks before coating, but the exact requirement of the selected product controls in this concrete-floor priming guidance.
A floor that looks dry after cleaning is not necessarily within the coating system’s moisture limit. Drying time after rinsing varies with temperature, humidity, ventilation, slab construction, and the amount of water used. Verify the required condition rather than guessing from appearance.
Assess moisture without confusing screening with mitigation
Visible dryness does not establish that a concrete slab is suitable for coating. Moisture can be present or move through concrete even when the surface looks dry. Below-grade slabs and slabs with uncertain underlying vapor control may require particular attention.
A sheet of plastic taped to the floor can serve as a basic warning screen. Condensation or darkening beneath it is a reason to stop and investigate. It is not a quantitative acceptance test, does not establish a vapor-emission value, and is not a substitute for the test required by the coating manufacturer. General preparation guidance presents the plastic sheet as a basic check rather than a complete specification test for floor evaluation.
Obtain the named quantitative test and acceptance limit when any of the following applies:
- condensation appears beneath a screening sheet;
- the slab is visibly damp;
- a previous coating blistered or detached amid suspected moisture;
- the floor is below grade;
- efflorescence or recurring dark patches are present;
- the building history suggests vapor drive;
- a warranty or project specification requires test results.
Do not choose a test independently and assume every coating manufacturer accepts it. Ask the selected system manufacturer which method, timing, number of readings, slab conditions, and maximum result apply.
What a documented mitigation system should provide
Before relying on a product as moisture mitigation, obtain:
- the published test method used to characterize slab moisture;
- the maximum numerical condition the product accepts;
- the required surface-preparation standard;
- the wet- or dry-film thickness needed for performance;
- the number of coats and required treatment of cracks, joints, and penetrations;
- the compatible primer, base coat, and topcoat sequence;
- environmental and cure limitations;
- any testing, recordkeeping, or installer requirements attached to the product documentation.
Commercial pages may use terms such as “vapor blocker,” “moisture blocking,” or “reduces water-vapor transmission” without supplying enough information to establish a universal allowable result. Treat those descriptions as reasons to request the complete technical documentation, not as automatic approval for a damp slab.
Do not use ordinary epoxy floor primer as a substitute for a documented moisture-mitigation system. Pause until measured conditions can be compared with the selected system’s published limit.
Read the specifications that control coverage, cost, and working time
Package price is a poor way to compare primers. Kits differ in mixed volume, solids content, target thickness, realistic spread rate, number of required coats, and whether another proprietary layer is mandatory.
Build a comparison sheet with these fields:
- approved substrates;
- compatible base coats and topcoats;
- solids by volume;
- target wet-film and dry-film thickness;
- Part A-to-Part B mix ratio;
- induction period, if required;
- pot life at the expected temperature and batch size;
- published coverage range;
- application temperature;
- slab-temperature limits;
- relative-humidity limit;
- required margin above the dew point;
- tack-free and cure schedule;
- minimum and maximum recoat time;
- walk-on and full-cure times;
- VOC value and the basis on which it is reported;
- required topcoat or permitted exposed use;
- approved application tools;
- cleanup, storage, and disposal instructions.
Conversely, a lower spread rate may reflect a thicker specified layer rather than poor value.
Estimating how much primer to buy
Use this planning formula:
Required mixed quantity = floor area ÷ conservative coverage rate
Then adjust for:
- concrete porosity;
- surface texture;
- vertical edges and details;
- expected roller, squeegee, and container loss;
- a required second coat;
- inaccessible remainder in premeasured packaging.
Finally, round up to purchasable kit sizes. Do not split a premeasured kit unless the manufacturer permits it and specifies a suitable measuring method.
For example, if a floor measures 500 square feet and the conservative planning rate is 175 square feet per gallon:
500 ÷ 175 = 2.86 gallons before allowances
That does not necessarily mean a 3-gallon kit will be sufficient. A rough or unusually porous slab, coated perimeter, and expected application loss could require more. Use the lower end of a published coverage range unless floor conditions justify another figure.
Published rates show how much products can differ. CFS Low Viscosity Epoxy Primer is described as a 93%-solids product with typical coverage of 150–200 square feet per gallon, depending on concrete porosity and texture on its product page.
ArmorPoxy lists approximately 220–320 square feet per gallon and gives different film-thickness ranges for its standard- and low-VOC formulations in the ArmorPoxy specifications. These figures are product- and formulation-specific.
E707LVP lists 133–267 square feet per gallon at 6–12 mils. The same commercial page warns that mixed epoxy retained in a bucket can lose working time, harden rapidly, overheat, and smoke in the E707LVP specifications and cautions.
Always read coverage beside thickness. A range that doubles from its low end to its high end may reflect a substantially thinner film, as well as differences in formulation, texture, or absorption.
Watch for inconsistencies in seller summaries. One ArmorGarage page gives approximately 550 square feet in its detailed text but advertises up to 600 square feet per two-gallon set elsewhere on the same primer listing. For purchasing, use the conservative figure and confirm it against the current technical data sheet for the exact formulation being supplied.
Do not treat prices, availability, regional shipping rules, VOC formulations, or mutable website summaries as durable specifications. Obtain the current TDS before ordering and make sure it matches the product name, formulation, color, and kit size being sold.
Mix, place, roll, and recoat within the product window
Two-part epoxy primer begins reacting when Part A and Part B are combined. Once mixed, the installation schedule is controlled by the product’s working time. Organize labor, tools, lighting, access, and the application path before mixing.
Confirm the instructions first
Before opening either component, confirm:
- the exact mix ratio;
- whether that ratio is by volume or weight;
- whether the kit is premeasured;
- whether Part A must be premixed;
- mixing speed and duration;
- whether an induction period is required;
- whether thinning is permitted;
- pot life at the anticipated temperature;
- approved roller nap, squeegee, brush, or spray setup;
- coverage and target film thickness;
- minimum and maximum recoat times.
Never borrow a ratio from another epoxy primer. Similar-looking products may use different curing agents or proportions.
Premeasured kits should ordinarily be mixed as supplied. Splitting a kit increases the risk of ratio error. If partial mixing is permitted, use the measuring method and equipment stated by the manufacturer rather than relying on casual container graduations.
Mix thoroughly without inventing steps
Use slow-speed mechanical mixing when directed. Blend until the material is uniform and streak-free, scraping the sides and bottom if the instructions require it.
Do not automatically add a transfer-mixing step, induction period, thinner, or solvent. Each belongs in the procedure only when the selected product’s instructions specify it.
Excessively aggressive mixing may introduce unwanted air or heat. Follow the stated mixer type, speed, and duration instead of assuming that faster mixing is better.
Distribute the mixed material promptly
Pot life is the usable period after the components are combined under stated conditions. It is not the same as drying time.
Warmer conditions and a larger mass of mixed material can shorten usable working time. Do not leave mixed epoxy concentrated in a bucket while cutting in the entire room. A published high-solids product warning notes that retained material can harden rapidly, overheat, and smoke, so prompt distribution is a safety as well as application concern.
A general application sequence may include:
- Cut in only the amount of perimeter that can be kept within the approved working sequence.
- Pour or distribute mixed primer over the designated section.
- Spread it with the approved squeegee or roller.
- Roll crosswise to even the coverage where directed.
- Back-roll in a consistent direction.
- Check for dry spots, puddles, thick edges, and missed areas.
- Continue with the next batch while maintaining the permitted application edge.
The approved method, roller nap, and spread rate remain product-specific. Some products permit brush or roller application; others describe pouring, squeegeeing, and back-rolling.
Apply a thin, even coat at the specified rate. More is not automatically better. Avoid puddles, thick overlaps, and unapproved overbuilding.
Understand the different clocks
Do not use “dry” as a catch-all term. A primer may have several separate milestones:
- Pot life: how long mixed material remains usable.
- Tack-free time: when the surface no longer feels tacky under the stated conditions.
- Recoat readiness: the earliest time the next layer may be installed.
- Maximum recoat window: the deadline for topcoating without additional preparation.
- Walk-on time: when limited foot traffic is permitted.
- Full cure: when the product reaches its stated final-cure condition.
These times are not interchangeable. A surface may feel dry but still be too early or too late for the intended intercoat bond.
There is no universal “topcoat the next morning” rule. Some published schedules begin within several hours, while others begin later. Timing can change with formulation, temperature, humidity, and film thickness.
If the maximum window is missed, follow the product’s specified abrasion and cleaning procedure. ArmorGarage, for example, instructs users to recoat after 4–6 hours but within 20 hours and calls for light sanding with 100-grit abrasive after that point in its product-specific application instructions. Those figures apply to that named product, not epoxy primers generally.
Safety, troubleshooting, and the final pre-purchase check
Obtain the current technical data sheet, product label, and safety data sheet for every material in the process, including:
- cleaner or degreaser;
- acid-etching product, if used;
- crack and patch repair;
- primer;
- decorative or build coat;
- topcoat;
- any approved thinner or cleanup product.
Use each material only with the controls stated in its own current documents. The primer SDS is not a substitute for the SDS of an acid, cleaner, solvent, repair compound, or topcoat.
This article cannot prescribe one glove material, respirator cartridge, ventilation arrangement, spill response, cleanup method, or disposal procedure for every product. Those requirements depend on the specific formulation and task. If the label or SDS requires controls you cannot provide or understand, pause the project and seek guidance from the manufacturer or a suitably qualified professional.
Confirm the exact formulation, reported VOC basis, regional restrictions, exposure controls, first-aid instructions, cleanup method, storage requirements, and disposal directions in the current product documents.
Troubleshooting primer defects
| Symptom | Possible causes to investigate | Appropriate response |
|---|---|---|
| Bubbles or pinholes | Concrete outgassing, moisture, high porosity, rising substrate temperature, thick application, or mixing technique | Stop and diagnose the source; do not assume another heavy coat will solve it |
| Fisheyes or areas that pull away | Oil, silicone, grease, cleaner residue, or other contamination | Follow the manufacturer’s removal procedure and correct the contamination |
| Soft, gummy, or streaked areas | Incorrect ratio, incomplete mixing, incompatible addition, or unsuitable conditions | Do not topcoat until the manufacturer supplies a remediation procedure |
| Peeling from concrete | Inadequate profile, laitance, dust, contamination, moisture, or weak concrete | Determine which interface failed and correct the substrate |
| Peeling with old paint attached | Failure of the underlying coating | Remove unsound old material rather than adding bonding primer |
| Intercoat delamination | Missed recoat window, contamination between coats, or incompatibility | Abrade and clean as specified; verify the complete layer sequence |
| Uneven sheen or rapid absorption | Variable porosity, thin application, or inconsistent coverage | Compare actual material use and film thickness with the TDS before recoating |
Primer may reveal contamination, but it does not neutralize it. If a defect appears, preserve photographs, batch information, temperatures, mix times, and coverage records before disturbing the area. Those records may help the manufacturer assess whether the issue involves the substrate, environment, mixing, or application.
Can the primer remain exposed?
Some primers are marketed as standalone base coats, while others require a finish coat. Before leaving a primer exposed, verify:
- indoor or outdoor approval;
- UV and color stability;
- abrasion and wear resistance;
- chemical exposure limits;
- appearance and gloss;
- wet and dry slip characteristics;
- cleaning requirements;
- whether a compatible topcoat is mandatory.
Do not assume that a high-solids epoxy is automatically a suitable finished garage floor. One commercial high-solids product states that it is not UV color-stable and warns that the installed surface may be slippery, particularly when wet or contaminated in its published limitations. A compatible topcoat or documented slip-resistant system may therefore be required for a particular location.
Final pre-purchase checklist
Before ordering, obtain written answers to these questions:
- Is the substrate explicitly approved?
- What preparation method and surface profile are required?
- What moisture test and numerical limit apply?
- Is slab pH restricted?
- Which repair materials are compatible?
- What is the Part A-to-Part B ratio?
- Is that ratio by weight or volume?
- Is an induction period required?
- What is the pot life at the expected slab and air temperatures?
- What spread rate and wet- or dry-film thickness must be achieved?
- Is a second coat required or permitted?
- What temperature, humidity, and dew-point limits apply?
- When does the recoat window open and close?
- What preparation is required if the window is missed?
- Which base coats, flakes, metallic layers, polyurethanes, or polyaspartics are approved?
- Must a topcoat be applied?
- What exposure controls, cleanup, storage, and disposal instructions apply?
- Are current TDS and SDS documents available for the exact formulation being sold?
Pause the project if the manufacturer cannot document compatibility with the planned layers or provide a moisture limit relevant to the slab.
Frequently asked questions
Can epoxy floor primer be used over an existing painted or epoxy-coated floor?
Sometimes. The existing coating must be sound, firmly bonded, clean, uniformly abraded, and compatible with both the bonding primer and the proposed topcoat. Apply a representative test area when the product instructions call for one.
Do not prime over peeling, blistering, soft, or poorly bonded paint. Remove unsound material first because a new primer cannot restore adhesion beneath the old coating.
Should concrete be ground or acid-etched before applying epoxy primer?
Use the preparation method specified by the selected primer and topcoat system. Mechanical preparation can remove laitance and create a controlled profile, while some product instructions permit acid etching on suitable bare concrete.
The methods are not universally interchangeable. Neither replaces contaminant removal, and an acid dilution or surface profile from an unrelated product should not be adopted without approval.
How long should epoxy floor primer dry before the topcoat?
Use the product’s minimum and maximum recoat times, not a universal drying period. The earliest recoat point may be several hours after application, while another formulation may require a longer wait.
Recoat readiness is different from pot life, tack-free time, walk-on time, and full cure. If the maximum window is missed, follow the specified abrasion and cleaning procedure before topcoating.
Is epoxy floor primer the same as a moisture-vapor barrier?
No. An ordinary primer may seal pores or reduce absorption without being engineered for specified vapor conditions.
Treat a product as moisture mitigation only when its documentation provides the applicable test method, numerical limit, required preparation, film thickness, and complete compatible coating sequence. An unquantified moisture-blocking claim is not enough.
Can epoxy primer be left as the finished floor coating?
Only when the manufacturer permits exposed use and the documented performance suits the location. Check UV stability, wear, chemical exposure, appearance, cleanability, and slip characteristics.
Some primers are marketed as standalone coatings. Others are intended only beneath a build coat or protective topcoat. Exposed-use suitability is a product-specific property, not a general feature of epoxy primer.
The final decision comes down to five steps:
- Follow the selected coating system first.
- Reject or repair unsound, peeling, dusty, or contaminated substrates.
- Verify moisture rather than guessing from appearance.
- Compare primers by documented compatibility, thickness, coverage, and application limits—not package price alone.
- Mix, place, and recoat within the stated product windows.
Epoxy floor primer is a system component. It is not a cure for poor preparation, a way to reattach failing material, or an undocumented moisture barrier. Read the current TDS, label, and SDS before purchase and again before application.