 MortarDesk
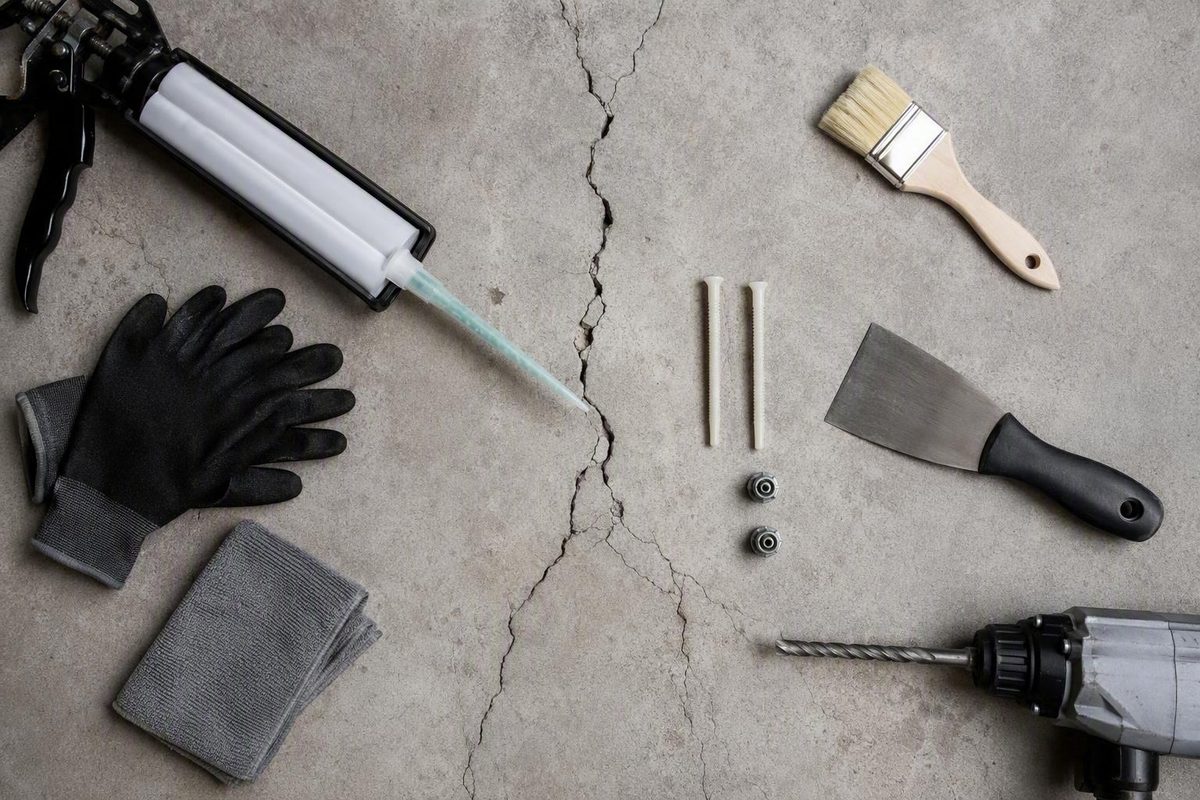
Epoxy can be the right material for a foundation crack—but only when the crack, concrete, moisture conditions, and repair objective suit a rigid adhesive.
A reasonable candidate is generally a clean, dry, stable crack in a poured-concrete wall where the purpose is to bond the cracked concrete together. An actively leaking crack, continuing movement, displacement, wall deformation, or unresolved settlement changes the decision. The visible opening is only one part of the problem.
This article is a material-selection overview, not a definitive DIY structural-repair guide. Much of the available practical guidance comes from manufacturers, equipment suppliers, contractors, and vendor-authored trade articles rather than independent comparative testing. Product-specific installation must therefore follow current technical and safety documentation, while cracks with uncertain structural significance should be evaluated by an appropriately qualified professional.
The short answer: when epoxy is—and is not—a reasonable fit
Before buying epoxy to fix cracks in a foundation, use this checklist to identify obvious poor candidates:
- Is the wall poured concrete?
- Is the crack clean and within the selected epoxy’s permitted moisture condition?
- Is there documented reason to consider the crack stable, rather than merely an absence of obvious change today?
- Is rigid bonding—not simply stopping water—the repair objective?
- Is the product expressly documented for concrete crack injection and the intended structural role?
If all five conditions align, low-pressure epoxy injection may be a suitable method. The checklist can rule out poor candidates, but it cannot establish structural safety by itself. If stability or structural significance remains uncertain, evaluation should come before injection.
Structural injection epoxy is generally non-expanding and becomes rigid after curing. That allows a suitable formulation to bond stable cracked concrete. Polyurethane is more commonly used as an expanding water-stop material, particularly where moisture is present. Manufacturers distinguish these two primary functions, although properties vary among formulations (SealBoss’s epoxy and polyurethane comparison).
Structural injection epoxy is not interchangeable with:
- General-purpose two-part repair adhesive
- Floor-crack filler
- Epoxy mortar intended for surface patching
- Decorative floor coating
- Nonstructural sealant
- Surface waterproofing coating
A product may close the visible opening without being formulated to flow through a crack or provide a documented structural bond. If bonding is the objective, the current technical data should expressly identify concrete crack injection and the applicable structural or load-bearing use.
Epoxy also does not correct the condition that caused the concrete to crack. Injection may be one component of a larger repair, but it is not a substitute for resolving the cause.
Pause before buying a kit if:
- Water is flowing or dripping through the crack.
- One side is visibly displaced from the other.
- The opening appears to be widening or repeatedly returns after patching.
- The wall is bowing, leaning, bulging, or otherwise moving.
- Several related cracks appear in the same wall or adjoining parts of the building.
- Settlement or unusual loading may be involved.
- You cannot confirm that the wall is poured concrete.
- The foundation is hollow concrete block, stone, brick, or another material not covered by the system.
- The crack’s structural significance is uncertain.
These observations do not establish a diagnosis or prescribe a particular repair. They indicate that material selection should follow a broader assessment. A vendor-authored trade article likewise recommends engineering evaluation when cracking is associated with movement, shifting, or settlement rather than treating injection as the corrective action itself (WATERPROOF! Magazine’s material-selection guidance).
Mortar Desk publishes general building-material reference information; it is not a contractor and does not provide engineering advice. Structural work should be assigned according to applicable local requirements and performed by suitably qualified trades where required (About Mortar Desk).
Assess the crack before choosing a repair material
The first useful step is not filling the crack. It is recording what exists before cleaning, patching, or injection covers the evidence.
Take clear, dated photographs from several distances. Include an image that places the crack in the context of the entire wall, followed by closer images showing its path, intersections, surface condition, and water staining. A ruler or other fixed scale placed beside—not inside—the opening can make later photographs easier to compare.
Record:
- The room and wall where the crack appears
- Whether it is vertical, horizontal, diagonal, stepped, or irregular
- Its approximate visible length and width
- Changes in width along its path
- Whether the two sides remain in the same plane
- Dampness, staining, mineral deposits, dripping, or flowing water
- Whether moisture appears after rain, snowmelt, or another event
- Wall material and thickness, if known
- Nearby corners, openings, beams, penetrations, or concentrated loads
- Other cracks or associated symptoms in the building
- Previous patches or injections
- Changes observed over time
A homeowner can document observable conditions without assigning a structural diagnosis. A photograph may show widening, displacement, or moisture after rain, but appearance alone does not reliably establish why a crack formed or whether it affects the structure.
Three possible causes illustrate why assessment must precede filling.
Settlement can create stress and displacement when one part of the foundation moves relative to another. Bonding the opening does not lift or support the settled area.
Hydrostatic pressure can drive water toward defects in a below-grade wall.
Seasonal movement can repeatedly open and close a crack as soil and building conditions change. A rigid cured material cannot keep stretching with continued movement. The epoxy or adjacent concrete may crack.
Associated observations can provide context.
Do not rely on a universal width cutoff. The available evidence does not provide a validated growth rate, crack width, or displacement measurement that lets a homeowner declare a crack dormant, nonstructural, or suitable for DIY injection. Width remains relevant to product viscosity and coverage, but it cannot answer the structural question by itself.
A conservative assessment sequence is:
- Identify the foundation material.
- Document the crack and surrounding conditions.
- Check for moisture during relevant weather events.
- Compare observations over time when delay is reasonable and no urgent concern is apparent.
- Look for displacement, wall deformation, recurring cracking, or associated symptoms.
- Define the objective as structural bonding, water stopping, void filling, or a combination.
- Obtain qualified evaluation if movement or structural significance is suspected or uncertain.
- Only then match the method and product to the documented conditions.
Documentation is not a reason to postpone action when displacement, deformation, or other serious concerns are already visible. In those circumstances, evaluation should precede injection.
Epoxy versus polyurethane: structural bonding and water stopping are different jobs
Epoxy and polyurethane can both be injected into concrete cracks, but they ordinarily serve different primary purposes. Epoxy is selected for rigid bonding; polyurethane is more commonly selected to obstruct water and create a more movement-tolerant seal.
| Comparison point | Structural injection epoxy | Polyurethane injection |
|---|---|---|
| Primary objective | Bond stable cracked concrete | Stop water, seal a pathway, or fill a void |
| Behavior after curing | Generally rigid and non-expanding | Generally expands during reaction and remains more flexible |
| Preferred moisture condition | Usually clean and dry, subject to product documentation | Often used in damp, wet, or actively leaking conditions |
| Ability to accommodate movement | Limited; continued movement can damage the repair or nearby concrete | Can accommodate limited movement, depending on formulation |
| Structural role | May provide structural bonding when expressly formulated and documented for it | Usually treated as a water-stop rather than equivalent structural reinforcement |
| Common limitations | Poor default for active leakage; requires suitable preparation and containment | Expansion and cured properties vary; may not provide the required structural bond |
This is a general comparison, not a specification. Epoxy and polyurethane are product families with differing viscosities, cure profiles, expansion characteristics, moisture tolerances, and equipment requirements.
When epoxy makes sense
Epoxy is suited to a stable crack when bonding concrete is the primary objective. Injection formulations are available in different viscosities, so the resin must be matched to the crack dimensions, wall condition, temperature, and installation system.
Once cured, structural injection epoxy is rigid. That property is useful when the intended repair is a rigid bond across stable cracked concrete. It is also the material’s principal limitation: if the foundation continues to move, the bond may fracture or a new crack may form beside the repaired line.
When polyurethane makes more sense
Many polyurethane injection products react with moisture and expand, helping them enter irregular pathways and obstruct water. Their cured flexibility can accommodate limited movement better than rigid epoxy. Equipment suppliers therefore commonly direct dry structural repairs toward epoxy and wet or actively leaking cracks toward a suitable polyurethane formulation (MABI USA’s resin-selection guide).
Polyurethane does not correct settlement or stabilize a moving wall. Nor should an expanding water-stop foam be represented as structurally equivalent to an epoxy expressly formulated for structural bonding. A crack involving both active water and structural concerns may require separate water-control and stabilization decisions.
Why active leakage changes the choice
Conventional structural epoxy is a poor default for a crack carrying water. Moisture may interfere with adhesion, while flowing water can prevent liquid resin from remaining where it must cure. Part of the crack may accept epoxy while another part retains a leakage channel.
Some specialized epoxies permit particular damp conditions, but suitability must be established from the selected product’s current technical data. “Damp tolerant” does not necessarily mean suitable for uncontrolled flowing water.
Polyurethane is commonly chosen for active leakage because many formulations react with moisture and expand within the pathway. The product still must suit the substrate, flow, temperature, crack geometry, and equipment. General-purpose canned foam is not automatically an injection grout, and polyurethane formulations do not all have the same expansion or flexibility.
Crack width alone does not decide
Available commercial sources disagree about whether epoxy is preferable for hairline cracks, wider cracks, or both. The disagreement reflects differences in resin formulation and repair purpose. A low-viscosity epoxy may enter a fine dry crack, while another product may be intended for a different range. Polyurethane products also vary.
The better questions are:
- Is the crack stable or moving?
- Is it dry, damp, or actively leaking?
- Is the objective bonding, water stopping, or void filling?
- What dimensions does the selected product permit?
- Can the material remain contained until it reacts or cures?
- Does the documentation cover the substrate, orientation, and temperature?
- Is a structural condition being corrected separately?
Some complex projects use more than one material or stage, such as controlling water before structural work. That is not a generic DIY sequence. Compatibility and sequencing should be established before either material is installed.
Confirm the foundation type and choose a documented structural epoxy
The low-pressure surface-port process discussed here is limited to suitable cracks in poured-concrete foundation walls. It should not automatically be applied to:
- Hollow concrete-block walls
- Stone foundations
- Brick or other masonry walls
- Slabs or footings
- Cold joints or wall-to-floor joints
- Cracks extending beneath footings
- Unusual horizontal or load-related cracks
- Previously injected cracks
A poured-concrete wall is substantially continuous concrete.
At least one seller of a low-pressure poured-wall kit expressly excludes hollow concrete-block walls. More broadly, published low-pressure surface-port guidance is directed at poured-concrete foundation walls rather than every foundation material.
When the wall material is uncertain, identify it before selecting a system or obtain a method-specific assessment. Do not compensate for an unsupported substrate by choosing thicker resin or increasing injection pressure.
Surface patching is not injection
A surface patch covers or bridges the opening visible from the room. It may improve appearance, limit entry at the face, or serve as the temporary containment seal in an injection system.
Injection has a different purpose: delivering resin into the internal crack pathway. A neat surface finish therefore does not prove a full-depth repair. Conversely, a designed surface-applied repair may be appropriate for a particular condition without being equivalent to injected structural bonding.
What “structural epoxy” should mean when shopping
Look beyond labels such as “foundation epoxy,” “professional strength,” and “permanent repair.” Current technical documentation should identify:
- Concrete as an intended substrate
- Crack injection as an intended application
- Whether structural or load-bearing use is covered
- Applicable classifications or standards
- Viscosity or grade
- Permitted crack dimensions
- Required moisture condition
- Substrate and ambient temperature limits
- Working time and cure schedule
- Mixing and dispensing requirements
- Installation limitations
ASTM C881 is described in the supplied vendor-authored trade guidance as a classification framework for epoxy-resin bonding systems. That article gives Type IV, Grade 1, Class B or C as an example for certain structural crack-injection conditions, not as a universal specification. Because the evidence supplied here does not include the current standard itself, the applicable edition, classification, and product compliance must be verified from authoritative current documentation before purchase (WATERPROOF! Magazine’s ASTM C881 discussion).
Viscosity matters because resin must enter the crack without escaping through an exterior opening or hidden void before curing. Crack geometry, wall thickness, temperature, and working time all affect that balance.
Temperature, moisture tolerance, and cure time also vary by formulation. A limit copied from another kit may be wrong for the selected injection resin, surface-seal paste, or cartridge system. If the substrate or structural condition falls outside the documentation, obtain a method-specific assessment rather than improvising.
How to compare epoxy injection kits, coverage, and advertised prices
Begin with technical fit, not package length or price. A lower-priced kit is poor value if it is not documented for the substrate, moisture condition, crack, or intended structural role.
Substrate and intended use
- Does the manufacturer identify poured concrete as an intended substrate?
- Is the system intended for foundation-wall crack injection?
- Does it exclude block, masonry, slabs, or particular crack locations?
- If structural bonding is intended, does the documentation expressly support it?
Resin properties
- What is the viscosity?
- What crack-size range is permitted?
- Must the crack be dry, or is limited dampness allowed?
- What are the application-temperature limits?
- What is the working time after mixing begins?
- What is the initial cure schedule?
- When may the repair be exposed to water, finishing, or service conditions?
Injection system
- Are the ports surface mounted or installed by drilling?
- Are flat, corner, or mixed ports needed?
- Does the system use a conventional caulking gun, dual-cartridge tool, or pump?
- Is the required static mixer included?
- Is compatible surface-seal paste included?
- Is the paste intended to remain, be ground away, or peel off?
- Are enough ports and mixers supplied?
Quantity and storage
- What crack length does the seller advertise?
- What crack width and wall thickness support that footage?
- Is allowance made for branches, hidden voids, or resin loss?
- What is the shelf life?
- What storage conditions apply?
- Can opened cartridges be resealed?
Documentation and safety
- Is a current technical data sheet available?
- Is a current safety data sheet available?
- Are mixing, ventilation, personal protection, cleanup, and disposal instructions clear?
- Can the manufacturer answer questions about the exact substrate and crack without borrowing specifications from another system?
Seller listings are useful illustrations, not market-wide specifications. As listed in the material checked for this article on August 13, 2026, one seller offered 10- and 20-foot kits with flat, corner, or mixed ports, required a conventional caulking gun, listed a one-year shelf life, and displayed prices from $289 to $519. Its coverage basis was a 1/16-inch crack through a 10-inch poured-concrete wall; prices, availability, and specifications can change (RadonSeal’s poured-concrete epoxy kit listing).
A second seller’s listing checked on the same date showed standard and peel-off-paste kits covering nominal ranges from 6–10 feet through 60 feet, with displayed prices from $260 to $1,200. Those figures are seller-specific and may change (Applied Technologies’ epoxy kit listings).
Advertised footage can vary with:
- Crack width and variation
- Wall thickness
- Branches and internal voids
- Surface irregularity
- Resin escaping through the exterior
- Material retained in mixers and ports
- Failure of the surface seal
- Repeat passes permitted by the system
Do not divide package price by advertised feet and treat the result as a universal repair cost. Diagnosis, preparation tools, access work, protective equipment, water management, exterior waterproofing, excavation, or structural stabilization may not be included.
Do not combine specifications across brands. Port spacing from one system, pressure from another, and cure time from a third do not create a valid installation method. Purchase and plan against the selected system’s current technical and safety documentation.
What a typical low-pressure epoxy injection involves
The following is an illustrative overview, not a step-by-step prescription for structural work. It describes the general sequence published for suitable poured-concrete wall cracks. The selected system’s current instructions—and any project-specific professional direction—control the actual installation.
1. Document and assess the crack
Preserve photographs and notes before cleaning or covering the wall. Confirm the substrate, moisture condition, access, and repair objective. Stop if the assessment reveals displacement, deformation, active leakage, recurring movement, or uncertain structural significance.
2. Expose sound concrete
Remove coatings, loose material, failed patches, dirt, mineral deposits, and other contaminants as required by the selected system. Ports and surface-seal paste need a suitable concrete surface to remain attached during injection.
Do not enlarge, grind, or route the crack indiscriminately. Preparation requirements differ, and altering the surface according to an unrelated method may compromise the selected system.
3. Clean and dry the work area
Dust, oils, weak concrete, old sealant, and moisture can interfere with adhesion.
Mechanical preparation may release dust, while resin components can create skin or respiratory exposure concerns. Follow the selected technical and safety data for ventilation, gloves, eye protection, respiratory precautions, cleanup, and disposal.
4. Place surface-mounted injection ports
Ports are positioned over the crack so resin can be introduced at successive locations. One published method gives intervals of 10 to 12 inches as an example, but spacing depends on the product, wall thickness, and crack geometry—not that example alone (WATERPROOF! Magazine’s low-pressure workflow).
Corners, changes in direction, obstructions, and surface irregularities can affect port type and placement. Port bases must remain bonded while the openings stay clear for injection.
5. Seal the exposed crack between ports
Surface-seal paste contains the liquid resin so it enters the crack instead of spilling from the wall face. The seal must bridge the visible opening while leaving the ports clear.
The paste must harden for the period specified by the system before injection begins. Starting too soon can rupture the seal and prevent controlled filling.
6. Inject slowly from the lowest port upward
For a generally vertical crack, published surface-port methods commonly begin at the lowest port. The installer advances when resin appears at the next port and closes ports as the selected system directs.
It does not independently prove that the full wall thickness, every branch, or every hidden void has been filled. Resin may follow the path of least resistance or escape at the exterior.
There is no suitable universal injection pressure. Published ranges vary, equipment differs, and exceptions are acknowledged. The selected system’s instructions control.
7. Cure and finish as documented
Leave ports, seals, and injected material undisturbed for the specified cure period. Do not expose the repair prematurely to water, finishes, or prohibited loads. Once the relevant cure has been reached, remove or finish the ports and paste as directed.
Product documentation must govern:
- Component proportioning and mixing
- Static mixer use
- Usable working time
- Substrate and ambient temperature
- Cure schedule
- Ventilation
- Gloves and eye protection
- Respiratory precautions
- Spill response
- Cleanup
- Waste and cartridge disposal
Incorrectly cured or misplaced resin can also be difficult to remove or correct, making review of both the technical data sheet and safety data sheet essential before work begins (Intech Anchoring’s epoxy limitations and safety summary).
Stop work if:
- Water begins flowing through the crack.
- Resin disappears without appearing where the system indicates it should.
- Resin escapes uncontrollably outside or into a hidden space.
- The surface seal repeatedly fails.
- The concrete is frozen or outside the documented temperature range.
- New displacement, movement, or a broader crack system becomes apparent.
- The product mixes, reacts, or cures differently from its documentation.
These are reasons to reassess containment, moisture, geometry, and structural conditions—not reasons to apply arbitrary additional pressure.
Why epoxy crack repairs fail or remain incomplete
A crack can look sealed from the basement while the repair remains incomplete. Appearance and internal performance are not the same.
The crack continues to move
Cured structural epoxy is rigid. If settlement, soil pressure, seasonal movement, wall deflection, or another force continues, the repaired line may fracture. The adjacent concrete may also crack when movement transfers to another weak path.
That outcome does not necessarily mean the resin was a poor adhesive. It may mean the crack was not stable or injection was attempted without correcting the movement.
Water interferes with adhesion or containment
Active leakage may reduce adhesion, move incompatible uncured resin, or leave channels through the repair. Moisture can remain within the crack even when the exposed wall face appears dry.
Resin escapes through the exterior or a hidden void
A through-crack may allow low-viscosity resin to migrate toward the exterior before curing.
A foundation-repair company’s account identifies resin loss, unfilled voids, and difficulty reinjecting cured repairs as practical failure modes. That account reflects commercial field experience rather than independent comparative testing, but it illustrates why containment cannot be assumed (U.S. Waterproofing’s discussion of epoxy-injection failures).
Preparation is inadequate
Dust, coatings, oil, deposits, old caulk, or moisture may impair adhesion.
Preparation failures can compound. If the seal ruptures after injection begins, the remaining working time may be too short to restore containment and finish the operation.
Mixing or curing conditions are wrong
Two-component epoxy depends on correct proportioning and mixing. Cartridge systems may meter components, but they still require the correct mixer, dispensing sequence, and working conditions.
Potential problems include:
- Using material beyond its shelf life
- Improper storage
- Failing to discard initially unmixed material when instructed
- Working outside the permitted temperature range
- Exceeding working time
- Disturbing ports before cure
- Exposing the repair to water too soon
- Combining incompatible resin, paste, ports, or mixers
- Applying excessive pressure
There is no single temperature or cure rule that can be substituted for current product instructions.
Visible resin is mistaken for complete filling
Resin appearing at the next port confirms that some material traveled between those locations. It does not prove that the entire crack depth, every branch, or the exterior opening was filled.
A smooth strip of surface paste proves only that the visible face is covered. The supplied evidence does not establish a simple, universal, nondestructive test that homeowners can use to confirm complete internal filling.
A failed cured injection obstructs the next repair
Once epoxy hardens, it can block the original pathway. If only part of the crack was filled, later resin may not reach the remaining channel. The unfilled route can be difficult to locate, and adding another material may simply redirect flow.
There is no universal remedy for a failed cured injection. Before another attempt, reassess:
- Whether movement is continuing
- Whether drainage or water pressure remains unresolved
- Where the earlier resin may have traveled
- Whether exterior access is needed
- Whether structural implications exist
- Whether the proposed materials are compatible
- Whether drilling or specialized equipment would introduce additional risk
Repeatedly covering the line can erase useful evidence while leaving the underlying condition unchanged.
After injection: monitor the wall and address the source of water or movement
Preserve the pre-repair photographs and create a comparable set after finishing. Record the product, batch or lot information, installation date, weather and moisture conditions, and any unexpected behavior observed during injection.
Periodically check for:
- Renewed opening along the repaired line
- A new crack beside the repair
- Displacement or wall deformation
- Dampness, staining, or mineral deposits
- Water emerging from a nearby joint or penetration
- Separation of the surface paste or finish
- Related changes elsewhere in the building
Observation cannot certify structural performance, but it can reveal changes that warrant reassessment. Renewed movement should not be answered automatically with another cosmetic patch.
Keep crack sealing separate from water management. A filled crack may coexist with poor grading, defective gutters or discharge arrangements, exterior-waterproofing defects, drainage problems, hydrostatic pressure, penetration leaks, or water entry at joints. Correcting those conditions can require work beyond an injection kit.
Interior access often makes poured-wall injection possible without excavation. That convenience does not prove that an interior-only repair is sufficient. A through-crack may create an exterior containment or water-pathway problem, while broader drainage defects may require exterior work.
The reverse is also true: the existence of a crack does not establish that excavation is always necessary. The available evidence supports no universal rule that every through-crack must—or must not—receive exterior treatment. The decision depends on geometry, leakage, drainage, exterior access, wall condition, earlier repairs, and the intended outcome.
Use this final decision check:
- Substrate: Is the wall poured concrete and covered by the system documentation?
- Moisture: Is the crack within the product’s permitted moisture condition, without uncontrolled leakage?
- Stability: Is there documented history or appropriate assessment supporting stability, with no displacement, deformation, recurring cracking, or unresolved uncertainty?
- Objective: Is rigid bonding the job epoxy is being asked to perform?
- Documentation: Does the exact product cover the crack dimensions, temperature, installation method, and intended structural role?
Use epoxy only when all five align. If active water stopping is the main objective, a suitable polyurethane system may be more appropriate. If the wall is moving, displaced, bowed, or structurally uncertain, pause for qualified evaluation. If the material is block, stone, or another unsupported substrate, use a method designed for that construction.
Epoxy is a specialized rigid-bonding material, not a universal answer to foundation cracking. The sound approach is to document and assess first, follow product-specific technical and safety instructions, and continue monitoring while addressing any broader water or movement problem.
Frequently asked questions
Can epoxy stop an actively leaking foundation crack?
Conventional structural epoxy is generally a poor choice while water is actively flowing. Water may interfere with adhesion or prevent liquid resin from remaining contained until it cures. Some specialized products permit limited dampness, but that suitability must be confirmed in current technical data.
Moisture-reactive polyurethane is more commonly used to stop active leakage because it expands within wet pathways. It should not be treated as structurally equivalent to an epoxy documented for structural bonding. A crack involving both water and structural concerns may require staged water control, stabilization, or a professionally designed repair.
Can I use a low-pressure epoxy kit on a concrete-block foundation?
Not unless the system is specifically documented for that construction. Standard surface-port instructions generally address poured-concrete walls, and at least one listed poured-wall kit expressly excludes hollow concrete block.
Block walls contain mortar joints and may include hollow or selectively grouted cells. Resin can leave the intended crack pathway and enter those spaces. Use a block-specific assessment and repair method rather than adapting poured-wall instructions.
Does epoxy injection permanently restore a foundation’s structural strength?
Do not assume so. A properly selected structural injection epoxy can form a rigid bond across stable cracked concrete, but the result depends on preparation, penetration, curing, substrate condition, and whether movement has stopped.
Injection does not correct settlement, wall deformation, unusual loading, or continuing soil movement. A structural designation also does not prove that a particular field installation filled the entire crack or restored a specific load capacity.
How much epoxy is needed for a foundation crack?
Quantity depends on crack length, average width, wall thickness, branching, internal voids, and resin loss. Advertised footage is based on seller assumptions and is not guaranteed coverage.
For example, one seller bases its listed coverage on a 1/16-inch crack through a 10-inch poured-concrete wall. A wider crack, thicker wall, hidden void, or exterior opening can increase consumption; the listing and its assumptions should be rechecked before purchase (RadonSeal’s kit coverage basis).
When should a foundation crack be evaluated before epoxy is applied?
Seek qualified evaluation before injection when the crack has visible displacement, appears to widen or recur, accompanies wall bowing or movement, forms part of a broader pattern, or may be associated with settlement or unusual loading. Evaluation is also prudent when the foundation material, crack activity, or structural significance is uncertain.
There is no validated appearance-only rule or universal width threshold that allows a homeowner to declare a crack safe, dormant, or nonstructural. Injection should follow assessment of the wall and repair objective—not replace it.