 MortarDesk
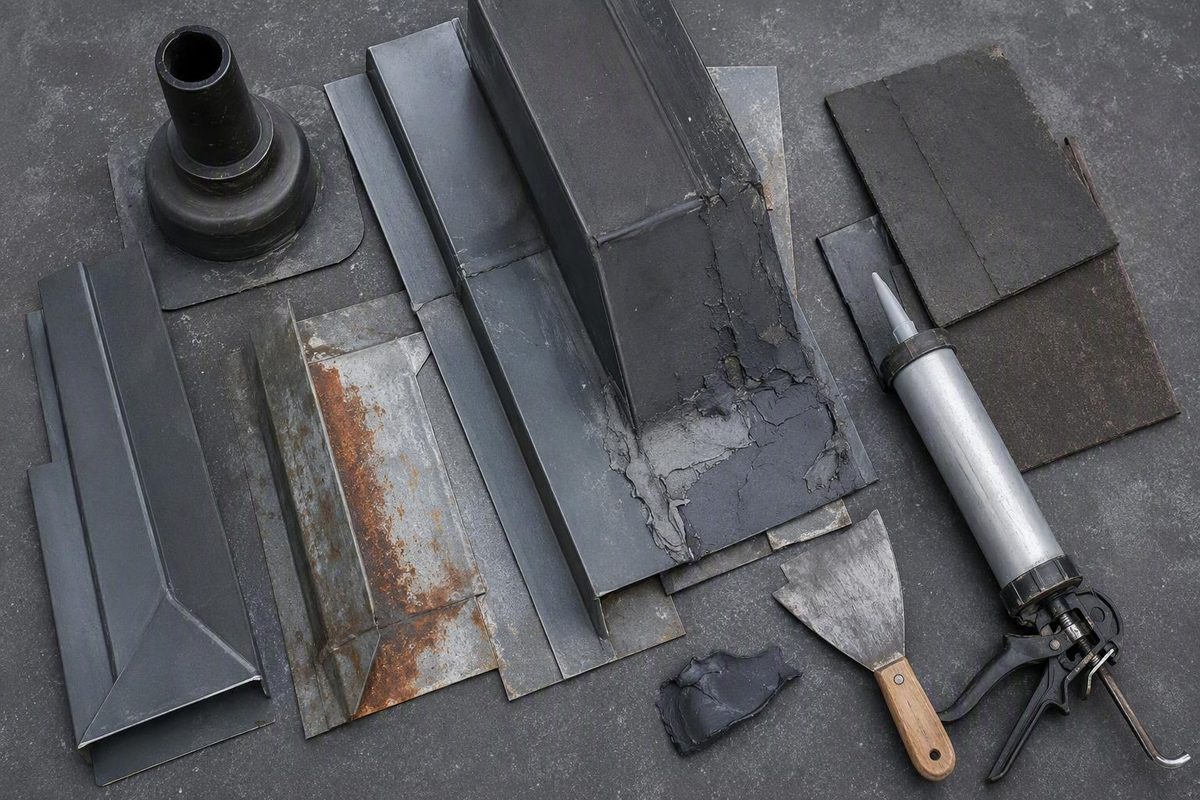
Roof flashing repair is not simply a matter of covering the most visible gap with caulk. A durable response begins by identifying where water enters, how it travels, and whether the flashing, roof covering, underlayment, decking, and adjoining wall or penetration remain serviceable.
That distinction matters because the same ceiling stain can lead to very different scopes of work. Sound metal with one failed sealed joint may need maintenance. Perforated or displaced flashing may require component replacement. Rotten decking, brittle shingles, defective underlayment, or repeated leaks may require a larger section of the roof to be opened and rebuilt.
This guide provides a conservative framework for recognizing suspected flashing failure, comparing repair options, setting a DIY safety boundary, understanding rough professional costs, and reviewing a contractor’s proposed scope.
What roof flashing does—and where failures occur
Roof flashing is a water-shedding component installed where the continuous roof surface is interrupted, changes direction, meets another material, or terminates at an edge. It is commonly metal, although some penetrations and proprietary assemblies use molded or flexible components.
The important term is water-shedding. Flashing is generally arranged so runoff moves from one layer onto the next and continues toward the roof edge or drainage system. It is not an isolated waterproof patch. It works with:
- Shingles, tiles, panels, membranes, or another roof covering
- Underlayment or another secondary water-control layer
- Roof decking
- Chimneys, pipes, vents, skylights, and other penetrations
- Siding, stucco, masonry, and other wall cladding
- Edge metal, gutters, and the intended drainage path
A defect in any adjoining element can resemble a flashing failure. Conversely, apparently intact shingles do not rule out a concealed flashing or underlayment problem.
Common locations to inspect include:
- Chimneys
- Skylights
- Plumbing vents and pipe penetrations
- Roof valleys
- Sidewalls and dormers
- Eaves and rakes
- Drip edges
- Roof-to-wall intersections
- Changes in roof plane
- Terminations where runoff must be diverted away from a wall
The main flashing names describe different functions rather than interchangeable products:
-
Step flashing uses separate pieces associated with successive roof-covering courses along a sloped wall or similar intersection.
-
Kickout flashing diverts water away from the lower end of a roof-to-wall intersection instead of allowing it to continue behind or onto wall cladding.
- Valley flashing manages runoff where two roof planes meet.
-
Pipe or vent flashing forms part of the assembly around a roof penetration.
-
Drip edge helps direct water at roof edges and protects the edge of the assembly.
These details do not share one universal installation sequence. Their geometry, exposure, fastening, laps, and relationship with the roof covering differ. A commercial roof-flashing overview likewise identifies chimneys, dormers, skylights, vents, walls, valleys, and penetrations as common locations, while noting that concealed flashing may require removal of adjoining cladding for access in its discussion of flashing locations and repair access.
A leak may become visible near one of these details because penetrations and transitions interrupt the otherwise continuous roof surface. Proximity, however, is not proof. A stain beside a chimney might come from its flashing, but it could also originate in masonry, a cap, a joint higher up, damaged shingles, or an upstream underlayment defect.
Useful illustration: A labeled roof overview should show a chimney, skylight, plumbing vent, open or closed valley, dormer sidewall, kickout termination, drip edge, and eave. The diagram should identify locations and drainage direction without presenting universal dimensions, lap lengths, or fastener positions.
Signs of damage and what they do—or do not—prove
Start by separating direct exterior evidence from indirect moisture symptoms.
A hole through metal is direct evidence that the component has lost integrity. A ceiling stain is evidence that moisture became visible at that location. It does not establish where water crossed the exterior roof system.
| Symptom or observation | What it may indicate | What it does not prove |
|---|---|---|
| Surface rust or oxidation | Coating loss, prolonged exposure, or early corrosion | That the metal is perforated or automatically requires replacement |
| Perforation or rust-through | Loss of metal integrity and a likely replacement condition | That it is the only water-entry path |
| Crack or split | Failed metal, flexible component, joint, or surrounding seal | Which adjoining layer first admitted water |
| Bent, wrinkled, or lifted metal | Movement, impact, insecure attachment, or poor original fit | That pressing it flat will restore correct integration |
| Missing flashing piece | An exposed transition requiring assessment | That no concealed damage has occurred |
| Loose or exposed fastener | Movement, incorrect fastening, or a possible opening | That replacing one fastener will resolve the assembly |
| Deteriorated sealant | A failed maintenance joint or evidence of movement | That the underlying flashing is correctly installed |
| Visible gap or separation | Displacement, poor fit, failed joint, or movement | Whether the gap is the primary entry point |
| Peeling exterior paint | Repeated wetting or an unrelated coating problem | That roof flashing is necessarily responsible |
| Stained siding or fascia | Runoff reaching or entering a wall or edge assembly | Whether the source is flashing, gutters, cladding, or another detail |
| Attic dampness | Roof intrusion, condensation, or indoor moisture migration | The exact exterior opening |
| Ceiling or wall stain | Water or condensation became visible indoors | That the defect sits directly above the stain |
Water can move beneath the roof covering, follow decking joints, wet insulation, run along framing, and emerge at a ceiling penetration or wall some distance away. Looking only at the point directly above an indoor stain can therefore lead to an unnecessary patch while leaving the actual opening untouched.
Photographs can document visible displacement or missing material, but they do not show every concealed condition. West Country Roofing’s repair-versus-replacement guide notes that images may not reveal deteriorated decking, sideways water movement, or whether surrounding shingles are too brittle to lift and reinstate when discussing the limits of remote roof assessment.
Competing causes should remain in the diagnosis until reasonably excluded:
- Split, displaced, or missing shingles
- Open joints in tiles or panels
- Damaged or discontinuous underlayment
- A cracked pipe boot or failed vent assembly
- Skylight frame, glazing, gasket, or curb defects
- Chimney masonry, crown, cap, or mortar-joint defects
- Wall-cladding or window leakage above the roof
- Gutter overflow or poor edge drainage
- Condensation associated with indoor moisture and cold surfaces
Location-based reasoning can narrow the investigation without turning a clue into a conclusion:
- Beside a chimney: Inspect step flashing, counterflashing, the upslope area, adjacent roofing, masonry joints, and the chimney cap or crown.
- Near a skylight: Consider the flashing assembly, roof covering, skylight unit, curb, condensation, and any uphill water path.
- Near a pipe penetration: Check the boot or flashing assembly, surrounding roofing, fasteners, and underlayment. Attic dampness near the pipe may still be displaced from the exact exterior opening.
- At a sidewall: Assess step flashing, concealed integration, the lower termination, and whether runoff is being directed away from the wall.
- Below a valley: Inspect the valley as a system, including the roofing on both sides, rather than assuming the visible metal alone has failed.
Lifted flashing, indoor stains, attic dampness, peeling paint, and stained siding are reasons to investigate. None independently identifies the precise entry point.
Diagnose the water path before choosing a repair
A diagnosis should progress from the symptom to the surrounding assembly rather than beginning with a tube of sealant.
A practical, non-prescriptive inspection sequence is:
- Document the symptom. Record where and when moisture appears. Note whether it occurs during prolonged rain, wind-driven rain, snowmelt, or apparently dry weather. Photograph stains and mark their boundaries so later changes are visible.
- Observe the suspected exterior detail from a safe location. Look for missing, displaced, cracked, perforated, or heavily corroded components. Consider the roof area above and beside the detail, not only the closest joint.
- Examine accessible attic or interior surfaces. Look for damp decking, water tracks, wet insulation, staining on framing, or moisture concentrated around a penetration.
- Assess adjoining materials. Determine whether the roof covering appears serviceable, whether cladding may have to be removed, and whether the detail appears integrated rather than merely surface-sealed.
- Select a remedy only after defining the likely path and condition. The result may be maintenance, replacement of one component, or a broader opening of the roof or wall assembly.
Concealed conditions that can enlarge the project include:
- Soft, delaminated, or rotten decking
- Wet or compressed insulation
- Torn, absent, or incorrectly integrated underlayment
- Deteriorated framing
- Brittle shingles or tiles that cannot be lifted and reused
- Flashing concealed behind siding, stucco, masonry, or trim
- Multiple layers of previous patches
- Incompatible materials or earlier repairs
- A defective original detail repeated elsewhere on the roof
Proper exposure may require removal of shingles on one or both sides of a detail. Sidewall flashing can sit behind siding or other cladding. A chimney repair may require access to counterflashing or masonry joints. This does not automatically mean the entire roof must be replaced, but it does mean the visible surface area can understate the necessary work.
An active leak warrants prompt attention, but prompt does not mean climbing onto an unsafe roof. Contractor-authored DIY guidance identifies wet roofs, upper stories, suspected structural deterioration, complex chimney or wall transitions, and lack of relevant experience as reasons to stop rather than proceed in its roof-access decision framework.
Temporary protection and permanent correction are different scopes:
- Interior containment limits immediate exposure while help is arranged.
- Temporary exterior protection may reduce further entry until permanent work is possible.
- Diagnosis identifies the likely path and affected materials.
- Permanent work restores the intended water-shedding sequence and replaces unsound material.
Controlled water testing may sometimes help isolate an immediate route, but it should not be treated as proof of long-term performance. The result can depend on where and how water is applied, and intermittent or wind-related entry may not appear during a limited test. A completion test is therefore one part of verification, not a substitute for examining how the assembly is built.
Repair, replace one component, or open up a larger area?
The appropriate scope depends on physical condition, original installation, compatibility, access, and the state of adjoining roof materials. Flashing age is context, not a verdict.
| Outcome | Conditions that may support it | Important limitation |
|---|---|---|
| Temporary leak control | Active intrusion before safe access or permanent work; storm damage awaiting assessment | Does not restore failed integration or unsound metal |
| Maintenance resealing or refastening | Metal is sound and correctly positioned; the defect is limited to a specified sealed joint or slight loosening | The cause of movement or sealant failure must still be investigated |
| Replacement of one or more components | Isolated perforation, cracked boot, distorted piece, missing step flashing, or one failed detail with sound surroundings | Adjacent roofing or cladding may need removal and reinstatement |
| Broader roof-system repair | Concealed rot, damaged underlayment, brittle roofing, repeated leakage, widespread installation errors, or several failing areas | The full scope may not be known until the assembly is opened |
Conditions that may be repairable
Maintenance can be reasonable when the relevant conditions align:
- Failed sealant is localized to a joint where sealant is part of the intended detail.
- The metal remains adequately thick, unperforated, and properly positioned.
- Slight loosening has occurred without substantial deformation.
- Corrosion is superficial rather than penetrating.
- One isolated component is damaged and can be accessed without destroying serviceable surrounding material.
- Decking and underlayment remain sound in the affected area.
- The likely water path is reasonably clear.
Refastening should not mean adding fasteners wherever metal appears to lift. The cause of movement matters, and the appropriate fastener and attachment position depend on the assembly.
Conditions favoring replacement
Replacement of the affected flashing becomes more likely when there is:
- Perforating rust
- Substantial thinning
- Widespread corrosion
- Multiple holes
- Cracking or splitting
- Significant distortion or buckling
- Missing pieces
- Separation from adjoining surfaces
- Incompatible materials
- Defective original installation
- Repeated leakage after earlier patches
Blue River Metal, a commercial flashing supplier, similarly distinguishes sound metal with localized sealant failure or slight lifting from rust-through, substantial thinning, multiple holes, distortion, and widespread corrosion in its repair-versus-replacement criteria.
When isolated repair is practical
A localized flashing repair can be sensible without whole-roof replacement when:
- The entry path is identified with reasonable confidence.
- The defect is confined to one detail.
- Adjacent roof covering can be removed or lifted without breaking apart.
- Underlayment and decking remain serviceable.
- The replacement can be integrated into the existing water-shedding sequence.
- The rest of the roof does not show a pattern of similar failures.
When the opening needs to be larger
A narrow patch can be inadequate if the leak has recurred, the deck is soft, the underlayment is damaged, or the surrounding roofing is too brittle to reinstate. Broader work may also be justified when the same defective original detail appears at several penetrations or wall intersections.
No universal roof-age threshold determines the answer. Older flashing can remain sound; newer flashing can fail because of poor fit, incompatible materials, impact, or faulty installation. A fixed percentage of roof area or a repair-cost-to-replacement-cost ratio likewise cannot substitute for inspection. The decision should follow the actual failure mode and the feasibility of reintegrating the assembly.
Why the repair method changes by flashing location
Durable flashing work follows a general principle: water should shed over successive materials toward drainage rather than encounter an exposed joint that depends entirely on a bead of sealant.
Sealant can still be a legitimate part of a detail where the applicable roof-covering, skylight, flashing, or sealant instructions specify it. The distinction is between a designed sealed joint within an integrated assembly and surface caulk used to cover failed metal or incorrect layering.
Step flashing and sidewalls
Step flashing consists of separate pieces associated with successive courses of roof covering. It may be partly concealed by siding or other wall cladding. Repair can therefore require lifting roofing and removing enough cladding to expose the flashing and assess its wall-side integration.
A continuous strip caulked to the surface is not automatically equivalent to correctly integrated step flashing. Exact dimensions, laps, fastening, and clearances should come from the instructions and requirements applicable to the particular roof and wall system.
Chimneys
The assessment may also need to consider:
- Masonry and mortar joints
- The chimney cap or crown
- Adjacent decking and underlayment
- Previous surface patches
- Water entering above the visible roof intersection
Repeated caulking at the base may fail because it does not address displaced step flashing, defective counterflashing, or entry through masonry higher on the chimney.
Valleys
Valleys receive runoff from two roof planes. Distorted, corroded, or poorly integrated valley material may require removal of roofing on both sides so the valley, underlayment, and adjoining courses can be inspected and reinstated.
This makes valley work materially different from resealing a small accessible joint. The visible point where water emerges may also sit below an upstream defect.
Pipe boots and vents
At a pipe penetration, deteriorated exposed sealant may be a limited maintenance issue. A split collar, cracked boot, displaced flange, corroded metal, or incorrectly layered assembly is a component failure. Covering a failed boot with more sealant does not restore its original fit.
Before replacing the boot or flashing, assess the pipe position, surrounding roof covering, decking, and any evidence that movement contributed to the failure.
Skylights
Moisture near a skylight can come from its flashing, surrounding roofing, the unit itself, or condensation on interior surfaces. A stain alone does not establish that the skylight must be replaced.
Diagnosis should distinguish among:
- A failed flashing component or kit
- Improper integration with the roof covering
- A curb or frame defect
- Glazing or gasket leakage
- Condensation
- An uphill roof leak traveling to the opening
Kickout flashing and roof-to-wall terminations
At the bottom of a roof-to-wall intersection, runoff must be directed away from the wall assembly. If the termination allows water to continue behind siding, concentrated wetting can occur below the roof edge.
Because this flashing may interact with step flashing, cladding, weather-control layers, trim, and gutters, concealed kickout defects are poor candidates for generic patching. They may require coordinated roof and wall work.
Drip edge and eaves
Edge details must coordinate with the roof covering, underlayment, fascia, and gutter or drainage path. A loose visible edge does not reveal whether the underlayment and edge metal are correctly integrated farther upslope.
Material compatibility
Material selection cannot be reduced to “use metal flashing” or “use roofing sealant.” Suitability may be affected by the existing roof and flashing materials, fasteners, sealant adhesion, masonry or treated-wood contact, environmental exposure, existing coatings, and movement.
The supplied commercial metal-flashing guidance specifically identifies exposure and contact with materials such as masonry or pressure-treated wood as factors that may affect deterioration. Product selection should therefore be checked against the relevant roof-covering, flashing, skylight, or penetration instructions rather than taken from a universal online recipe.
The DIY safety gate: when not to get on the roof
DIY flashing repair is first a risk decision and only then a cost decision. The question is not merely whether the visible defect looks small. It is whether the roof can be accessed safely, the assembly can be diagnosed correctly, and adjoining materials can be opened and reinstated without creating another leak.
Do not proceed with roof access when any of the following applies:
- The roof is wet, icy, frosted, or covered with loose debris.
- Wind or changing weather affects footing or material handling.
- The slope, height, or exposed edge exceeds your experience and equipment.
- The work is on an upper story.
- Ladder setup or the transition onto the roof is difficult.
- Footing is uncertain.
- You lack relevant roof-work experience.
- Decking feels soft or structural deterioration is suspected.
- Storm damage may have destabilized the assembly.
- Significant concealed moisture is suspected.
- The detail involves a chimney, valley, sidewall, kickout, or concealed flashing assembly.
- Roofing, siding, stucco, trim, or masonry must be removed.
- The applicable product and roof-system instructions cannot be identified.
There is no roof pitch that can be declared universally safe from general guidance alone. Surface condition, height, access, roof material, obstacles, weather, experience, and equipment all affect the decision.
DIY evaluation may be reasonable only for an experienced person dealing with a small, readily accessible defect where the source is reasonably clear, the flashing remains intact, surrounding materials are sound, and the applicable instructions are available. Inspection from the ground, a window, or an accessible attic may still be more appropriate than stepping onto the roof.
Generic directions cannot establish the correct flashing material, fastener, sealant, overlap, attachment point, or placement for every assembly. Common ways an attempted repair can go wrong include:
- Covering corrosion without checking whether the metal remains sound
- Using a product unsuitable for the existing materials
- Damaging shingles during rough removal
- Adding insecure or poorly placed fasteners
- Creating an inadequate water-shedding arrangement
- Treating the indoor symptom rather than the exterior entry path
- Failing to inspect concealed decking and underlayment
- Assuming one successful water test proves completion
Mortar Desk’s general reference library provides building-material information rather than property-specific contracting services. As explained on the About page, Mortar Desk is not a contractor or engineering adviser, and project requirements must be checked against the instructions and rules that control the work. Unsafe access, uncertain diagnosis, concealed deterioration, or complex integration calls for a scope-appropriate professional assessment.
Flashing repair cost: useful benchmarks and their limits
Commercial sources commonly publish approximately $200 to $600 for minor professional flashing work. One 2026 commercial guide reports $300 to $450 as a common total and $600 to $1,000 or more for higher-end work in the Modernize flashing cost guide.
These figures are planning benchmarks, not verified national averages. The published guide does not disclose a representative dataset, sample size, regional adjustment method, or consistent project scope.
| Flashing location | Rough published professional estimate |
|---|---|
| Vent or pipe flashing | $150–$350 |
| Chimney flashing | $300–$800 |
| Step flashing | $250–$600 |
| Valley flashing | $400–$1,000+ |
| Skylight flashing | $300–$700 |
The figures in the table come from the same commercial cost guide and should be interpreted accordingly. “Flashing repair” can mean anything from renewing a small specified sealant joint to removing roofing, fabricating replacement metal, replacing damaged decking, and rebuilding a concealed transition.
The main price drivers include:
- Extent of the defect
- Flashing type and location
- Metal or proprietary component required
- Standard versus custom fabrication
- Length of the affected detail
- Roof pitch, height, and access
- Local labor conditions
- Emergency timing
- Removal and reinstatement of shingles, tile, panels, siding, stucco, or masonry
- Disposal and cleanup
- Diagnostic and testing time
- Concealed deterioration found after opening
A flashing quote may exclude related work such as:
- Decking replacement
- Underlayment replacement
- New shingles, tiles, or panels
- Siding or trim work
- Masonry repair
- Skylight components
- Insulation replacement
- Framing repairs
- Ceiling, wall, paint, or other interior restoration
This is why the lowest number may not represent the lowest price for the same result. A resealing quote and a replacement quote are not directly comparable if the latter includes removal, concealed-condition assessment, custom metal, reintegration of adjoining layers, cleanup, photographs, and completion testing.
Ask each bidder to distinguish among:
- Temporary leak control
- Maintenance resealing or refastening
- Replacement of a specific flashing component
- Reconstruction of the surrounding roof or wall assembly
No category guarantees a particular service life or savings outcome. Performance depends on diagnosis, materials, installation, exposure, movement, and the condition of the larger roof system.
What a professional scope of work should include
A useful proposal should describe what the contractor believes is wrong, what will be opened, what will be replaced, and how the result will be integrated—not merely promise to “seal flashing.”
Use the following checklist when comparing estimates.
Diagnosis and proposed remedy
- What is the suspected water-entry area?
- What observations support that diagnosis?
- What type of flashing is involved?
- Is the work temporary protection, maintenance, component replacement, or broader reconstruction?
- Is the existing metal considered sound, and on what basis?
- Which competing causes have been considered, such as masonry, shingles, a pipe boot, skylight components, or condensation?
Materials and compatibility
- What flashing metal, boot, kit, membrane, or proprietary component is proposed?
- How will compatibility with existing materials be checked?
- Will custom fabrication be required?
- Which manufacturer or roof-system instructions govern the work?
- Who will verify any effect on an existing product or roof-system warranty?
Integration with adjoining materials
Ask how the repair will integrate with:
- Shingles, tile, panels, or membrane
- Underlayment
- Siding, stucco, trim, or masonry
- The chimney, skylight, pipe, or vent
- Valley drainage
- Edge metal, gutters, or a wall termination
An unspecified promise to add sealant does not explain how failed flashing will be exposed or how water will shed over the completed layers.
Removal and reinstatement
The proposal should state:
- Which shingles or roof components will be removed
- Whether siding, trim, stucco, or masonry access is anticipated
- Whether removed materials will be reused or replaced
- How color or material mismatch will be handled
- Whether disposal and cleanup are included
- Whether photographs will be provided before, during, and after the work
Concealed-condition terms
No visual inspection can establish every hidden condition. The contract should explain how the following will be handled if discovered:
- Wet or rotten decking
- Damaged underlayment
- Wet insulation
- Deteriorated framing
- Failed masonry
- Brittle or unserviceable roof covering
- A larger-than-expected area of defective flashing
Ask whether these items are included, covered by an allowance, priced by unit, or subject to a written change order. The point at which work stops for approval should be clear.
Testing, exclusions, and administration
Confirm:
- The proposed inspection or completion-check method
- The limitations of any water test
- Explicit exclusions
- Allowances
- Change-order procedures
- Start and completion conditions
- Cleanup and property-protection responsibilities
- Workmanship warranty terms
- Product-warranty implications
- Who will confirm permit requirements
- What insurance documentation will be supplied
- What license or registration, if any, the controlling authority requires
Do not assume the answer to a permit, licensing, insurance, or warranty question from general online guidance. Verify it with the relevant authority, insurer, manufacturer, warranty document, and written contract.
Verifying the completed work
A cautious completion check includes:
- Review before-and-after photographs, including concealed areas where practical.
- Confirm that the agreed failed material was removed rather than merely covered.
- Inspect accessible finished edges for open gaps, lifted material, or incomplete reinstatement.
- Check that shingles, cladding, trim, and gutters were restored as specified.
- Monitor the interior during later weather.
- Treat any controlled water check as limited verification rather than proof of long-term performance.
A professional workflow may involve diagnosis, removal of failed material, fitting replacement flashing, reintegrating the detail, and completion testing. That sequence explains why a replacement proposal may be broader than a quote to apply surface sealant.
Signs that the original diagnosis or repair may have been incomplete include:
- Renewed staining at the same location
- Moisture appearing somewhere else
- Leakage returning only during wind-driven rain
- Continuing attic dampness
- New staining after a previously dry period
- Persistent exterior wetting below a roof-to-wall termination
Before approving the final scope, check the applicable roof-covering instructions, flashing-product requirements, skylight or penetration documentation, warranty terms, locally adopted code edition, and relevant permit or inspection authority.
Frequently asked questions
Can roof flashing be repaired without replacing the entire roof?
Yes. Localized repair can be practical when the likely water path is reasonably clear and the surrounding roof covering, underlayment, and decking remain serviceable.
Examples include replacing an isolated pipe boot or damaged flashing component, or maintaining a specified sealed joint where the metal remains sound. Broader work becomes more likely when leaks recur, roofing is too brittle to reinstate, decking is compromised, or similar defects appear in several areas.
Is caulk a permanent flashing repair?
Not when the flashing is perforated, distorted, missing, incorrectly layered, or separated from the assembly. In those conditions, surface caulk does not restore the intended water-shedding arrangement.
Sealant may be appropriate where the applicable system specifically requires a sealed joint and the flashing remains sound. It may also serve as temporary leak control while permanent work is arranged.
How can I tell whether a ceiling stain is caused by flashing?
You usually cannot tell from the stain alone. Its location identifies where moisture became visible, not necessarily where it entered the exterior roof.
Document the stain, inspect accessible interior or attic surfaces for water tracks, and assess the nearby detail together with the roof area above it. Keep competing causes—including masonry, roof covering, pipe boots, skylight components, underlayment, and condensation—in view.
How much does flashing repair usually cost?
A preliminary commercial benchmark for minor professional work is approximately $200 to $600, while complex locations or concealed deterioration can bring published estimates to $1,000 or more. These are rough commercial figures, not a verified national dataset, and actual quotes depend heavily on access and scope according to Modernize’s 2026 cost guide.
Compare what each proposal includes rather than comparing totals alone. Diagnosis, removal, replacement metal, adjoining-material reinstatement, concealed-damage allowances, cleanup, photographs, and testing can materially change the quoted price.
Can I repair roof flashing myself?
Possibly, but only within a narrow safety and competence boundary. A small, accessible defect may be suitable for an experienced person when the source is reasonably clear, the flashing remains intact, surrounding materials are sound, and the applicable instructions are available.
Do not proceed when access, weather, height, deterioration, or detail complexity exceeds your experience or equipment. Concealed step flashing, chimneys, valleys, kickout terminations, masonry, siding removal, soft decking, and uncertain leak paths are strong reasons to obtain a professional assessment.
The final decision can be reduced to four questions:
- Which roof detail is suspected?
- Is the interior stain merely where water appeared rather than where it entered?
- Are the flashing and surrounding roof-system materials still sound?
- Does the proposed response match the actual condition?
Sound, correctly positioned flashing with a limited maintenance defect may be repairable. Perforation, distortion, poor integration, recurring leakage, or concealed deterioration can require component replacement or broader work. Temporary sealing may limit immediate intrusion, but it should not be confused with a permanent water-shedding repair.
When access is unsafe, the water path is uncertain, or hidden damage is likely, obtain a scope-specific professional assessment. Then verify the proposed materials, installation requirements, permit questions, and warranty implications against the documents and authorities that apply to the project.