 MortarDesk
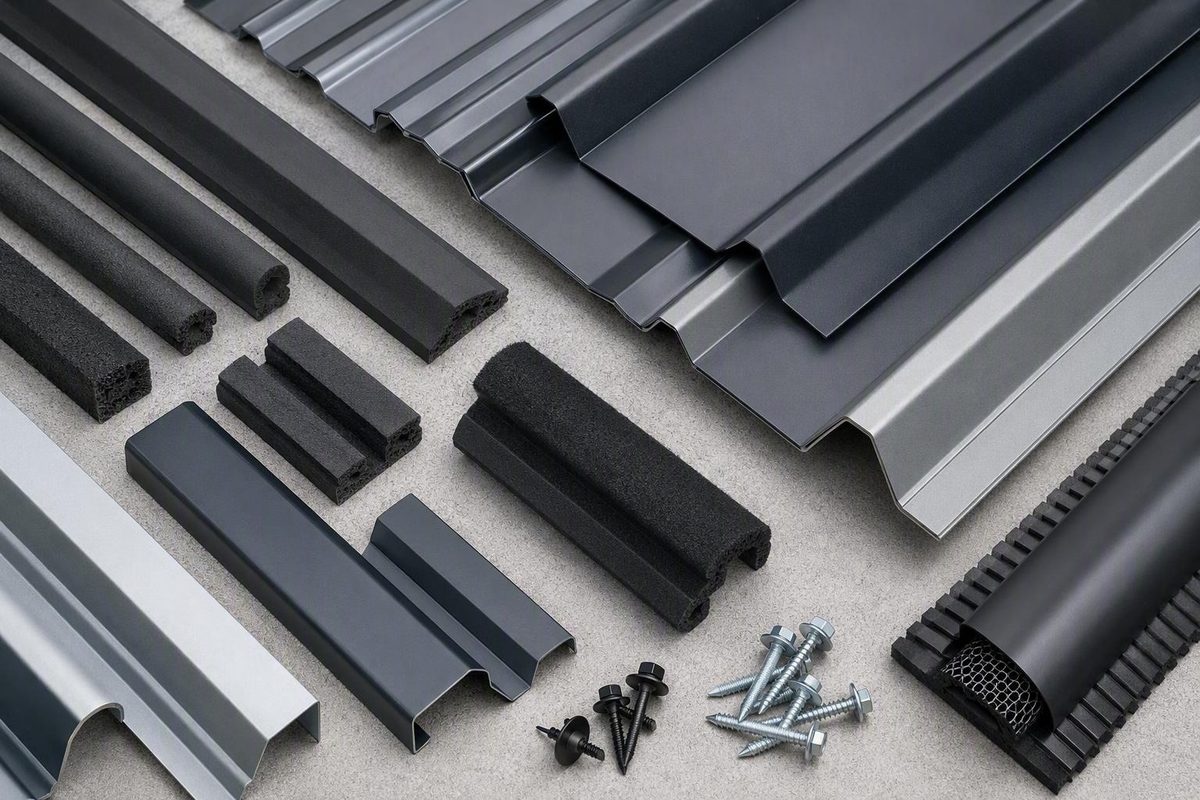
Foam closure strips for metal roofing are not generic gap fillers. They are roof-system components whose contour, orientation, placement, ventilation characteristics, and retention method must suit the exact panel and trim detail.
Before buying, identify the panel profile, determine where the closure physically sits, confirm whether that location must pass ventilation air, and calculate quantity from usable coverage—not simply the length printed in a product title. A strip that is black, adhesive-backed, or 36 inches long may still be completely wrong for the roof.
Updated August 11, 2026. Product formats and displayed prices were checked against the cited listings; specifications, availability, and prices can change.
What foam roof closures do—and what they cannot fix
Ribbed and corrugated roof panels are intentionally three-dimensional. When the end of one of these panels meets a relatively flat eave, ridge cap, hip cap, or flashing detail, its ribs and valleys create profile-shaped openings. A closure is a shaped or compressible component intended to fill those openings.
Manufacturers, suppliers, and retailers commonly describe closures as helping limit entry by wind-driven rain or snow, dirt, debris, insects, birds, and other pests. These are intended functions rather than guarantees that the finished roof will be watertight or pest-proof. The result still depends on the panel, flashing, trim, fasteners, underlayment, joints, workmanship, and exposure conditions.
A closure cannot compensate for:
- Incorrect or missing flashing
- Misaligned roof panels
- Loose, missing, or failed fasteners
- Trim installed in the wrong position
- An improperly sealed side lap or end lap
- Damage or corrosion elsewhere in the assembly
- A ridge detail that conflicts with the attic ventilation design
Nor should foam be treated as a substitute for sealant, butyl tape, lap tape, or another joint treatment required by the roof-system instructions. The closure fills the intended profile opening; it does not independently seal every route through which water or air could move.
Not every metal-roof assembly uses the same approach. An open-air agricultural shelter may intentionally leave some openings unobstructed. An enclosed shed may use solid closures, while a conditioned building with a ventilated attic may need an airflow-permitting ridge detail. Some standing-seam systems terminate with formed metal closures, cleats, hemmed edges, sealant, or combinations of these components rather than conventional die-cut foam.
This article provides general material-selection and purchasing guidance. Mortar Desk is an independent reference site, not a contractor or engineering adviser; see About Mortar Desk for its editorial scope. Current panel-system drawings, permit requirements, applicable local code, and instructions from the panel and closure manufacturers take precedence.
Identify the panel profile before shopping
Start with identification, not a product search. “Corrugated,” “ribbed,” and “ag panel” are broad descriptions, and visually similar panels can have different rib spacing, rib height, shoulder geometry, or minor stiffening ribs.
Look for the following, in order:
- The original material invoice or order confirmation
- A manufacturer or profile name printed or stamped on the panel
- The building plans or roofing takeoff
- Manufacturer literature or an installation drawing
- A profile template supplied by the panel manufacturer or closure seller
- Direct measurements from an accessible panel end
Use a worksheet rather than relying on a photograph:
| Identification field | What to record |
|---|---|
| Panel manufacturer | Company shown on the invoice, label, stamp, or literature |
| Model or profile name | Exact designation, including suffixes where applicable |
| Rib or corrugation shape | Rounded wave, trapezoidal rib, major rib with minor ribs, V-shaped rib, or another form |
| Rib height | Vertical distance from the panel flat or valley to the rib peak |
| Rib-to-rib spacing | Centerline distance between repeating major ribs |
| Flat width | Clear flat or pan width between major ribs |
| Minor features | Stiffening ribs, shoulders, beads, or drainage channels |
| Peak-and-valley orientation | Which surface and contour must face the foam at the intended location |
| Roof location | Eave, ridge, hip, end condition, flashing intersection, or specified transition |
| Panel drawing reference | Drawing number, revision date, or document title |
Measure more than one interval when possible. If the pattern repeats, measure across several ribs and divide by the number of spaces. This can reduce the effect of a small placement error. Do not distort the panel while measuring, and do not assume that overall panel coverage width establishes the closure contour.
Profile dimensions can differ substantially even among familiar exposed-fastener products. One specialty listing, for example, gives its AG-Panel geometry as 9 inches on center and its R-Panel geometry as 12 inches on center. The same listing separates products by profile and by inside or outside style, illustrating why a general search for “R-panel foam” does not prove compatibility (AG-Panel and R-Panel product specifications).
Other documented products include SM-Rib closure model 98190, AG Panel or similar Pro Panel II closures, and closures made for 7/8-inch corrugated panels. These are examples of separate product systems, not interchangeable alternatives. One corrugated listing specifies 2.67-inch ridge spacing and gives several contour dimensions for its 7/8-inch corrugated closure.
Color, foam type, adhesive backing, package quantity, and nominal length do not establish fit. Two strips can both be black, three feet long, and adhesive-backed while having incompatible contours.
When the panel identity remains uncertain, obtain a sample closure or printable profile template before buying cartons. Place the sample against an actual panel end in the same orientation it will occupy in the assembly.
A successful test fit has four characteristics:
- Every peak and valley aligns with the panel.
- The strip is oriented correctly for the physical location.
- No periodic gaps appear as the profile repeats.
- The foam does not need to be stretched, severely crushed, twisted, or forced into place.
Regularly repeating gaps are a strong reason to stop and recheck profile spacing, orientation, and panel alignment before trying to add sealant or another filler.
Map the closure by physical location, not just its label
Many product ranges offer two complementary contours. One fits beneath the roof panel, and the other fits above it. Because the underside and topside of a ribbed panel have different shapes, a project may need both products even when every strip has the same nominal length.
A simplified conceptual section looks like this:
RIDGE

                Ridge or hip cap
             ______________________
                [TOP CLOSURE]
/\/\/\/\/\/\/\/\/\/\/\/ Roof panels
/\
/ Roof structure


EAVE

/\/\/\/\/\/\/\/\/\/\/\/ Roof panel
                [BOTTOM CLOSURE]
          ___________________________   Eave edge, trim, or deck
In much of the available product guidance:
- Inside closure means the strip beneath the panel at an eave or exposed panel end.
- Outside closure means the strip above the panel and beneath a ridge or hip cap.
That terminology is not universal. Some supplier guidance reverses the labels while describing comparable physical locations. For purchasing purposes, “inside” and “outside” are therefore weaker identifiers than:
- Beneath panel at eave
- Above panel beneath ridge cap
Use the panel manufacturer’s drawing or a product-specific placement diagram to resolve the label. Compare the illustrated panel contour with the strip, and confirm which face of the closure contacts the metal.
The SM-Rib system provides a useful system-specific example. Its document identifies model 98190 as the inside closure at the eave and model 98191 as the outside closure beneath the ridge cap. It also shows different placement sequences for the two locations. Those labels and procedures should not be generalized to unrelated panels; they apply to the products shown in the SM-Rib closure installation sheet.
Treat hips, endwalls, sidewalls, valleys, end laps, and other transitions as separate details. A strip that fits a standard eave or ridge does not automatically suit a hip angle or flashing intersection. Use the applicable system drawing instead of extrapolating from the nearest-looking detail.
Choose among profiled, universal, solid, and vented products
Once the profile and physical location are known, select the closure construction. The main distinctions concern shape, compressibility, blockage, and ventilation.
Profile-shaped closures
Die-cut or molded profile closures reproduce a defined panel contour. They are usually the first products to investigate for regular eave and ridge details because their peaks and valleys are predetermined.
The principal advantage is straightforward alignment with less dependence on uneven field compression. The limitation is equally important: a product made for one geometry is unlikely to accommodate a materially different rib pattern.
Universal compressible closures
Universal material is typically supplied as a flat strip or roll that compresses and expands into a gap. It may be useful at irregular transitions, valleys, or details with modest profile variation—but only where the panel or accessory manufacturer approves it.
“Universal” does not mean suitable for every gap. The material must still have appropriate dimensions, cell structure, weather-exposure limits, chemical compatibility, and retention provisions. Long rolls may also be more difficult to keep straight during installation.
Solid or closed-cell closures
Solid or closed-cell closures are intended to create a more complete blockage through the profile opening. They may suit details where airflow is not wanted, subject to the roof-system design.
Do not select a solid closure at a ridge without first checking whether that ridge is part of an attic exhaust path. A solid strip can obstruct the airflow the ridge detail was intended to provide.
Open-cell and purpose-made vented closures
Open-cell foam permits more air movement than closed-cell foam, but ordinary open-cell material should not automatically be treated as a purpose-made ridge vent. The product specification must establish that the closure is intended for the location and provide the airflow information required by the ventilation design.
Purpose-made vented closures are intended to combine profile closure with airflow. Their suitability depends on the complete intake-and-exhaust arrangement—not simply the presence of holes or porous material at the ridge.
Some standing-seam terminations use formed closures, cleats, hems, universal material, sealant, or combinations of these details instead of conventional profile-cut foam. General supplier guidance therefore recommends matching the closure category to both the exact panel geometry and its physical installation location.
This article cannot prescribe net free ventilation area. That calculation requires project-specific information about the building, roof assembly, intake provisions, exhaust products, applicable code, and manufacturer data.
Selection matrix
| Panel and building condition | Physical location | Ventilation function | Product direction to investigate |
|---|---|---|---|
| Known exposed-fastener profile; enclosed building | Beneath panel at eave | Not an intended airflow path | Matching profile-cut solid closure, if shown in the system detail |
| Known profile; ventilated attic | Above panel beneath ridge cap | Designed exhaust path | Profile-compatible vented ridge product with documented airflow data |
| Known profile; unvented ridge | Above panel beneath ridge cap | No designed airflow | Matching solid closure where specified |
| Irregular approved transition | Transition or valley | Depends on detail | Approved universal compressible material |
| Open-air shelter | Eave or ridge | Openings may be intentional | Verify whether a closure is needed |
| Conditioned or enclosed shed | Eave and ridge | Depends on enclosure design | Coordinate closures with the moisture and ventilation strategy |
| Standing-seam roof | Eave, ridge, or termination | System-specific | Follow the prescribed formed-closure, cleat, hem, sealant, or other detail |
| Unknown panel profile | Any location | Unknown | Do not bulk-order; identify the panel and test a sample first |
Building use matters because “seal every visible opening” is not always the correct design objective. A conditioned building, enclosed unconditioned shed, ventilated attic, and open-sided agricultural shelter can require different approaches.
Compare specifications, package formats, and displayed prices
After narrowing candidates by fit, placement, and ventilation, compare what each listing actually documents. Retail pages often provide package count and nominal length while omitting material properties needed for a full technical evaluation.
The table below shows how formats vary. Prices are source- and configuration-specific snapshots checked on August 11, 2026. They are not national averages and may change with date, seller, location, shipping, profile, closure style, and package configuration.
| Documented example and source | Profile and placement | Nominal and actual length | Package | Adhesive | Known material | Pitch restriction | Displayed price and normalization | Important missing information |
|---|---|---|---|---|---|---|---|---|
| Schafer Metals AG Panel/Pro Panel II | Inside or outside variants | 36 in nominal; actual not stated | 4 | Pre-applied | Not stated | Not stated | $4.80; $1.20/strip; $0.40/nominal ft | Polymer, density, cell structure, UV data, temperature range, warranty |
| Home Depot SM-Rib 98190 | Inside closure | 3 ft nominal; actual not stated | 4 | Not listed as pre-applied | Dense polyethylene foam | Minimum 3:12 listed | $6.82; about $1.71/strip; about $0.57/nominal ft | Full dimensions, density, UV data, adhesive specifications, service life |
| Amazon Duco R-Panel listing | R-Panel; physical placement not established in the supplied listing | 3 ft nominal; actual not stated | 20 | Not stated | Not stated | Not stated | $48.49; about $2.42/strip; about $0.81/nominal ft | Profile dimensions, material, density, cell type, installation method |
| Schafer Metals 7/8-in corrugated | Listing says inside or outside | 36 in nominal; 37.5 in actual to provide overlap | 2 | Not stated | Not stated | Not stated | $3.00 per two-piece unit | Polymer, adhesive, UV data, warranty, tested performance |
| MetalRoofingScrews.com AG-Panel/R-Panel listing | Separate profile and inside/outside choices | 3 ft nominal; actual not stated | 4, 12, 20, or 100 | One side | Foam type not fully established | Not stated | Selected configurations vary | Usable coverage, full material data, approved retention details |
| Western States Metal Roofing closure category | Several corrugated and ribbed profiles; some separate inside/outside products | Not stated on category page | 100 | Not stated | Foam | Not stated | Quote required | Dimensions, cell structure, adhesive, technical properties, usable coverage |
The corrugated example demonstrates why nominal, actual, and usable length must be kept separate. Although the product title describes a 36-inch closure, the detailed listing states an actual length of 37.5 inches to provide overlap. Actual physical length still does not necessarily equal installed coverage: required overlaps, locking tabs, end cuts, and system-specific placement can reduce the length credited toward the takeoff.
Before buying, ask for missing technical information that matters to the application:
- Foam polymer and density
- Open-cell, closed-cell, or other construction
- Temperature range
- Resistance or limitations concerning ultraviolet exposure
- Fire-test data or properties, where relevant
- Compatibility with panel coatings, butyl tape, sealants, and cleaners
- Adhesive type and intended function
- Approved retention method
- Warranty terms
- Product-specific tested performance
- Documented service life under expected conditions
- Usable installed coverage
- Roof-pitch restrictions
- Storage limitations
- Current installation instructions
Separate specifications from sales claims. A seller may describe a product as weather-resistant, insulating, noise-reducing, durable, or capable of reducing heat transfer. Unless the listing provides relevant product-specific testing, these descriptions should not be converted into quantified performance assumptions, expected energy savings, or service-life predictions.
Package price matters only after compatibility has been established. A lower cost per foot is not a bargain if the contour is wrong, the ridge must ventilate, or the package contains the wrong eave or ridge style.
Calculate strips, packages, and usable coverage
Calculate each closure location separately. At minimum, create individual rows for:
- Eaves
- Ridge
- Hips
- End conditions
- Manufacturer-specified transitions that use the same closure
Do not combine eave and ridge quantities merely because both products are three feet long. They may have different contours, product codes, overlaps, package quantities, or retention instructions.
Use this basic formula:
Required strips = total detail length ÷ usable coverage per strip, rounded up
Then account for:
- Required end overlap
- Locking-tab engagement
- End cuts and offcuts
- Corners or changes in direction
- Damaged or contaminated pieces
- Installation waste
- Full-package rounding
The calculation is most reliable when usable coverage comes from the product instructions. Nominal length is the product’s stated size; actual length is its physical end-to-end dimension; usable coverage is the amount of detail one installed strip completes. Those three numbers can differ.
Baseline example
Suppose one eave requires 60 feet of closure and each strip provides a full 3 feet of usable coverage:
60 ft ÷ 3 ft per strip = 20 strips
That is a baseline only. If the product requires overlap, uses locking tabs that consume length, or produces unusable cuts, the adjusted requirement will be higher.
Package example
If overlap, cuts, and waste raise the requirement to 22 strips and the product is sold in four-packs:
22 strips ÷ 4 strips per pack = 5.5 packs
Round up to six packs, providing 24 strips.
Use a worksheet that exposes every assumption:
| Location | Measured footage | Product and contour | Usable coverage per strip | Overlap or tab allowance | Waste allowance | Adjusted strips | Strips per pack | Packs required | Extended cost |
|---|---|---|---|---|---|---|---|---|---|
| Eave A | |||||||||
| Eave B | |||||||||
| Ridge | |||||||||
| Hips | |||||||||
| Transitions |
For a profile-specific strip with locking tabs, calculate coverage according to the joined assembly rather than assuming every piece contributes its full physical length. Likewise, if a nominal 36-inch strip is physically longer to create an overlap, do not count the extra length twice.
Finally, price each product row separately. This prevents a surplus of eave closures from masking a shortage of ridge closures.
Install according to the panel system, not a generic recipe
Installation details vary, but a defensible general sequence is:
- Verify the profile and location. Confirm the product code, contour, physical placement, and ventilation function.
- Test-fit the closure. Check a complete profile repeat and confirm orientation before removing release paper or applying tape.
- Clean and dry the metal. Remove dust, moisture, oil, loose residue, and contaminants using methods compatible with the panel coating and closure.
- Mark the alignment. Establish the position specified by the system drawing so the panel or trim will cover the foam fully.
- Apply the specified retention material. This may be pre-applied adhesive, approved butyl tape, or a compatible sealant, depending on the instructions.
- Place the closure without stretching it. Align the contour naturally and maintain consistent compression.
- Install the covering component. Depending on location, this may be the roof panel, ridge cap, hip cap, or other trim.
- Fasten according to the panel system. Use the specified fastener type, position, spacing, and tightening practice.
- Inspect the completed line. Look for exposed foam, periodic gaps, displacement, excessive crushing, and missed joints.
Pre-applied adhesive can make positioning easier, but do not assume it provides permanent resistance to wind displacement by itself. The completed retention mechanism may depend on compression beneath installed panel or trim, butyl tape, compatible sealant, fasteners through the assembly, locking tabs, or another system-specific method.
The SM-Rib procedure is one documented example—not a universal recipe. At the eave, its instructions place butyl tape at the roof edge, embed the closure, and then install the panel. At the ridge, butyl tape is applied to the roof panel before the closure and ridge cap are installed. Adjacent pieces join with locking tabs.
Avoid stretching the foam to gain coverage. Stretched material can retract and expose gaps. Also avoid tightening trim to the point that the closure is crushed, distorted, or displaced. The objective is the compression prescribed by the system, not maximum compression.
Keep foam completely beneath the panel or trim. Supplier guidance warns that direct sunlight and weather exposure can accelerate deterioration, so an installed strip should not project beyond its protective covering.
Closure installation also does not seal side or end laps between panels. Apply the specified lap treatment independently. If a drawing requires butyl tape, sealant, stitching fasteners, or another detail at a lap, foam installed elsewhere does not eliminate that requirement.
Roof work introduces fall hazards, and sheet metal has sharp edges. Proper fall protection is necessary when working above grade; gloves and eye protection are necessary when handling sheet metal or using power tools. The SM-Rib manufacturer’s installation guidance expressly includes those precautions and directs installers to consult the panel guide, local inspector, and permit office.
Before work starts, obtain the current panel and closure drawings, verify applicable permit requirements, and check local code. If safe access, system identification, or the required detail is uncertain, use a qualified roofing professional.
Diagnose poor fit and decide whether a retrofit is practical
A poor result does not automatically mean the foam itself is defective. The pattern of the problem can point toward profile mismatch, orientation, preparation, compression, retention, or panel alignment.
| Symptom | Likely issues to investigate | Appropriate next step |
|---|---|---|
| Regularly spaced gaps | Wrong rib-to-rib spacing, wrong profile family, or repeated panel-alignment error | Compare panel measurements with the product drawing |
| Peaks align but valleys do not | Incorrect rib height, shoulder geometry, or flat width | Obtain the exact profile template and replace the mismatched strip |
| Contour appears inverted | Closure reversed or wrong eave/ridge style | Recheck physical placement and orientation |
| Closure lifts before covering | Dust, moisture, contaminated metal, weak temporary adhesive, or incompatible materials | Stop, clean and dry the surface, and confirm the approved retention method |
| Closure moves after assembly | Inadequate retention, insufficient compression, or incorrect trim detail | Review the complete panel-and-trim instructions |
| Foam is crushed flat | Excessive compression or incorrect strip thickness | Check trim position and fastening requirements |
| Foam bows or pulls away at ends | Strip was stretched or joined incorrectly | Replace it without stretching and follow overlap or tab instructions |
| Uneven, non-periodic gaps | Misaligned panels, distorted trim, irregular substrate, or inconsistent compression | Correct the assembly before adding filler |
| Water appears near a panel lap | Failed lap treatment, flashing, trim, or fasteners | Inspect and repair the joint intended to control that route |
| Foam is exposed or deteriorating | Strip extends beyond trim or lacks suitable exposure protection | Review exposure limits and replacement guidance |
Do not respond to profile mismatch by packing recurring gaps with unspecified glue or sealant. That may conceal rather than correct the fit problem, and the added material may be chemically incompatible with the foam or panel coating.
If water appears near a panel lap, inspect the lap seal, adjacent flashing, trim, and fasteners. Closure foam does not seal the panel joint by itself. Likewise, if moisture appears below the roof, do not assume that the nearest visible closure is necessarily the entry point.
For exposed foam, determine why the trim does not cover it. Check the product’s exposure limitations and replacement instructions rather than painting, coating, or gluing it without approval.
Evaluating a retrofit
Adding closures after the roof is complete may be possible, but it is a different task from installing them during assembly. Access may require loosening or removing ridge caps, eave trim, corner trim, or fasteners. Existing surfaces may be dusty, wet, oxidized, or difficult to clean, and the closure must still be installed without obstructing intended ventilation.
An online discussion about retrofitting closures mentions difficult access, dusty bonding surfaces, displaced closures, and attempts to add glue. These are unverified user anecdotes, not manufacturer instructions or evidence that a particular adhesive is approved. They are best treated as questions to raise with the panel and closure manufacturers.
Use this retrofit decision sequence:
- Identify the exact panel profile. Do not buy by appearance alone.
- Identify the opening being addressed. Determine whether it is an eave, ridge, corner, transition, lap, or unrelated flashing defect.
- Determine the ventilation function. Confirm whether closing the opening would obstruct intended intake or exhaust.
- Inspect access. Establish whether trim or panels must be loosened or removed.
- Obtain the system detail. Find the current drawing for that panel and location.
- Confirm retention. Verify the approved adhesive, butyl tape, sealant, tabs, compression, or fastening arrangement.
- Assess the existing metal. Determine whether it can be cleaned and prepared without damaging its coating.
- Evaluate roof access and safety. Consider height, slope, weather, fragile edges, and the need to handle long trim.
- Decide whether professional work is appropriate. Retrofit complications can exceed the apparent simplicity of the foam component.
Before purchasing, complete this order-of-operations check:
- Identify and measure the exact panel.
- Label the closure by physical placement.
- Confirm whether that detail must ventilate.
- Test-fit a sample or profile template.
- Determine usable coverage after overlaps or tabs.
- Calculate each eave, ridge, hip, and transition separately.
- Convert the adjusted strip count into complete packages.
- Verify the approved retention method.
- Check any roof-pitch limitation.
- Request missing material and performance data.
- Consult the current panel-system drawing.
A correctly matched closure can fill the intended profile gap. It remains only one component of the roof assembly and cannot compensate for defective laps, flashing, trim, ventilation, or fastening.
Frequently asked questions
Will any 36-inch foam closure strip fit corrugated metal roofing?
No. Thirty-six inches describes length, not contour. Fit depends on rib or corrugation shape, height, on-center spacing, flat width, orientation, and whether the closure goes beneath or above the panel. Confirm the exact profile and test-fit a sample before ordering.
Can I use a solid foam closure under a vented ridge cap?
Not automatically. If the ridge is an intended attic exhaust path, a solid closure may obstruct airflow. Use the ridge closure specified by the roof and ventilation design, and verify its documented airflow characteristics. Ordinary open-cell foam should not be assumed equivalent to a purpose-made vented ridge product; trade guidance distinguishes airflow-permitting and more completely blocking closure constructions (closure-strip overview).
Is adhesive backing enough to hold a closure strip permanently?
It should not be assumed to be enough. Pre-applied adhesive may assist alignment during assembly, while the completed system may rely on compression, butyl tape, approved sealant, fastening, locking tabs, or another prescribed retention method. Follow the instructions for the exact panel and closure rather than treating adhesive backing as proof of permanent wind resistance.
Can foam closure strips be installed after the metal roof is complete?
Sometimes, but access may require loosening or removing trim or fasteners. The metal must still be prepared properly, the closure must be retained by an approved method, and intended ventilation must not be blocked. Safe access and the risk of damaging completed roofing can make professional installation appropriate. User reports describe retrofit difficulties, but those reports remain anecdotal rather than approved installation guidance.
Are foam closure strips required on every metal roof?
No universal answer applies. Requirements vary with the panel system, building enclosure, ventilation design, termination detail, manufacturer instructions, and local code. Some open-air shelters may omit conventional closures, while some standing-seam roofs use formed metal closures, cleats, hems, sealant, or other terminations instead of profile-cut foam.