 MortarDesk
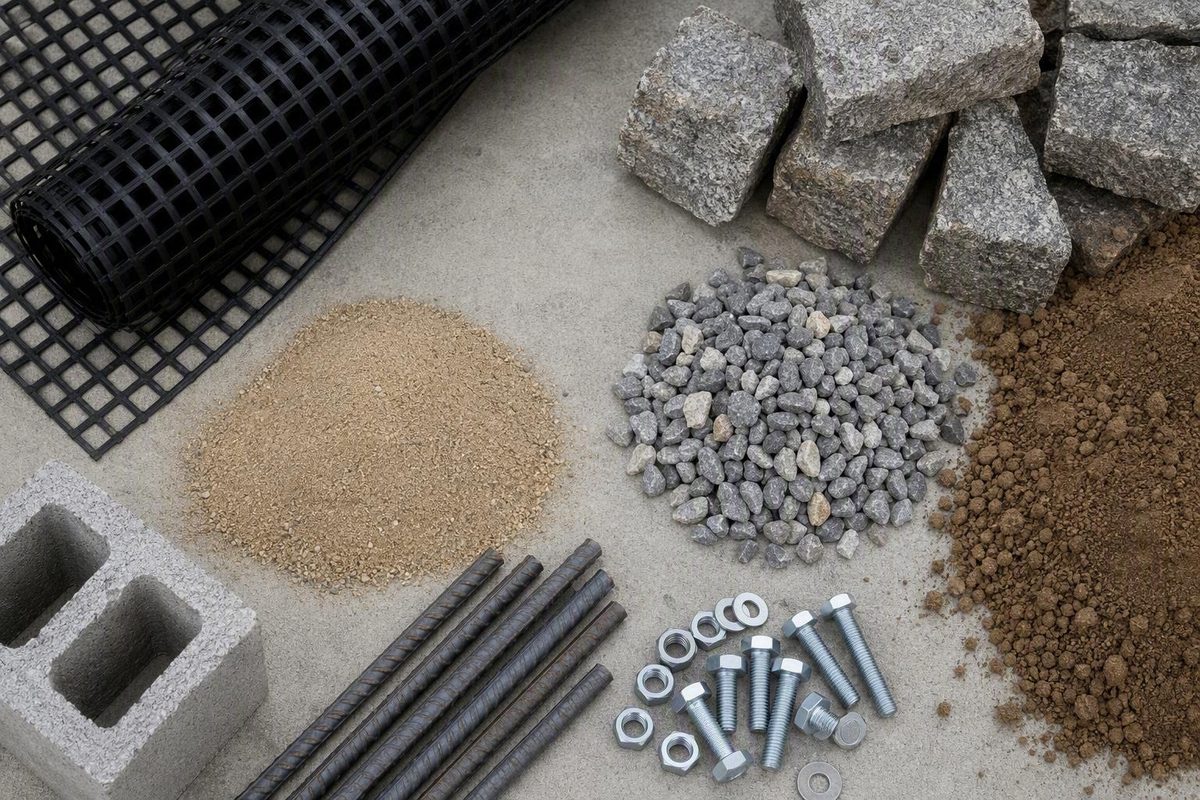
Geogrid for retaining walls can look like a generic roll of plastic mesh. In practice, it is one component of a reinforced-soil system. Its performance depends on the facing, connection detail, reinforced fill, foundation, drainage, compaction, loading, and installation matching the approved wall design.
That changes how geogrid should be selected and ordered. Wall height, roll size, retail series, and price are not enough. Before buying, identify the wall system, site loads, soil and water conditions, local requirements, and approved reinforcement schedule. Then verify the exact grid, its strength direction, documented long-term properties, connection compatibility, and current installation instructions.
This article is a purchasing and consultation reference, not a retaining-wall design method. It cannot establish grid strength, reinforcement length, layer spacing, fill specifications, compaction targets, drainage dimensions, or permit requirements for an individual site.
What geogrid does behind a retaining wall
Geogrid is a polymer geosynthetic installed in horizontal layers between selected wall courses and extended into compacted fill. Its apertures allow the surrounding fill to interact with the grid. As the retained soil tends to move, the grid carries tensile forces and helps hold the reinforced zone together.
The result is not simply a stronger block face. The facing, grid, grid-to-facing connection, and compacted soil form a larger reinforced mass that helps resist pressure and lateral movement. VERSA-LOK describes the grid-reinforced soil mass as part of the retaining-wall system rather than merely an attachment behind the blocks (manufacturer explanation of reinforced-soil action).
This distinguishes two broad wall concepts:
- A gravity wall relies primarily on the mass and geometry of its units to resist the retained soil.
- A reinforced-soil wall relies on the facing, horizontal geogrid layers, compacted reinforced fill, and their connections working together.
The facing still retains soil at the front, establishes alignment and appearance, and transfers force through the specified connection. It should not be treated as though it independently supports everything behind it.
Conceptual cross-section—not to scale:
                   Driveway, structure, stored load,
                   or upward slope if present
                         ↓
     Final grade  ______________________________
Compacted reinforced fill
=========================== Grid layer
\=========================== Grid layer
\========================== Grid layer
                      |<-- primary strength direction
 Wall facing          |    normally runs into the fill
 [ block ]            |
 [ block ]  drainage  | reinforced-soil zone
 [ block ]  aggregate |
 [ block ]     ○------|-------------------------> outlet
 __________ leveling pad / prepared foundation __________
The drawing should be read as a labeling guide, not a construction detail. A project cross-section should identify:
- Wall facing: the specified blocks, panels, or other approved facing.
- Compacted reinforced fill: the designed soil zone behind the facing.
- Horizontal geogrid layers: shown at their specified elevations and lengths.
- Primary strength direction: normally extending from the face into the fill for a specified uniaxial product.
- Drainage aggregate: placed only where the wall-system detail requires it.
- Drain and outlet: including a defined discharge route.
- Foundation and leveling pad: the prepared support beneath the facing.
- Loads and slopes: including driveways, buildings, upper walls, stored materials, or rising ground.
- Final grading: showing how surface runoff is directed.
These labels prevent a common conceptual mistake: drawing the grid while omitting the soil, water, and connection conditions that allow it to function.
Geogrid does not compensate for an unsuitable foundation, unapproved fill, poor drainage, inadequate compaction, or an incorrect wall design. Adding layers cannot be assumed to correct those defects because each affects a different part of the wall system.
When a retaining wall may need geogrid
Wall height is a useful screening question, but it does not determine by itself whether reinforcement is required.
Manufacturers commonly mention a range around three to four feet as the point at which geogrid or professional design may become relevant. That is system-specific screening guidance, not a universal cutoff, code threshold, or assurance that a shorter wall is simple. For example, CornerStone recommends consulting a qualified engineer for reinforced CornerStone 100 walls at or above 3.5 feet and says shorter walls may also require reinforcement beneath parking areas, roads, or positive slopes (CornerStone system guidance).
A shorter wall can still have demanding conditions if it supports:
- a driveway or parking area;
- a roadway;
- a building, foundation, or other structure;
- an upper retaining wall;
- stored materials or another concentrated load;
- ground that rises behind the wall.
These loads and geometries can increase the demand even when the visible face is relatively low. Other conditions that may require professional assessment include:
- weak, loose, expansive, or uncertain soil;
- a soft, variable, or previously disturbed foundation;
- a slope above or below the wall;
- closely spaced or tiered walls;
- groundwater, seepage, irrigation, or concentrated runoff;
- difficult corners, curves, steps, or abrupt changes in height;
- seismic exposure;
- erosion or an unreliable drainage discharge route.
A proper assessment may need to consider exposed height, total height, buried depth, wall batter, facing geometry, soil properties, foundation conditions, reinforced-zone dimensions, drainage, loading, and the requirements of the selected wall system.
A practical decision path is:
- Identify the exact wall system. Obtain its current design and installation documents rather than relying on a generic block diagram.
- Check local requirements before excavation. Ask the relevant authority how wall height is measured and whether slopes, tiering, or nearby loads affect review requirements. Manufacturer guidance itself directs users to confirm local permitting and design requirements with the applicable authority.
- Map the site conditions. Record upper and lower slopes, driveways, buildings, parking, tiering, utilities, runoff, irrigation, groundwater, and questionable soil.
- Compare the site with the manufacturer’s simple-wall guidance. Do not extend that guidance to conditions it excludes.
- Obtain professional review when the project exceeds the published guidance or when an important condition remains uncertain.
A threshold quoted for one city, state, province, or proprietary system cannot be generalized. Local authorities may distinguish among visible height, total height, retained height, slopes, tiering, and surcharge conditions. A permit trigger may also differ from the point at which engineered design is appropriate.
The useful question is not merely, “How tall is the wall?” It is, “What soil mass and loads must the wall retain, and which project, system, and local requirements apply?”
Uniaxial, biaxial and triaxial geogrids compared
The terms uniaxial, biaxial, and triaxial describe reinforcement arrangements. They are not interchangeable retail categories.
Uniaxial geogrid has one principal strength direction. In retaining-wall applications, that primary or machine-strength direction normally runs perpendicular to the face, extending into the reinforced soil. Smaller transverse elements may maintain the grid structure but should not be assumed to provide the same design strength.
Biaxial geogrid provides reinforcement in two principal directions. Square or rectangular aperture arrangements are common. Commercial product guidance frequently associates these products with aggregate confinement, base reinforcement, and subgrade stabilization.
Triaxial geogrid has a multidirectional, commonly triangular, aperture arrangement. The supplied product guidance primarily associates it with base and subgrade stabilization rather than treating it as a generic replacement for wall reinforcement.
Retaining-wall sources most often identify uniaxial grid as the typical choice for mechanically stabilized earth and segmental retaining walls. Carthage Mills, for example, separates its rigid biaxial products for soil stabilization and base reinforcement from rigid HDPE and woven-coated polyester uniaxial products intended for soil-reinforcement applications such as walls and slopes (manufacturer overview of geogrid types).
For a specified uniaxial roll, “perpendicular to the wall” means that the documented strong direction runs away from the facing and into the reinforced zone. It does not mean laying that direction along the wall. Incorrect orientation may leave less tensile capacity in the direction assumed by the design.
Do not determine the strong direction from appearance alone. Confirm:
- the machine and cross-machine directions;
- whether the machine direction follows the roll length or width;
- the product designation and roll identification;
- cutting and orientation instructions;
- the orientation shown in the project drawings.
Supplier documentation for uniaxial wall grids similarly directs installers to run the machine-strength direction perpendicular to the wall and to use the reinforcement length established by the engineered plans (uniaxial orientation guidance).
Some proprietary wall systems permit a particular bidirectional product. That does not make every biaxial product suitable, nor is a product automatically unsuitable merely because it has strength in two directions. The deciding questions are whether its documented properties, orientation, soil interaction, connection behavior, and approval match the wall system and project design.
A grid sold for road-base stabilization may not have the wall-facing connection data or documented long-term properties required by a reinforced-wall design. Conversely, an approved bidirectional product may be acceptable where the wall system and responsible designer expressly allow it.
Material alone does not settle the choice. Uniaxial wall-reinforcement products include coated polyester grids and rigid HDPE grids. Neither polymer should be declared universally superior without considering the documented durability conditions, installation-damage assumptions, soil environment, connection, and intended service conditions.
How to read a geogrid specification before buying
A retail listing may emphasize dimensions, price, nominal tensile strength, or an advertised maximum wall height. Those details may help with ordering, but they do not establish structural suitability.
Use this buyer checklist:
| Item to verify | Why it matters |
|---|---|
| Product designation | The plans, data sheet, invoice, and roll label should identify the same product and grade. |
| Grid type | Confirm whether it is uniaxial, biaxial, triaxial, or another defined construction. |
| Polymer and construction | Record whether it is coated polyester, HDPE, polypropylene, or another specified material. |
| Machine and cross-machine directions | These determine how the roll must be cut and oriented. |
| Primary strength direction | It must align with the reinforcement direction shown on the plans. |
| Aperture dimensions | Apertures affect interaction with fill and may affect engagement with pins, lugs, blocks, or connectors. |
| Roll dimensions | Width and length affect takeoff, cutting, handling, and approved sheet layouts. |
| Documented long-term properties | These are more relevant to sustained wall loading than an isolated retail strength figure. |
| Creep information | The product documentation should address performance under sustained tension. |
| Durability information | Verify the stated environmental, soil, temperature, and service-life assumptions. |
| Installation-damage considerations | Placement and compaction may affect available performance. |
| Facing-connection data | The grid must work with the exact block, pin, lug, connector, or facing configuration. |
| Applicable tests or approvals | Obtain the documents actually required by the project or reviewing authority. |
| Current installation instructions | These control product-specific cutting, orientation, handling, cover, and detailing. |
Ultimate tensile strength is not automatically the strength available to a wall throughout its intended service period. Retaining-wall product documentation may distinguish short-term tensile results from properties used after considering sustained loading, creep, durability, and installation conditions. This article cannot calculate those reductions or convert a listed value into an allowable project capacity.
Creep means continuing deformation while a material remains under sustained load. For that reason, a product intended to carry soil forces over time should not be selected solely from a short-term headline strength.
An unexplained LTDS figure is also insufficient. Retail pages may publish an LTDS number without units, test basis, direction, design assumptions, or supporting calculations, illustrating why the underlying technical documents are needed before comparison (example of retail LTDS listings).
Treat the following as ordering clues, not proof of project suitability:
- seller series names;
- “contractor grade” or “professional strength” labels;
- retailer wall-height categories;
- roll color or visual similarity;
- a substitution described only as “equal or stronger.”
Compatibility with the facing is essential. Depending on the proprietary system, the grid may be captured between courses, engaged by pins or lugs, connected through hollow cores, attached to a welded-wire facing, or secured through another detail. A grid that physically fits between blocks has not necessarily been shown to provide the connection assumed by the design.
Before accepting a proposed product or substitution, request:
- the current technical data sheet;
- complete installation instructions;
- applicable test, evaluation, or approval documents;
- connection information for the exact wall system;
- written acceptance from the person or organization authorized to approve the change.
Separate structural selection from quantity takeoff. The approved design or wall-system layout must first establish the product, reinforcement lengths, layer elevations, and coverage. Only then can the buyer total the layer areas and allow for approved cutting layouts, corners, curves, and waste.
Price comparison comes last. Availability, freight, minimum quantities, and return terms can change. A lower-priced roll is not equivalent if its dimensions, orientation, long-term documentation, or connection data do not satisfy the project requirements.
The decisions that must come from the wall design
Grid length, strength, and spacing cannot be calculated from wall height alone. Height influences the forces and potential size of the reinforced mass, but it is only one input.
The approved wall design or applicable system layout should establish:
- the exact grid or required product properties;
- strength direction and roll orientation;
- reinforcement length at each elevation;
- number of layers;
- vertical spacing;
- block courses or elevations receiving grid;
- facing and connection detail;
- reinforced-fill type and limits;
- drainage and separation details;
- excavation limits;
- compaction requirements;
- construction tolerances;
- details at corners, curves, steps, tiers, and utilities.
Taller walls generally need a larger reinforced-soil mass and may require longer layers, stronger reinforcement, more layers, or a combination. That trend is not a sizing formula. Soil strength, water, slopes, loads, foundation conditions, and connection behavior can change the result.
Some guidance for qualifying short residential walls gives a preliminary grid length equal to 0.8 times wall height. Factor Geotechnical expressly presents this as a rough rule for smaller walls and directs readers to check local engineering requirements and the selected block system (limited residential rule-of-thumb guidance). It is not a design rule and does not account for all relevant soil, loading, water, connection, foundation, and stability conditions.
Likewise, instructions such as “place grid every second course” belong only to the limited example or proprietary system in which they appear. The approved layer schedule controls, and spacing may change within a single wall.
A professional wall assessment may need to consider several distinct forms of unacceptable performance:
- tensile demand exceeding the grid capacity used by the design;
- inadequate grid anchorage or soil interaction;
- insufficient transfer at the facing connection;
- movement along the base;
- excessive rotation;
- inadequate foundation support;
- total or differential settlement;
- a deeper instability extending around or beneath the reinforced zone.
These are conceptual categories, not checks a buyer can complete from a roll label. A grid can have a high advertised tensile value and still be unsuitable if the reinforcement is too short, the connection has not been verified, the foundation is weak, or the larger slope is unstable.
Use this document hierarchy:
- Stamped project plans and specifications
- Approved revisions and written design clarifications
- Approved wall-system and geogrid instructions
- General manufacturer literature
- Generic articles and retail descriptions
If the grid data sheet, block instructions, and project drawing appear to conflict, pause and obtain clarification. Do not choose whichever detail is easiest to build. The discrepancy may indicate an outdated document, wrong product, unapproved substitution, or project-specific requirement.
Conceptual installation sequence
Scope notice: The sequence below explains the usual organization of the work. It does not establish dimensions, grid length, layer spacing, soil acceptance, compaction targets, drainage details, equipment limits, or legal requirements. Those must come from the approved project and wall-system documents.
-
Complete preconstruction checks. Confirm applicable approvals and plans, locate utilities, review available soil information, identify drainage outlets, and verify access and sequencing. Manufacturer installation guidance also calls for utility locating and soil review before excavation (MagnumStone installation guide).
-
Inspect delivered materials. Check that blocks, connectors, and grid match the specified products. Record the grid designation, roll or lot information, dimensions, documented strength direction, and visible condition. Isolate unidentified or damaged material pending review.
-
Prepare the excavation and subgrade. Follow the approved excavation limits and foundation requirements. Do not shorten the excavation merely to reduce reinforcement length.
-
Construct the leveling pad and buried first course. Establish the specified foundation preparation, embedment, wall line, level, batter, setback, and alignment before reinforcement begins.
-
Install drainage components that must precede backfilling. Confirm that the drainage aggregate, pipe, filter or separator, and discharge route match the approved detail. A pipe should not be treated as a complete drainage provision unless collected water has an intended route away from the wall.
-
Place and compact fill to the specified grid elevation. Bring the compacted surface level with the relevant course so the grid can lie flat. Do not use the grid to bridge depressions or level uneven fill.
-
Cut the specified reinforcement length. Use a continuous piece in the reinforcement direction unless the approved plans provide another detail. Do not improvise an end-to-end splice to make up missing depth.
-
Orient the grid correctly. For specified uniaxial grid, place the documented primary strength direction perpendicular to the face and extending into the reinforced soil. Recheck orientation after cutting.
-
Make the approved facing connection. Extend the grid toward the front and engage it through the specified block, pin, lug, connector, clamping detail, or other connection. Keep it from remaining visible on the completed face.
-
Set the next facing course. Maintain the specified bond, setback, alignment, and connection. Hollow cores, pins, lugs, and proprietary connectors apply only to their associated systems.
-
Remove slack and folds. Pull the grid taut without disturbing the facing. Hold or secure it only as allowed by the approved instructions.
-
Place suitable fill over the grid. Use controlled placement methods that do not drag, fold, or displace the reinforcement or push the facing out of alignment.
-
Compact in controlled lifts. Follow the project requirements for fill, moisture, lift thickness, equipment, and compaction. Maintain the grid position and facing alignment.
-
Repeat only at the designed elevations. Do not add, remove, or relocate layers according to an assumed course interval. Before burial, verify the product, orientation, elevation, length, connection, and condition.
Manufacturer sequences show why proprietary details cannot be transferred casually. MagnumStone, for example, uses hollow units and a SecureLug connection while directing grid strength, length, orientation, and elevations to follow the project design. A connection or front-edge detail from another system is not automatically equivalent.
Drainage, backfill and compaction are part of the reinforcement system
Correct grid placement is necessary but not sufficient. Geogrid depends on interaction with the surrounding fill. Excavated site soil should not be assumed acceptable merely because it appears dry or can be compacted.
The approved design may specify requirements for fill strength, gradation, drainage behavior, plasticity, moisture condition, and compaction. Fine, wet, organic, expansive, or otherwise unsuitable material may be difficult to compact, retain water, undergo volume change, or provide different grid interaction from the material assumed by the design.
Drainage components have separate functions:
- Drainage aggregate provides a free-draining zone where the wall detail requires it.
- A perforated drain collects water and conveys it toward the specified discharge point.
- An outlet provides an intended route for collected water.
- Filter or separation material may limit migration of fine soil into drainage aggregate where specified.
- Final grading directs surface runoff away from vulnerable areas.
- Erosion protection helps protect outlets, slopes, and newly placed soil.
Drainage does not mean leaving the reinforced zone loose or uncompacted. The wall must satisfy both drainage and structural-fill requirements, which is why the boundaries between material zones matter.
Lift thickness, moisture conditioning, and compaction targets depend on the fill, equipment, wall system, and project. Values copied from a different manufacturer may be inappropriate. The field method must follow the approved documents and avoid shifting the blocks, wrinkling the grid, or damaging the connection.
Construction equipment should not travel directly on exposed grid. CornerStone’s system-specific instructions prohibit driving equipment on exposed geogrid and require the reinforcement to remain tensioned during backfilling (CornerStone installation precautions). Required soil cover and turning, braking, and equipment restrictions should come from the approved documents.
The facing zone needs particular care because compaction equipment can move units or disturb connections. Some proprietary instructions require lighter, hand-operated equipment near the face, but the applicable restriction must be taken from the selected wall system rather than generalized from another product.
Useful records before each layer is hidden include:
- grid product, grade, roll, or lot;
- documented machine direction and installed orientation;
- layer elevation and corresponding course;
- cut length and coverage;
- condition before covering;
- facing connection;
- fill type and source;
- lift placement and moisture observations;
- required compaction checks and results;
- drainage aggregate, pipe, outlet, and filter placement;
- photographs showing the full layer before burial;
- approved field changes and written clarifications.
Records do not make deficient work acceptable, but they help compare hidden construction with the approved documents and identify discrepancies before another lift is placed.
Drainage defects, unsuitable fill, weak foundations, and inadequate compaction cannot be corrected merely by adding more grid. Reinforcement does not create an outlet, remove organic material, or compact loose backfill.
Common mistakes and the failure mode behind each one
The best time to identify a geogrid problem is before it is covered.
| Mistake | Why it matters |
|---|---|
| Wrong uniaxial orientation | The grid may provide less reinforcement in the direction required by the design. |
| Pieces shorter than specified | Reduced depth can reduce anchorage and alter the size of the reinforced mass. |
| Unapproved end-to-end splices | The joint has not necessarily been shown to transfer the required force or provide equivalent soil interaction. |
| Slack, folds, or wrinkles | The grid may not engage as intended until movement removes the slack, producing uneven load transfer. |
| Grid disturbed during fill placement | Displacement changes the layer position, tension, and coverage. |
| Arbitrary layer spacing | The installed wall no longer matches the approved reinforcement schedule. |
| Unapproved product substitution | Long-term properties, direction, durability, apertures, or connection behavior may differ. |
| Unsuitable fill | The installed soil may not provide the behavior assumed by the design. |
| Inadequate compaction | Loose zones can settle, deform, and provide inconsistent grid-soil interaction. |
| Blocked or incomplete drainage | Water and erosion conditions remain unaddressed by the grid. |
| Traffic on exposed grid | Equipment can cut, stretch, shift, or otherwise damage the reinforcement. |
| Grid visible at the face | This may indicate incorrect front-edge placement and leaves the material exposed. |
Continuous reinforcement depth deserves particular attention. Commercial retaining-wall guidance directs installers to use one continuous piece for the required depth rather than joining short pieces to reach it (retaining-wall geogrid installation guidance). If a project permits a splice, the approved detail—not a casual overlap—must define it.
“Overlap” can describe several different conditions:
- adjacent sheets at one elevation;
- vertically coincident layers;
- layouts at inside or outside corners;
- arrangements along curves;
- an attempted splice in the reinforcement direction.
Those conditions are not interchangeable. VERSA-LOK, for example, distinguishes general layer-separation requirements from special corner and curve layouts (system-specific overlap guidance). Generic instructions to “always overlap” or “never overlap” should not replace the approved detail.
Pause before burial and obtain clarification if any of the following cannot be verified:
- product identity or grade;
- primary strength direction;
- required layer elevation;
- reinforcement length;
- facing connection;
- fill acceptance;
- drainage placement or discharge route;
- treatment of damaged grid;
- the detail at a corner, curve, utility, or obstruction.
Clarification at that stage is more practical than attempting to verify or correct hidden work after another lift has been placed.
When to involve an engineer or local authority
Professional review should occur early enough to affect excavation, product selection, foundation treatment, and drainage—not after the blocks and grid have been delivered.
Strong triggers include:
- a taller wall or one outside the manufacturer’s simple-wall guidance;
- a wall below an uphill slope or above a downhill slope;
- a nearby driveway, parking area, roadway, building, or other surcharge;
- tiered or closely spaced walls;
- weak, variable, expansive, or uncertain soil;
- a soft or previously disturbed foundation;
- groundwater, seepage, irrigation, flooding, or difficult drainage;
- seismic exposure;
- unusual geometry, sharp curves, corners, steps, or abrupt height changes;
- utilities or structures crossing the reinforced zone;
- a proposed substitution for the specified grid, block, pin, lug, or connector.
Check local requirements before excavation. Ask the authority having jurisdiction how it treats total height, retained height, buried portions, slopes, tiering, and surcharge loads. Manufacturer thresholds are not legal rules for every location.
A wall that is already leaning, bulging, settling, separating, eroding, or retaining persistent water needs diagnosis rather than a surface application of geogrid. The products and installation methods discussed here describe reinforcement buried within compacted fill; laying grid at the surface does not reproduce that system or address hidden foundation, drainage, or connection defects.
Mortar Desk describes itself as a building-material reference publisher, not a contractor or engineering adviser. Project-specific wall design, diagnosis, and substitution approval should be handled by appropriately qualified professionals working to local requirements.
Before ordering geogrid, confirm that you have:
- approved project plans or applicable wall-system guidance;
- completed the required local review;
- identified the soil, foundation, loading, and drainage assumptions;
- selected the exact grid product and grade;
- confirmed its primary strength direction;
- obtained the relevant long-term product documentation;
- verified compatibility with the exact facing and connector;
- obtained the layer lengths, elevations, and coverage schedule;
- placed current installation documents on site;
- resolved discrepancies in writing.
Frequently asked questions
Does a retaining wall under four feet need geogrid?
It may. The frequently quoted three-to-four-foot range is a commercial or manufacturer screening guide, not a universal cutoff or statement that shorter walls are safe without reinforcement or professional review (supplier screening guidance).
A shorter wall can still be demanding if it supports a driveway, building, upper wall, parking area, roadway, or uphill slope, or if it has weak soil, water, tiering, seismic exposure, or a poor foundation. Check the selected wall system and local requirements, then assess the complete site rather than visible height alone.
Which direction should uniaxial geogrid run?
For a typical retaining-wall application, the documented primary or machine-strength direction runs perpendicular to the wall face, extending from the facing into the reinforced soil.
Do not infer the direction solely from appearance. Verify the roll label, technical data sheet, installation instructions, and project drawing before cutting.
How far should geogrid extend behind a retaining wall, and how many layers are needed?
The approved design should specify reinforcement length, number of layers, strength, vertical spacing, and course elevations. Those requirements depend on wall geometry, soil, water, slopes, loads, foundation conditions, and facing connection—not height alone.
A preliminary length of 0.8 times wall height appears in limited guidance for qualifying short residential walls, but the source labels it a rough rule rather than an engineered design (Factor Geotechnical’s limited-scope guidance). Do not apply it to conditions outside that scope.
Use the approved layer schedule for quantity takeoff. Wall face area alone cannot determine reinforcement requirements.
Can geogrid pieces be overlapped or joined to obtain the required length?
Do not assume an overlap creates a structural splice. A continuous piece is generally used for the specified reinforcement depth unless the approved plans provide another load-transfer detail.
Rules for adjacent sheets, coincident layers, corners, and curves may differ. Follow the stamped plans and the approved grid and wall-system instructions for the exact condition.
Can any geogrid be used with any retaining-wall block?
Suitability must be verified rather than assumed. A cross-brand combination may be acceptable if the responsible design documents and wall-system requirements support it, but physical fit alone is not evidence of compatibility.
The design may depend on a particular aperture, strength direction, long-term property, polymer, pin, lug, connector, clamping action, or documented grid-to-facing connection. A visually similar product—or one with a higher advertised ultimate strength—may not satisfy those assumptions.
For a substitution, obtain the proposed product’s current technical data, orientation instructions, durability information, long-term documentation, and connection data for the exact facing. Proceed only after the authorized party has approved the change.
Do not order geogrid from wall height or roll price alone. First establish the wall system, site loads, soil and water conditions, local requirements, and approved layer schedule. Then verify the exact product, strength direction, long-term documentation, connection compatibility, and installation instructions.
A correctly selected grid supports a complete reinforced-soil system; it does not replace one. Stamped plans and project-specific instructions take priority over general guidance.