 MortarDesk
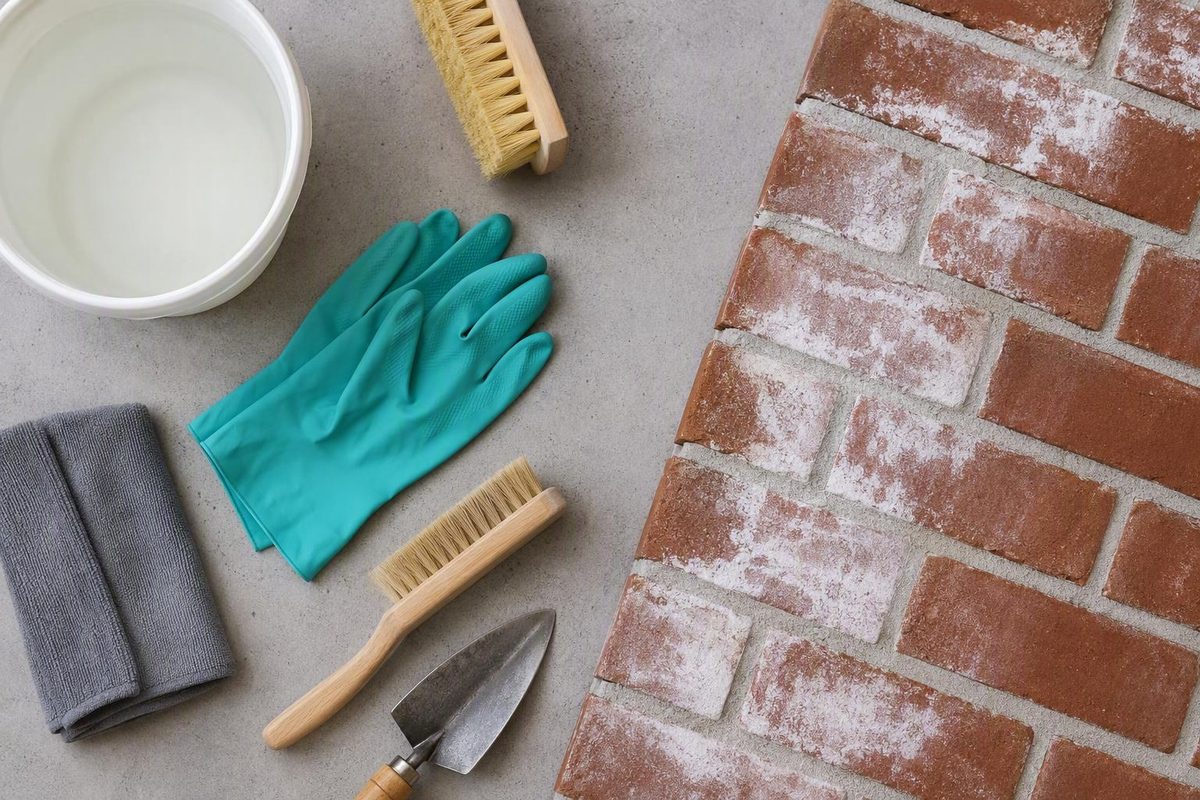
If you want to know how to get rid of efflorescence safely, do not begin by trying to dissolve the white stain. Efflorescence is evidence that moisture has transported soluble salts through a porous material and left them behind as the water evaporated. Cleaning can improve the appearance, but it cannot stop new deposits while the same moisture pathway remains active.
A durable approach has three stages:
- Find and reduce the moisture source.
- Remove surface salts with the least aggressive compatible method.
- Let the material dry, monitor it, and delay painting or sealing until rapid recurrence has stopped.
Dry brushing is the safest general starting point for loose deposits. Water, pressure washing, vinegar, and commercial acidic cleaners represent increasing intervention, but not a universal ranking of risk: compatibility depends on the substrate, its condition, and how the method is used. Water can restart salt migration, while excessive pressure or an unsuitable cleaner can damage masonry (efflorescence-removal guidance from W. R. Meadows).
Quick answer: the safest order for removing efflorescence
If the deposit is dry, loose, and powdery—and the masonry beneath it is sound—use this sequence:
- Check for active dampness and water entry. Look for leaks, overflowing gutters, failed flashing, cracks, poor drainage, condensation, plumbing problems, or moisture rising from the ground.
- Choose suitable conditions. Dry-brush only when the deposit and surface are dry enough to clean safely. If liquid treatment may be needed outdoors, wait for warm, dry, above-freezing weather.
- Test a stiff nylon or other nonmetallic brush. Begin in a small, inconspicuous area and use controlled pressure.
- Sweep or vacuum the loosened powder. Collect it instead of spreading it over nearby brick, paving, soil, or finishes.
- Leave the surface dry and reassess. Some mild deposits require no further treatment after the moisture source has been corrected.
- Use minimal clean water only if necessary and compatible. Do not saturate the wall.
- Patch-test a labeled remover for stubborn residue. Select a product that explicitly names the substrate and follow its label and safety data sheet.
- Dry and monitor before repeating the process, painting, or sealing.
Dry brushing is the conservative first treatment because it removes loose surface material without introducing more water. Additional water can dissolve salts and transport them through cementitious materials, allowing them to crystallize again as the surface dries.
A lightly damp sponge or controlled low-flow rinse may help on a compatible, durable surface after brushing. Soaking is counterproductive: the visible deposit may disappear when dissolved without actually being removed from the assembly.
Chemical treatment belongs near the end of the sequence. A cleaner that appears harmless while wet may leave a lighter patch, etched texture, exposed aggregate, softened mortar, or altered pigment after drying. Patch testing and substrate-specific product selection are therefore essential (professional guidance on cleaner selection and testing).
Stop DIY cleaning and seek an appropriate assessment if you find:
- Crumbling or deeply eroded mortar
- Spalling brick, concrete, stucco, or stone
- Brittle, flaking, or visibly deteriorating masonry
- Persistent wetness
- Deposits that return rapidly after removal
- Extensive coverage or large, hard crusts
- Suspected freeze-thaw deterioration
- An uncertain substrate or coating
- Historic, unusually soft, colored, or highly textured masonry
- Natural stone that has not been positively identified
Cosmetic cleaning will not prevent recurrence while moisture, soluble salts, and a route to the surface continue to coexist.
Confirm that the white deposit is likely efflorescence
Efflorescence is a surface deposit formed when moisture dissolves salts in or around a porous material, carries them toward an evaporating face, and leaves them behind. It commonly appears on brick, mortar, concrete, concrete block, stucco, pavers, and some natural stone.
A typical deposit is:
- Dry rather than slimy
- Powdery, fluffy, or crystalline
- Loose enough to brush away, at least in part
- Often white or pale gray
- Concentrated where the material dries or moisture exits
Color is not conclusive. Depending on the salts and accompanying substances, deposits may also appear yellowish or brown. Appearance alone cannot positively identify every pale masonry deposit (PROSOCO’s overview of masonry efflorescence).
Use texture and context as preliminary clues:
- Loose powder that brushes away: consistent with surface efflorescence.
- Hard, dense crust or fixed streak: may be a more tenacious mineral deposit, lime run, scale, or another condition.
- Fuzzy, patchy, or organic-looking growth: may require evaluation for biological growth.
- Peeling or blistering paint: suggests a coating and moisture problem, whether or not salts are present.
- Brick faces, stucco, or concrete breaking away: indicates material deterioration, not merely a removable stain.
- White bands tracing mortar joints: may indicate that moisture and salts are preferentially moving through the mortar.
- Deposits at the base of a wall: may suggest soil contact, splashback, poor drainage, or capillary moisture, but location alone does not prove the cause.
Do not apply vinegar or another acid merely because a deposit is white. Acid may react with the substrate as well as the deposit. This is especially important if the surface could be limestone, marble, travertine, acid-sensitive mortar, colored concrete, or an unidentified coating.
It is also important to distinguish visible surface efflorescence from subflorescence. Surface efflorescence forms where salts crystallize at the exposed face and is often primarily cosmetic. Subflorescence occurs when crystallization takes place inside pores. Internal crystal growth can contribute to flaking or spalling, and freeze-thaw exposure may accelerate that deterioration (discussion of surface and subsurface salt deposition).
Surface appearance cannot confirm hidden crystallization, structural damage, or the source of the moisture. If the material sheds its face, breaks under light brushing, remains wet, or shows other visible deterioration, stop treating it as a routine cleaning job.
Find the moisture source before cleaning
Efflorescence requires three conditions:
- Soluble salts must be present.
- Enough moisture must be available to dissolve them.
- There must be a path to a surface where the moisture can evaporate.
The salts may come from brick, cement, mortar, grout, aggregate, soil, groundwater, or another material within the assembly. The visible deposit does not necessarily mean that the exposed brick or block was the original salt source. Froehling & Robertson describes this three-part mechanism and the range of possible salt sources in a masonry system (technical overview of masonry efflorescence).
Initial bloom versus recurring deposits
A bloom on relatively new masonry may be related to moisture present during manufacture, storage, mortar placement, curing, or construction. It may diminish as the assembly dries and readily available salts are depleted.
A deposit that begins later or repeatedly returns is more suggestive of continuing moisture entry. Neither pattern should be assumed to resolve permanently on its own. Inspect the building rather than diagnosing the cause by age alone.
Exterior inspection checklist
Examine the area above, beside, and behind the deposit. Look for:
- Gutters that leak, overflow, or contain debris
- Downspouts that discharge against the wall or foundation
- Roof leaks and defective roof-to-wall flashing
- Failed chimney caps, coping, parapet caps, or wall caps
- Open cracks or deteriorated mortar joints
- Failed sealant around windows, doors, penetrations, and transitions
- Wind-driven rain exposure
- Sprinklers repeatedly wetting masonry
- Soil or mulch held against the wall
- Paving or grade sloping toward the building
- Splashback from roofs or hard surfaces
- Blocked cavity drainage or weep openings
- Poor site drainage or standing water
- Unprotected wall tops or unfinished construction
Deposit location can help prioritize the search. White material immediately below a gutter may correspond with overflow. A trail below flashing or a window opening may track water entry. Deposits concentrated near grade may suggest splashback, groundwater, soil contact, or capillary movement.
These are clues, not proof.
Interior and below-grade inspection checklist
For basement walls, interior masonry, or deposits behind finishes, consider:
- Plumbing supply or drain leaks
- Condensation on cold walls or pipes
- High indoor humidity
- Inadequate bathroom, kitchen, or laundry ventilation
- Dryer exhaust problems
- Water entering through foundation cracks
- Groundwater pressure
- Poor exterior foundation drainage
- Capillary movement from damp soil
- Missing or failed moisture-control layers
- Water entering at the wall-floor joint
Repeatedly washing a basement wall may remove the white residue while adding water and leaving the entry path untouched. Painting over a recurring deposit can similarly conceal the symptom while moisture continues to move behind the coating.
Repair the most plausible source before expecting a durable cosmetic result. Clear or repair drainage components, redirect discharge, fix plumbing leaks, improve appropriate ventilation, and have failed joints or flashing corrected. Active roof or flashing defects belong with a qualified roofer or building-envelope trade; suspected plumbing leaks belong with a plumber. Persistent below-grade entry may require a waterproofing, drainage, or building-envelope specialist able to inspect the full assembly.
Prepare the area, tools, and weather conditions
Dry cleaning should be performed only when the deposit and surface are dry enough to brush without smearing the salts or damaging softened masonry. If exterior wet treatment is likely, choose warm, dry, above-freezing conditions and allow sufficient favorable weather for drying. Avoid liquid cleaning immediately before rain, freezing conditions, or heavy overnight condensation.
Start with a modest kit:
- Stiff nylon or other nonmetallic brush
- Soft broom, dustpan, or suitable vacuum
- Clean water, only if needed
- Sponge or low-flow rinsing tool
- Buckets and absorbent materials
- Compatible protection for nearby surfaces
- Painter’s tape where appropriate
- Product-specific personal protective equipment
- Materials needed to contain runoff
Do not make a wire brush the default DIY tool. Abrasion can alter vulnerable masonry, while retained metal fragments may later corrode and stain the surface. Aggressive rotary abrasion, grinding, and abrasive blasting can also change surface texture or expose aggregate and are not casual substitutes for controlled brushing (technical cleaning discussion and wire-brush caution).
For loose dry powder, use low-dust collection methods instead of compressed air or a leaf blower. If dust will be generated, use respiratory protection required by the product information, task, exposure, workplace rules, or qualified safety guidance. If the deposit or deteriorating material is unidentified, avoid unnecessary disturbance; dry-brushing guidance specifically calls for dust protection when sweeping powdery deposits.
Before applying any liquid:
- Identify the substrate as far as practical.
- Check for a coating, sealer, curing compound, pigment, or prior treatment.
- Select a hidden or inconspicuous test area.
- Apply the proposed method only to that small area.
- Let the test patch dry fully.
- Compare its color, sheen, texture, mortar condition, and recurrence with the surrounding surface.
A wet test patch may look acceptable and then dry noticeably lighter. Spot treatment can create mottling, particularly on colored concrete, weathered brick, pavers, or surfaces with uneven exposure.
Protect plants, soil, glass, metal, painted surfaces, coatings, wood, fixtures, and adjacent finishes. Cleaner runoff may stain nearby materials or damage vegetation, and treatment waste should be collected and handled under applicable rules (manufacturer guidance on cleaning and runoff).
For a commercial cleaner, the label and safety data sheet govern:
- Dilution
- Required gloves, eye protection, clothing, or respiratory protection
- Ventilation
- Application equipment
- Surface pre-wetting
- Dwell time
- Whether the cleaner may dry on the surface
- Rinsing
- Neutralization, if required
- Spill response
- Storage
- Disposal
There is no universal chemical procedure.
Step-by-step removal, from dry brushing to a compatible cleaner
Step 1: Address the moisture pathway
Make the applicable repair—or at least identify and schedule it—before treating cleaning as a permanent solution. If the wall is actively wet, wait.
Photograph the untreated area and note recent weather. This provides a baseline for observing whether deposits return after rainfall, plumbing use, irrigation, or changing indoor humidity.
Step 2: Test dry brushing
Choose a dry, inconspicuous area. Use a stiff nylon or other nonmetallic brush with controlled, moderate pressure.
Stop if:
- The brick face begins to sand away
- Mortar grains shed readily
- Stucco flakes or powders
- Pigment transfers to the brush
- The surface profile changes
- A coating lifts
- Cracks or spalls begin releasing material
These changes indicate that the substrate is being damaged or is already deteriorated. Do not increase pressure merely because the deposit remains.
Step 3: Collect the loosened salts
Vacuum or sweep the powder into a container. Avoid spreading it onto lower courses, paving, planting beds, or clean sections of wall. If using a vacuum, do not drag a hard nozzle across fragile brick, mortar, or decorative finishes.
Examine what remains. A faint haze may not justify a more aggressive process, especially on old or weathered masonry where visual uniformity may be difficult to achieve without altering the surface.
Step 4: Allow dry weathering and reassess
Mild outdoor deposits may diminish through natural weathering. Whether this works depends on climate, exposure, the salts involved, and whether additional moisture continues to enter. Weathering is not a substitute for repairing a leak, but it may be preferable to unnecessary chemical cleaning.
Wait through a relevant change in conditions rather than judging only the immediate result. A deposit that returns after rain provides different diagnostic information from one that remains absent during dry weather.
Step 5: Introduce as little water as practical
If dry brushing is insufficient and the substrate tolerates wet cleaning, test a minimal amount of clean water. Use controlled scrubbing, a sponge, or low-flow rinsing rather than saturation.
Water presents a tradeoff: it can dissolve visible salts but may also carry them into or through the pore network. As the surface dries, those salts can crystallize again. Plain water can therefore make a deposit look gone without proving that salts have been removed from the assembly.
Do not allow rinse water to run down and dry over untreated areas. Collect it where practical and protect nearby materials.
Step 6: For a small compatible brick area, try a lightly damp sponge
After dry brushing, a lightly damp—not soaked—sponge may collect remaining loose powder from sound brick while limiting added water. Rinse and wring the sponge frequently instead of smearing dissolved material across the face.
This method is best suited to a small area with stable brick and mortar. It is not a remedy for a saturated wall, widespread deposits, or deteriorated joints. A masonry contractor’s small-area method similarly recommends a damp rather than soaked sponge because excess moisture can encourage reappearance (small-area brick-cleaning method).
Step 7: Consider vinegar only for mild deposits on a compatible surface
Diluted white vinegar may help with mild residue on some brick or masonry, but no single concentration is suitable for every surface.
Before using vinegar:
- Confirm that the surface is not limestone, marble, travertine, or another calcareous stone.
- Check that it is not coated, painted, pigmented, or otherwise acid-sensitive.
- Test a small hidden area.
- Use only a concentration supported by the material or product manufacturer.
- Protect adjacent metals, plants, mortar, and finishes.
- Remove residue as appropriate for the tested assembly.
- Let the patch dry before judging it.
Stop if the surface fizzes unexpectedly, loses color, becomes rough, sheds mortar or paste, or develops a lighter patch. Vinegar is an acid; being a household product does not make it universally compatible.
Step 8: Escalate to a labeled efflorescence remover
For stubborn residue, choose a remover that explicitly lists the substrate. The term “masonry cleaner” is too broad by itself. A cleaner intended for durable red brick may not be appropriate for colored pavers, polished stone, soft mortar, stucco, or a sealed surface.
Follow the label for dilution, preparation, application, dwell time, agitation, rinsing, neutralization if required, PPE, ventilation, and waste handling. Do not combine cleaners or substitute an improvised concentration.
Raw muriatic acid should not be routine DIY advice. Available industry guidance conflicts on whether it should be used in tightly controlled circumstances, but consistently identifies substantial risks, including corrosive fumes, staining, etching, and deterioration of masonry or mortar. Use a labeled, substrate-compatible product or a qualified professional when chemical cleaning is genuinely necessary (substrate and acid-safety guidance).
After treatment, let the area dry thoroughly. Inspect it in consistent lighting for:
- Residual white material
- Color changes or mottling
- Etching or exposed aggregate
- Mortar erosion
- Surface softening
- Cleaner residue
- Renewed dampness
- Returning deposits
Do not immediately repeat treatment because a pale mark remains. First determine whether it is residual salt, an altered substrate, a hard mineral crust, or a permanent color difference caused by cleaning.
Choose the method by substrate
Cleaner selection must begin with the surface, not only the stain. Brick, concrete, stucco, coatings, and natural stone differ in porosity, strength, pigments, surface treatments, and acid resistance. Acidic cleaners can etch mortar or concrete, alter color, expose aggregate, strip pigment, or attack calcareous stone, while unsuitable pressure washing can force water farther into porous masonry (substrate-specific cleaning and pressure guidance).
| Surface | Safe starting method | Escalation option | Major cautions |
|---|---|---|---|
| Brick and mortar | Dry nylon brushing; collect loose powder | Minimal water where appropriate, then a patch-tested remover labeled for the masonry | Strong acid, excessive pressure, and aggressive abrasion can etch mortar, stain brick, or change texture |
| Plain poured concrete | Dry brushing or controlled scrubbing | Concrete-compatible remover after a dried patch test | Acid can etch cement paste and expose aggregate; curing or sealing compounds may affect treatment |
| Colored concrete and pavers | Gentle dry brushing | Product explicitly labeled for colored concrete or pavers | Pigment loss, mottling, texture change, exposed aggregate, and conspicuous spot-treatment differences |
| Stucco and fragile finishes | Gentle dry removal | Finish-compatible cleaner after testing or specialist advice | Do not assume the finish tolerates saturation, pressure washing, or acid |
| Limestone, marble, travertine, and similar stone | Gentle dry removal | Non-acidic product explicitly labeled safe for that stone | Vinegar and ordinary acidic masonry cleaners can attack calcareous stone |
| Painted or coated masonry | Identify the coating and inspect the moisture problem | Follow the coating manufacturer’s preparation and cleaner requirements | Abrasion or chemicals may strip, soften, discolor, or undermine the coating |
| Historic, soft, deteriorated, or unusually textured masonry | Documentation and specialist assessment | A tested, conservation-compatible method | Improvised pressure, abrasion, or chemical cleaning may cause irreversible surface loss |
Brick and mortar
Sound modern brick with stable mortar often responds to dry nylon brushing. If water is needed, use it sparingly.
Use additional caution with old lime-rich mortar, soft-fired brick, glazed units, decorative faces, and brick with integral coatings. A method that worked on one wall is not proof that it is safe on another.
Plain concrete
Concrete may tolerate controlled scrubbing, but acidic treatment can remove or roughen the cement paste at the surface. This can expose aggregate and create a permanently different appearance. Previously applied curing compounds, sealers, densifiers, coatings, or contaminants may also produce uneven results.
If the concrete will receive a coating or adhesive, cleaner residue and altered surface chemistry matter as much as appearance.
Colored concrete and pavers
Pigmented materials require cautious testing. Acid or abrasion may remove surface paste, expose aggregate, strip pigment, or create pale patches. Weathered pavers may also clean to a different color from surrounding units.
Choose a product whose label explicitly includes the colored material. Avoid aggressive isolated spot treatment if a small clean patch would become more conspicuous than the original haze.
Stucco and fragile finishes
Stucco varies in composition, thickness, texture, pigment, age, and condition. Start with gentle dry removal. Pressure washing may erode a weak finish or introduce water through cracks, while acid can alter color or attack cementitious components.
If brushing changes the texture or releases finish material, stop and seek an assessment.
Natural stone
Do not use vinegar or an ordinary acidic masonry cleaner on limestone, marble, travertine, or similar calcareous stone. Acid can dissolve or etch the stone itself. Use only a non-acidic or explicitly stone-safe product.
Treat unknown stone as sensitive until it has been identified. A stone professional is preferable to experimentation on a prominent or valuable surface.
Coated, painted, historic, or deteriorated surfaces
A white deposit on paint may be coming through the coating, sitting on it, or accompanying coating failure. Identify the coating before selecting a cleaner. Abrasion may remove it, while chemicals may soften it or interfere with future adhesion.
For historic or deteriorated masonry, prioritize retention of the original surface over uniform color. Specialist assessment is appropriate because improvised acid cleaning, pressure washing, wire brushing, or abrasive blasting may remove material that cannot be restored.
No universal pressure, nozzle, distance, chemical concentration, or dwell time is safe for every substrate. Those settings must come from the applicable manufacturers, a dried test patch, and professional judgment where the surface is sensitive.
Why efflorescence returns and how to reduce recurrence
Efflorescence returns when salts, moisture, and a migration path continue to coexist. Washing may dissolve what is visible, but those salts can recrystallize during drying. Additional salts may also migrate from deeper in the wall, adjoining mortar, concrete, soil, or groundwater.
Frequent or rapid recurrence is a reason to pause cosmetic cleaning. It suggests that removal is outrunning diagnosis and repair.
Match the response to the likely cause:
- Roof leak: repair roofing and related flashing.
- Overflowing gutter: clear or repair it and correct its drainage where necessary.
- Poor downspout discharge: route water away from the wall and foundation.
- Failed wall cap or coping: repair the top-of-wall water-shedding detail.
- Cracked or failed joints: have appropriate cracks, mortar joints, or sealant joints repaired.
- Sprinkler wetting: adjust irrigation direction and schedule.
- Poor grading: correct drainage so water moves away from the building.
- Soil contact: reduce inappropriate contact where the assembly permits.
- Plumbing leak: locate and repair it before refinishing.
- Condensation or high humidity: investigate ventilation, humidity, and relevant insulation conditions.
- Below-grade entry: assess exterior drainage, cracks, groundwater, and waterproofing as a system rather than repeatedly coating the inside face.
In new work and major repairs, correctly configured flashing, open weeps, capillary breaks, moisture barriers, complete mortar joints, protected wall tops, drainage spaces, and dry material storage can reduce water entry. The suitable detail depends on the wall assembly and applicable local requirements (masonry moisture-control overview).
Water repellents and sealers require restraint. A compatible treatment may form part of a moisture-control design, but it cannot repair a leaking roof, failed flashing, plumbing defect, open crack, or groundwater problem. It is not a guaranteed cure.
Do not seal damp or actively efflorescing masonry. Before selecting a repellent, consider the substrate, existing treatments, exposure, vapor behavior, and manufacturer requirements.
Monitor repairs through changing conditions. A single dry afternoon does not establish that a leak, capillary pathway, or condensation cycle has ended. Recheck after the conditions that previously corresponded with the deposit, such as rain, snowmelt, irrigation, seasonal humidity, or plumbing use.
Keep cosmetic and repair success separate:
- Cosmetic success: the surface looks clean today.
- Repair success: the material remains appropriately dry and the deposit does not rapidly return under the conditions that previously triggered it.
Only the second suggests that the moisture pathway may have been controlled.
Before painting or sealing—and when to call a professional
Do not paint, seal, coat, tile, or bond an adhesive to masonry that remains damp or continues to produce salts. Residual moisture, salts, cleaner, or acid may interfere with adhesion and durability.
Potential outcomes include:
- Blistering or peeling paint
- Discoloration
- Delamination
- Reduced coating durability
- Failed sealer bond
- Salt accumulation behind a coating
- Continued deterioration that becomes harder to observe
Sherwin-Williams advises correcting the moisture source and delaying painting while efflorescence continues (coating manufacturer’s troubleshooting guidance).
Before coating, confirm that:
- The likely moisture source has been addressed.
- There is no active dampness.
- The substrate has dried fully under the selected product’s requirements.
- Loose salts and unsound material have been removed.
- Deposits are not rapidly returning.
- Cleaner and rinse residues have been removed.
- Any required neutralization has been completed according to the cleaner label.
- Required moisture and pH tests have been completed under the coating, adhesive, or sealer manufacturer’s instructions.
- The proposed finish is compatible with the substrate and previous treatments.
There is no universal drying period, moisture-content threshold, or pH target for every wall, slab, coating, and climate. Follow the specifications for the selected cleaner and finish. If their requirements conflict, contact the manufacturers before proceeding.
Move beyond DIY cleaning when there is:
- Extensive or rapidly recurring efflorescence
- Persistent dampness
- Below-grade water entry
- Large, dense, or hard crusts
- Crumbling or missing mortar
- Spalling brick, concrete, stucco, or stone
- Brittle material
- Suspected freeze-thaw damage
- An uncertain diagnosis
- Historic or soft masonry
- Colored, coated, or decorative surfaces
- Natural stone of uncertain type
- A suspected building-envelope defect
- A need to coat the surface despite unresolved moisture
Choose the professional according to the likely cause. A mason can assess deteriorated units and joints. A roofer can investigate roof and flashing defects. A plumber can trace suspected supply or drainage leaks. A waterproofing or building-envelope specialist can examine persistent or complex water entry. Historic masonry may warrant a conservation professional familiar with compatible materials and cleaning tests.
Mortar Desk is a general-reference publisher, not a contractor or provider of individualized engineering or building-envelope advice, as explained in its description of Mortar Desk’s reference role. Site conditions, assemblies, materials, and local requirements vary, so qualified local assessment is appropriate when moisture or deterioration extends beyond a small cosmetic deposit.
The practical rule is straightforward: correct the water pathway, dry-brush loose salts, and escalate only when the substrate and a dried test patch support doing so. Then allow thorough drying and monitor before applying a finish.
Frequently asked questions about efflorescence removal
Can I remove efflorescence with vinegar?
Sometimes. Diluted white vinegar may help mild deposits on compatible brick or masonry, but it is not universally safe and no single concentration is suitable for every substrate.
Patch-test it and inspect the area after drying. Do not use vinegar by default on limestone, marble, travertine, unidentified natural stone, colored concrete, fragile mortar, stucco, coatings, or painted surfaces. Acidic cleaners can etch sensitive stone, alter colored materials, and damage incompatible masonry (substrate-specific acid-cleaner cautions).
Dry brushing should still come first. Vinegar does not correct the moisture pathway and will not prevent recurrence if the wall remains wet.
Will pressure washing remove efflorescence safely?
It may remove or temporarily dissolve visible deposits from some durable surfaces, but it is not universally safe. Excessive pressure can damage vulnerable masonry, and improper pressure washing may force water and dissolved salts farther into porous material, encouraging renewed migration as it dries.
There is no pressure, nozzle, distance, or angle that is safe for every assembly. Begin with dry brushing and controlled low-water methods. Use professional help for fragile, historic, coated, or deteriorated masonry.
Should I use muriatic acid on efflorescence?
Raw muriatic acid should not be treated as a routine homeowner remedy. Industry guidance records risks including corrosive fumes, staining, burning or etching masonry, damage to mortar joints, and premature deterioration. One masonry-cleaning guide specifically advises against muriatic acid on masonry and mortar for these reasons.
For stubborn deposits, choose a commercial remover explicitly labeled for the substrate and follow its label and safety data sheet. If a strong acid appears necessary, professional treatment is the safer course. Never improvise the dilution, mixing sequence, neutralization, PPE, or disposal process.
Does efflorescence mean the masonry is damaged?
Not necessarily. Loose surface efflorescence is often primarily cosmetic and may brush away without revealing damage. It does, however, show that moisture transported salts to an evaporating surface.
Damage is more concerning when the masonry remains wet, becomes brittle, sheds its face, develops spalls, or has crumbling mortar. Salt crystallization inside pores can contribute to physical deterioration rather than merely leaving surface powder. Rapid recurrence or visible deterioration warrants assessment of both the material and the moisture source.
Can I paint or seal over efflorescence?
Do not paint or seal over active efflorescence or damp masonry. Residual moisture, salts, cleaner, or acid can contribute to peeling, discoloration, delamination, reduced durability, and coating or sealer failure.
First address the moisture source, remove loose deposits, complete any label-required rinsing or neutralization, and let the surface dry. Monitor for recurrence and meet the selected coating manufacturer’s moisture, pH, and surface-preparation requirements. A clean-looking surface alone is not proof that it is ready for a finish.