 MortarDesk
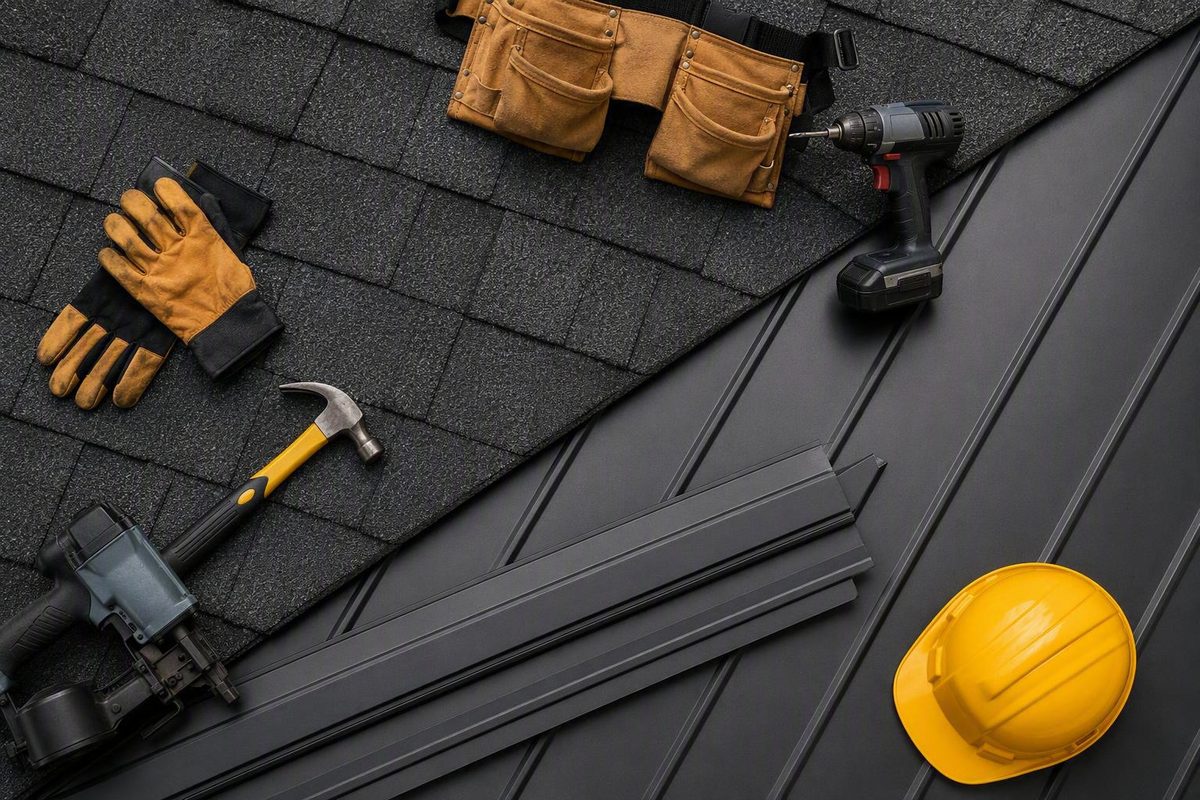
Metal roofing can sometimes be installed over asphalt shingles, but appearance alone cannot establish that an overlay is suitable. The existing roof, deck, supporting structure, moisture conditions, and proposed metal-roof assembly all need to be evaluated before the shingles are covered. The selected manufacturer must also accept the substrate, slope, attachment method, and complete recover configuration for that property (USA Metal Roofs’ roof-over guidance).
A roof-over, also called a recover installation, leaves the existing shingles in place and covers them with a completed metal-roof system. Keeping the shingles may reduce removal, transportation, disposal, disruption, and associated labor. The trade-off is reduced access to concealed decking, old flashing, and possible moisture damage.
That makes the first question not “How do I fasten the panels?” but “Should the existing roof remain?” The practical process is to inspect the roof, verify the controlling documents, choose an approved assembly, plan moisture and flashing details, and then follow the exact system instructions.
Can metal roofing go over shingles? Start with four possible outcomes
Place the project in one of four categories before choosing panels or ordering trim:
- Proceed with a documented, approved overlay.
- Expose and repair limited defects, then reassess.
- Obtain structural, manufacturer, or local-authority review.
- Remove the shingles and rebuild from the deck.
A roof may be a candidate for an overlay when:
- The existing shingles are secure and sufficiently flat for the selected system.
- The roof deck and supporting framing appear sound after an appropriate inspection.
- No active leak, unresolved moisture source, deterioration, or structural defect would be concealed.
- The roof slope and geometry suit the exact panel profile.
- The manufacturer accepts installation over the existing asphalt-shingle condition.
- The specified attachment substrate can be reached and verified.
- Questions about permits, existing layers, local design conditions, and inspections have been resolved with the appropriate local authority.
- The proposed assembly satisfies the applicable product and workmanship warranty terms.
Repair and reassess may be appropriate when a defect is limited and can be fully exposed. Examples include a localized area of deteriorated decking or a leak around a removable penetration. The work must address both the affected material and the source of the problem. Fastening down a curled tab, covering a stain, or applying surface sealant does not establish that concealed materials are dry and sound.
Choose professional or official review when there is uncertainty about structural capacity, the attachment substrate, wind or snow design conditions, existing roof layers, or whether the proposed configuration matches a manufacturer’s approved assembly. Metal’s relative lightness does not establish that every building can accept another roofing layer.
Conditions such as active leakage, widespread deterioration, soft decking, sagging, damaged framing, unstable shingles, severe unevenness, or extensive edge and flashing reconstruction commonly require greater exposure and repair. Depending on their extent and the applicable product requirements, the result may be repair followed by reassessment or a complete tear-off. Removing the shingles provides direct access to the deck and makes it possible to rebuild underlayment, edges, valleys, and flashing rather than adapting around concealed conditions (Jeff Woods Construction’s discussion of overlay risks).
The same conclusion applies when the selected manufacturer does not accept the recover configuration or when the local building department will not approve it. A roof may be physically capable of receiving panels without being an accepted installation.
Mortar Desk publishes independent general-reference information about building materials. It is not a contractor and does not provide project-specific engineering advice, as explained on the About Mortar Desk page.
Inspect the existing roof before selecting an overlay method
The initial inspection should determine what would remain concealed, what must be exposed and repaired, and whether enough information exists to approve an overlay. It should address the exterior roof, accessible attic or roof cavity, decking, supporting framing, drainage paths, and transitions where water may enter.
Use this go-or-no-go checklist:
| Area | What to examine | Reasons to stop, correct the condition, or seek further review |
|---|---|---|
| Shingles | Number of layers, secure attachment, missing pieces, curled tabs, blisters, patches, and surface flatness | Loose, unstable, badly curled, extensively patched, or severely uneven roofing |
| Roof deck | Softness, decay, delamination, staining, movement, panel edges, and suitability as an attachment base | Soft areas, deterioration, unexplained staining, movement, failed edges, or an uncertain fastening base |
| Framing | Sagging, cracks, movement, altered members, and signs of prolonged water exposure | Damaged, modified, or visibly deflected members; uncertainty about capacity |
| Moisture | Active leakage, historic stains, damp insulation, musty areas, and possible condensation | An unexplained source, ongoing leakage, or materials whose condition has not been assessed |
| Eaves and rakes | Deck edges, fascia, gutters, existing drip details, and discharge | Deteriorated edges, failed drainage, unsupported trim, or details that cannot be integrated |
| Valleys | Existing lining, patches, debris paths, transitions, and deck condition | Leakage, corrosion, complex patching, unevenness, or a detail requiring deck access |
| Penetrations | Plumbing vents, exhausts, chimneys, skylights, and mounted equipment | Failed boots, movement, improvised sealant repairs, or inaccessible flashing |
| Walls and transitions | Sidewalls, headwalls, changes in slope, and roof-to-wall intersections | Missing or concealed flashing and terminations that cannot be rebuilt properly |
| Ventilation | Existing intake and exhaust paths and any proposed above-sheathing cavity | Blocked paths or an overlay cavity with no documented intake, exhaust, and closure design |
| Drainage | Valleys, gutters, roof edges, intersections, and low points | Debris traps, backflow paths, staining, or discharge onto vulnerable materials |
Do not cover known deterioration with membrane, battens, clips, or panels. If an inspection identifies a soft area, expose enough material to determine its extent. If staining is present, investigate whether it came from roof leakage, condensation, plumbing, or another source. Dry-looking shingles above an interior stain do not establish that the deck is undamaged.
A ground-level survey may reveal obvious sagging, missing shingles, damaged edges, or displaced flashing. It cannot reliably confirm the condition of concealed sheathing and framing.
Confirm the number and type of existing roofing layers. Do not assume that one visible shingle surface means only one layer is present. Ask the local building department whether the existing and proposed layers are acceptable for the property rather than relying on a general reroofing rule.
Surface condition matters even though the shingles will no longer be the primary exposed roof covering.
Map the roof geometry as part of the inspection:
- Slope of every roof plane
- Eaves, rakes, hips, and ridges
- Valleys
- Sidewalls and headwalls
- Chimneys and masonry intersections
- Skylights and roof windows
- Plumbing and exhaust penetrations
- Changes in pitch
- Dormers and intersecting roofs
- Low-slope transitions
- Gutters, scuppers, and discharge points
Each added intersection creates another location where the recover system must connect to drainage, flashing, closure, and possibly ventilation components. If extensive perimeter or flashing work requires dismantling the old roof, compare the resulting overlay scope with the access and repair advantages of tear-off.
Questions about framing or structural capacity belong with an appropriately qualified professional. This article does not provide a load calculation, and a general product-weight comparison cannot establish capacity for a particular building.
Verify code, permits, slope, substrate and warranty requirements
Before buying materials, assemble a preconstruction file for the exact property and panel system. Generic videos, retailer summaries, and instructions for visually similar panels are not substitutes for the selected manufacturer’s documents.
The file should identify:
- The local building department and the requirements it says apply to the project
- Any permit, plan-review, or inspection steps identified by that authority
- The existing number and type of roofing layers
- The exact panel name, profile, metal, finish, and thickness
- The current installation manual
- The manufacturer’s approved asphalt-shingle recover detail
- Product, finish, weather-tightness, and workmanship warranty terms, as applicable
- Approved substrates and minimum slope
- Required separator, membrane, ice-barrier, or ventilation components
- Fastener or clip type and attachment schedule
- Eave, rake, valley, wall, penetration, transition, hip, and ridge details
- Required closures, butyl products, sealants, and trim
- Any project-specific attachment or design documentation requested for the location
- Written answers to unresolved questions
Treat local acceptance and manufacturer approval as separate checks. A local authority’s willingness to consider a recover does not establish that the chosen panel manufacturer accepts it. Conversely, a manufacturer’s recover detail does not answer every property-specific question a local reviewer may raise.
Obtain written confirmation that the exact panel system accepts the existing asphalt-shingle condition. The confirmation should describe the complete assembly rather than merely state that metal can be installed over shingles. Ask:
- Which existing shingle types and conditions are accepted?
- What must the fasteners or clips engage?
- Is a separator or membrane required?
- Are battens, clips, or other supports permitted?
- What slope limits apply?
- Which edge, valley, wall, and penetration details govern?
- What installer, documentation, or registration conditions affect warranty eligibility?
Minimum slope is panel-specific. For example, McElroy Metal describes its proprietary 138T shingle-recover application as requiring a solid deck and a minimum 2:12 roof slope. Its clips elevate the panels 3/4 inch, and the described configuration uses vented eave and ridge components. Those figures apply to that manufacturer’s system and must not be transferred to unrelated panels (McElroy Metal’s 138T recover description).
There is likewise no universal answer to where fasteners terminate. A fastener that passes through the shingles but does not engage the specified substrate is not validated merely because it feels tight.
Ask the building department, manufacturer, designer, or qualified contractor to resolve project-specific questions involving wind exposure, snow, ice barriers, fire classification, structural loading, and other local conditions. Do not infer the answer from a project in another jurisdiction or a different manufacturer’s detail.
The contract should identify the installation manual, revision, and recover detail that govern the work. Instructions that conflict with the selected panel’s requirements can compromise weather resistance and may affect warranty eligibility.
Compare direct attachment, battens and elevated recover clips
Direct attachment, battens, proprietary recover clips, and tear-off are different assemblies. They are not interchangeable ways to hold down the same panel.
| Approach | Basic arrangement | Potential advantages | Important limitations |
|---|---|---|---|
| Direct attachment through an approved separator | Panels or system components fasten through the existing roof into the manufacturer-specified substrate | Comparatively simple buildup with no secondary wood framing | Existing irregularities may remain visible; above-sheathing ventilation is difficult; attachment substrate must be verified |
| Battens or furring | Secondary framing is secured to the approved substrate or structure, and panels attach to it | Creates physical separation and may be part of a designed cavity | Adds material, weight, height, labor, and connection-design questions |
| Proprietary elevated recover clips | System-specific clips support compatible standing-seam panels above the shingles | Can integrate separation and a defined airspace without conventional wood furring | Product-specific; clip layout, substrate, slope, ventilation, and flashing details cannot be transferred |
| Complete tear-off | Shingles and affected components are removed before the roof is rebuilt from the deck | Direct deck access, smoother substrate, easier repairs, and new edge, membrane, and flashing work | Adds removal, handling, disposal, and temporary-exposure planning |
With direct attachment, the panels or their attachment components pass through the existing roof into the substrate specified by the manufacturer. This may use fewer components than a framed recover, but it places greater emphasis on the condition and flatness of the existing surface. Direct attachment can also make a functional above-sheathing ventilation cavity difficult to create.
An approved separator may be required between the shingles and metal. Its possible role is to prevent abrasive granules from rubbing against the underside of the panels as the metal moves with temperature changes. The material, continuity, laps, attachment, and relationship to other membranes must come from the approved assembly.
A batten or furring assembly places secondary framing over the existing roof and attaches the metal panels to that framing. Battens can create separation, but they also introduce new load paths and connections.
Do not adopt common lumber dimensions from a contractor tutorial as a universal specification. A size that appears in one installation guide may not be accepted for another panel, span, substrate, or location.
Material compatibility also requires review. McElroy Metal warns that copper compounds in some pressure-treated lumber can attack metal panels and calls for an appropriate barrier in the configuration it describes. Any proposed combination of lumber treatment, barrier, panel metal, coating, and fastener should be approved by the relevant manufacturer (McElroy Metal’s comparison of overlay methods).
A proprietary elevated clip system may support standing-seam panels above the shingles without conventional wood battens. Some products incorporate a defined airspace and matching intake, exhaust, support, and closure components. That does not mean an improvised spacer or an unrelated clip will perform the same function. The clips, panels, fasteners, layout, substrate, ventilation pieces, and flashing details must be treated as one system.
A tear-off adds removal and disposal work but gives the installer direct access to the deck. Deteriorated sheathing can be replaced, surface irregularities corrected, and membranes, edges, valleys, penetrations, and wall flashing rebuilt without preserving the limitations of old roofing layers.
Choose the method by starting with the selected panel and its approved details—not by assuming battens are always better ventilated, direct attachment is always cheaper, or an elevated clip can be paired with any standing-seam panel.
Design the separator, underlayment and moisture strategy as one assembly
“Do I need underlayment?” has no universal answer for a recover project. The required material and placement depend on the selected panel, approved recover configuration, existing roof, climate, local review, and warranty terms.
Published advice differs because it often addresses different assemblies. Some direct-attachment guidance calls for a barrier between asphalt shingles and metal to limit abrasion. Some contractor guidance describes underlayment as optional over shingles considered sound. A proprietary elevated system may rely on clip-created separation under its own product-specific details. None of those positions should be generalized beyond the assembly being described.
Separate the possible functions:
- Separator: prevents abrasive or chemically incompatible contact.
- Secondary water-resistive layer: performs the role assigned by the approved assembly.
- Ice barrier: is included where the project’s applicable requirements and details call for it.
- Ventilation cavity: provides a documented air path with intake, exhaust, closures, and weather protection.
- Thermal or radiant component: performs only the function established for that product and assembly.
- Existing shingles: remain part of the roof buildup but should not be assigned a new function unless the approved design does so.
A separator does not automatically create ventilation. A sheet placed between the shingles and panels may prevent direct contact while leaving little or no airflow space.
Before installation, the moisture plan should answer:
- Has the existing roof been assessed for leakage or damp materials?
- How were previous stains investigated?
- Is there an unresolved interior moisture source?
- Does the approved recover assembly include an above-sheathing airflow path?
- If so, where are its intake and exhaust points?
- Is the path interrupted by hips, valleys, walls, transitions, or closures?
- How are openings detailed for the property’s exposure to rain, snow, pests, and debris?
- How do penetrations and flashing intersect the cavity?
- How would a future leak between the metal and shingles be detected or serviced?
Suspected moisture should be assessed before it is covered. Ventilation may be one part of an approved design, but the existence of a gap does not establish that condensation or leakage will be prevented.
Do not apply a manufacturer’s statement that underlayment may be omitted from one elevated proprietary system to unrelated products. The exact panel, clips, substrate, slope, ventilation components, local acceptance, and warranty documents must match.
Claims of guaranteed cooling savings or heat-transfer reductions should not control the decision. Project-level performance depends on the complete roof and building assembly, not merely on the presence of a gap above old shingles.
Follow a system-specific installation sequence—not a universal screw pattern
The following sequence is a planning framework, not a construction specification. The exact installation manual, recover detail, project drawings, and locally requested documents must supply the technical requirements.
- Resolve local review, manufacturer, structural, and warranty questions.
- Select the exact panel and approved recover assembly.
- Inspect the shingles, deck, accessible framing, moisture conditions, edges, and flashing.
- Expose and repair defects that must not be concealed.
- Verify the specified attachment substrate.
- Measure the roof and prepare panel, trim, flashing, and accessory schedules.
- Establish the contractor’s project-specific access, handling, and weather-protection plan.
- Install the approved separator, membrane, clips, battens, or support components.
- Prepare eaves, rakes, valleys, walls, and other perimeter conditions in the specified order.
- Lay out panels from the manufacturer-designated starting point.
- Attach, lap, lock, snap, or seam panels as required.
- Complete valleys, walls, transitions, and penetrations.
- Install closures, trim, drainage, and ventilation components.
- Complete hips and ridges.
- Inspect the finished installation and correct deficiencies.
Before ordering, record roof-plane length, slope, eave and ridge lengths, hips, valleys, penetrations, transitions, panel direction, panel coverage, and required installation sequence. Confirm whether panels will be factory-cut or field-cut and account for trim and flashing geometry. Inaccurate measurements can result in poor cuts, rough edges, inadequate coverage, and ordering errors, so project drawings and manufacturer guidance should be reviewed before fabrication (Corrugated Metals’ installation-error guidance).
Panel placement should begin where the selected manufacturer directs. Maintain the required eave position, squareness, alignment, panel sequence, and any specified installation direction.
The exact manual and project design must provide:
- Fastener material, head, washer, length, and coating
- Fastener location and spacing
- Required substrate and engagement
- Washer compression for exposed-fastener products
- Clip type, orientation, spacing, and movement allowance
- Panel side laps and end conditions
- Mechanical-seaming stages and equipment
- Sealant and butyl type, size, placement, and continuity
- Closure profile and location
- Eave, rake, valley, wall, penetration, hip, transition, and ridge details
Do not apply generic advice about fastening through either a panel’s flat or raised area. Exposed-fastener panels, concealed-fastener panels, snap-lock products, and mechanically seamed standing-seam systems use different attachment arrangements.
Adjacent panels may be lapped, snapped together, or mechanically seamed. Some systems require a predetermined installation direction or order. There is no universal overlap dimension or seam-treatment method supported across all metal roofs.
Cuts around edges and penetrations should be measured and made using methods accepted for the selected panel. Handle panels as the manufacturer directs so coatings, formed edges, and cut surfaces are not unnecessarily damaged. Remove metal shavings and address field cuts or coating damage using the specified procedure.
The contractor’s plan should also define how incomplete work will be protected from weather and how much roof area may be opened at one time. This is a project-planning requirement, not a substitute for a site-specific safety and temporary-protection plan.
Install closures, edge flashing, ridge components, and ventilation pieces only where the assembly specifies them.
Plan every flashing transition and avoid common leak paths
Design the flashing before ordering panels. Covering old flashing without determining how it will connect to the new system may preserve an existing defect or create a concealed drainage path.
The flashing plan should address:
- Eaves and gutter edges
- Rakes and gable edges
- Valleys
- Hips and ridges
- Sidewalls and headwalls
- Roof-to-wall transitions
- Chimneys
- Skylights and roof windows
- Plumbing vents
- Exhaust and combustion penetrations
- Equipment curbs and mounts
- Changes in slope
- Intersections between roof planes
- Every other opening or termination
For each location, identify what will be removed, what may remain, how the new flashing engages the panel profile, where water drains, how counterflashing is handled, and how the completed detail can be inspected. Exposed sealant should not be treated as a substitute for lapped or mechanically integrated flashing when the approved detail requires those components.
Extensive reconstruction at valleys, edges, walls, skylights, chimneys, or ventilation openings may favor tear-off because the work requires access to the deck or to underlying materials. Compare the full flashing scope rather than assuming that preserving the field shingles will necessarily simplify the project.
Common attachment errors include fasteners that are:
- Too tight or too loose
- Off-center or angled
- Installed in an unapproved panel location
- Spaced incorrectly
- Driven into an unsuitable or missed substrate
- Made from an incompatible material
- Unable to achieve the engagement specified for the system
Fastener appearance alone is not enough. The component, location, substrate, engagement, and installed condition must all match the approved detail.
Common seam and sealant problems include incorrect laps, incomplete mechanical seams, missing or damaged butyl, discontinuous sealant, contaminated bonding surfaces, and exposed sealant where the system requires it beneath a panel or trim. Manufacturer-oriented guidance identifies improperly driven fasteners, deficient flashing, missing butyl, and damaged coatings as conditions that can permit leakage or corrosion; the correct remedy remains system-specific.
Material handling and compatibility also matter. The installation plan should prevent or address:
- Panels dragged across abrasive surfaces
- Scratched protective coatings
- Metal shavings left on finished panels
- Ragged or unprotected field cuts
- Contact between incompatible metals
- Unapproved contact with treated lumber
- Sealants, cleaners, or chemicals that attack the coating
- Foot traffic in locations prohibited by the panel manufacturer
Do not automatically dismiss it as cosmetic. Determine whether it reflects an unacceptable substrate, distorted panel, incorrect support, attachment problem, or an appearance condition within documented tolerances.
Chimneys, valleys, skylights, and roof-to-wall intersections are especially dependent on project geometry. Use the manufacturer’s approved details or project-specific drawings rather than inventing generic dimensions.
Decide who should install it, then inspect the completed roof
Most full-size metal-roof projects warrant qualified professional assessment and installation. Relevant concerns include fall exposure, sharp metal edges, long-panel handling, wind acting on unsecured panels, specialized fastening or seaming equipment, structural uncertainty, and the consequences of errors at flashings and penetrations. Bumble Roofing, a commercial contractor, similarly recommends professional installation for most full roofs because of access, panel handling, equipment, and correction risks (Bumble Roofing’s installation overview).
A shed, porch, or other small roof is not automatically suitable for DIY work. The person responsible for the project still needs to evaluate access, experience, equipment, weather, panel length, roof slope, edge exposure, manufacturer requirements, and any local review obligations. Work should proceed only under an appropriate site-specific safety plan.
When interviewing contractors, ask:
- Are you licensed and insured where the local authority requires it?
- How many recover projects have you completed with this exact panel system?
- Who will contact the building department and handle requested permits or inspections?
- How will the number of existing roof layers be confirmed?
- How will concealed moisture and deck deterioration be investigated?
- Who determines whether structural review is needed?
- What exact panel and recover assembly are proposed?
- Where will fasteners or clips terminate?
- What attachment documentation governs the work?
- What separator, membrane, batten, clip, or cavity design is included?
- If a ventilation cavity is proposed, how do intake, exhaust, closures, and flashing work together?
- Which existing flashings will be removed or rebuilt?
- How will valleys, walls, chimneys, skylights, vents, and transitions be handled?
- What is the temporary weather-protection plan?
- Who handles product registration and warranty documentation?
- Who is responsible for leaks attributed to workmanship, retained materials, or concealed defects?
- How can damaged panels or concealed roof components be serviced later?
Request the panel installation manual, warranty terms, approved recover and substrate details, attachment schedule, locally requested documents, and any project-specific drawings. The proposal should distinguish among repairs, recover preparation, flashing reconstruction, optional tear-off, and tear-off that becomes necessary after exposure.
At completion, inspect or obtain documentation for:
- Straight and consistent panel alignment
- Correct system-approved fasteners or clips
- Completed laps, locks, snaps, or mechanical seams
- Properly installed profile closures
- Completed eave, rake, valley, wall, penetration, hip, and ridge flashing
- Sealant and butyl in the specified protected locations
- Finished edge and ridge components
- Clear valleys, gutters, and drainage paths
- Open and protected intake and exhaust points where a ventilation cavity was designed
- No loose panels, trim, fasteners, or closures
- No abandoned metal shavings or debris
- No unaddressed coating scratches
- Cut edges treated or protected as specified
- No unexplained gaps or open terminations
- Completion of any locally required inspection or closeout
- Product, finish, and workmanship warranty records
After installation, follow the manufacturer’s maintenance and warranty instructions. Arrange periodic inspection and additional inspection after significant weather when warranted by the system, property, or observed conditions. Keep drainage and designed ventilation openings clear, remove debris without damaging coatings, and investigate loose components, seal deterioration, corrosion, staining, or leakage promptly. No single inspection interval applies to every panel system, climate, and warranty.
Frequently asked questions
Can metal roofing be installed directly over one layer of asphalt shingles?
Sometimes. One secure, sufficiently flat layer may be suitable when the deck and framing are sound, no unresolved moisture or structural defect will be concealed, and the exact metal-roof manufacturer accepts direct installation over that condition.
“One layer” is not an approval by itself. The property still needs verification of slope, panel type, separator requirements, attachment substrate, flashing details, local review, and warranty terms. Direct attachment may also make above-sheathing ventilation difficult and allow existing irregularities to remain visible.
Do I need underlayment between shingles and metal roofing?
It depends on the approved assembly. A direct-attachment system may require a separator or underlayment to prevent asphalt granules from abrading the metal. Another system may use a membrane for additional functions, while a proprietary elevated recover product may use clips and an airspace under its own documented details.
Do not add or omit underlayment based solely on generic advice. Confirm the product, location, laps, attachment, compatibility, and relationship to ventilation and other membranes in the manufacturer’s recover detail. A roofing supplier’s recommendation for synthetic underlayment is an assembly recommendation, not a rule for every metal roof (1st Coast Metal Roofing Supply’s overlay guide).
When should shingles be removed instead of covered?
Removal should be considered when the roof has active leaks, wet or deteriorated decking, soft areas, sagging, damaged framing, unstable or badly curled shingles, severe unevenness, or unresolved moisture. Tear-off may also be appropriate when valleys, walls, edges, chimneys, skylights, ventilation, or other flashing details require direct access to underlying materials.
Remove the shingles when the selected manufacturer’s documents or the project’s locally confirmed requirements call for it. If inspection cannot establish that the concealed assembly is suitable, covering it does not resolve the uncertainty.
Are battens better than fastening metal panels through the shingles?
Not universally. Battens can separate the panels from the shingles and may form part of a designed cavity, but they add material, weight, height, labor, and attachment questions. Their size, orientation, spacing, and connections must come from the approved design. Lumber treatment and metal contact also require compatibility review.
Direct attachment may create a simpler buildup, but it can reveal substrate irregularities and make above-sheathing ventilation difficult. The better method is the one documented for the selected panel, existing roof, structure, and property—not whichever uses more or fewer components.
Will an over-shingle installation affect the metal-roof warranty?
It can. Some manufacturers accept specified recover assemblies, while others may require removal or condition coverage on particular substrates, separators, fasteners, clips, slopes, and flashing details. Work that conflicts with the installation manual may affect warranty eligibility.
Obtain written confirmation before ordering. Ask for the exact recover detail, relevant exclusions, installer qualifications, registration requirements, and division of responsibility between the manufacturer and contractor. A statement that “the metal is warranted” does not establish that the complete over-shingle installation qualifies.
Make the final roof-over decision
Return to the four possible outcomes before work begins:
- Proceed with a documented, approved overlay.
- Expose and repair limited defects, then reassess.
- Obtain structural, manufacturer, or local-authority review.
- Remove the shingles and rebuild from the deck.
A successful metal-over-shingle roof begins with documented acceptance and a sound existing assembly—not with panel installation. If the inspection, slope, substrate, moisture plan, attachment method, flashing details, local review, and warranty terms align, the contractor can follow the exact approved recover system.
If defects would remain concealed, structural or moisture questions remain unresolved, or the governing documents do not support the proposed overlay, stop. Repair and reassessment, qualified review, or complete tear-off is the appropriate next outcome.