 MortarDesk
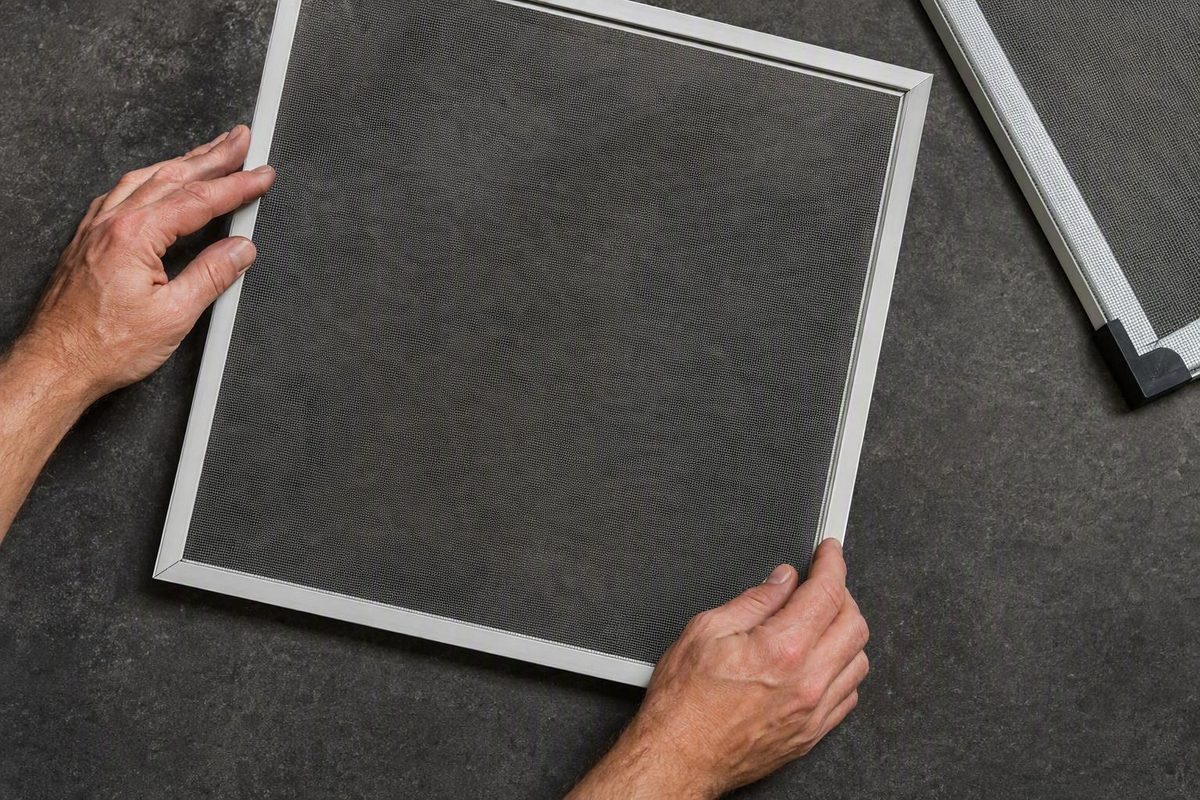
Learning how to measure window screens begins with one decision: are you copying a sound, correctly fitting screen, measuring an empty conventional opening, or dealing with a mounting system that requires its own instructions?
The distinction matters because there is no universal screen size or clearance formula. A replacement can have the correct width and height yet fail to fit because its frame is too deep, its hardware is incorrectly positioned, or it cannot move far enough into a channel during insertion.
The reliable sequence is to identify the mounting arrangement, take raw measurements from consistent reference points, document the frame and hardware, and only then apply the selected seller’s instructions.
Choose the Right Measurement Method Before Picking Up the Tape
Use this three-path decision tree:
- Copy a correctly fitting existing screen. Choose this path when the screen belongs to the intended window, sits properly, and has a flat, square, undamaged frame.
- Measure a conventional tracked opening. Choose this path when the old screen is missing or unreliable, but you can clearly identify the tracks, channels, retaining lips, and insertion direction.
- Stop and obtain product-specific instructions. Do this for surface-mounted, retractable, arched, odd-shaped, trackless, or unfamiliar proprietary systems. Do not convert the opening to an order size with a generic deduction.
A correctly fitting screen is often the simplest template, but only after its condition and fit have been verified. Remove it and check for bent rails, bowed corners, distortion, damaged joints, or evidence that it was previously too loose or too tight. A warped or poorly fitting frame should not be reproduced without checking the opening itself. Manufacturer guidance likewise distinguishes between a sound existing frame and one too damaged to provide dependable dimensions (RiteScreen’s replacement-screen measuring guide).
Next, identify the window and mounting arrangement. It may be:
- A vertically operating single-hung or double-hung window
- A horizontal slider
- A full screen held in perimeter tracks
- An inside-mounted screen
- A surface-mounted screen secured over the opening
- An insect screen using an inner track
- A solar screen using a separate outer track
These are not interchangeable categories. A hung-window screen may lift into a deep upper channel and settle behind a lower lip. A slider may enter through a shallow vertical channel. A surface-mounted product may overlap the opening rather than fit within it.
Use the following terms consistently:
- Finished screen frame: The final outside dimensions of the completed rigid frame. Any clearance allowance used to derive those dimensions is a separate calculation.
- Mesh: The flexible screening material held inside the frame. It is not the measurement reference when copying a finished screen.
- Frame depth: The front-to-back thickness of the screen frame. Do not confuse it with the visible face width of the rail.
- Track: A continuous channel or guided path that positions or retains the screen.
- Deep U-channel: A relatively deep track into which the screen is lifted or slid during insertion.
- Shallow retaining lip: A smaller ridge behind which the opposite frame edge settles.
- Inside mount: A screen fitted within an opening, track, or recess.
- Surface mount: A screen attached over the face of an opening, usually with overlap around it.
- Raw opening measurement: A dimension taken directly from the identified window reference points before any adjustment.
- Final order dimension: The dimension submitted after applying the selected seller’s ordering rule, if the buyer is instructed to apply it.
Gather the Tools and Set Up a Measurement Worksheet
Use a rigid metal tape measure whose hook is small enough to enter the relevant channel fully. Add a sharp pencil and a worksheet or notepad. If the opening is above comfortable reach, use a stable step stool or ladder rather than trying to measure from the floor; these tools and stable access are included in published replacement-screen guidance (M&M Gutters & Exteriors’ measuring guide).
Create one worksheet row for every window. Label openings by room and position rather than relying on memory:
- Bedroom — left window
- Bedroom — right window
- Kitchen — over sink
- Living room — street side
Give each row fields for:
| Window label | Screen or mount type | Top width | Middle width | Bottom width | Left height | Center height | Right height | Frame depth | Mounting side | Hardware |
|---|---|---|---|---|---|---|---|---|---|---|
Then add three separate order fields:
| Raw measurement | Vendor adjustment | Final order dimension |
|---|---|---|
| Measurement taken at the screen or opening | Exact adjustment stated by the selected seller | Calculated dimension to submit |
Write dimensions in width × height order, adding depth as a third dimension when required: W × H × D. Record measurements to the nearest 1/16 inch, preserving the exact fraction instead of rounding to a whole, eighth, or quarter inch.
Photograph details that may be difficult to describe:
- Upper and lower channels
- Side tracks and retaining lips
- The screen-frame profile
- Tension or leaf springs
- Lift tabs and plungers
- Clips and screws
- Crossbars
- The mounting surface
Include a ruler or tape in close-up photographs when scale matters. Keep the images under the same room-and-position label as the worksheet row.
How to Measure a Correctly Fitting Existing Screen
Remove the screen carefully and place it on a clean, flat surface. Do not measure it while it is leaning against a wall, hanging partly in a track, or flexing across your knees.
Inspect the frame before using it as a template. Check whether:
- The long rails lie flat
- The corners remain joined and square
- No side bows inward or outward
- The frame is not twisted
- The screen previously sat securely without binding
- The hardware appears complete and correctly positioned
If the screen is bent, warped, damaged, or known to fit poorly, switch to the empty-opening method. You may still record the old frame’s profile and hardware, but its overall dimensions should not be treated as authoritative.
Measure the finished frame, not the mesh:
- Measure width from the outermost left frame edge to the outermost right frame edge.
- Measure height from the outermost top frame edge to the outermost bottom frame edge.
- Measure frame depth from front to back.
The frame-depth measurement is not the visible width of the rail when viewed from the front. Turn the screen so you can measure the actual thickness that must enter the track. Existing-screen instructions call for the outside width, outside height, and frame thickness, recorded to the nearest 1/16 inch (Metro Screenworks’ measuring guide).
Record the result in this form:
31 3/8 inches W × 27 1/2 inches H × 5/16 inch D
Add hardware separately:
Hardware: Two top tension springs; two bottom lift tabs; no crossbar.
Record the type, number, observed orientation, and approximate location of every spring, tab, plunger, clip, screw, or crossbar. If a spring is positioned near one corner rather than centered, note that distinction or photograph it beside the tape.
Do not assume that a nearby window accepts the same screen. A neighboring screen is a useful template only after you verify that the two openings have the same dimensions, mounting side, track arrangement, frame profile, depth, hardware, and insertion direction. Similar appearance is not enough.
How to Measure an Empty Screen Opening
Open the window fully and identify the surfaces that will actually retain the replacement. Do this before placing the tape anywhere.
Look for:
- A deep channel that accepts one edge first
- A shallower lip that retains the opposite edge
- Continuous side tracks
- Flat or L-shaped side surfaces
- An alternative inner or outer lip
- Screw holes, clips, plungers, or other mounting points
Do not measure decorative trim, the visible mesh area, an unrelated sash edge, or the interior stool projecting into the room. The tape must reference the specific surfaces that control the finished frame.
Choose one measurement basis and use it for both dimensions. For example, do not take width between inside retaining lips and height between outside trim edges.
For width:
- Measure across the identified reference points at the top.
- Repeat at the middle.
- Repeat at the bottom.
- Keep the tape level and straight.
- Retain all three readings.
For height:
- Measure at the left.
- Repeat at the center.
- Repeat at the right.
- Keep the tape straight and seat its end fully at the chosen reference point.
- Retain all three readings.
Repeated measurements reveal taper or variation that a single nominal pair would conceal. RiteScreen advises using consistent inside reference points, measuring in more than one location, and recording relevant springs, clips, and tabs (its guide to screen-measuring errors).
For a conventional inside-mounted screen, the smallest repeated width and height commonly reduce the risk of binding. That is a starting principle, not a universal order formula. The selected product’s instructions still determine which readings to use and whether an adjustment is required.
Surface-mounted screens are an important exception. They cover the opening instead of fitting inside its narrowest point, so the maker may require the largest coverage dimensions or a stated overlap.
If the readings vary, give the supplier all of them. Do not invent an average, silently square the opening, or assume that a generic frame will absorb the difference.
Finally, test the insertion path conceptually. Determine whether the proposed frame can:
- Lift or slide far enough into the deeper channel
- Clear the opposite retaining lip
- Move back toward that lip
- Settle securely into its retained position
- Reverse the movement for later removal
An opening can match the nominal width and height yet leave no usable route for installing a rigid frame. If there are no recognizable tracks or retaining lips, stop and obtain instructions for the intended mounting system.
Measuring Common Single-Hung and Double-Hung Screen Openings
The following method applies to a common hung-window arrangement with a deep upper U-channel and a shallower lower retaining lip. It is not a universal rule for every single-hung or double-hung window.
First identify the upper channel and the lower lip aligned directly beneath it. If the window has two lower lips, establish which one belongs to the intended screen. Some assemblies provide separate inner and outer positions for insect and solar screens.
For height:
- Place the end of the metal tape fully inside the deep upper U-channel.
- Make sure the hook reaches the channel’s actual end.
- Hold the tape straight down.
- Read the height at the lower reference point specified by the seller.
The insertion logic explains why these reference points matter. The screen must rise into the deep upper channel far enough for its lower edge to clear the lower lip. It then moves down behind that lip and remains retained.
One documented convention defines the finished height as approximately 1/16 to 1/8 inch above the upper edge of the bottom lip. Quality Screen Company uses that convention for its illustrated single-hung configuration and identifies upper springs and lower lift tabs as typical hardware (its single-hung measuring guide).
A different seller method instructs the buyer to measure from behind the lower lip to the top screen channel and then add 1/8 inch. That arithmetic belongs to the reference points in that particular method and must not be combined with the first convention (PJ Fitzpatrick’s window-screen instructions).
For width, measure straight across the seller’s specified opening or side-channel reference points. Product instructions variously allow approximately 1/16 inch or 1/8 inch of total width clearance. Do not select whichever allowance produces the preferred result. Use the reference points and adjustment from one complete seller method.
Include notes such as:
Two top leaf springs; two lower lift tabs; insect-screen inner lip; exterior access.
Before ordering, perform a physical logic check: can the proposed frame engage the upper channel, move high enough to clear the lower lip, settle behind it, remain retained, and still be removed later? If not, recheck the selected channel, frame depth, and stated height convention.
Measuring Slider and Full-Track Screens
Do not automatically apply a hung-window add-to-height convention to a horizontal slider. The screen’s insertion direction and retaining channels may be entirely different.
For a horizontal slider:
- Compare the opposing vertical channels.
- Identify the shallower channel or retaining lip used during insertion.
- Establish the seller’s reference points for channel width and height.
- Take multiple readings if either dimension varies.
- Record the insertion side and any springs, tabs, or plungers.
PJ Fitzpatrick’s slider method deducts 1/8 inch from both width and height after measuring from its specified channel references. This is a product-method example, not a general slider rule.
Another retailer describes a slider method using a 1/16-inch width allowance and its own reference points (Affordable Window Screens’ configuration guide). The difference is why the selected vendor’s complete method must control.
For a full screen fitted within tracks, measure width across the intended side references at the top, middle, and bottom. Retain the smallest raw width for a conventional inside-track configuration unless the product instructions say otherwise.
Measure height at the left, center, and right. Seat the tape fully in the upper track and read it at the correct lower lip. Check carefully for separate insect-screen and solar-screen lips; choosing the wrong one changes the finished dimension.
If the replacement includes a crossbar, record its position separately. The crossbar or meeting-rail location does not replace the screen’s overall height. A complete order note might read:
Overall: 34 7/16 inches W × 58 3/4 inches H × 5/16 inch D Crossbar: centerline 29 inches above selected bottom reference Track: inner insect-screen lip
Full-track instructions similarly call for width measurements at the top, middle, and bottom, height measurements across multiple positions, and a separately recorded crossbar location (Affordable Window Screens’ full-track guide).
Confirm that the frame can enter and leave the track system. A rigid screen may be impossible to insert if deep channels constrain too many sides without enough clearance or a removable track component.
Handle Solar, Surface-Mounted, Retractable, and Specialty Screens Separately
Specialty mounting systems should not be reduced to one generic deduction.
For a screw-mounted solar screen, record:
- The outside-edge coverage area
- The mounting surface around the opening
- Available screw clearance
- Required edge overlap
- Screw or clip positions
- Any vendor-stated deduction
Where a window has separate insect and solar tracks, verify the intended retaining lip before measuring. The outer lip used for a solar screen may produce different dimensions from the inner insect-screen lip.
For a center mullion or colonial pattern, measure the horizontal distance from the relevant outside edge to the center of the mullion. Take the vertical dimension using the method that applies to that window and mounting arrangement. Record whether the crosspiece is structural, decorative, or intended to align visually with the meeting rail.
Retractable screens require their own template. The Roll Away measuring guide, for example, calls for inside width readings at the top, middle, and bottom and height readings at the sides. Its illustrated inside-mount method uses the smallest readings and specifies a 1/16-inch deduction from both width and height; its surface-mount method uses the largest readings (Roll Away’s product-specific measuring guide).
That example does not establish a rule for all retractable or surface-mounted screens. The relevant dimensions may therefore be larger than the opening itself.
Brick-clip instructions demonstrate the danger of generic formulas. One commercial guide instructs users to reduce both width and height by approximately 1 inch for its brick-clip method; this is not a universal rule.
Another retailer describes an approximately 1-inch reduction from width only for the hardware it discusses. Because the two ordering methods are not equivalent, no general brick-clip calculation is defensible. Obtain instructions from the manufacturer of the selected clips or screen.
Route the following to product-specific templates:
- Casement screens
- Awning-window screens
- Arched or nonrectangular screens
- Trackless openings
- Proprietary clip or plunger systems
- Retractable products
- Frames with unfamiliar profiles
When the arrangement is unclear, send the manufacturer the unadjusted measurements and photographs of the channels, lips, mounting surfaces, and hardware. Ask the manufacturer to identify the correct measurement basis before converting anything to an order size.
Convert Measurements Into an Order and Check for Errors
Keep three quantities distinct:
- Raw measured dimension
- Vendor-specified adjustment
- Final order dimension
Before calculating, ask the seller two direct questions:
- Do you want the raw opening size or the finished manufactured screen-frame size?
- Should I apply the clearance, or will you apply it during fabrication?
The phrase “send us your measurements” does not answer either question.
For a hypothetical calculation, suppose the smallest raw width is 31 3/8 inches and the selected vendor explicitly instructs you to deduct a total of 1/16 inch:
31 3/8 − 1/16 = 31 6/16 − 1/16 = 31 5/16 inches final order width
This demonstrates the arithmetic only; it does not establish a universal allowance. Write it on the worksheet as:
| Raw width | Vendor adjustment | Final order width |
|---|---|---|
| 31 3/8 in. | −1/16 in. total | 31 5/16 in. |
Do not deduct an opening allowance from a correctly fitting existing screen’s finished dimensions unless the seller specifically asks you to convert that frame size to a different ordering basis.
Read each order line back in width × height × depth order, including units and exact fractions. Then verify:
- Frame depth and profile
- Inside or outside mounting side
- Insect-screen or solar-screen track
- Hardware type, quantity, location, and orientation
- Crossbar position, if applicable
- Insertion and removal path
- Room-and-position label
Measure every window individually and match every order line to its worksheet row. Do not group windows merely because they appear identical.
An oversized screen may bind or bow; an undersized screen may leave gaps, rattle, or fail to remain behind its retaining surfaces. Those symptoms can have more than one cause, so they should prompt a check of the dimensions, depth, hardware, and track selection rather than an assumed diagnosis.
Before submitting the order, confirm:
- [ ] The measurement path was selected: sound existing screen, conventional tracked opening, or product-specific system.
- [ ] All reference points belong to the intended screen track.
- [ ] Width and height use one consistent measurement basis.
- [ ] Multiple readings were taken where measuring an opening.
- [ ] Fractions were recorded to the nearest 1/16 inch, as directed in full-track measuring guidance.
- [ ] Width, height, and required frame depth are clearly labeled.
- [ ] Raw measurements remain separate from final order dimensions.
- [ ] The vendor adjustment was applied no more than once.
- [ ] Springs, tabs, clips, screws, plungers, and crossbars were documented.
- [ ] The insertion path was checked.
- [ ] The seller’s measurement basis and allowance were confirmed.
Frequently Asked Questions
Do I measure the window-screen frame or the mesh?
Measure the rigid frame, not the mesh. For an existing screen, take width and height from the outermost frame edges and measure frame depth from front to back.
If the old frame is bent, warped, damaged, or did not fit correctly, do not rely on it alone. Measure the actual opening and identify its tracks and retaining lips.
Should window-screen dimensions be written width first or height first?
Write width first, then height. Add frame depth as a third dimension when needed:
W × H × D
Always include units and preserve the exact fractions. Labeling each value is especially useful when width and height are similar.
Should I subtract 1/16 inch or 1/8 inch from my measurements?
Neither deduction is universal. Some product guides use a 1/16-inch allowance for specified opening measurements, while others use 1/8 inch or instruct the buyer to add 1/8 inch to a particular hung-window height reading.
Use the selected seller’s reference points and allowance as one complete method. Confirm whether the seller wants raw opening dimensions or finished frame dimensions and whether the buyer or manufacturer applies the adjustment. Do not combine the reference points from one guide with the arithmetic from another.
What should I do if the top, middle, and bottom measurements are different?
Write down every reading. For a conventional inside-mounted screen, the smallest repeated dimension commonly helps avoid binding, but the selected product’s instructions control.
Report the variation to the supplier if it is significant for the system being ordered. Do not average the readings, invent a correction, or assume the frame will flex enough to compensate. Surface-mounted products may instead use coverage measurements or the largest readings.
Can I use a screen from another window as the template?
Yes, but only after confirming that it fits the target opening and matches its width, height, frame depth, profile, mounting side, track, hardware, and insertion direction.
A neighboring or visually identical window is not automatically interchangeable. Label both openings and compare them directly before copying the screen’s finished dimensions.
The sequence is what prevents avoidable ordering errors: choose the appropriate method, identify the true retaining surfaces, take repeated measurements, record W × H × D, document the hardware and insertion path, and preserve the raw dimensions before applying any adjustment. Because clearance conventions differ among hung windows, sliders, inside mounts, surface mounts, and specialty systems, the final authority is the manufacturer of the screen being ordered.
Mortar Desk provides general reference information rather than individualized sizing or a fit guarantee. This guide does not replace the selected manufacturer’s specifications or product-specific measuring instructions, as explained in About Mortar Desk.