 MortarDesk
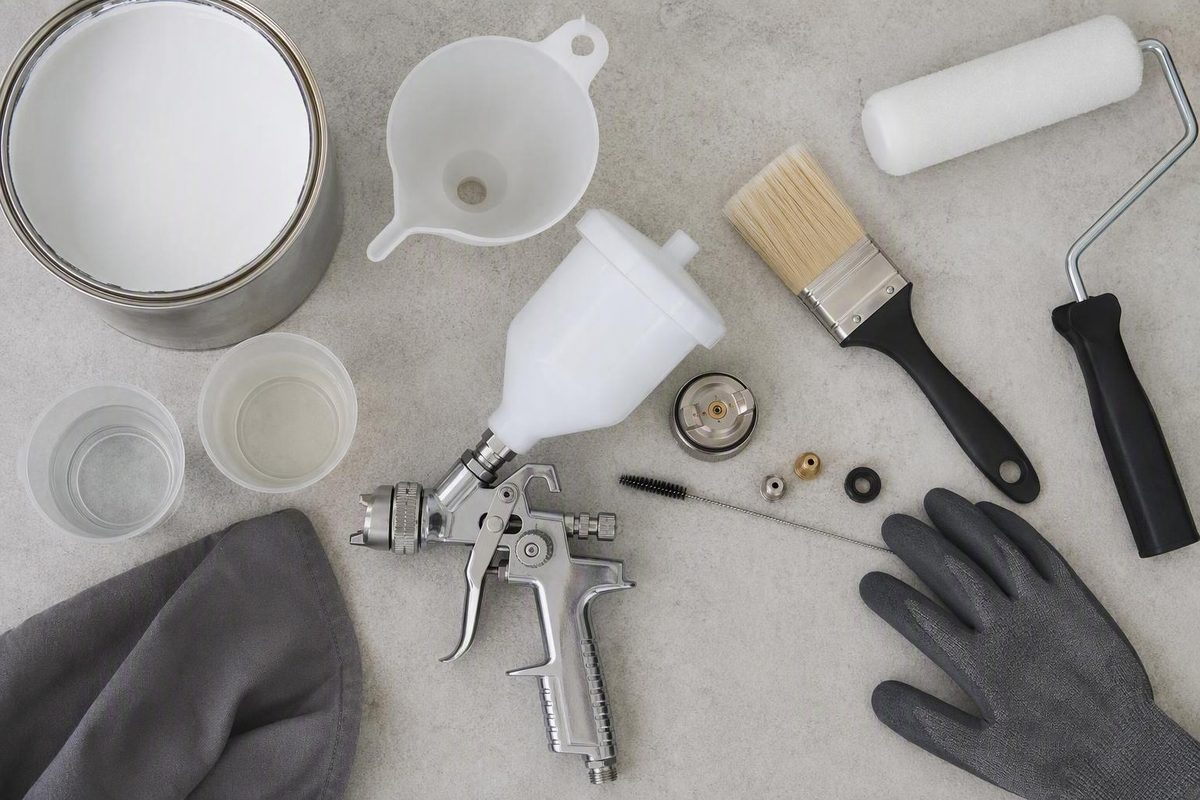
Latex paint can work in a spray gun, but the useful question is not simply whether paint comes out of the nozzle. The real test is whether the complete system can deliver and atomize the coating consistently, produce an acceptable dried film, and stay within the paint and equipment manufacturers’ limits.
There is no universal nozzle, pressure, airflow setting, or thinning ratio for latex paint in a spray gun. Begin with the project and finish goal, confirm that the exact paint and sprayer are compatible, prepare the coating carefully, and test the least-modified setup on representative scrap. Change one variable at a time rather than compensating for unsuitable equipment with an unsupported amount of water.
Can You Put Latex Paint in a Spray Gun?
Yes. Latex paint can be sprayed, but success depends on the particular formulation, sprayer design, feed system, fluid hardware, available airflow or pump capacity, and finish required.
“Latex paint” is a broad category of water-based coatings, not a standardized viscosity. Flat wall paint, acrylic trim enamel, cabinet coating, and exterior paint can behave differently in the same gun. Mixing and the application conditions identified by the coating manufacturer can also affect spray performance.
It helps to separate two questions:
- Can the sprayer move the paint through its fluid path and nozzle?
- Can it atomize that paint into a stable pattern that produces an acceptable dried coating?
Thick latex commonly challenges an ordinary gravity-fed HVLP gun. Gravity offers limited help moving a viscous coating, while the gun’s relatively low-pressure atomizing air must break the liquid into droplets. Larger compatible fluid hardware, adequate airflow, positive fluid pressure, or manufacturer-permitted reduction may help, but each remedy is equipment- and coating-specific.
The main variables are:
- Paint formulation and viscosity
- Fluid nozzle, needle, or airless tip
- Air-cap design and available airflow
- Gravity, siphon, pressure-pot, turbine, or pump delivery
- Fluid and fan controls
- Compressor performance while the gun is operating
- Turbine or airless-pump capacity
- Paint, substrate, and application conditions
- Gun movement, distance, orientation, and application rate
Commercial catalogs place airless, HVLP, pneumatic, handheld, gravity-feed, and siphon-feed sprayers in latex-compatible categories. That confirms the availability of several equipment types, but a retail filter does not establish that every listed model can spray every latex formulation unthinned or produce the finish needed for a particular project. The exact coating data sheet and sprayer manual remain controlling.
Sprayed acrylic latex can provide an acceptable result on trim or millwork when the coating and system are well matched. Expectations should remain realistic: experienced finishers report good results while cautioning that sprayed latex should not automatically be expected to level like lacquer (Woodweb’s industry discussion of spraying latex). That is practical experience, not proof that every professional finish will outperform every water-based coating.
Choose the Sprayer by Project, Not by a Universal Ranking
HVLP and airless sprayers atomize paint differently.
HVLP—high volume, low pressure—uses a large volume of air at relatively low pressure. Depending on the system, that air comes from a compressor or turbine. A needle and nozzle regulate fluid delivery, while the gun typically provides fan and fluid controls.
Airless equipment uses a pump to pressurize the coating and force it through a small tip orifice. It does not use compressed atomizing air. This arrangement is commonly selected for production work and thicker architectural coatings.
Neither category is always better. Choose according to the surface area, coating, finish goal, containment needs, and time available.
Gravity-fed HVLP can be practical for doors, trim, cabinet parts, furniture, and other smaller work. It offers a compact fluid path and convenient adjustment, but thick latex may exceed what a modest gun, small fluid set, or limited compressor can deliver. The label “HVLP” alone says little about actual airflow or coating capacity.
Pressure-fed HVLP provides positive fluid delivery from a pressure cup or pot instead of relying on gravity alone. This can help move viscous paint while retaining HVLP-style fan and fluid control. It does not eliminate the need for a compatible air cap, adequate airflow, clean passages, and approved coating preparation.
Turbine HVLP systems vary considerably. Confirm that the exact turbine and fluid set are approved for the intended coating (Pittsburgh Spray Equipment’s latex spraying guide).
Airless equipment is generally the more practical starting point for walls, ceilings, siding, fences, and other broad areas where production speed and the ability to move thicker latex matter. A capable unit may draw directly from the paint container and can often spray latex with little or no reduction, subject to both manufacturers’ instructions.
Fine-finish airless tips are another option for doors, trim, and similar work. They can balance production and atomization, but “fine finish” does not guarantee compatibility with thick paint. Titan notes that some fine-finish airless tips may be less suitable for medium- and high-viscosity coatings (Titan’s comparison of HVLP and fine-finish airless tips).
| Sprayer arrangement | Project scale | Finish priority | Overspray and containment considerations | Likely thinning requirement | Refill frequency | Cleanup burden |
|---|---|---|---|---|---|---|
| Gravity-fed HVLP | Small parts and detail work | Close control; validate the sample finish | Contain the spray and protect nearby surfaces | More likely, if permitted | Frequent because of cup size | Cup, gun, air cap, and fluid passages |
| Pressure-fed HVLP | Small to medium work or repeated parts | Close control with stronger fluid delivery | Contain the spray and account for hoses and pot placement | Often less dependent on reduction than gravity feed, but coating-specific | Less frequent with a larger pot | Gun, hoses, pot, air cap, and fluid components |
| Turbine HVLP | Small to medium detail work | Controlled application | Containment remains necessary; performance is model-dependent | Depends strongly on turbine and fluid set | Usually cup-dependent | Gun, cup, fluid set, and filters as directed |
| Handheld sprayer | Touch-ups to medium projects, model-dependent | Convenience and portability | Model and tip design determine containment needs | Varies widely | Usually frequent | Model-specific pump, cup, valves, filters, and tip |
| Airless | Walls, ceilings, siding, fences, and large areas | Coverage and production | Plan substantial masking and containment | Often little or none with capable equipment | Low when drawing from a container | Pump, hose, gun, filters, and tip |
| Airless with fine-finish tip | Trim, doors, and selected medium projects | Balance of production and finer atomization | Mask and contain the pressurized spray pattern | Coating- and tip-specific | Low to moderate | Similar to other airless systems |
These are selection tendencies, not performance guarantees. General buying guidance likewise places HVLP on cabinets, furniture, doors, and trim, and airless equipment on walls, ceilings, fences, siding, and exteriors (Lowe’s HVLP and airless comparison).
Before filling a sprayer, find the model’s approved-coating list, viscosity or reduction instructions, fluid-set or tip table, and capacity requirements. Do not rely solely on a retailer’s “latex-compatible” label.
Nozzle and Tip Sizes: Use the Right Measurement System
A nozzle recommendation is meaningful only when it identifies the sprayer type.
HVLP fluid nozzles are commonly specified by opening diameter in millimeters. Airless tips use a separate coded or inch-based orifice system. The numbers are not interchangeable, and an airless orifice measurement should never be copied into an HVLP nozzle selection.
For example, a painting-contractor article lists airless-style orifice ranges of 0.015–0.021 inch for broad surfaces and 0.011–0.013 inch for detailed cabinet work (Nash Painting’s spray guidance). These are low-authority, general examples rather than product-specific specifications, and they do not correspond to HVLP fluid nozzles measured in millimeters.
For HVLP, one commercial equipment guide suggests these starting points:
- At least 1.8 mm for some pressure-fed HVLP configurations
- Typically at least 2.0 mm for gravity-fed HVLP spraying of latex
The guide also calls for a suitable high-airflow cap and recommends using only the minimum manufacturer-approved reduction. Those figures are vendor guidance, not universal minimums for every gun and paint.
Community reports provide context but not specifications. Users have described successful gravity-feed spraying with 2.0–2.2 mm hardware, while others found smaller gravity guns frustrating or dependent on substantial thinning (Sawmill Creek’s gravity-feed HVLP discussion).
There is also a counterexample: a forum technical adviser reported a working 1.5 mm HVLP configuration paired with a particular air cap and sufficient compressor air. This does not establish 1.5 mm as a general recommendation. Instead, the conflicting examples demonstrate that nozzle diameter alone does not determine performance.
Paint formulation and gun design further complicate direct comparisons.
Use this order when choosing hardware:
- Find the coating manufacturer’s approved spray-application table.
- Identify whether it covers HVLP, conventional air spray, air-assisted airless, or airless.
- Check the sprayer manual’s approved fluid set or tip range.
- Confirm that the compressor, turbine, or pump supports that hardware and coating.
- Select a documented starting point and test it.
- Reject any generic “best nozzle for latex” answer that does not identify the paint and sprayer models.
Does Latex Paint Need Thinning?
There is no evidence-supported universal thinning ratio for latex paint in a spray gun.
Reported setups range from unthinned application to substantial dilution because the paints, guns, needles, air caps, airflow, feed systems, application conditions, and finish goals differ. Conflicting percentages do not establish a useful average.
The paint label or technical data sheet and sprayer manual should control the decision. Check:
- Whether spray application is approved
- Which spray method is covered
- Approved reducing liquids or additives
- Maximum permitted reduction
- Recommended tip or fluid set
- Required application conditions
- Film thickness, drying, and recoating instructions
If the documents conflict or do not address your combination, contact the coating manufacturer’s technical department. Do not assume water is acceptable merely because the coating is water-based.
A capable airless sprayer can often apply latex with little or no thinning. That does not mean airless equipment never requires reduction. Pump capacity, hose and filter configuration, tip choice, and the exact paint still matter.
Gravity-fed HVLP is more likely to require permitted thinning because both material delivery and atomization can be limiting. Pressure-fed HVLP reduces dependence on gravity, while a capable turbine or more suitable fluid hardware may improve atomization without requiring as much modification to the paint.
One retailer guide suggests adding one-half cup of water to one gallon of latex paint for HVLP use. Under the calculation convention below, that equals about 3.1% added water by volume. It is an attributed general example, not a formula for every paint and gun (Paint Life Supply’s HVLP and airless overview).
Use an explicit convention when recording percentages:
Added-liquid percentage = volume of added liquid ÷ starting paint volume × 100
For example, adding 4 fluid ounces to a starting gallon gives:
4 ÷ 128 × 100 = 3.125%
This expresses added liquid relative to the starting paint volume. State the convention because “10% thinning” can otherwise mean either adding an amount equal to 10% of the starting paint or making water 10% of the final mixture.
Forum contributors have reported unthinned use, approximately 10%, 20–25%, and 25–33% additions with different paints and equipment. These anecdotes demonstrate variability and should not be converted into recommendations (NC Woodworker’s discussion of thinning latex for HVLP).
Excessive thinning may contribute to runs, sags, weaker hiding, additional coats, or altered sheen. Forum reports also raise concerns about film formation, adhesion, and durability when waterborne coatings are modified excessively, but those consequences are formulation-specific and require confirmation from the coating manufacturer.
Treat these as separate options:
- Water
- A manufacturer-specified reducer
- An extender or conditioner
- Another proprietary additive
Approval of one does not imply approval of another. Do not add Floetrol or another extender solely because a forum recipe recommends it; compatibility, permissible quantity, sheen, drying, and performance are coating-specific.
A Conservative Setup and Test-Spray Procedure
The reliable way to dial in latex paint is to begin with documented compatibility and make the smallest necessary change.
1. Complete a preflight check. Read the paint label or technical data sheet and the sprayer manual. Confirm that the coating category is approved for the exact model. Identify any maximum reduction, specified reducer, required fluid set, tip range, filter arrangement, or viscosity limit.
2. Inspect and mix the paint. Confirm that the coating is suitable for use, then mix it thoroughly enough to redistribute settled material without deliberately whipping in excess air.
3. Strain the coating. Use a clean strainer appropriate for the equipment and paint. Straining cannot make an incompatible coating sprayable, but it can remove skins and debris that might cause preventable clogs.
4. Inspect the fluid system. Check the nozzle, needle, air cap, airless tip, filters, cup vent, pickup tube, seals, and fluid passages. Components should be clean, undamaged, correctly seated, and matched as a set.
5. Verify equipment capacity. For a compressor-fed gun, find the required airflow at operating conditions in the manual and confirm that the compressor can sustain it. For a turbine, verify approval for the coating and selected fluid set rather than assuming every turbine HVLP system handles latex equally well.
6. Begin with the least-modified coating. Start unthinned only when both the paint and equipment documentation permit it. If either manufacturer requires a particular preparation or reduction, follow that instruction instead.
7. Test on a representative surface. Cardboard can reveal the initial pattern, but scrap matching the actual substrate is better for evaluating hiding, texture, edge buildup, and dried appearance. Match the work orientation: a vertical sample may reveal sagging that remains hidden on a horizontal panel.
8. Adjust one control at a time. Stay within the manual’s limits. Observe fan shape, material distribution, droplet size, delivery stability, and wet-film behavior after each change. Changing air and fluid controls simultaneously makes the result harder to diagnose.
9. Diagnose hardware before thinning. Confirm cleanliness, correct fluid hardware, adequate airflow or turbine capacity, unrestricted delivery, and proper assembly. Paint that appears “too thick” may instead be exposing a clogged filter, blocked cup vent, weak compressor, worn part, or unsuitable nozzle.
10. Modify only a small measured batch. If reduction is permitted, add only the approved liquid in measured increments without exceeding the stated limit. Mix completely and repeat the representative test. Do not alter the full container while searching for a setting.
11. Keep modified paint separate. Do not pour the test batch back into the original paint. Isolation preserves the unmodified baseline and prevents accidental dilution of the remaining product.
12. Record the successful setup. Note the paint product and batch, starting volume, added liquid and calculated percentage, nozzle or tip, air cap, control settings, filters, application conditions, substrate, orientation, coats, and dried result.
Finally, evaluate the complete primer and topcoat schedule. Let the sample dry and recoat according to the coating instructions before committing to cabinetry, doors, millwork, or an entire room.
Spray Technique for an Even Latex Finish
A workable machine setup can still produce a poor finish when gun movement is inconsistent. Practice the complete stroke before pointing the gun at finished work.
Keep the gun perpendicular to the surface. Swinging it in an arc changes the distance across the pass and can produce uneven application. Move your arm and body so the gun stays square to the work.
Begin moving before pulling the trigger. Release the trigger before stopping, then continue beyond the edge. This limits localized buildup at the beginning and end of each pass.
Use the model-specific spraying distance stated in the manual. Different HVLP caps, turbines, pneumatic guns, airless tips, and fan widths behave differently, so no universal distance is appropriate. Once the distance is established, keep it steady.
Overlap passes consistently enough to avoid gaps and heavy bands, but follow the equipment maker’s technique instead of assuming one overlap percentage suits every fan. Watch the actual deposition on the representative surface.
Coordinate movement speed with fluid delivery:
- If material accumulates rapidly, move faster or reduce fluid within the documented range.
- If coverage is patchy, check the fan, distance, overlap, and delivery before repeatedly spraying the defect.
- Avoid lingering on edges and profiles while trying to fill a missed area.
- Let the coating level and dry as instructed before deciding that another pass is necessary.
If material collects on an HVLP air cap or airless tip, stop and clean it as the manual directs. For airless equipment, engage the safety features and complete the prescribed pressure-relief procedure before touching, reversing, removing, or servicing the tip (Home Depot’s sprayer operation and safety guide).
Judge finish quality on a dried representative sample, not solely by the appearance of the airborne spray or wet surface. Hiding, leveling, sheen, and texture can change as the coating dries.
Project priorities also differ. Walls and ceilings generally emphasize consistent coverage and production. Trim, doors, cabinets, and millwork reveal edge buildup, texture, and sheen variation more readily, so they warrant a validated sample of the complete finish schedule.
Troubleshoot the System Before Adding More Water
Treat troubleshooting as a diagnostic ladder rather than a definitive defect chart. The same symptom can have several causes, and more than one fault may be present.
No or restricted fluid flow
Check:
- Is the exact coating approved for the sprayer?
- Was the paint thoroughly mixed and strained?
- Is the tip or nozzle clear?
- Are the filters clean and correctly installed?
- Is the cup vent open?
- Are pickup tubes, valves, hoses, and passages unrestricted?
- Is the gravity, pressure-pot, turbine, or pump feed operating correctly?
- Is the fluid hardware within the manufacturer’s approved range?
A larger nozzle or thinner paint will not correct a blocked vent, clogged filter, improperly assembled needle, or failed feed component.
Coarse atomization or an incomplete pattern
Verify that the nozzle, needle, and air cap form the correct set. For compressor equipment, confirm that adequate airflow reaches the gun while spraying—not merely while the trigger is closed. For a turbine, check coating and fluid-set capacity. For pressure-fed equipment, confirm stable material delivery. For airless equipment, use the coating-approved tip and model-specific setup.
Consider incremental thinning only after cleanliness, hardware, airflow, and delivery have been verified—and only if the coating manufacturer permits it.
Intermittent sputtering or spitting
Inspect the paint supply, cup level, cup vent, pickup connections, fluid-path cleanliness, component seating, and maintenance items identified by the manual.
Runs and sags
Check for excessive localized application, slow movement, stopping while triggered, inconsistent distance, excessive fluid delivery, or over-thinning. Correct the setup and technique rather than repeatedly spraying an already wet sag.
Weak hiding or unexpected sheen
Review the batch record. Too much liquid or an unapproved additive may have changed the application properties or reduced the solids deposited in each coat. Stop and consult the coating manufacturer if the dried sample differs from the expected appearance.
Persistent problems with gravity-fed HVLP
Compare the consequences of further dilution with changing the delivery system. Compatible larger fluid hardware, pressure-fed HVLP, a more capable documented turbine, or airless equipment may be more defensible than forcing thick paint through a marginal gun.
Avoid universal fixes for orange peel, dry spray, airless tails, pressure, temperature, or humidity. These symptoms can reflect several interacting variables. Use the defect chart for the exact sprayer together with the coating maker’s application instructions.
Stop testing when the next step would exceed a documented setting, hardware limit, or maximum reduction—or when the paint cannot produce an acceptable dried sample without excessive modification.
Safety, Shutdown, and Cleanup
Water-based paint should not be treated as harmless when sprayed. Spraying creates airborne paint and overspray, so consult the coating label and safety data sheet for product-specific exposure controls. Provide suitable ventilation, contain the spray area, protect adjacent surfaces, and isolate occupied spaces as appropriate to the location and coating (Lowe’s paint-sprayer safety guidance).
Wear protective clothing, suitable gloves, and eye protection. Select respiratory protection from the coating label or safety data sheet and the actual exposure conditions. The supplied evidence does not support treating a generic dust mask or unspecified respirator as adequate for every sprayed water-based coating.
**Airless injection is a medical emergency. Never point an airless gun at yourself or another person, place a hand over the tip, or use a hand or finger to check a leak. Engage the gun’s safety features and complete the manufacturer’s pressure-relief procedure before cleaning, clearing, disconnecting, inspecting, or servicing any pressurized component. **
After spraying:
- Keep modified test batches separate from unmodified paint.
- Empty the cup, reservoir, hopper, or fluid path promptly.
- Complete the specified pressure-relief procedure.
- Use only the flushing medium approved for the coating and equipment.
- Clean the tip or nozzle, needle, air cap, filters, pickup parts, hoses, and passages as directed.
- Inspect seals, threads, guards, filters, and wear components.
- Lubricate only where the manual directs and with an approved product.
- Reassemble or store the equipment in the prescribed condition.
- Follow the product instructions for paint, flushing liquid, filters, and residue; if disposal directions are unclear, ask the relevant local waste authority.
A “soap-and-water cleanup” statement on a paint container does not replace the sprayer’s pressure-relief, flushing, disassembly, seal-care, or storage procedure. Prompt cleaning helps prevent dried latex from blocking fluid passages.
The final sequence is straightforward: identify the project and finish goal; confirm that the exact paint and sprayer are compatible; select documented fluid hardware or an airless tip; mix and strain the coating; test the least-modified setup on representative scrap; and thin only when expressly permitted. If gravity-fed HVLP requires excessive modification, change the hardware or delivery system rather than relying on unsupported dilution.
Mortar Desk publishes general reference information, not individualized coating, equipment, respiratory-protection, contracting, or medical advice. Current paint and equipment manufacturer instructions remain controlling.
Frequently Asked Questions
Can I spray latex paint through a gravity-feed HVLP gun?
Yes, if the exact gun has adequate fluid hardware and airflow and the coating is approved for that use. Gravity-feed HVLP can suit smaller doors, trim, furniture, or cabinet parts, but thick latex may flow or atomize poorly in a modest gun.
Begin with the documented nozzle, air cap, airflow, and coating preparation. If correct setup cannot produce a stable dried sample, consider permitted measured reduction, larger compatible fluid hardware, pressure-fed HVLP, a capable turbine, or airless equipment.
What size HVLP nozzle should I start with for latex paint?
Use the paint’s spray table and the gun manufacturer’s fluid-set chart. One equipment vendor suggests at least 1.8 mm for some pressure-fed HVLP arrangements and typically at least 2.0 mm for gravity-fed HVLP, but these are starting points rather than universal requirements.
Reported setups range from 1.5 mm with a particular air cap and sufficient air to 2.0–2.2 mm gravity-feed hardware. The variation shows why nozzle diameter must be evaluated with airflow, air-cap design, feed pressure, paint formulation, and gun design.
Do not convert an airless tip’s coded or inch-based orifice into an HVLP nozzle size.
Can I spray latex paint without thinning it?
Often, but not with every paint and sprayer. Capable airless equipment frequently handles latex with little or no reduction, while gravity-fed HVLP is more likely to need manufacturer-permitted thinning. Some pressure-fed or capable turbine HVLP systems may also spray particular coatings without added liquid.
Start unthinned only when both manufacturers allow it. Verify cleanliness, hardware, airflow, and fluid delivery before assuming viscosity is the problem.
Is HVLP or airless better for spraying latex paint?
Airless is generally the more practical starting point for walls, ceilings, siding, fences, and other large areas. HVLP is commonly selected for trim, doors, cabinets, furniture, and smaller components where close control matters more than production speed.
Pressure-fed HVLP can help when viscous paint needs positive delivery. Fine-finish airless tips offer another option, but no equipment category guarantees the best result with every coating.
How should I clean a spray gun after using latex paint?
Empty it promptly and follow the manual’s pressure-relief, flushing, disassembly, inspection, and storage procedure. Use the approved flushing medium and clean the nozzle or tip, needle, air cap, filters, cup or pickup assembly, hoses, and fluid passages as applicable.
For airless equipment, relieve pressure before touching or removing the tip or servicing any pressurized component. Follow the coating instructions for handling leftover paint and cleaning residue.