 MortarDesk
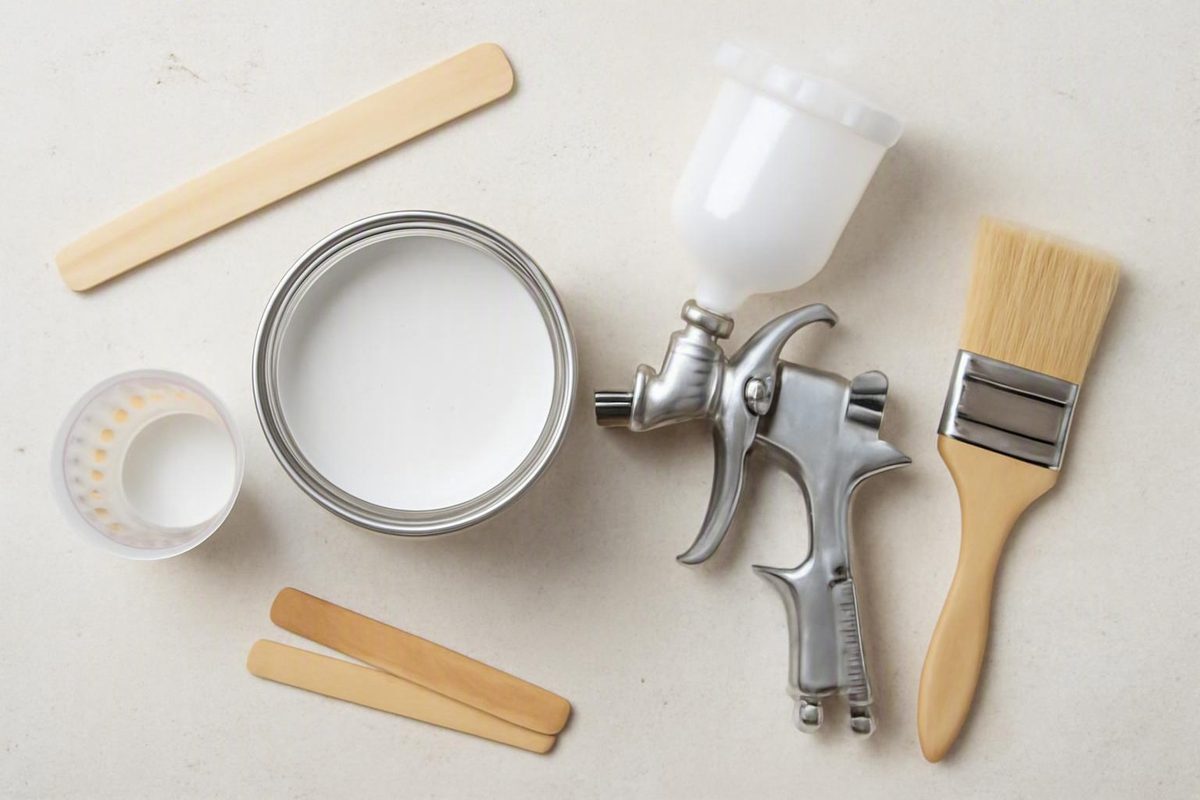
Thinning paint for spray gun use is not a matter of choosing one ratio for every can. Some paint-and-sprayer combinations work without reduction. Others require an approved reducer, a particular nozzle, and a measured viscosity adjustment. A mixture that works in one HVLP gun may be excessive for an airless sprayer—or prohibited by the coating manufacturer.
The dependable method is manufacturer-first: confirm that the coating may be sprayed, identify the permitted reducer and maximum dilution, match the tip or nozzle to the material, and test a measured batch. If the pattern is poor, inspect the equipment and technique before assuming that more thinner is the answer.
Does the paint need thinning at all?
Not necessarily. Do not add thinner automatically, and do not assume there is a standard paint-to-thinner ratio for every spray gun.
Start with the coating label and current technical data sheet. They should establish whether spray application is permitted and, where applicable:
- Which spray systems are suitable
- Which reducer may be used
- The maximum permitted reduction
- The recommended nozzle or airless tip
- Applicable pressure, airflow, or fluid settings
- Whether a viscosity test is required
- Any restrictions affecting application or performance
Then consult the manual for the exact sprayer model and configuration. A gun may be capable of spraying one product but unable to atomize another, even when both are described broadly as latex, acrylic, enamel, or oil-based paint.
The coating instructions and sprayer manual override every generic percentage, chart, or rule of thumb in this article. If the coating prohibits thinning, a retailer’s suggested ratio does not make dilution acceptable. If the data sheet sets a maximum reduction, treat that figure as a limit rather than a target.
When both manufacturers permit it, test the coating unthinned first. This is particularly relevant to airless equipment, which can often handle thicker material than many small HVLP or handheld units. A suitable larger tip may also allow a coating to spray without dilution, but the tip must be approved for both the coating and the equipment.
If the available setup cannot handle the material, consider a spray-formulated version of the coating or another compatible nozzle before adding more reducer.
Use this decision sequence:
- The coating is not approved for spraying: Do not proceed.
- Spraying is approved, but thinning is prohibited: Use a compatible sprayer and tip that can handle the product as supplied.
- Spraying and optional thinning are approved: Install the documented tip or nozzle and test unthinned.
- The specified viscosity test shows that reduction is needed: Add only the approved reducer in measured increments.
- The test pattern is poor: Check the tip, filter, fluid path, pressure or airflow, and settings before adding more reducer.
- Acceptable atomization cannot be achieved within the permitted reduction: Stop and change the setup or coating.
Mortar Desk publishes general reference information rather than individual coating, equipment, or contracting advice, as explained in its description of Mortar Desk’s role.
Why the spray system changes the answer
HVLP, handheld, conventional, and airless systems do not necessarily require the same paint consistency. Their atomization methods, available nozzle sizes, and material-delivery capabilities differ, so a thinning chart written for one system should not be transferred automatically to another.
HVLP means high volume, low pressure. In practical use, many HVLP units require lower-viscosity material than airless equipment. That does not mean every HVLP coating must be thinned or that every HVLP gun needs the same reduction. Turbine capacity, air-cap and needle selection, coating formulation, and the gun’s documented viscosity capability all affect the result.
Airless sprayers pressurize the coating and force it through a small tip. Many can spray comparatively thick architectural coatings with little or no thinning. The tip still has to suit the material, and pressure should be adjusted within the equipment instructions rather than used indiscriminately to compensate for an unsuitable coating or tip.
PaintTech’s commercial guidance, for example, suggests trying some water-based finish paints unthinned in airless equipment while giving a separate 10–20% starting range for airless-applied emulsion, subject to the coating manufacturer’s maximum. These differing recommendations show why paint type and documentation matter more than the word “airless” alone in a system-specific reduction guide.
Handheld and hobbyist sprayers may have less capacity to atomize undiluted architectural paint than some professional systems. Even within this category, however, motor output, nozzle design, cup arrangement, and coating limits vary. Use the model manual rather than assuming that every handheld sprayer requires heavily diluted paint.
Commercial guidance sometimes proposes more reduction for conventional guns than for airless systems, but those figures are source-specific starting points—not universal equipment specifications.
| Spray system | Could unthinned paint be possible? | Check first | Why a generic ratio is unreliable |
|---|---|---|---|
| HVLP | Yes, with some coatings and capable setups | Spray approval, nozzle or needle set, turbine capacity, and named viscosity test | HVLP units vary in atomization capacity and nozzle design |
| Handheld electric | Sometimes | Maximum viscosity, supplied nozzle, coating approval, and manual procedure | Consumer units do not all handle the same materials |
| Conventional compressed-air gun | Sometimes | Air cap, needle/nozzle, available air supply, and coating data | Gun setup and coating formulation determine the required consistency |
| Airless | Frequently, especially with a suitable tip | Coating-approved tip, pressure range, filter condition, and test pattern | Different coatings require different tips and may impose different dilution limits |
The Earlex Spray Station Gemini illustrates how narrowly equipment instructions must be interpreted. Its quart-container setup has a supplied-cup viscosity procedure, while direct-from-can use is governed by separate restrictions and does not permit solvent-based coatings. These are model- and configuration-specific conditions, not targets for another Earlex unit, an unrelated sprayer, or a different viscosity cup.
Match the reducer to the coating chemistry
Compatibility is the controlling rule: use only the reducer expressly permitted by the current documentation for the exact coating.
The generic name of a paint family may suggest where to begin looking, but it does not authorize a particular reducer. “Water-based” does not mean unlimited water may be added. “Oil-based” does not make every solvent interchangeable.
| Coating family | Reducer commonly identified in general guidance | What must be verified before use |
|---|---|---|
| Water-based latex, acrylic, or emulsion | Water | Whether the exact coating permits water reduction, the maximum amount, and any spray-system restrictions |
| Oil-based paint or enamel | Mineral spirits, paint thinner, or another specified solvent | The exact solvent named by the manufacturer and whether spraying and reduction are permitted |
| Lacquer | Lacquer thinner | The product-specific reducer, mixing instructions, and approved spray setup |
| Epoxy or other multi-component coating | Manufacturer-specified reducer | The exact product and reducer designation, component-mixing instructions, and reduction limit |
| Urethane or specialty finish | Manufacturer-specified reducer, if any | Whether reduction is permitted and which reducer is approved |
| Spray-formulated coating | Sometimes none | Whether the product is intended to be sprayed as supplied and which equipment is suitable |
For compatible water-based latex, acrylic, or emulsion paint, water is commonly named as the reducer. Some products nevertheless have strict dilution limits, while others are intended for application without reduction.
For compatible oil-based coatings, the documentation might name mineral spirits, paint thinner, white spirit, or a proprietary reducer. Do not treat these as permission to use whichever solvent is available. A commercial restoration guide lists several possibilities for oil-based paint but also acknowledges that not every oil-based product can be thinned and sprayed. Its three-parts-paint-to-one-part-thinner mixture is general commercial guidance, not authorization for a particular product; see its discussion of emulsion and oil-based paint reduction.
Lacquer guidance commonly points to lacquer thinner, while epoxies and other specialty coatings may require a named proprietary reducer. Do not infer compatibility from the broad coating category alone. Two products can both be solvent-based without being suitable for mixing.
Do not combine reducer types unless the coating documentation expressly instructs you to do so. Likewise, do not select water, mineral spirits, turpentine, lacquer thinner, or a generic solvent solely from an online chart.
Reducer compatibility is only the first test. It does not prove that the mixture will produce acceptable adhesion, curing, film build, sheen, durability, recoat characteristics, compliance, or warranty coverage. Check the coating documentation for those product-specific effects.
Paint-to-thinner ratios: calculate them without making them universal
Published starting recommendations differ too much to support one universal formula.
A commercial Titan HVLP chart proposes 25–30% reduction for latex and 10–20% for oil paint. It describes these percentages as starting points, says coating-manufacturer recommendations take precedence, and does not define whether every percentage is based on original paint volume or final mixture volume. Those figures are HVLP retailer guidance, not industry-wide specifications, as the Titan HVLP chart itself indicates.
The Earlex Gemini manual uses a different, model-specific sequence: where reduction is required, it starts at approximately 10%, calls for mixing and remeasurement, and then allows later 5% adjustments for that setup. Those numbers should not be transferred to another sprayer or used when the coating permits less, as shown in the Earlex Spray Station Gemini manual.
Airless-oriented PaintTech guidance supplies another contextual example: 10–20% water for emulsion, subject to the coating manufacturer’s maximum. Its table equates that range to 100–200 ml of water per litre of paint. The same guide says some water-based finish paints should first be tried unthinned, so its range is not a rule for every airless coating.
Oil-based recommendations also conflict. The Titan-oriented HVLP chart gives 10–20%, while the commercial restoration guide discussed above proposes three parts paint to one part solvent. Under the convention used in this article, adding one part solvent to three parts paint equals approximately 33.3% of the original paint volume. That disparity is evidence against treating either recommendation as a default.
Define the percentage before calculating
For consistency, this article uses the following convention:
Reduction percentage = reducer volume ÷ original paint volume × 100
Therefore:
Reducer volume = original paint volume × stated reduction percentage
Examples:
- 500 ml paint at 5%:
500 × 0.05 = 25 mlreducer - 500 ml paint at 10%:
500 × 0.10 = 50 mlreducer - 1 litre paint at 10%:
1,000 × 0.10 = 100 mlreducer - 1 litre paint at 20%:
1,000 × 0.20 = 200 mlreducer
Adding 100 ml of reducer to 1,000 ml of paint produces 1,100 ml of final mixture. The reducer equals 10% of the original paint volume, but approximately 9.1% of the final mixture.
That distinction matters. If an instruction instead means that reducer should form 10% of the final mixture, a different calculation is required. When a label gives a percentage without defining its basis, seek clarification rather than guessing.
Reduction calculator
The following figures use original paint volume as the basis. They are calculation aids, not recommended ratios.
| Original paint volume | 5% reducer | 10% reducer | 15% reducer | 20% reducer |
|---|---|---|---|---|
| 250 ml | 12.5 ml | 25 ml | 37.5 ml | 50 ml |
| 500 ml | 25 ml | 50 ml | 75 ml | 100 ml |
| 1 litre | 50 ml | 100 ml | 150 ml | 200 ml |
| 1 US quart (32 fl oz) | 1.6 fl oz | 3.2 fl oz | 4.8 fl oz | 6.4 fl oz |
Never use a column merely because it appears in the table. Select only a percentage permitted by the coating documentation and justified by the specified viscosity test or test spray.
Adjust a test batch incrementally
Suppose the coating permits up to 10% water and you separate 500 ml of paint. Rather than adding the full 50 ml immediately:
- Add 25 ml for a 5% reduction.
- Mix thoroughly.
- Repeat the specified viscosity test.
- Check the gun setup and test the spray pattern.
- If necessary and permitted, add another measured amount without taking the cumulative reduction over 10%.
Track cumulative additions. If 25 ml is followed by another 15 ml, the batch contains 40 ml of reducer, or 8% of the original 500 ml. The second addition is not a separate percentage calculation disconnected from what is already in the batch.
This staged method reduces the chance of overshooting. It also recognizes that a published maximum is a limit, not necessarily a target.
Measure viscosity with the cup specified for the sprayer
Viscosity is a liquid’s resistance to flow—its practical thickness. For spraying, the relevant goal is a viscosity that the equipment can atomize into an acceptable, even pattern.
A typical drain-cup procedure is:
- Bring the coating into the conditions required by its documentation.
- Stir it thoroughly.
- Fill or immerse the specified cup as instructed.
- Lift the cup vertically.
- Start timing at the point identified by the manual.
- Stop when the continuous stream breaks, or at the manual’s stated endpoint.
- Compare the result with the target for that cup, material, and equipment.
The exact procedure matters. So do the cup’s geometry, orifice, condition, and cleanliness. A time in seconds has little meaning when separated from those details.
A result from a #4 Ford cup cannot be substituted for a proprietary Earlex cup, nor can either be assumed equivalent to an unidentified cup supplied with another sprayer. Different cups can produce different drain times for the same material.
As an attributed commercial example, the Titan HVLP retailer chart lists latex at 30–35 seconds in a #4 Ford cup alongside 25–30% reduction. The page does not provide an independent testing protocol that establishes those figures as a universal target. They apply only as contextual guidance for the HVLP setup the retailer describes.
The Earlex Gemini uses a very different model-specific test. For its quart-container configuration, material that empties the supplied cup in less than 180 seconds is generally below the manual’s thinning threshold. The same manual separately says that latex coatings used from the quart cup require at least 10% dilution. That latex instruction is an additional material-specific condition: a sub-180-second result does not cancel it. Users must apply the viscosity rule together with every relevant material and configuration instruction in the manual.
If neither the coating nor the equipment manufacturer specifies a viscosity cup, descriptions such as “similar to whole milk” or observing flow from a stir stick can provide a rough visual check. These are subjective fallback heuristics, not equivalents to a named cup and target. Appearance alone cannot establish compliance with a product’s reduction limit.
Record the following for each useful trial:
- Coating name and base
- Original paint volume
- Reducer type and cumulative volume
- Percentage convention used
- Cup design and orifice, if identified
- Flow time and test procedure
- Required coating and room conditions
- Tip, nozzle, needle, or air-cap setup
- Pressure, airflow, and fluid settings
- Test-spray result
A successful mixture is easier to reproduce when the recipe includes equipment variables rather than only the paint-to-thinner ratio.
A cautious step-by-step thinning workflow
A controlled workflow prevents reducer from becoming the first response to every spray problem.
-
Verify spray approval. Confirm that the exact coating may be sprayed with the intended system. Identify prohibited methods or configurations.
-
Find the dilution limit. Read the label and technical data sheet. Note whether the figure is a recommendation or an absolute maximum, which reducer it applies to, and how the percentage is defined.
-
Select the specified tip or nozzle. Match the material to a compatible tip, needle/nozzle set, and air cap where applicable. Do not thin paint merely to force it through an unsuitable opening.
-
Prepare the sprayer. Assemble it according to the manual. Check the pickup path, filters, seals, tip, and controls before diagnosing the coating.
-
Condition and stir the paint. Bring the paint into any conditions stated in its documentation, then stir thoroughly. Environmental conditions can affect flow and spraying behavior, but there is no universal thinning correction for every coating.
-
Separate a measured test batch. Do not add reducer directly to the main container. A small batch protects the remaining paint if the reducer is unsuitable, the calculation is misunderstood, or the mixture is reduced too far.
-
Assess viscosity. Use the cup and procedure specified for the equipment or coating. If neither specifies a cup, follow the manufacturer’s alternative test rather than importing an unrelated target.
-
Test unthinned when permitted. Load only enough material for a controlled trial. This may show that the selected setup already handles the coating.
-
Add only the approved reducer when required. Measure it rather than estimating by eye, then mix the test batch thoroughly.
-
Remeasure before adding more. Follow the incremental procedure specified for the coating and equipment. A sequence published for one sprayer must not be copied when another product permits less or uses a different test.
-
Strain the final mixture. Pass the fully mixed material through a strainer suitable for the coating and sprayer. This helps remove dried paint, skin, and debris that could obstruct a filter, fluid passage, or tip.
-
Test on a representative surface. Cardboard is useful for inspecting the fan, but a hidden sample or scrap prepared like the project provides more relevant information about appearance and absorption.
-
Adjust the equipment before adding more reducer. Set fluid delivery, airflow or pressure, and fan pattern according to the manual. Confirm that the nozzle is suitable and the fluid path is clean.
-
Scale by measurement. Once the trial works, multiply both paint and reducer volumes by the same factor. Record the tip and settings with the recipe.
For example, if 500 ml of paint performs well with 25 ml of reducer, scaling to 2 litres multiplies both quantities by four: 2,000 ml of paint and 100 ml of reducer.
Use the coat system stated by the coating manufacturer rather than over-thinning in an attempt to obtain one-coat coverage. Commercial spray guidance similarly recommends measured small batches, test application, and multiple controlled coats rather than treating extra reducer as the cure for every finish problem.
Troubleshoot the spray pattern before adding more thinner
A spray defect is a symptom, not a viscosity measurement. Thick material may contribute to sputtering or poor atomization, but the same symptom can arise from a blocked tip, debris, insufficient airflow, an unsuitable nozzle, or an incorrect setting.
| Symptom | Possible viscosity-related cause | Other possible causes | Next controlled test |
|---|---|---|---|
| Sputtering or spitting | Material may be too viscous | Air entering the fluid path, low material level, debris, loose connection, blocked vent or tip | Check assembly and the fluid path before reducing |
| Repeated clogging | Paint may be too thick | Unstrained paint, dried material, dirty filter, unsuitable tip | Clean and strain; verify the tip |
| Large droplets | Viscosity may exceed equipment capacity | Insufficient airflow or pressure, wrong nozzle or air cap, excessive fluid delivery | Adjust settings within the manual and compare the pattern |
| Uneven atomization | Material may be too viscous | Partially blocked tip, damaged component, unsuitable fan setting | Clean and inspect, then repeat the test |
| Orange-peel texture | Viscosity may be too high | Poor atomization, setup, technique, surface condition, or environmental effects | Test viscosity and equipment variables separately |
| Runs, drips, or sagging | Mixture may be over-reduced | Excessive fluid flow, slow movement, or too much overlap | Reduce fluid delivery and correct technique on scrap |
| Weak or transparent coverage | Excessive dilution may contribute | Inadequate passes, unsuitable coating, poor contrast, or incorrect application | Verify the recipe and required coat system |
| No material or intermittent flow | Paint may be too viscous | Blockage, pickup problem, empty cup, closed control, or equipment fault | Inspect the fluid path before adding reducer |
Cosmos Lac’s commercial troubleshooting guide associates overly viscous paint with poor atomization, large droplets, uneven patterns, and orange peel. It also proposes system-specific starting reductions and recognizes that tip size, settings, and technique affect the result. These are diagnostic possibilities rather than proof that viscosity caused a particular defect; see its spray troubleshooting discussion.
When the gun sputters
Stop and inspect simple mechanical causes first:
- Is the cup sufficiently filled and correctly fitted?
- Is the pickup tube submerged and unobstructed?
- Is a vent blocked?
- Are the filter, tip, and fluid passages clean?
- Is the nozzle appropriate for the coating?
- Are airflow or pressure and fluid controls within their intended ranges?
- Was the paint strained after final mixing?
Only after those checks should viscosity be reconsidered. If the specified test shows that the material remains above the equipment target, add a measured amount of approved reducer without exceeding the coating limit.
When paint runs or sags
Runs can indicate excessive reduction, but they may also result from excessive fluid delivery or application technique. Before altering the batch:
- Reduce fluid flow within the equipment instructions.
- Make a faster, controlled test pass.
- Keep movement consistent.
- Avoid dwelling at the beginning or end of a stroke.
- Test whether excessive overlap is depositing too much material.
- Follow the coating’s instructions for applying subsequent coats.
A commercial guide suggests that a slightly over-reduced mixture may sometimes be adjusted by adding measured unthinned paint, mixing, and retesting. This is not a guaranteed rescue. Consider it only if the resulting mixture remains within every documented product limit and can be tested again.
When orange peel appears
Do not assume that more thinner will fix orange peel. Possible contributors include:
- Material viscosity
- Insufficient pressure or airflow
- Excessive fluid delivery
- Incorrect nozzle or air-cap selection
- A dirty or damaged tip
- Surface preparation
- Application technique
- Conditions outside the coating’s stated range
Change one variable at a time and make a new test panel. Simultaneously changing viscosity, pressure, fan width, and movement makes it difficult to identify what improved—or worsened—the pattern.
The stop condition is straightforward: if acceptable atomization cannot be achieved within the coating’s permitted reduction, stop adding reducer. Recheck equipment compatibility, tip selection, equipment condition, and whether the coating is suitable for that sprayer.
Preparation, safe-use boundaries, and cleanup
This article does not establish a complete safety procedure for solvent spraying or high-pressure airless equipment. Requirements vary with the coating, reducer, work area, and sprayer. Follow the coating label, applicable safety documentation, and exact equipment manual for protective equipment, ventilation, handling, operation, shutdown, and cleanup.
At a general level:
- Use the protective equipment required by the product and sprayer documentation.
- Ventilate the work area as directed by those documents.
- Prepare the surface and surrounding work area before spraying.
- Assemble and inspect the equipment according to its manual.
- Recognize that high-pressure airless equipment can be hazardous if mishandled.
An airless-equipment manufacturer’s overview similarly emphasizes preparation, correct assembly, protective equipment, ventilation, and cleaning nozzles and filters. Its airless preparation and safety overview is only general guidance and does not replace the safety instructions for the exact machine.
Do not select a respirator from a generic paint category, invent a ventilation rate, improvise an ignition-control procedure, or rely on this article for an airless pressure-relief sequence or injection-injury response. Those matters require authoritative instructions applicable to the product, equipment, and working conditions.
Follow the coating’s specified application range rather than applying a universal temperature- or humidity-based thinning correction.
For cleanup, the coating and sprayer instructions remain controlling. Water is commonly identified for cleaning after compatible latex or acrylic paint, while mineral spirits may be identified for compatible oil-based paint. These are broad pairings, not permission to flush any substance through any machine; a handheld-sprayer guide presents them as general preparation and cleanup guidance.
After use:
- Follow the shutdown procedure in the sprayer manual.
- Handle remaining material as directed by the coating instructions.
- Flush the equipment only with an approved cleaning material.
- Clean the nozzle, filter, cup, pickup path, and other specified components.
- Inspect the equipment for remaining coating before storage.
- Follow applicable product instructions for cleaning liquid and coating residue.
Thinning may affect coverage, sheen, film build, curing, durability, recoat time, compliance, or warranty. A generic ratio cannot predict those effects for a particular product.
Frequently asked questions
What is the best paint-to-thinner ratio for a spray gun?
There is no single best ratio for every paint and spray gun. The correct amount can range from no reduction to a product-specific measured addition, depending on:
- Whether the coating permits spraying and thinning
- The approved reducer
- The maximum reduction
- The spray system
- Tip or nozzle size
- Equipment capacity
- The specified viscosity target
- Application conditions
Commercial starting ranges vary substantially even for broadly similar materials. Treat them as context, not specifications. Follow the coating and sprayer documentation, test unthinned when permitted, and make small measured adjustments to a separate batch.
Can I use water to thin every water-based paint for spraying?
No. Water is commonly specified for compatible latex, acrylic, and emulsion paints, but “water-based” does not automatically mean that the coating may be thinned—or sprayed.
Check whether the exact product permits water, how much may be added, and whether spray application is approved. Do not exceed the documented limit or substitute a visual consistency test for a manufacturer-specified procedure.
Does paint need thinning for an airless sprayer?
Sometimes, but not always. Many airless systems can handle thicker coatings with minimal or no reduction, especially when fitted with a suitable approved tip. Other coating-and-equipment combinations may require limited reduction.
Check the coating’s airless instructions, recommended tip, and pressure range. Test unthinned if permitted. If atomization is poor, inspect the tip, filter, fluid path, pressure, and spray settings before adding reducer. Never continue thinning past the coating’s maximum to force an incompatible setup to work.
Can I use a #4 Ford-cup time with the viscosity cup supplied with my sprayer?
Only if the documentation explicitly identifies the supplied cup as a #4 Ford cup and gives an applicable target for it. Otherwise, no.
Flow time depends on the cup design, orifice, procedure, and test conditions. A #4 Ford-cup target cannot be transferred to a proprietary cup merely because both tests are timed in seconds. Use the cup and target named by the sprayer or coating manufacturer.
What should I do if the thinned paint runs or the gun still sputters?
For runs, first reduce excessive fluid delivery and check movement, overlap, and technique on scrap. Confirm that the cumulative reduction has not exceeded the documented limit. If considering the addition of unthinned paint to a test batch, verify that the corrected mixture will remain within all product instructions and retest it thoroughly.
For sputtering, inspect the material level, pickup path, vent, filter, nozzle, tip, connections, airflow or pressure, and fluid settings. Strain the final mixture and repeat the test. Add more reducer only if the specified viscosity test and equipment checks justify it.
The repeatable rule
Verify that the coating can be sprayed, use only its approved reducer, test unthinned when permitted, and adjust a measured test batch instead of chasing a generic ratio.
A successful test combines suitable viscosity with the correct tip, a clean fluid path, appropriate settings, and an even pattern. If that cannot be achieved within the manufacturer’s dilution limit, change the setup or coating rather than continuing to thin.