 MortarDesk
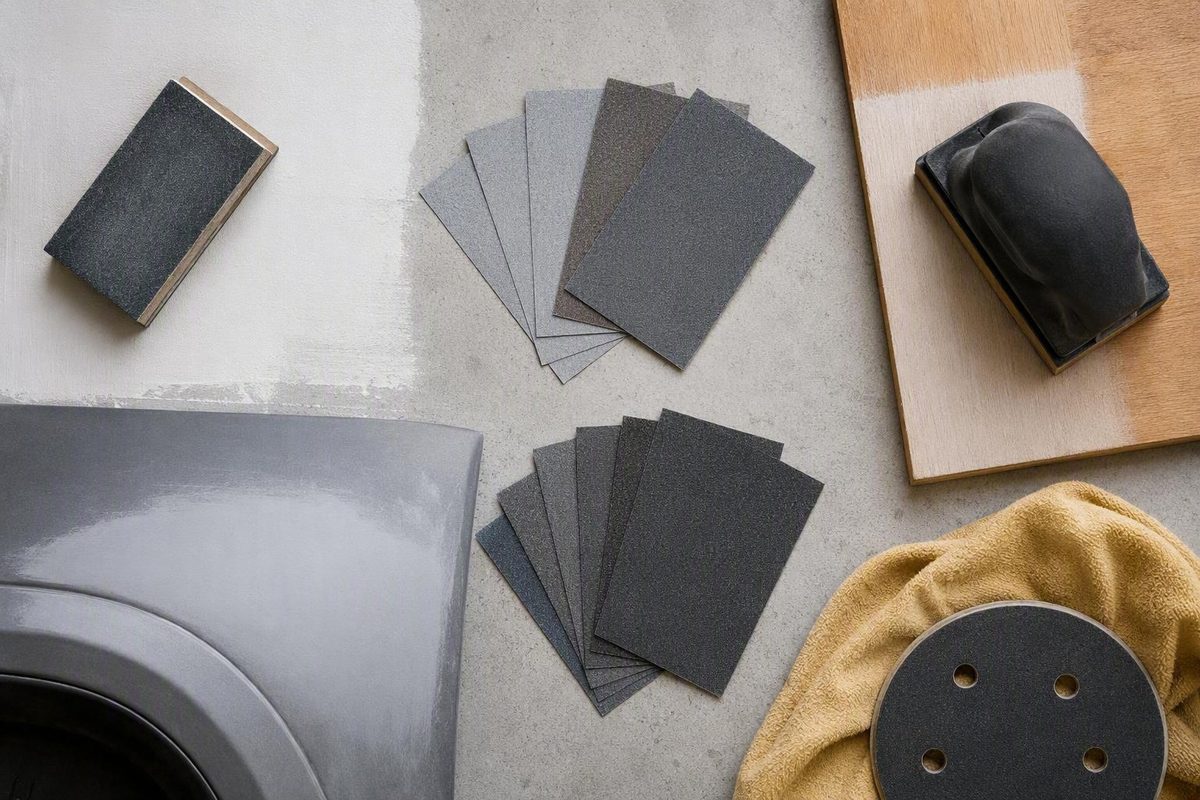
There is no single sandpaper grit for primer. For dried household wall, ceiling, trim, or wood primer, about 220 grit is a supported starting point for light smoothing.12 In automotive refinishing, 320–400 grit commonly describes final preparation before primer, while 400–600 grit is forum-based practitioner guidance for cured 2K primer before paint or sealer.34 The current label or technical data sheet for the specific primer and next coating overrides every generic range.
Related: Painting Hardie Board Siding: Prep, Primer & Paint Guide.
Quick answer: choose the grit by surface and next coat
| Substrate and current layer | Next layer | Typical grit | Key limitation |
|---|---|---|---|
| Dried wall, ceiling, or trim primer | Household finish paint | About 2201 | Smooth lightly; do not strip the primer |
| Primed wood with raised grain | Household finish paint | About 2202 | A starting point, not a requirement if already smooth |
| Automotive filler or existing finish, fully refined | Automotive primer | 320–4003 | Pre-primer range after coarse scratches are removed |
| Cured automotive 2K primer | More primer | About 150–1804 | Practitioner blocking practice, not a paint-ready finish |
| Cured automotive 2K primer | Sealer or paint | Commonly 400–6004 | Practitioner guidance; the coating data sheets control |
| Automotive surface at final paint-prep stage | Paint | Supplier guidance includes 600–8005 | The source does not establish one universal primer specification |
For household work, the practical buying number is usually 220 grit: use it gently on dried primer to remove roller lint, brush marks, rough fibers, or raised grain without exposing the material below.12
Automotive work cannot be reduced to one number. Manufacturer guidance places 320–400 grit at the final preparation stage before primer, after coarser filler and featheredge scratches have been removed.3 For sanding cured 2K primer, the often-quoted 400–600 grit range comes from practitioner discussions rather than a technical sheet for a named coating system.4 One abrasive supplier recommends 600–800 grit for final sanding before paint, which illustrates the variation rather than establishing a universal rule.5
Buying rule: identify the substrate, current layer, next layer, sanding method, and grit standard first. Then check the current instructions for both the primer and the coating that will cover it.
First identify which primer operation you mean
“Sandpaper for primer” can describe three different operations:
- Preparing bare material, existing paint, or filler before primer
- Leveling cured primer before another primer coat
- Smoothing cured primer before sealer or finish paint
These operations do not use the same grit. Lower numbers indicate coarser abrasives that remove material more aggressively. Higher numbers cut more finely and leave a smaller scratch pattern. In automotive work, 80–180 grit generally belongs to filler shaping, paint removal, or early leveling rather than routine final preparation immediately before paint.3
The frequently quoted automotive 320–400 grit range normally concerns surface preparation before spraying primer.3 It is not a universal recommendation for sanding cured primer, and it should not be transferred to walls, wood, masonry, fiberglass, or plastic.
A grit sequence is progressive. Each abrasive should remove the scratch pattern left by the preceding one. Merely touching a panel with the final grit does not erase deeper scratches that remain from an earlier step.
Read the abrasive label as carefully as the number. FEPA P-grade and CAMI numbers should not be assumed to be directly interchangeable. Abrasive material and wet-versus-dry use can also change the scratch produced by the nominal grit.4 Before buying paper, identify:
- The substrate
- The primer type or chemistry
- The coating that comes next
- Whether sanding will be by hand or machine
- Whether the primer permits wet or dry sanding
- Whether the abrasive uses a P-grade or another grading system
Walls, trim, and primed wood: start around 220 grit
For an ordinary household primer, use this sequence:
- Let the primer dry for the period stated on its label.
- Sand lightly with approximately 220 grit.1
- Inspect the surface by touch and under angled light.
- Remove sanding dust by the method specified for the coating.
- If a damp cloth is permitted and used, let the surface dry completely.
- Apply the finish coat.
The aim is to knock down roller lint, brush marks, isolated rough spots, raised drywall fibers, or raised wood grain. It is not to remove the primer or expose drywall paper, bare wood, or an underlying coating. If the layer beneath the primer is older or its composition is unknown, do not continue sanding into it.
Use a sanding pole on broad walls and ceilings. A flexible foam sanding pad is easier to control on trim, curves, molded profiles, and edges.1 Keep pressure especially light at corners and raised details, where the primer film is easiest to cut through.
Primed wood does not automatically require sanding. If the surface already looks and feels acceptable, and the coating instructions do not require abrasion, additional sanding may provide no useful correction. When moisture has raised the grain or application defects remain, start around 220 grit and stop when the surface is smooth but the primer remains intact.2
Finer sanding on wood is product- and finish-specific. Some wood-finishing guidance mentions progressing beyond 220 grit in selected cases, but that does not make 600 grit a general requirement.2 Excessive refinement can also conflict with the topcoat maker’s required preparation, so use the primer and finish-paint instructions as the final specification.
Automotive preparation before primer: refine to 320–400 grit
For automotive refinishing only, a typical progression by purpose is:
- About 80–180 grit: shape filler or perform early leveling.
- About 220–240 grit: refine filler and featheredged areas.
- About 320–400 grit: complete final preparation before primer when the primer technical sheet permits it.3
This is an example progression, not a prescription for every metal, filler, existing finish, or primer. It does not establish grit requirements for drywall, wood, masonry, fiberglass, or plastic.
Deep scratches from 80- or 180-grit abrasives should be removed rather than buried under primer. As the coating settles, unresolved scratches may remain visible. Manufacturer guidance therefore calls for progressive refinement and notes that some primer technical sheets require preparation no coarser than 320 or 400 grit.3
Completion means that the preceding scratch pattern has been removed consistently across the repair. It does not mean that the operator has simply used a 320- or 400-grit disc somewhere on the panel.
Guide coat provides a practical quality check. Apply it before sanding and again when changing grits. Powder remaining in scratches, pinholes, or low areas shows where more work is needed. A manufacturer demonstration shows guide coat being used through coarse-to-fine automotive sequences to reveal scratches that might otherwise be missed.6 That demonstration concerns professional collision repair, not household painting.
Automotive primer before another coat, sealer, or paint
Choose the abrasive according to what will cover the cured primer.
If another primer coat will follow: Automotive practitioners may block 2K primer at approximately 150–180 grit to straighten the panel before applying more primer.4 This is coarse leveling practice based on user experience, not a universal coating specification. The following primer coat is expected to cover the resulting scratch pattern, so this is not a paint-ready endpoint.
If sealer or paint will follow: 400–600 grit is a common range reported by automotive refinishers for cured 2K primer.4 Reported methods include starting at 400 and finishing at 600, with some contributors preferring a finer and more uniform scratch under silver. Because this evidence comes from practitioner discussion rather than a named primer’s technical data sheet, it should be treated as secondary guidance.
Supplier guidance differs. National Abrasives gives 600–800 grit for final automotive sanding before paint.5 That wider variation is why the complete system matters: primer, optional sealer, basecoat, color, abrasive type, grading standard, and sanding method. Metallic or silver finishes may require a finer, more consistent scratch profile, but the evidence does not support one finish grit for every paint system.
Treat wet-versus-dry sanding as product-specific. Do not assume that one method is always better, and do not wet-sand unless the primer documentation permits it. Abrasives carrying the same nominal number can leave different scratches depending on their material, grading system, condition, and whether they are used wet or dry.4
Do not confuse 800–1000 grit blend-panel preparation with routine sanding of primer. Blend preparation normally concerns an existing painted surface beside a repair and is a separate automotive operation.3
Prevent pigtails, deep scratches, and sand-throughs
| Defect | Likely issue | Corrective action |
|---|---|---|
| Residual coarse scratches | Grits skipped or refinement incomplete | Return to the necessary intermediate grit |
| Pigtails | Loaded paper, excess pressure, or inconsistent technique | Replace the abrasive, clean the surface, and use even pressure |
| Clogged paper | Dust or coating has loaded the abrasive | Stop and replace it rather than pressing harder |
| Raised grain | Wood fibers lifted after priming | Smooth lightly around 220 grit without stripping primer2 |
| Low spots | The block bridges over a recessed area | Use guide coat and continue controlled leveling |
| Exposed substrate | Edge cut-through or excessive sanding | Stop and follow the coating system’s repair instructions |
In automotive machine sanding, loaded or worn abrasives, incorrect grit selection, excessive or uneven pressure, and inconsistent patterns can produce spiral-shaped pigtails.3 Remove dust often enough to inspect the scratch profile. Replace clogged paper instead of forcing it to cut, because additional pressure can deepen defects rather than correct them.
Use a firm block for controlled leveling on broad, flat areas. Use flexible abrasives and light pressure around trim profiles, edges, curves, automotive body lines, and arches. During automotive blocking, guide coat can expose residual scratches, pinholes, high areas, and low areas before another coating hides them.6
If sanding exposes wood, drywall paper, metal, filler, or plastic, stop. Do not continue thinning the surrounding primer. Consult the coating system’s current instructions for repairing the sand-through, restoring any required substrate protection, and re-priming the affected area.
Sanding also requires suitable personal protection. Manufacturer training specifies safety glasses, protective gloves, a particulate respirator, and hearing protection for the demonstrated professional automotive sanding process.6 Select protection appropriate to the material and equipment being used, and use dust extraction where the sanding system calls for it.
Pre-paint checklist
Before applying the next coating, confirm the following:
- Cure: The primer has dried or cured for the period stated on its current label or technical data sheet. There is no universal waiting time.
- Scratch removal: Roughness and the preceding grit’s scratches are gone without widespread removal of the primer film.
- Compatibility: The final grit and wet-or-dry method are permitted by both the primer and the coating that comes next.
- Cleanliness: Sanding dust has been removed by the coating maker’s specified method. Any damp-cleaned household surface is completely dry.
- Abrasive condition: The paper or disc is clean, cutting consistently, and not producing pigtails or isolated deep scratches.
- Protection: Suitable eye and respiratory protection is in use, with gloves and hearing protection added where the material or powered equipment warrants them.6
- Application scope: Masonry, fiberglass, plastic, and specialty primers require product-specific documentation; these general ranges do not establish specifications for them.
Choose sandpaper by the substrate and the layer that comes next, not by the word primer alone. For light smoothing of dried household or wood primer, start around 220 grit.12 Treat automotive numbers as stage-specific: 320–400 grit commonly applies before primer, while cured-primer recommendations vary with the next coating and system.34 Before buying, verify the final choice against the current technical data sheets for both coatings.