 MortarDesk
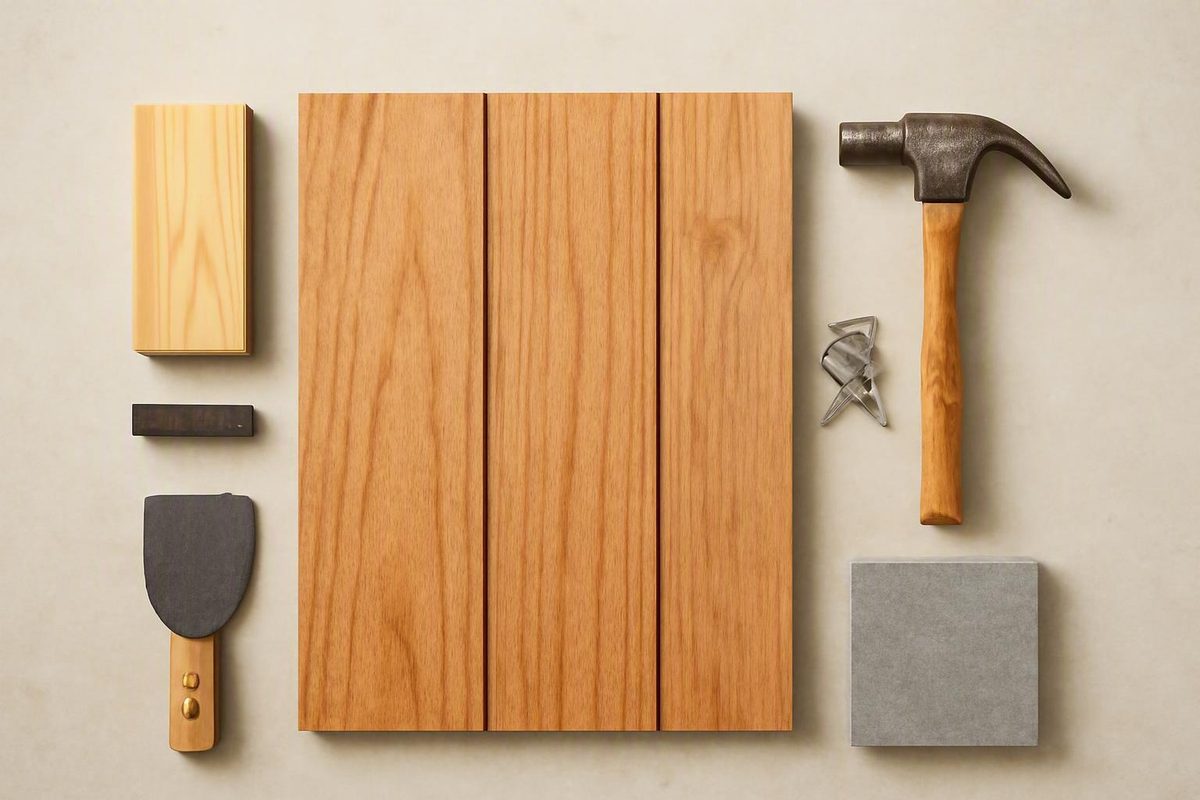
T1-11 can provide economical wall coverage with a rustic, vertically grooved wood appearance. But “T1-11” is not a complete product specification. Two panels sold under that name may differ in construction, thickness, actual dimensions, groove pattern, edge profile, treatment, exposure classification, structural rating, finishing requirements, and warranty.
That distinction matters whether you are siding a house, building a shed, or matching a damaged panel. The right choice depends not only on sheet price but also on how the selected panel fits into a wall assembly that manages water, accommodates openings, and can be maintained over time.
What T1-11 siding is—and what the name does not tell you
“T111 siding” is a common spelling and search variant of T1-11 siding. In ordinary building-material use, both terms refer to grooved wood-panel siding commonly offered in plywood or oriented strand board (OSB) forms. The panels are generally installed vertically, with grooves that suggest individual vertical boards or a board-and-batten-like wall. The exact groove pattern is not universal.
Plywood and OSB describe different panel constructions. Plywood is assembled from bonded wood veneers, while OSB is made from compressed wood strands bonded with adhesives. Either construction may receive a textured, grooved face and be marketed as T1-11. Contractor and retailer descriptions commonly identify 4-by-8-foot sheets, although that format is not exclusive.
A 4-by-8-foot sheet is therefore a useful starting point for preliminary estimates, not a guaranteed product dimension. Thicknesses vary, actual widths and lengths may differ from title-listed dimensions, and groove spacing is product-specific. Some panels have shiplapped long edges; others may use different edge profiles.
Most importantly, the name T1-11 does not establish that a panel is:
- Pressure treated
- Rated for every form of exterior exposure
- Structurally rated for the proposed wall
- Approved for direct attachment to framing
- Compatible with a particular paint, stain, or sealant
- Suitable for ground, soil, plant, food, or animal contact
- Covered by a particular warranty
- Approved to replace separate structural sheathing
- Approved to replace a water-resistive barrier or other water-control layer
Treat T1-11 as a product family or appearance category, not as a complete design instruction. The grade stamp, technical data, installation instructions, treatment information, and warranty for the selected panel must answer the remaining questions.
This article is a product-identification and material-selection reference. It does not provide a project-specific fastening schedule, structural design, flashing sequence, or code determination. Specifications change, codes vary by locality and edition, and structural work should be checked against the selected products’ instructions and local requirements. Mortar Desk explains these limits for its building-material references.
How to read a T1-11 panel specification
Do not order from the words “T1-11 siding” alone. Compare products line by line, using current manufacturer literature where available rather than relying only on an abbreviated shelf label.
A useful buyer’s checklist includes:
- Panel construction: plywood or OSB
- Wood species: where identified
- Treatment: untreated, pressure treated, or another documented treatment
- Nominal thickness: the trade or category dimension
- Actual thickness: the measurement relevant to joints, trim, and flashing
- Actual width and length: especially important for replacement work
- Groove spacing: usually stated on center
- Face texture: smooth, rough-sawn, woodgrain, or another profile
- Edge profile: square, rabbeted, shiplapped, or otherwise formed
- Exposure classification: the conditions for which the product is rated
- Structural rating: if the panel is intended to perform as wall sheathing
- Fastening instructions: approved fastener type, spacing, edge distance, and corrosion resistance
- Finish requirements: preparation, compatible coating, edge treatment, and recoating conditions
- Installation clearances: including required separation from soil, roofs, decks, masonry, or other surfaces
- Warranty: duration, exclusions, maintenance obligations, and recordkeeping requirements
A Home Depot Plytanium example shows why the full specification matters. The panel is nominally listed as 19/32 inch by 4 feet by 8 feet, but its stated actual dimensions are 0.563 inch by 48 inches by 96 inches. Its grooves are spaced 8 inches on center (Home Depot’s Plytanium T1-11 listing).
A Lowe’s listing demonstrates a different discrepancy. Its title states 0.594 by 48 by 96 inches, while the product overview reports actual measurements of 0.578 by 47.874 by 95.866 inches. The same panel is described as Southern Yellow Pine plywood with a rough-sawn face, an 8-inch groove pattern, and shiplapped edges (Lowe’s Plytanium panel specifications).
These differences may look minor until a replacement panel must fit beneath existing trim, align with an adjacent sheet, or sit correctly within an existing flashing profile. Actual thickness affects the relationship between the siding face, trim, and flashing. Actual width affects seam placement. Actual length affects clearances and horizontal-joint locations. Groove position matters at corners, openings, and transitions between old and new work.
This nominal-versus-actual distinction occurs throughout building materials. When fit is critical, measure the available panel or verify a current technical sheet rather than calculating from the product name alone; the same principle is explained in this guide to nominal and actual building-material dimensions.
Groove spacing also varies. One treated retail example has a 4-inch groove pattern, while the two plywood listings above use 8-inch grooves. A separate retailer lists a 5/8-inch, 4-by-8-foot panel with grooves 12 inches on center, although its displayed price is ambiguous and should not be used for estimating (12-inch-on-center T1-11 listing).
Closer grooves produce a busier vertical rhythm; wider spacing creates broader apparent boards. Groove spacing affects appearance, cut planning, and alignment around openings. It does not by itself establish strength, durability, or moisture resistance.
Shiplapped edges can help neighboring panels align and form an orderly joint. They do not make a wall waterproof. Water performance still depends on the complete, documented assembly, including edge preparation, joint design, flashing, trim, coating, and any required water-control layers.
For repair work, measure the existing material at an accessible edge and confirm the groove-to-groove layout. If matching is important, inspect the replacement panel before purchase or obtain its current technical documentation. Do not assume every store’s T1-11 is interchangeable.
Plywood, OSB, treated, and exterior-rated panels are not interchangeable
The first major distinction is panel construction. Plywood T1-11 uses bonded wood veneers, while OSB T1-11 uses oriented wood strands and adhesive. Both are wood-based products, and neither name eliminates the need for appropriate water management and finishing.
Commercial contractor and seller articles commonly portray plywood T1-11 as more tolerant of incidental moisture and swelling than OSB. They also tend to position OSB as the less expensive option. The available evidence, however, does not include controlled, like-for-like testing across equivalent thicknesses, grades, coatings, exposures, and installations. A shed seller’s comparison, for example, favors plywood for moisture performance but is commercial guidance rather than an independent test program (commercial plywood and OSB comparison).
“Plywood is better” is therefore too broad to serve as a purchasing rule. Compare specific products by thickness, grade, edge construction, exposure classification, structural rating, required finish, price, availability, and installation requirements. Local prices should be checked for equivalent specifications before concluding that OSB will cost less for the completed wall.
Three questions are particularly easy to confuse:
-
Is the panel classified for the intended exterior exposure? An exposure classification concerns suitability for stated exposure conditions. It does not automatically mean the panel may be left unfinished or installed without required flashing and water-control components.
-
Is the panel pressure treated? Treatment is a separate product attribute. An exterior-rated panel is not automatically pressure treated. A treated panel may also have product-specific requirements for coating, cutting, fasteners, and permitted uses.
-
Is the panel structurally rated for the proposed wall? A siding panel is not automatically approved to replace structural sheathing.
A retail product titled “100-T1-11 Treated” illustrates why treatment must be identified separately. The listing describes a rough-sawn Southern Pine appearance, 4-inch grooves, shiplapped long edges, exterior applications, and a captured price of $45 per panel. It does not state the treatment chemistry, panel thickness, installation requirements, or approved contact categories, and its price is seller- and time-specific (treated T1-11 product listing).
Do not infer from advertising for planters, dog houses, barns, or similar projects that a panel is approved for every soil-, food-, plant-, or animal-contact application. Instead, ask the manufacturer or treatment supplier to confirm:
- The treatment used
- Permitted applications and exposure categories
- Whether barriers are required
- How field-cut edges must be handled
- Which fasteners and connectors are compatible
- Whether coating is required
- Which uses are excluded from warranty coverage
The documentation standard should rise with the consequences of failure. For a basic utility shed, the principal priorities may be weather protection, security, appearance, and economical coverage. For an occupied house, confirm the product’s structural role, integration with the intended water-control system, treatment of openings and penetrations, fastening, finishing, and local approval. A familiar product name is not sufficient documentation for a residential wall assembly.
Where T1-11 fits: practical advantages and tradeoffs
T1-11 is commonly advertised for sheds, utility buildings, barns, workshops, cabins, garages, remodeling projects, and some homes. Its appeal comes from combining a wood-panel appearance with relatively large sheets.
Large panels can cover substantial wall area without installing many individual siding boards. Vertical grooves create a rustic woodgrain effect, and rough-sawn faces can suit agricultural buildings, cabins, garages, and traditional sheds. Depending on the product and its finishing instructions, the face may be painted for an opaque finish or stained to preserve more visible wood character.
Groove layout provides another appearance choice:
- 4-inch spacing creates relatively narrow apparent boards.
- 8-inch spacing produces a moderate vertical rhythm.
- 12-inch spacing creates broader visual divisions.
These patterns can change how a building’s proportions appear and where grooves fall around doors, windows, corners, and repairs. They do not change the need to protect edges or manage water.
Affordability is frequently cited as an advantage, but sheet price alone cannot establish that T1-11 is the least expensive completed option. Delivery, waste, trim, flashing, water-control layers, coating, access equipment, labor, and future refinishing can materially affect the comparison. On a simple rectangular outbuilding, the large-panel format may reduce installation time; on a wall with many openings and transitions, detailing and waste may offset that advantage.
The principal tradeoffs are practical:
- Exposed or inadequately protected wood edges can be vulnerable to moisture.
- Coatings must be inspected and renewed as their condition requires.
- Openings and horizontal joints need documented water-management details.
- Roof runoff and splashback can concentrate water at lower walls.
- Replacement work may require matching an older thickness, edge profile, or groove pattern.
- A panel serving several wall functions provides less redundancy if a detail fails.
Some T1-11 products may be accepted as both siding and structural sheathing in specific wall designs. That possibility must be verified from the selected product’s grade stamp, structural documentation, framing requirements, fastening schedule, bracing design, and local approval. Do not omit separate sheathing merely because another T1-11 product can perform a structural role.
It is more accurate to treat performance as the result of interacting factors than to call T1-11 either inherently durable or inherently defective. Panel construction, exposure, roof protection, water management, workmanship, coating condition, openings, climate, and maintenance can all influence the result. A low shed protected by broad eaves presents a different exposure from a tall wall with multiple windows and wind-driven rain.
Why moisture is the central performance concern
T1-11 is wood-based, so moisture management is central to its performance. Water may reach the material through a failed coating, exposed end grain, an unprotected cut, a defective joint, or an inadequately integrated opening. If the assembly does not exclude, redirect, or drain that water, panel edges can absorb moisture and change dimension.
Reported warning signs include:
- Peeling, blistering, or otherwise failed finish
- Dark staining or persistent discoloration
- Swollen panel bottoms or cut edges
- Warping or buckling
- Softness under gentle probing
- Separation or delamination within plywood
- Mold-like surface growth
- Decayed or missing wood
- Recurring interior staining
Contractor accounts identify swelling, delamination, warping, coating failure, mold, and rot as moisture-associated symptoms. These reports are useful for recognizing possible damage but do not establish how often each problem occurs across all T1-11 installations (discussion of exposed edges and deterioration).
Pay particular attention to predictable exposure points:
- Panel bottoms
- Freshly cut edges
- Horizontal joints between stacked panels
- Window and door heads, jambs, and sills
- Corners and trim transitions
- Fastener and utility penetrations
- Walls below roof valleys or concentrated runoff
- Areas near soil, paving, decks, or hard splash surfaces
- Locations affected by gutter overflow or downspout discharge
Not every coating defect requires panel replacement.
Recurring lower-wall damage is especially useful diagnostically. Replacing the visible strip without investigating runoff, splashback, clearance, flashing, or drainage may reproduce the same failure. The damaged panel may be the consequence of a water-management problem rather than its original source.
There is no well-supported universal lifespan for T1-11. One commercial cost guide gives an average estimate of 15–20 years, while a contractor article suggests 20–30 years; neither provides the controlled durability evidence needed to turn those ranges into a promise for a particular wall (HomeAdvisor’s T1-11 cost and lifespan guide).
Seek qualified assessment when deterioration may extend behind the siding. Widespread softness, persistent interior moisture, movement around openings, or repeated leakage warrants more investigation than a surface repaint.
Water-management principles for joints, edges, and openings
The high-level objective of exterior wall water management is to limit bulk-water entry and provide a route for incidental water to return to the exterior. The exact materials and installation sequence must come from a documented, compatible assembly—not from a generic T1-11 rule.
A water-resistive barrier, drainage plane, or another approved water-control layer may be part of that assembly. Flashing at joints, openings, and transitions must be compatible with the selected siding, barrier, window or door, sealant, coating, trim, and fasteners.
Horizontal versus vertical joints
A horizontal joint occurs when one panel is stacked above another, often because the wall is taller than the available sheet. Z-flashing is commonly discussed for this condition because its profile can direct water over the face of the lower panel.
One commercial construction article quotes Section 1405.4 of the 2015 International Building Code as saying that flashing must prevent moisture from entering the wall or redirect it to the exterior. That is the article’s report of a general code principle, not verification that one profile, gap, overlap, or fastening method applies to every T1-11 installation. The adopted code edition, local amendments, product instructions, and approved assembly should control (horizontal plywood-siding Z-flashing discussion).
A vertical seam between adjacent shiplapped or rabbeted panels is a different condition. Do not automatically apply horizontal-joint advice to a vertical seam. Whether a vertical joint receives edge coating, sealant, backing, or another treatment depends on the panel manufacturer’s detail and the rest of the wall assembly.
Contractor articles sometimes publish exact drainage gaps, flashing thicknesses, overlaps, and fastener spacing. Those figures should be treated only as examples for the assemblies those authors describe. They are not universal T1-11 specifications.
Protect edges without blocking intended drainage
Fresh cuts expose new wood surfaces. Bottom edges and horizontal cuts can be especially consequential because they may receive runoff or splashback. Follow the selected panel and coating instructions for preparation, drying conditions, compatible products, and required coverage.
Generic caulking rules are unreliable. Sealant may be specified at a concealed lap, trim interface, penetration, or flashing overlap. An opening intentionally designed to drain, however, may need to remain unobstructed. Indiscriminate face caulking can interfere with drainage or redirect water into another part of the assembly.
The correct question is not “Should every seam be caulked?” It is “What function does this joint perform, and what does the approved detail require?”
Treat windows and doors as assembly-specific details
Face caulk around trim should not be assumed to provide a complete window or door water-management system. Opening details may involve sill, jamb, and head components integrated with the wall’s water-control layer, but the exact sequence and compatible materials depend on the selected window, siding, barrier, flashing, and sealant instructions.
This becomes particularly consequential when T1-11 is expected to serve simultaneously as siding, sheathing, and the principal water-control layer. A building-science discussion presents several possible approaches and illustrates why openings are harder to resolve when one panel performs several functions, but it is a community discussion rather than an approved installation manual (Green Building Advisor discussion of T1-11 window flashing).
Before approving an opening detail, obtain current instructions for:
- The T1-11 panel
- The water-resistive barrier or other water-control layer
- The window or door
- Flashing tapes, pans, membranes, and metal components
- Sealants
- Coatings
- Trim
- Fasteners
If those instructions conflict or do not describe the proposed combination, ask the manufacturers and local building authority for an approved resolution rather than improvising from a general article.
Maintenance planning without relying on a universal calendar
T1-11 maintenance should be based on condition and coordinated with the panel and coating manufacturers’ requirements. A fixed calendar cannot account for panel construction, coating chemistry, preparation, climate, sun exposure, wall orientation, color, roof protection, or local moisture conditions.
Commercial articles sometimes recommend refinishing stained T1-11 every three to five years. That range is a generalized estimate, not a requirement for every panel or finish, and the same commercial material gives different intervals for painted products (commercial T1-11 maintenance comparison).
Inspect the building regularly and after unusual storms, gutter failures, or changes to grading and landscaping. Check for:
- Peeling, blistering, chalking, or checking finish
- Bare or exposed wood
- Open cuts or damaged edges
- Failed sealant where sealant is specified
- Staining below windows, trim, or flashing
- Swollen, soft, distorted, or delaminated areas
- Rusting fasteners or metal flashing
- Loose trim and open penetrations
- Debris obstructing intended drainage
- Soil, mulch, vegetation, or stored materials crowding the wall
- Concentrated runoff or persistent splashback
- Interior staining or musty conditions near exterior walls
End grain and freshly cut edges deserve attention because they expose pathways into the wood structure. Do not choose a primer, stain, paint, or preservative solely from generic advice. Confirm compatibility with the selected plywood, OSB, or treated panel and check whether the product warranty imposes preparation or maintenance conditions.
Preparation matters as much as the coating. The substrate should satisfy the coating manufacturer’s requirements for cleanliness, soundness, and moisture condition.
Keep records of products used, preparation, dates, photographs, and repairs. A long warranty should not be interpreted as a prediction of service life; coverage can depend on installation, finishing, maintenance, exclusions, and documentation.
Quantity and cost: estimate the whole assembly, not just the sheets
A nominal 4-by-8-foot panel represents 32 square feet before cuts, openings, layout constraints, and waste. That figure follows directly from the listed dimensions, but final quantities should be based on the selected product’s actual size and the planned wall layout.
Use this worksheet sequence:
-
Calculate gross wall area. Multiply length by height for each wall section and total the results.
-
Handle openings cautiously. Subtract large windows and doors, but remember that offcuts may be unusable when groove alignment or edge profiles matter.
-
Map panel orientation and seams. Draw panel widths, corners, openings, horizontal joints, and groove positions. Determine whether full-height panels can be used.
-
Account for cuts and damaged pieces. Include corner cuts, opening cutouts, unusable offcuts, transport damage, and any panels reserved for future matching repairs.
-
Add project-appropriate waste. Waste depends on wall geometry, actual panel dimensions, groove alignment, workmanship, and the number of openings. One percentage does not suit every project.
-
Verify the selected product. Confirm actual thickness, width, length, edge profile, and groove position before finalizing trim, flashing, and sheet count.
For example, a wall with a gross area of 320 square feet appears to require ten nominal 4-by-8-foot panels before accounting for openings, cuts, seams, actual dimensions, and waste. A wall with many windows may have less net area but create more unusable offcuts than a blank wall of equal size.
A complete budget should separate:
- T1-11 panels
- Delivery and handling
- Sales tax
- Required sheathing, water-resistive barrier, or other wall layers
- Flashing and drip caps
- Corner, opening, and transition trim
- Compatible fasteners
- Specified sealants
- Primer, paint, stain, or another finish system
- Tools and consumables
- Scaffolding, lifts, or other access equipment
- Installation labor
- Removal of existing siding
- Repair of concealed damage
- Disposal and cleanup
- Future inspection and recoating
As a localized example rather than a national benchmark, HomeAdvisor lists $2.50–$7 per square foot for T1-11 siding and a normal project range of $6,500–$10,000 for Ashburn, Virginia. Its descriptions do not consistently make clear whether every figure covers materials, labor, or an installed scope, so local quotes should define inclusions explicitly (HomeAdvisor’s localized T1-11 cost guide).
Panel construction, thickness, treatment, access, wall height, removal, hidden repairs, and local labor rates can all affect cost. Do not use a retailer’s displayed price when the decimal or unit is unclear.
When comparing options, build local carts or request quotes around the same panel specification and project scope. A material-only OSB sheet price cannot be meaningfully compared with an installed plywood project that includes removal, flashing, finishing, and disposal. Contractor proposals should identify whether concealed repairs, access equipment, permits, trim finishing, and cleanup are included.
Choose, maintain, repair, or replace: a practical decision framework
The appropriate path depends on whether you are selecting a new product or evaluating an existing wall.
For a new purchase
T1-11 may be reasonable where you value a wood appearance, large-panel coverage, and a budget-conscious initial material choice—and where recurring inspection and finishing are acceptable.
Before buying, confirm:
- Plywood or OSB construction
- Species, grade, and treatment
- Nominal and actual dimensions
- Groove spacing and face texture
- Edge profile
- Exposure classification
- Structural role, if any
- Required wall layers
- Fastener type and schedule
- Opening and joint details
- Compatible finish system
- Required clearances
- Warranty terms and maintenance obligations
- Current local stock and availability
For an occupied home, require documented details for structural performance, water-control integration, openings, and penetrations. A basic shed may use a simpler assembly, but it still needs a documented route for water to remain outside or return to the exterior.
For maintenance
Maintenance is the likely branch when panels are firm, flat, and dimensionally stable, with localized coating deterioration and no evidence of concealed leakage.
Identify and correct the exposure issue first. Then prepare and refinish the material according to the compatible panel and coating instructions. Do not assume every stain is compatible with an existing coating or that any exterior paint is suitable for every treated or untreated panel.
For investigation or localized repair
Closer investigation is appropriate when you find:
- Localized staining
- Failed or displaced flashing
- Open or damaged cut edges
- Limited softness or delamination
- A leaking penetration
- Repeated coating failure in one location
- Damage concentrated beneath a window or roof transition
Correct the water source before performing cosmetic work. Determine whether the panel can be repaired under applicable product guidance or whether a complete section must be replaced. Matching actual thickness, groove pattern, and edge profile may be as important as matching color.
For replacement or professional assessment
Consider broader replacement or qualified assessment when there is:
- Widespread softness
- Extensive delamination
- Buckling or major distortion
- Significant rot
- Recurring leakage after previous repairs
- Damage around several openings
- Suspected framing deterioration
- Failed or absent water-control components
- Uncertain structural capacity
Cutting or removing siding may encounter concealed framing, fasteners, barriers, wiring, and decay. Community retrofit guidance specifically warns that concealed components and unknown conditions can make cutting hazardous, so the safe scope should be established before removal begins (discussion of concealed risks during T1-11 retrofit work).
Comparing other siding systems
Alternatives commonly mentioned in commercial T1-11 discussions include engineered wood, fiber cement, vinyl, cedar, and redwood. The available evidence does not support a universal ranking for durability, maintenance, or lifecycle cost, so compare actual local products rather than material names alone.
For each candidate, request answers to the same questions:
| Decision category | What to verify |
|---|---|
| Appearance | Profile, texture, joint pattern, available colors, and whether field finishing is required |
| Upfront cost | Materials, accessories, labor, delivery, access equipment, removal, and disposal |
| Moisture management | Required barrier, drainage, flashing, clearances, edge treatment, and compatible sealants |
| Maintenance | Cleaning, inspection, coating, repair, and replacement requirements |
| Installation complexity | Weight, cutting methods, fastening, dust or handling controls, and opening details |
| Repairability | Whether localized pieces can be replaced and whether matching products remain available |
| Lifecycle cost | Expected inspections, coatings, repairs, accessory replacement, and eventual disposal |
| Documentation | Current instructions, evaluation reports, warranty terms, and local acceptance |
Commercial comparisons sometimes portray engineered wood, fiber cement, or vinyl as lower-maintenance choices, but the supplied material does not prove that one system always lasts longer or costs less over its full life. Cedar and redwood should likewise be evaluated as specific products and assemblies rather than assumed to outperform panel siding automatically.
T1-11 may fit a budget-conscious shed, cabin, garage, or house where its wood appearance and panel format are valued and maintenance is acceptable. If reduced coating work, greater assembly redundancy, or easier opening details are priorities, obtain comparable installed proposals for other systems.
Frequently asked questions
Is T111 siding the same as T1-11 siding?
Yes. “T111 siding” is a common spelling and search variant of “T1-11 siding.” In ordinary use, both refer to grooved plywood or OSB panel siding.
The spelling does not identify the panel’s material, thickness, treatment, rating, edge profile, or groove pattern. The exact product specification still needs to be checked.
Is plywood T1-11 better than OSB T1-11?
Not in every respect or for every project. Commercial sources generally describe plywood T1-11 as more moisture tolerant and OSB as the lower-cost option, but the available evidence does not contain a controlled comparison proving that one always performs better.
Compare specific products by grade, thickness, exposure classification, structural rating, edge profile, finish requirements, warranty, local price, and wall design. Water management and installation quality remain important for both.
Can T1-11 serve as both siding and structural sheathing?
Some documented products and wall designs may allow it, but the T1-11 name alone does not establish structural capacity.
Verify the panel’s grade stamp or evaluation documentation, required framing support, fastening schedule, bracing design, exposure conditions, and local approval. Do not omit separate sheathing or a water-resistive barrier unless a documented, approved assembly permits that design.
Does T1-11 need Z-flashing at horizontal joints?
Z-flashing is commonly used where an upper plywood siding panel is stacked above a lower panel because it can redirect water over the joint and toward the exterior.
The exact profile, gap, overlap, fastening, sealant placement, and integration with other water-control components are product- and assembly-specific. A horizontal stacked-panel joint is different from a vertical shiplapped seam, so the same detail should not be applied automatically to both.
How long does T1-11 siding last?
There is no reliable universal lifespan. Published commercial estimates conflict, and personal reports of short or long service do not establish what a particular wall will achieve.
Service life depends on the selected panel, exposure, roof protection, water management, openings, installation, coating, climate, and maintenance. Evaluate an existing wall by its condition—especially firmness, dimensional stability, edge condition, flashing, and evidence of concealed moisture—rather than age alone.
Final pre-purchase check
Purchase T1-11 as a documented panel and wall-system component, not as a generic commodity. Verify the exact construction, actual dimensions, groove pattern, treatment, exposure classification, structural role, edge profile, finish requirements, installation instructions, and warranty. Then price the complete wall assembly rather than the sheets alone.
Specifications, warranties, inventory, and local requirements can change. Where structural use, concealed deterioration, or uncertain water-management details are involved, current manufacturer instructions, locally adopted requirements, and qualified project professionals should control.