 MortarDesk
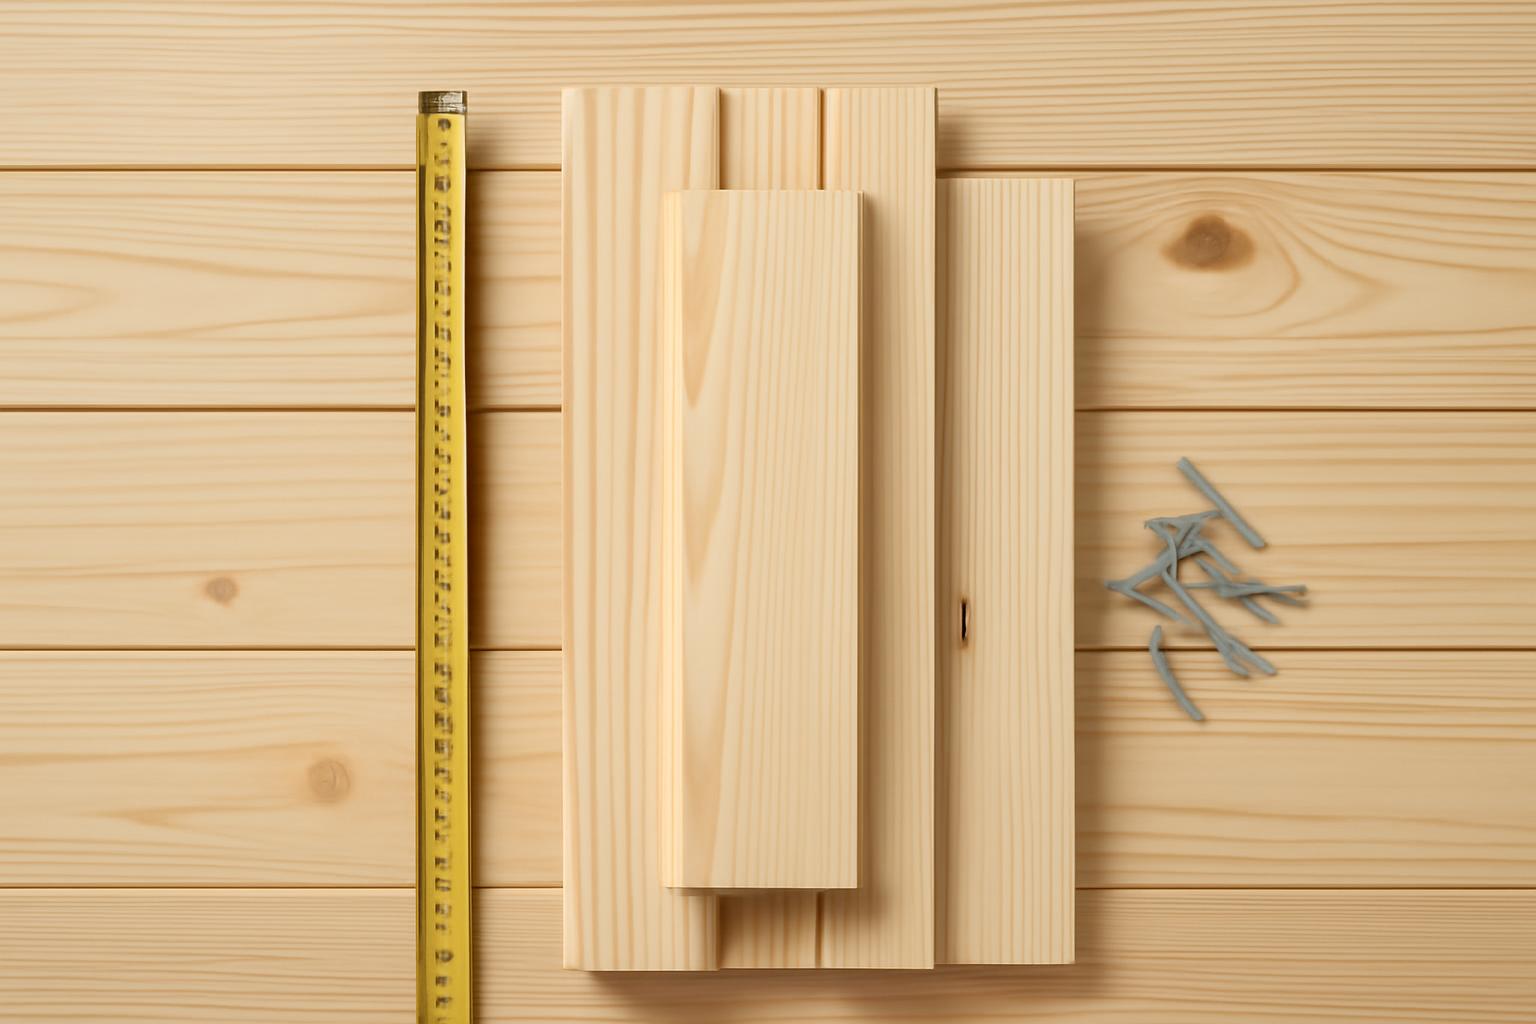
Tongue-and-groove pine can look like a simple board purchase. In practice, the nominal size in a listing may not reveal the board’s actual thickness, installed face width, profile, grade, end treatment, finish, permitted exposure, package quantity, or delivered cost.
Those omissions matter. A low advertised price may also be offset by narrow coverage, rustic-grade sorting, finishing labor, package rounding, or difficult unloading.
Use a specification-first buying sequence:
- Match the exact product to the application.
- Verify the species and grade.
- Obtain actual dimensions and installed face width.
- Confirm the profile and end treatment.
- Calculate coverage from usable face width, not nominal width.
- Normalize every quote to delivered project cost.
- Confirm finish, installation instructions, exposure limits, freight terms, and warranty in writing.
Scope note: Reviewed July 30, 2026. This guide compares documented seller listings and published installation guides. Commercial specifications, prices, stock, and instructions can change. It is a purchasing and planning guide—not a universal fastening specification, building-code determination, or substitute for the selected manufacturer’s current documents.
What tongue-and-groove pine is—and what the label does not tell you
Tongue-and-groove paneling consists of boards with a projecting tongue on one long edge and a corresponding groove on the other. Engaging those edges creates a continuous wall or ceiling surface. The joint can align successive courses and, where the product permits, conceal fasteners driven through the tongue.
That describes side-matched boards. An end-matched product also has mating joints across its short ends, so all four edges are machined. A square-ended product has interlocking long edges but plain short ends.
“Tongue and groove” alone does not disclose:
- Pine species
- Appearance grade
- Actual thickness or overall width
- Installed or stack-face width
- Joint profile
- End treatment
- Available or supplied lengths
- Moisture condition
- Finish system
- Package coverage
- Permitted exposure
- Substrate and fastening requirements
- Whether end joints may fall between framing members
The reviewed marketplace listings include Eastern White Pine, Ponderosa Pine, Radiata Pine, Southern knotty pine, generic pine, and whitewood. One retailer category, for example, separates Eastern White, Ponderosa, and Radiata pine and lists several edge and end options. That shows the range represented by that catalog, not universal availability from every seller (Twin Creeks’ tongue-and-groove collection).
Be especially careful with whitewood. It is a broad retail designation, not a dependable species identification. The reviewed Home Depot listing describes its nominal 1×6 board as “whitewood common softwood” and does not identify it as pine (Home Depot’s whitewood tongue-and-groove listing). If species matters for matching, finishing, documentation, or appearance, obtain it in writing.
The reviewed products are principally presented as finish paneling for walls, ceilings, and decorative surfaces. Some sellers permit selected products in dry, covered exterior locations. That limited permission does not establish suitability for direct rain, snow, salt exposure, persistent dampness, or an unventilated assembly.
Treat tongue-and-groove pine as finish paneling unless documentation for the exact product establishes another use. Words such as clear, select, knotty, rustic, premium, and appearance grade do not by themselves prove structural capacity. Do not assume decorative paneling can replace structural sheathing, bracing, drywall, or another required assembly component.
Before ordering, obtain:
- Exact species
- Grade rule and permitted characteristics
- Dimensioned profile drawing
- Actual thickness and overall width
- Installed or stack-face width
- End-matched or square-ended construction
- Available and supplied lengths
- Moisture condition and conditioning instructions
- Finish and field-touch-up requirements
- Intended applications and exposure limits
- Installation manual for the exact variant
- Package coverage and price unit
- Warranty and applicable certifications
Nominal size, actual dimensions, and profile
A nominal size is a marketplace name. Actual size is the board’s finished physical measurement. Installed face width is the amount by which each course advances after the tongue enters the adjoining groove.
For estimating paneling, installed face width is usually the critical figure.
The reviewed listings span nominal options from 1×4 through 1×12, although no single product necessarily comes in every width. Several listings describe selected boards as approximately 3/4 inch thick, but that dimension must not be transferred to a different manufacturer, width, or profile without verification.
A nominal 1×6 is not necessarily 6 inches wide. One supplier guide describes a nominal 1×6 as approximately 3/4 inch thick by 5-1/2 inches overall, with about 5 inches of installed coverage depending on profile (Northern Log Supply’s size and coverage guide). A different seller lists a 5-1/4-inch stack face for its nominal 1×6 paneling (Log Home Shoppe’s knotty-pine dimensions). That quarter-inch difference changes the linear footage required.
Shop using the familiar nominal label, but design, lay out, and order from the selected product’s documented measurements. Mortar Desk’s guide to nominal and actual lumber sizes explains the broader rule: nominal size identifies the marketplace category, while measured dimensions control fit and cut planning.
What profile names tell you
Marketplace labels include Center-V, Edge-V, Edge and Center Bead, square-edge, center-match, shiplap, and nickel gap.
Do not assume that two sellers use a profile name identically.
Shiplap also needs to be distinguished from conventional tongue-and-groove construction. A retailer may group shiplap and tongue-and-groove products in the same paneling category, but that does not make their joints or coverage interchangeable.
Likewise, do not treat square-edge and center-match as automatic synonyms. Use the manufacturer’s drawing or a physical sample to establish what the selected label means.
Specification-table blueprint
Use a table like this for every quote:
| Specification | Product A | Product B | Why it matters |
|---|---|---|---|
| Nominal size | Marketplace category only | ||
| Stated thickness | Affects transitions and fastening | ||
| Actual overall width | Controls physical fit | ||
| Installed face width | Controls layout and quantity | ||
| Profile | Determines the visible joint | ||
| End treatment | Affects seam planning | ||
| Available lengths | Affects cuts, joints, and waste | ||
| Supplied length mix | Reveals the likely proportion of short pieces | ||
| Package coverage | Determines package rounding | ||
| Boards per package | Helps verify the coverage statement | ||
| Finish | Changes field labor and touch-up needs |
Never substitute nominal width for installed coverage. Do not copy one manufacturer’s 1×6 dimensions into an estimate for another manufacturer’s 1×6.
Species, grade, and the defects that affect appearance or fit
The reviewed pine-paneling listings use grades principally to communicate appearance and permitted characteristics. Terminology varies by supplier and should not be treated as a structural rating.
A practical—but approximate—appearance spectrum is:
| Appearance label | General buying expectation | What to verify |
|---|---|---|
| Clear | Minimal knots and relatively uniform faces | Exact permitted defects and color variation |
| Select or standard | More knots and natural variation | Supplier-specific grade rule |
| Knotty | Knots are an intended feature | Knot condition and joint-edge quality |
| Rustic or industrial | Heavy character and wider variation | Sorting needs, usable yield, and return terms |
The supplier’s written grade rule must control. “Select” from one seller may not equal “select” from another, while “rustic” can cover a wide range of appearances and fitting conditions.
One rustic listing illustrates why a low advertised price can bring a sorting tradeoff. It permits sound and unsound knots, knot holes, splits, cracks, pitch, wane, warp, and wormholes. It also warns that knots may occur on the tongue or groove and leave a small gap (Homestead Timbers’ rustic tongue-and-groove listing).
A board may therefore comply with the seller’s grade while still being unsuitable for:
- A prominent eye-level wall
- A long, uninterrupted ceiling course
- A fixture opening
- A visible butt joint
- A position where a damaged tongue prevents engagement
- A position where a broken groove leaves an objectionable gap
Such a board may remain usable after trimming or in a short cut, concealed area, or less prominent location. The expected usable yield still needs to be reflected in the order quantity. A lower-priced board is not necessarily the lowest-cost installed board if it requires extensive sorting and trimming.
Receiving inspection checklist
Inspect the shipment before distributing it through the room, applying finish, or cutting boards:
- Confirm that bundle labels match the ordered species, grade, profile, width, and finish.
- Compare measured dimensions with the order confirmation.
- Inspect tongues and grooves for crushing, missing sections, knots, and machining damage.
- Look for knot holes, loose knots, cracks, splits, pitch, wane, warp, wormholes, and staining.
- Separate freight damage from characteristics expressly permitted by the grade.
- Dry-fit questionable joints.
- Sort the best faces for prominent locations.
- Reserve shorter or less uniform pieces for cuts and concealed areas.
- Photograph bundle labels and visible damage before moving the shipment.
- Follow the seller’s reporting procedure and deadline.
Before purchase, ask the supplier to explain what the grade permits, what qualifies as freight damage, whether partial bundles can be returned, and whether unusable joint edges qualify for replacement.
Species may matter when hardness, movement, machining, or finish behavior is important, but the reviewed evidence does not establish a dependable performance ranking among Eastern White, Ponderosa, Radiata, and Southern pine. Request product-specific technical information and test the proposed finish on a representative offcut.
End-matched versus square-ended boards
An end-matched board has mating joints on its long and short edges. A square-ended board has long-edge tongue-and-groove joints but plain short ends.
The potential advantage of end matching is layout flexibility. When the exact manufacturer’s instructions expressly permit it, factory end joints may fall between framing members rather than being cut back to a joist, stud, furring strip, or blocking member. That can make random lengths easier to use and reduce framing-dependent cuts.
End matching is not permission to ignore the assembly design. Confirm framing or strapping spacing, substrate, board thickness, fastening pattern, and treatment of field-cut ends. Once an end is cut, it is no longer factory end-matched.
Square-ended products commonly require a seam plan tied to suitable support. There is no safe universal support rule for every product and assembly, so the selected installation instructions must govern.
| Decision factor | End-matched stock | Square-ended stock |
|---|---|---|
| Short-end geometry | Machined mating ends | Plain cut ends |
| Seam placement | May be allowed away from framing when documented | Commonly planned over suitable support |
| Random-length use | May provide greater placement flexibility | May require more support-dependent cutting |
| Field cutting | Removes the factory end joint | Produces another square end |
| Layout | Potentially less dependent on supplied lengths | More dependent on framing and length mix |
| Price | Obtain a like-for-like quote | Obtain a like-for-like quote |
| Support requirements | Product- and assembly-specific | Product- and assembly-specific |
| Main verification | Confirm all four edges and permitted joint locations | Confirm butt-joint support requirements |
Tilton’s knotty-pine product, for example, describes interlocking long and short edges and states that its system permits end joints away from framing. That permission belongs to the documented system, not to every product sold as end-matched (Tilton’s end-matched knotty-pine product page).
Random lengths can help create a staggered pattern, but they also introduce uncertainty. Ask for the expected length mix, the proportion of shorts, and whether the stated package coverage assumes every piece is usable.
Do not accept “zero waste” as an estimating method. End matching cannot eliminate perimeter cuts, fixture openings, grade sorting, damaged boards, pattern selection, final-row ripping, or unusable short pieces. Do not budget a claimed percentage reduction in labor or material unless the seller supplies a credible basis relevant to the exact project.
Before paying for end matching, ask:
- Are all four edges machined?
- May factory end joints fall between framing members?
- What framing or strapping spacing applies?
- Do field-cut ends require support?
- Must cuts be sealed, stained, or otherwise touched up?
- Are lengths fixed, random, or mixed?
- Does the installation manual cover the exact thickness and profile quoted?
How to calculate coverage and order quantity
Start with the net surface you intend to cover.
For a rectangular ceiling:
Surface area = length × width
For a wall:
Wall area = wall length × wall height
Calculate each wall separately and add the results. Subtract doors, windows, and other openings only when the supplier’s estimating method permits it and the openings are large enough to produce reusable material. Small openings often create offcuts rather than equivalent savings.
Convert square feet to linear feet
Use installed face width—not nominal or overall width.
Required linear feet before allowance = surface area in square feet ÷ installed face width in feet
If a board has a documented 5-inch installed face:
5 inches ÷ 12 = 0.4167 feet
Each linear foot of board covers approximately:
1 linear foot × 0.4167 feet = 0.4167 square feet
For a 100-square-foot surface:
100 ÷ 0.4167 ≈ 240 linear feet
That is theoretical coverage before cuts, grade losses, damaged material, package rounding, or unusable lengths. The 5-inch input in this example comes from Northern Log Supply’s nominal 1×6 example cited in the dimensions section.
A nominal 1×6 with a 5-1/4-inch installed face covers more area per linear foot. The nominal labels may match, but the quantities are not interchangeable.
Add a project-specific allowance
The reviewed project guides use allowances from 10% to 15%, rather than one universal figure. This Old House uses 10% in its ceiling material list, while the Think Wood porch guide adds 15% for cuts and waste (This Old House’s pine-ceiling guide; Think Wood’s porch-ceiling guide).
For a 200-square-foot surface:
- At 10% extra: 200 × 1.10 = 220 square feet
- At 15% extra: 200 × 1.15 = 230 square feet
Increase or refine the allowance when the project includes:
- Diagonal or herringbone layouts
- Irregular or out-of-square surfaces
- Numerous fixture openings
- Rustic-grade sorting
- Random lengths
- A strict stagger pattern
- Prominent grain or color selection
- Greater shipping-damage risk
- Limited installation experience
- No practical source for a small matching reorder
Do not choose a low allowance merely to make a quote appear affordable. Conversely, a large generic percentage may be unnecessary when a detailed cut plan, consistent long lengths, simple geometry, and documented usable yield support a tighter estimate.
Convert the result into the seller’s unit
Convert the waste-adjusted quantity into the unit actually sold:
- Linear feet
- Square feet
- Individual boards
- Whole packages
- Minimum-order increments
The reviewed Log Home Shoppe listing gives approximately 220–225 square feet per package depending on width. Tilton states a 250-square-foot minimum for its ceiling and wall planks. Both are seller-specific commercial terms and must be confirmed for the chosen configuration.
If a project requires 230 square feet after its allowance:
- A 220-square-foot package is insufficient unless a supplementary quantity is available.
- Two whole packages may substantially exceed the requirement.
- A 250-square-foot minimum may fit, but only if it applies to the exact grade, width, finish, and end treatment selected.
Calculator-input checklist
Record these inputs before using a calculator:
- Gross measured surface area
- Treatment of openings
- Installed face width
- Available and supplied board lengths
- Expected usable yield for the grade
- Board direction
- Seam pattern
- Waste allowance
- Package coverage
- Boards or linear feet per package
- Minimum order
- Whether mixed sizes or finishes count toward the minimum
- Availability of small matching reorders
Do not combine a nominal width from one source, a square-foot coverage claim from another, and a package quantity from a third. Every input must refer to the same product variant.
How to compare prices and delivered project cost
Tongue-and-groove pine may be priced per linear foot, square foot, board, package, or configurable selection. Some commercial pages display a number without making its unit clear. Those figures are not directly comparable.
Promotional prices may also depend on width, grade, finish, length, quantity, destination, or stock status. Record the seller, exact variant, unit, and date whenever you capture a price.
Convert linear-foot pricing to square-foot pricing
For a quote priced by linear foot:
Cost per square foot = price per linear foot ÷ installed face width in feet
For example, if a board costs $1.14 per linear foot and has a documented 5-inch installed face:
$1.14 ÷ 0.4167 ≈ $2.74 per square foot
That figure still excludes waste, package rounding, freight, tax, finish, trim, tools, and labor. It is valid only if the quoted board actually provides a 5-inch installed face.
As commercial examples observed on July 30, 2026—not current-market benchmarks—Homestead Timbers displayed $1.14 per linear foot for its rustic 1×6 and $1.29 per linear foot for the unfinished 1×8 variant (Homestead Timbers’ reviewed price listing). The page also warns that online pricing may change, and its finish descriptions contain an inconsistency that should be resolved with the seller.
The reviewed Log Home Shoppe page separately displayed width-dependent square-foot prices while also showing conflicting package and pricing statements. Do not resolve such discrepancies by assumption. Request a written quote identifying the exact product, quantity, and unit.
Hold specifications constant
A fair comparison aligns:
- Species
- Grade
- Actual thickness
- Installed face width
- Profile
- End treatment
- Finish
- Board lengths and length mix
- Package coverage
- Waste allowance
- Minimum order
- Warranty
- Exposure permission
- Freight terms
A square-foot price calculated from nominal width understates the effective cost when the installed face is narrower. Unfinished and factory-finished products should be compared only after including the applicable coating materials and labor. Rustic and more uniform grades should be compared after accounting for usable yield and sorting.
Total-cost worksheet
| Cost item | Quote A | Quote B | Notes |
|---|---|---|---|
| Base paneling | Record the price unit | ||
| Waste and grade allowance | Use project-specific quantity | ||
| Package rounding | Include whole-package minimums | ||
| Freight | Include access-related fees | ||
| Tax | Confirm treatment of delivery charges | ||
| Unloading | People, forklift, or other equipment | ||
| Dry storage | Include handling and protection | ||
| Trim and moldings | Perimeter, transitions, and beams | ||
| Finish or primer | Include required coats and surfaces | ||
| Touch-up materials | Confirm matching product availability | ||
| Fasteners | Match product, substrate, and exposure | ||
| Blocking, furring, or strapping | Include attachment hardware | ||
| Tools and access equipment | Saws, nailer, scaffold, or lift | ||
| Professional labor | Include required trades | ||
| Total delivered project cost | Final comparison figure |
Freight can determine whether an order is practical. Log Home Shoppe describes an approximately 9-foot package weighing about 495 pounds, delivered to the roadside or nearest accessible point without a lift gate. Its listing says the customer must unload within approximately 15 minutes and document visible freight damage on the delivery receipt (Log Home Shoppe’s package and freight terms).
Before paying, confirm:
- Truck access and turning space
- Roadside, curbside, or driveway delivery
- Lift-gate availability
- Package dimensions and weight
- Unloading time
- Required people or equipment
- Dry, level storage
- Lead time
- Freight charges and surcharges
- Inspection procedure
- Damage-reporting deadline
- Responsibility for concealed damage
- Return freight and restocking terms
Unfinished, site-finished, or factory-prefinished
There are three main finish paths:
- Install unfinished boards and finish them afterward.
- Coat unfinished boards on site before installation.
- Buy factory-prefinished boards.
None is automatically the cheapest or best. Obtain like-for-like quotes and account for field labor, coating materials, handling, touch-up, and lead time.
| Decision factor | Finish after installation | Site-finish before installation | Factory-prefinished |
|---|---|---|---|
| Material quote | Verify | Verify | Verify |
| Field coating labor | Mostly overhead or in place | Performed before installation | Usually limited to cuts and touch-up |
| Color flexibility | Depends on chosen coating | Depends on chosen coating | Limited to available configurations |
| Access to edges | Restricted after installation | Accessible before installation | Verify which surfaces are factory coated |
| Color consistency | Depends on preparation and application | Depends on preparation and application | Request current production samples |
| Cut-end treatment | Confirm | Confirm | Confirm |
| Touch-up | Retain the project coating | Retain the project coating | Verify matching product availability |
| Repairability | Depends on known coating system | Depends on known coating system | Depends on finish documentation |
| Lead time | Stock plus field finishing | Stock plus coating and drying | May include factory finishing time |
| Sampling | Test an offcut | Prepare a full mockup | Request a current sample |
Unfinished pine gives the buyer control over paint, stain, or clear coating, but it adds preparation, application, drying, handling, and touch-up. Finishing an installed ceiling also means working overhead and may restrict access to joint edges.
Several published installation guides recommend coating loose boards before overhead installation because they can be laid flat at a workable height. That is a planning option, not a universal coating specification.
Recommendations for coating backs, tongues, grooves, and ends differ among guides. One editorial guide advises treating both faces and treating ends for exterior work, but buyers should not transfer that instruction to every paneling product or coating system. Confirm the required sequence with both the paneling supplier and finish manufacturer.
Factory-finished products in the reviewed listings include clear, stained, whitewashed, and darker options. Advantage Lumber’s Southern knotty-pine media, for example, depicts multiple colors and grade variations, but the supplied page excerpt does not establish that every depicted combination is currently selectable (Advantage Lumber’s prefinished Southern pine listing).
The reviewed evidence does not establish one best primer or coating for controlling blotching, ambering, resin bleed, or knot bleed. Ask the finish manufacturer for guidance appropriate to the exact pine, exposure, and desired appearance, then test the complete coating sequence on a representative sample.
For factory finishes, confirm:
- The photographed color is currently available.
- It can be ordered in the required grade and width.
- It is available with the required profile and end treatment.
- The sample represents the current coating system.
- Matching touch-up material is available.
- Field-cut ends require treatment.
- The warranty covers the intended location.
- Lead time includes finishing and freight.
Match the product and assembly to the location
A product marketed for an interior wall should not automatically be moved to a porch ceiling, persistently humid room, coastal location, or exposed exterior. The complete assembly matters: paneling, framing, substrate, ventilation, finish, fasteners, weather protection, and local requirements.
| Location | Primary checks | Buying position |
|---|---|---|
| Interior wall | Substrate, framing direction, profile, finish, movement strategy | Use when documented for the assembly |
| Interior ceiling | Support, fixtures, finish, fastening, final-row layout | Use when documented for the assembly |
| Dry covered porch ceiling | Roof condition, ventilation, finish, corrosion exposure | Use only when expressly permitted |
| Persistently humid room | Moisture source, ventilation, coating, warranty | Do not assume suitability |
| Coastal covered location | Salt exposure, fasteners, finish maintenance, wind-driven moisture | Obtain product-specific approval |
| Direct weather exposure | Rain, snow, sunlight, drainage, treatment, maintenance | Do not use ordinary interior paneling without documentation |
Interior walls and ceilings
Confirm the substrate and framing direction before choosing lengths or end treatment. Determine whether the paneling may attach directly to framing or requires drywall, plywood, furring, or another substrate. Check the finish schedule, movement strategy, fixture layout, and any local requirements affecting the assembly.
Direct attachment to studs, joists, or trusses is not automatically permitted in every location. Tilton notes that drywall or another substrate may be required by local rules even where its planks can otherwise attach directly to framing. Its product page also limits exterior use to dry, covered locations without direct rain or snow exposure (Tilton’s application qualifications).
Dry covered porch ceilings
Inspect the roof and framing before covering them. Resolve:
- Roof leaks
- Damp or deteriorated framing
- Existing ceiling or soffit materials
- Framing spacing and direction
- Need for blocking or strapping
- Ventilation
- Board direction
- Fastener exposure
- Finish and cut-end treatment
- Wind-driven moisture
- Access for future repair
The Think Wood porch guide directs installers to check framing condition, joist spacing, existing materials, and roof leaks before work begins. It specifies galvanized finish nails for its example and recommends stainless steel in coastal areas, but those project-specific details are not universal fastener requirements.
A broad retail description such as “interior/exterior” does not establish treatment, sealing, maintenance, or exposure limits. Do not claim bathroom, coastal, exposed-exterior, or fire-rated suitability without documentation for the exact species, grade, thickness, finish, and complete assembly.
Installation planning and the final pre-order checklist
The material below is a planning overview. Exact acclimation, support, gaps, fasteners, joint locations, and coating requirements must come from the selected product’s current installation manual and applicable project requirements.
Preparation sequence
Resolve the work in this order:
- Inspect the surface and framing. Identify deterioration, irregularities, missing support, and unsuitable coverings.
- Correct leaks and other moisture sources. Do not conceal an active problem behind paneling.
- Obtain the exact installation instructions. Confirm that they match the species, thickness, profile, end treatment, finish, and application.
- Condition the boards as directed. Published guides give conflicting periods, so do not impose one generic schedule.
- Plan the finish. Decide what must be coated before installation and how cuts will be treated.
- Locate and mark framing. Preserve reference marks after paneling begins to cover the surface.
- Map fixtures and penetrations. Resolve their positions before cutting.
- Choose board direction. Consider framing, room proportions, lengths, seams, and waste.
- Map butt joints. Distinguish square ends, factory end matches, and field cuts.
- Calculate the final row. Avoid discovering late that it will be an impractical sliver.
Framing direction and support
A recurring principle in the reviewed installation guidance is that boards running across suitable framing may be fastened directly, while boards running parallel may require blocking, furring, or strapping. The support system must itself be suitable and properly attached.
Enterprise Wood Products describes that general distinction and a typical sequence of starting accurately, fastening through the tongue where permitted, checking alignment, and ripping the final row as needed (Enterprise Wood Products’ installation guide).
Do not assume adhesive can replace required mechanical attachment or support. Any adhesive must be permitted for the wood, finish, substrate, exposure, and complete assembly.
Common concealed-fastening sequence
Where the exact product permits concealed fastening, the general workflow is:
- Establish a straight first course.
- Secure the starting edge as directed.
- Drive later fasteners through the tongue at the specified position and angle.
- Seat each groove without crushing the tongue.
- Keep fasteners clear of the interlocking path.
- Check straightness and accumulated alignment regularly.
- Stagger visible butt joints according to the layout.
- Rip the final row if required.
- Use trim to conceal permitted perimeter spaces and face fasteners.
A grooved tapping block or sacrificial offcut can help seat a reluctant board without striking the exposed joint. Stop if a joint will not close. Possible causes include debris, machining damage, a knot, bowing, incorrect orientation, a misplaced fastener, or accumulated layout error.
Movement space and layout variables
Wood paneling needs a product-specific movement strategy, but there is no universal perimeter dimension. Several reviewed guides use approximately 1/2 inch, while one porch example uses 3/4 inch. These are examples tied to those guides, not specifications for every room, climate, profile, or finish system.
Published guidance also conflicts on:
- Conditioning duration
- Starting at a wall or at the ceiling center
- Fastener size and spacing
- Perimeter movement space
- Whether all ends require framing support
- Which faces and edges should be coated
A center-start layout may balance border courses. A wall-start layout may simplify installation. Choose from the room geometry, framing, visual plan, trim coverage, and product instructions.
Predictable problem areas
Plan for:
- Bowed boards: Determine whether they can be seated without damaging the joint or overstressing attachment points.
- Damaged tongues: Trim for an approved joint location or assign the board elsewhere.
- Uneven surfaces: Correct the support plane rather than forcing boards over severe irregularities.
- Repetitive seams: Sort lengths and draw a seam map.
- Fixture openings: Verify positions and dimensions before cutting.
- Boards that will not seat: Check debris, machining, knots, fasteners, orientation, and alignment.
- Narrow final row: Calculate it in advance and adjust the starting line or trim strategy.
- Field-cut ends: Support and finish them as the product instructions require.
- Finish damage: Keep compatible touch-up material available.
Safety and licensed work
Ceiling installation can involve ladders or scaffolding, long boards, saws, and nailers. Use appropriate access equipment and the eye and hearing protection required for the tools. Stop if the work cannot be performed from a stable position.
Switch off the relevant electrical circuit before removing or disturbing fixtures. This Old House advises professional help when ladder or scaffold work with power tools is outside the installer’s comfort level and calls for an electrician when new lighting is rough-wired (This Old House’s installation and safety guidance). Obtain qualified assistance for wiring, structural concerns, or code-sensitive decisions.
Supplier-confirmation form
Send these questions to the supplier and retain the written response with the order:
- Species: What exact species is supplied?
- Grade: What grade rule and allowable characteristics apply?
- Dimensions: What are the actual thickness and overall width?
- Coverage: What is the installed or stack-face width?
- Profile: Can you provide a dimensioned drawing?
- Ends: Are boards square-ended or factory end-matched?
- Seams: May factory end joints fall between framing members?
- Lengths: Are lengths fixed, random, or mixed? What is the expected mix?
- Moisture condition: How is the material supplied, and what jobsite conditioning is required?
- Finish: Is it unfinished, primed, stained, clear-coated, or otherwise factory-finished?
- Cut ends: What sealing or touch-up is required?
- Price: Is the quote per linear foot, square foot, board, or package?
- Package coverage: Does the calculation use installed face width?
- Minimum order: Are there package, square-foot, or mixed-product minimums?
- Applications: Which interior or covered-exterior locations are expressly permitted?
- Exposure limits: Are rain, snow, persistent humidity, or coastal exposure prohibited?
- Instructions: Which installation manual governs the exact variant?
- Fastening: What substrate, framing spacing, fastener, and schedule are required?
- Warranty: What does it cover, for how long, and under what conditions?
- Certifications: Which documents apply to the exact configuration?
- Stock and lead time: Is the selected combination currently available?
- Freight: What are the package dimensions, weight, access requirements, and unloading terms?
- Damage: How and when must visible or concealed damage be reported?
Frequently asked questions
How much extra tongue-and-groove pine should I order?
The reviewed project guides use allowances between 10% and 15%, but neither figure is universal. Use the lower end only when straightforward geometry, consistent lengths, grade, and seam planning support it. Increase or refine the allowance for diagonal layouts, irregular surfaces, random lengths, rustic sorting, fixture openings, strict seam patterns, or limited access to matching replacement stock.
After adding the allowance, round the result to the seller’s package size or minimum order.
Do tongue-and-groove board ends have to land on a joist or stud?
It depends on the product and assembly. Square-ended boards commonly require suitable support at butt joints. A factory end-matched system may permit short-end joints between framing members, but only when the exact manufacturer’s instructions expressly allow it.
A field-cut end is no longer factory end-matched. Confirm whether it requires support, refastening, sealing, or another treatment.
Is a nominal 1×6 tongue-and-groove board actually 6 inches wide?
Do not assume so. Milling normally leaves an overall width smaller than the nominal label, and the installed face is narrower again because part of the joint overlaps.
Use the exact product’s actual overall width and installed face width for design and estimating—not the “1×6” name.
Can tongue-and-groove pine be used on a porch ceiling?
Some products are expressly offered for dry, covered exterior applications, but that does not make every tongue-and-groove pine product suitable for a porch.
Confirm the exact product’s exposure limits, finish requirements, fastening system, substrate, ventilation needs, warranty, and maintenance instructions. Repair roof leaks first and account for wind-driven moisture and corrosion. Coastal or persistently damp locations require additional product-specific documentation.
Is whitewood tongue-and-groove the same as pine?
Not necessarily. Whitewood is a broad retail description and may not identify a precise species. If a listing says “whitewood common softwood” without naming pine, do not assume the board is pine.
Request the species in writing whenever appearance, matching, finish behavior, or technical documentation depends on it.
The final buying sequence is simple: choose the application, verify species and grade, obtain the profile drawing and installed face width, decide between end-matched and square-ended stock, calculate coverage with a project-specific allowance, and normalize the quote to delivered cost. Then confirm finish, exposure limits, installation instructions, freight, and warranty in writing.
Nominal labels, profile names, and promotional claims are not substitutes for exact product documentation, applicable local requirements, or qualified help where structural, electrical, or code-sensitive work is involved.