 MortarDesk
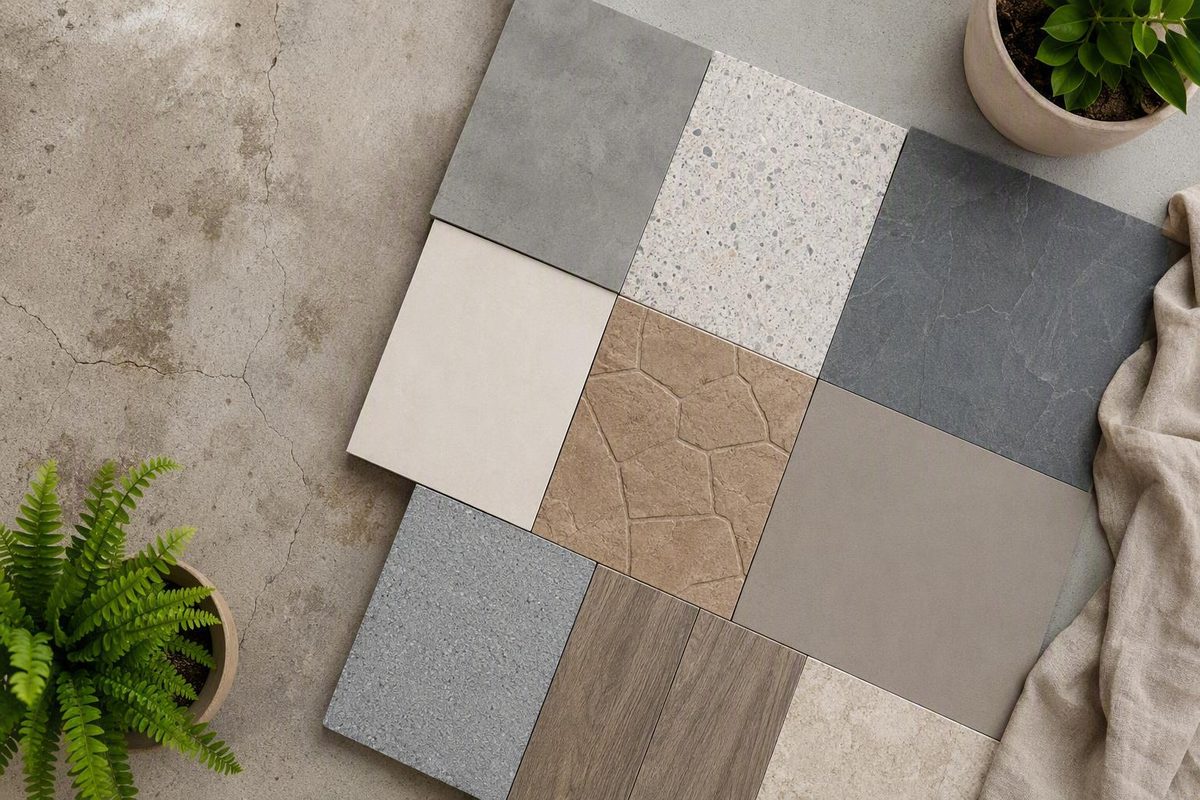
An old concrete patio does not automatically need demolition. If the slab appears stable, drains adequately, and has enough clearance for the complete proposed assembly, it may be possible to conceal it, refinish it, or install a new walking surface above it.
That is only a preliminary screen—not a determination of structural adequacy, safety, or code compliance. The more permanent the proposed covering, the more important it becomes to verify substrate limits, drainage details, finished height, climate exposure, and installation requirements with the product manufacturer or an appropriately qualified professional.
The central question is not simply, “What can cover a cement patio?” It is, “Which options are compatible with this slab and site?” A rug and a raised deck solve different problems. Paint, stain, sealer, and overlays may all be thin, but they perform different jobs. Tile and pavers can transform the patio more substantially, yet their rigidity and added height make preparation particularly important.
Start with slab condition, water movement, total finished height, climate, and maintenance tolerance. Compare appearances only after those constraints are understood.
Editorial scope: This is a consumer decision framework based on the supplied manufacturer, retailer, contractor, and home-improvement guidance. It is not an exterior-assembly specification or a substitute for site-specific structural, drainage, accessibility, fire-safety, or code advice.
What Does It Mean to Cover a Cement Patio?
Homeowners frequently search for a “cement patio.” This guide uses that familiar search phrase while referring to the existing patio surface as a concrete slab.
“Covering” the slab can mean four different things:
- Concealing it: An outdoor rug hides part of the concrete without becoming a permanent floor.
- Recoloring or protecting the visible surface: Paint, stain, and sealer leave the slab as the walking surface.
- Adding a new surface layer: Interlocking deck tiles, an overlay, outdoor-rated tile, or pavers create a different finish over the concrete.
- Constructing a raised system: Wood or composite decking sits on sleepers or a subframe above the slab.
These groups differ substantially in permanence. Rugs and many interlocking tiles can be lifted and removed. Paint, stain, and sealer alter the visible surface. Cementitious overlays and bonded tile are generally permanent. Raised decking is a substantial construction project, although it remains physically distinct from the slab below.
A floor-surface project is also different from an overhead patio cover. Pergolas, awnings, and roofs provide shade or weather protection rather than changing the walking surface. Treat them as separate projects and ask the relevant local authority and product supplier what structural, attachment, wind, setback, or approval questions apply.
Most importantly, covering concrete is not the same as stabilizing it. A finish may hide discoloration, old repairs, or cosmetic wear, but it does not stop active settlement or restore severely deteriorated concrete. If the slab is moving, crumbling, or repeatedly holding water, assess the underlying condition before concealing it.
Inspect the Slab Before Choosing a Covering
Clear the patio so that the full surface and perimeter are visible. If possible, inspect it when dry and again during or shortly after rain.
Use this condition-first checklist:
- Cracks: Note their locations, patterns, previous repairs, and whether opposite sides remain level.
- Vertical displacement: Look for one side of a crack sitting above the other.
- Possible movement or settlement: Check for areas sinking toward the house, separating from steps, or changing relative to posts and adjoining paving.
- Loose or crumbling concrete: Examine visibly weak edges and deteriorated patches.
- Spalling: Record flaking, scaling, or missing surface material.
- Standing water: Identify where water collects and whether ponding repeatedly returns.
- Drainage direction: Observe where runoff travels and where it exits.
- Major unevenness: Look for humps, abrupt depressions, patch ridges, and areas where furniture rocks.
- Existing finishes: Identify paint, sealer, adhesive residue, curing compounds, or older coatings where possible.
Discoloration, fading, small stains, and superficial wear are mainly cosmetic. Shifting cracks, vertical offsets, apparent settlement, severe spalling, widespread crumbling, major bumps, and recurring ponding suggest a substrate or drainage problem that should not simply disappear beneath another material.
There is no universal crack width, unevenness limit, or moisture threshold that makes every covering acceptable. A flexible interlocking product may have different substrate limits from bonded porcelain or an overlay. Use the written requirements for the exact system and obtain a site-specific assessment when the cause or extent of damage is uncertain.
Follow the water
A covering can change how water moves even when the exposed slab previously drained acceptably. Rugs can remain damp. Solid edges may interfere with an existing runoff path. Sediment can collect beneath removable tiles. Pavers add bedding and perimeter components, while raised decking creates a concealed area that still needs drainage and maintenance access.
Trace the intended water path across, through, or beneath the complete assembly. Pay particular attention to walls, posts, low perimeter edges, garden borders, doorways, drains, and transitions to soil or adjoining paving. Do not assume that perforations in a product will correct ponding in the slab below.
Calculate the real finished height
Measure available clearance at:
- Exterior doors and thresholds
- Stair treads and risers
- Gates
- Posts and columns
- Siding and wall finishes
- Drain openings
- Neighboring paving
- Routes that require a smooth transition
Finished height is not merely the advertised thickness of a board, tile, or paver. It includes every installed layer, which may include adhesive, primer, membrane, bedding, edge profiles, sleepers, pedestals, or a subframe.
Ask the system manufacturer for the complete build-up and verify the resulting transitions before ordering. Where stairs, doors, guards, or accessible routes are involved, direct compliance questions to the relevant local authority or qualified professional; building requirements vary by locality.
Existing paint or sealer may also interfere with an overlay, coating, adhesive, or mortar. Visual cleanliness does not establish compatibility. Confirm whether the old finish may remain, requires mechanical preparation, or must be removed under the selected system.
Compare Patio Covering Options at a Glance
The matrix uses broad relative costs because preparation, labor, location, drainage work, material grade, patio shape, and transition details can change the ranking.
| Option | Primary purpose | Reversibility | Relative cost | Relative complexity | Drainage sensitivity | Likely height added | Typical maintenance | Renter suitability | Key reason not to use it |
|---|---|---|---|---|---|---|---|---|---|
| Outdoor rug | Quick camouflage and comfort | High | Low | Low | High; fabric and backing may retain moisture | Very low | Lift, clean, dry, and inspect below | Often suitable with permission | Does not repair or protect the whole slab |
| Concrete paint | Opaque color or pattern | Low | Low–moderate | Low–moderate | Sensitive to preparation and substrate moisture | Minimal | Clean gently and make compatible touchups | Usually poor | A film may fail when substrate or application conditions are unsuitable |
| Concrete stain | Color while retaining concrete character | Low | Low–moderate | Moderate | Existing coatings and moisture affect results | Minimal | Clean and maintain any specified topcoat | Usually poor | Does not fully conceal repairs, texture, or color variation |
| Sealer | Protect the visible concrete surface | Low | Low–moderate | Moderate | Product moisture and preparation limits apply | Minimal | Clean and reapply only as specified | Usually poor | Provides limited concealment |
| Interlocking plastic or rubber tiles | Removable walking surface, sometimes with drainage or cushioning | High | Low–moderate | Low–moderate | High; the underside, slab, and perimeter must allow drainage | Low–moderate | Clean above and below; inspect connections | Potentially suitable | Exterior rating, heat response, traction, and drainage vary by product |
| Interlocking wood or composite tiles | Removable deck-like appearance | High–moderate | Moderate | Low–moderate | High; damp debris and blocked channels matter | Low–moderate | Clean below; inspect wood, connectors, and edges | Potentially suitable | May create moisture, clearance, or transition problems |
| Concrete overlay | New decorative surface layer | Low | Moderate | Moderate–high | Preparation, compatibility, and moisture are critical | Low–moderate | Clean and reseal if specified | Poor | Does not cure active movement |
| Outdoor-rated tile | Rigid decorative finish | Very low | Moderate–high | High | High; exterior exposure, drainage, cracks, and joints affect the assembly | Moderate | Clean joints and replace damaged units where feasible | Poor | An unsuitable substrate or assembly can lead to failure |
| Pavers | New modular masonry surface | Low–moderate | Moderate–high | High | High; bedding, runoff, joints, and edge restraint matter | Moderate–high | Inspect joints, settlement, and perimeter restraint | Poor | Added elevation may conflict with doors or stairs |
| Raised wood or composite decking | New elevated walking plane | Moderate, but substantial | High | High | Very high beneath the assembly | High | Clean boards; inspect supports, drainage, fasteners, and concealed debris | Rarely suitable | Requires a designed support system and adequate clearance |
Cost context—not a price guide
A commercial contractor guide reports broad installed estimates of $6–$15 per square foot for outdoor tile, $8–$20 for pavers, $10–$25 for decking, $2–$7 for rugs or deck tiles, and $3–$10 for coatings or resurfacing. The publisher provides no methodology or geographic basis, so these are source-reported commercial estimates rather than market benchmarks. Review the contractor’s cost categories and assumptions.
Today’s Homeowner separately lists broad material prices of $2–$20 per square foot for tile, $5–$50 for pavers, $3–$20 for wood coverings, and $5–$15 for interlocking deck tiles. These material figures are not directly comparable with installed prices; repairs, tools, labor, drainage work, transitions, and permits may be additional. See the publisher’s material-price estimates.
Neither set of figures identifies the cheapest choice for a particular patio. A low surface-material price can be overtaken by coating removal, crack preparation, complicated cuts, drainage correction, edge pieces, or professional labor.
Match common scenarios to a starting point
For a renter: Begin with an outdoor rug or removable interlocking tiles, subject to the lease. Avoid adhesives unless expressly permitted, and preserve drainage and manageable edge transitions.
For an immediate cosmetic change: A rug can alter the appearance as soon as it is placed. Paint and stain can also provide a visual refresh, but they may require substantial cleaning, coating evaluation, surface preparation, and suitable application weather.
For a beginner DIY project on a sound slab: Manufacturer-approved interlocking tiles may be approachable because they avoid wet mortar and framed construction. Easy assembly does not eliminate the need to check defects, drainage, product ratings, and edges.
For a low-profile finish near a door: Stain, paint, sealer, or a compatible thin overlay may preserve more clearance than pavers or decking. Compare complete system thickness rather than category names.
For a substantial long-term transformation: A specified overlay, exterior tile assembly, paver system, or raised deck can create a genuinely new surface. These options demand progressively more attention to movement, water, elevation, edges, and maintenance.
Quick and Removable Options: Rugs and Interlocking Deck Tiles
An outdoor rug is camouflage. It can define a dining or seating area and hide a stained section within minutes, but it neither repairs concrete nor creates a comprehensive protective system.
Moisture is the main limitation. Today’s Homeowner advises removing outdoor rugs during rainy periods because retained moisture may contribute to mold, mildew, staining, or concrete damage. Rug weight, backing, exposure, humidity, and opportunities for drying all affect what happens in practice. Read the publisher’s outdoor-rug moisture cautions.
Interlocking deck tiles cover more of the slab and create a distinct walking surface. The category includes products with different characteristics:
- Plastic or PVC tiles may be rigid or flexible and solid or perforated.
- Rubber tiles may provide cushioning, but exterior suitability and thermal behavior vary.
- Wood tiles create a natural deck-like appearance but require checks for dampness, weathering, and deterioration.
- Composite tiles avoid some wood-finishing tasks but still require cleaning and drainage.
- Outdoor carpet tiles emphasize texture and comfort but may retain moisture or debris.
- Turf tiles create a softer appearance and feel, although the backing and drainage design must suit the site.
A perforated or channeled design may be useful where water needs to pass beneath the walking surface. Perforations alone do not correct poor slab drainage, blocked perimeter outlets, clogged channels, or ponding in low areas.
Basic interlocking-tile installation sequence
For a product expressly approved for direct installation over concrete:
- Measure the actual coverage area and plan the layout.
- Remove furniture, planters, and loose objects.
- Sweep and clean the slab.
- Allow the surface to dry as the product requires.
- Establish the layout from a straight edge, accounting for visible borders and cuts.
- Connect the tiles by the manufacturer’s specified method.
- Make cuts only with an approved tool and procedure.
- Install compatible border pieces or ramps where the product offers them and the layout requires an edge transition.
Greatmats, a retailer, describes this general measure-clean-layout-connect-trim sequence for certain interlocking PVC and polypropylene products. It also recommends considering drainage and compatible border ramps, but suitability remains product- and site-specific. See the retailer’s installation sequence.
Retailer guidance suggests that flexible tiles may accommodate some roughness, but the supplied material does not define an acceptable amount. Flexibility may help a tile follow minor texture; it does not correct settlement, major humps, unstable cracks, or crumbling concrete.
Before ordering, verify the exact product’s:
- Outdoor-use rating
- Wet- and dry-traction information
- Ultraviolet-exposure limits
- Freezing-exposure suitability
- Thermal expansion and surface-heat guidance
- Drainage configuration
- Wind or perimeter-restraint requirements
- Approved cutting method
- Cleaning requirements
- Warranty exclusions
Removable tiles may suit renters when the lease permits them, the slab remains unaltered, drainage is preserved, and the edge treatment is acceptable for the space. “Removable” does not mean maintenance-free: periodically lift sample sections to check for sediment, staining, blocked drainage, and damp areas.
Low-Profile Finishes: Paint, Stain, Sealer, and Concrete Overlays
These systems add relatively little height, but they do different jobs:
- Paint forms an opaque film over the concrete.
- Stain changes the appearance while generally leaving more texture and variation visible.
- Sealer primarily protects the exposed concrete surface.
- Overlay adds a new cementitious or coating layer that may be colored, patterned, or textured.
Paint and stain
Use paint intended for concrete and the relevant exterior exposure—not ordinary wall or trim paint. Surface profile, contamination, substrate moisture, application weather, and compatibility with any existing finish can affect adhesion and appearance.
Performance anecdotes should not be treated as guarantees. The Garden Glove reports that stain on one patio lasted through multiple seasons with minimal touchups, while commercial coating guidance warns that paint may peel on porous concrete. These are individual and commercial observations, not category-wide service-life findings. Compare the DIY account of stain and paint.
Stain generally does not conceal patches, repairs, or uneven coloration as completely as an opaque coating. Paint hides more visual variation but creates a film that depends heavily on suitable preparation and moisture conditions. Neither product stabilizes movement in the slab.
Before choosing either finish, determine whether an existing paint, sealer, or contaminant can remain. The answer must come from the selected product or complete coating system rather than a generic preparation rule.
Sealer
Sealer is appropriate when the goal is to retain the appearance of concrete while protecting the visible surface. It is less suitable when the main objective is to hide widespread staining, repairs, or rough texture.
Follow the instructions for the exact formulation. General precautions supported by manufacturer guidance include:
- Clean the concrete thoroughly.
- Allow new or repaired concrete to cure as the product requires.
- Avoid trapping dirt or moisture beneath the finish.
- Apply thin, even layers rather than leaving puddles.
- Avoid application in peak sun, strong wind, or forced airflow.
- Observe the stated drying time before restoring foot traffic or furniture.
U-C Coatings specifically cautions that contamination may become trapped beneath sealer and that sun, wind, or artificial airflow can cause overly rapid evaporation and application defects. Its article is product-marketing guidance rather than an independent specification. Review the manufacturer’s sealer precautions.
There is no universal curing period, drying time, coverage rate, or resealing interval for every sealer. Use the instructions for the exact product, substrate condition, and permitted weather range.
Concrete overlays
An overlay creates a new surface layer rather than merely coloring the existing slab. Depending on the specified system, the material may be sprayed, rolled, or troweled.
Documented decorative possibilities include:
- Knockdown textures
- Stamped patterns
- Stains and dyes
- Tinted sealers
- Finishes intended to resemble brick, wood, flagstone, slate, or granite
A system-level installation sequence commonly involves:
- Assessing the slab and identifying defects appropriate for repair.
- Preparing the surface by the specified method.
- Removing contamination and incompatible coatings.
- Cleaning and priming where required.
- Mixing and applying the overlay.
- Adding the intended texture, pattern, or color.
- Allowing the material to cure.
- Applying a sealer if the system requires one.
SUNDEK, a commercial contractor network, describes this preparation-and-overlay process and documents sprayed, rolled, troweled, stamped, stained, and masonry- or wood-look finishes. Its comparative performance statements remain commercial claims. See the documented overlay sequence and finish options.
An overlay can disguise appropriately repaired cosmetic damage. It should not be treated as a cure for active settlement, continuing crack movement, or severe deterioration. Confirm acceptable substrate condition, crack treatment, preparation method, primer, thickness, curing conditions, joint treatment, and sealer with the selected system supplier.
Maintain low-profile finishes by sweeping or rinsing routinely, cleaning spills promptly, and using compatible non-abrasive cleaners. Make paint repairs only with compatible materials, and reseal stained or overlay systems according to their instructions rather than a generic calendar.
Outdoor Tile and Pavers Over Existing Concrete
Some outdoor tile and paver systems can be installed over a stable concrete slab. That conditional answer does not mean every slab can receive every product or installation method.
Rigid assemblies require early investigation of:
- Existing cracks and evidence of movement
- Control and expansion joints
- Exterior moisture exposure
- Drainage across or beneath the finish
- Freezing exposure
- Perimeter and edge requirements
- Thresholds, stairs, and transitions
- Complete finished elevation
Porcelain, ceramic, natural stone, concrete pavers, and concrete-backed porcelain are not interchangeable. They differ in water absorption, thickness, installation method, joint requirements, sealing needs, exposure ratings, and cutting tools.
Rochester Concrete Products states that its relevant outdoor porcelain pavers absorb less than 0.5% water and require no sealing. The manufacturer also distinguishes traditional porcelain installations using adhesives and specialized tools from dry-set-rated or concrete-backed products installed by other methods. Those statements apply to the relevant products and should not be generalized to all outdoor tile. Review the manufacturer’s porcelain and concrete-paver comparison.
A bonded porcelain assembly may include surface preparation, a membrane or crack-management component, exterior-rated adhesive, grout or joint materials, and specified movement detailing. Other porcelain pavers may be approved for dry setting, pedestals, or concrete-backed installation. Use only an assembly expressly approved for the selected product, substrate, and exposure.
Do not assume that an existing control or expansion joint can be covered by an uninterrupted rigid finish. Ask the tile and installation-system manufacturers how each joint must be treated within the complete assembly. A decorative grout layout is not, by itself, evidence that movement has been accommodated.
Pavers over concrete
Pavers can sometimes be installed over a stable slab using a compatible bedding or support method, drainage path, and edge-restraint system. The details vary by product and site; a procedure documented for one walkway is not a universal patio specification.
One sponsored DIY walkway project followed this sequence:
- Confirm that the concrete was solid, intact, relatively flat, and free of large cracks or bumps.
- Dry-lay the pavers.
- Add perimeter edge restraint.
- Place and level bedding sand.
- Install and cut the pavers.
- Sweep polymeric sand into the joints and activate it as directed.
The project initially used coarse paver-base sand, found that the units wobbled, and removed it. That is an account of one installation problem, not a general rule about bedding materials.
The same project illustrates why elevation should be calculated early. Its assembly used approximately 3/4 inch of leveling sand plus 1.5-inch pavers, changing the relationship between the paved surface and adjoining stairs. Those dimensions describe that project only; they are not a specification for another patio. See the sponsored project’s sequence and finished-height example.
Calculate the approved bedding, paver, joint, and restraint system for the actual project. Verify where water will exit and whether perimeter components alter that route. Do not adopt a generic slope, bedding depth, or joint detail without documentation for the selected system.
Manufacturer-supported or professional design is prudent when cracks are present, the climate freezes, drainage is complex, joints cross the patio, or thresholds and stairs leave little tolerance.
Building Wood or Composite Decking Above the Slab
A deck over concrete is a separate assembly—not loose boards placed directly on the patio.
Available commercial guidance describes decking supported by sleepers or a subframe. The support system needs a documented approach to drainage and ventilation beneath the boards. A designed raised plane may bridge some surface irregularity or an existing slope, but it does not eliminate the need to understand the slab and water movement below.
Planning questions include:
- Does the slab show movement or deterioration?
- Where will runoff travel beneath and around the framing?
- How will concealed areas be cleaned and inspected?
- What framing or sleeper material is approved?
- How will the assembly be fastened or restrained?
- What clearances are required at doors and wall finishes?
- How will stairs and perimeter transitions be handled?
- How are edges supported?
- Does the added elevation change another building component that needs local review?
Wood and composite should be compared cautiously. Exterior wood may require cleaning, finishing, and weather-related maintenance; moisture, insects, decay, and weathering remain relevant concerns. Composite manufacturers often promote periodic cleaning without staining or painting, but the exact requirements depend on the selected boards, subframe, fasteners, exposure, and warranty.
For example, Millboard says its composite boards generally require occasional cleaning with mild soap and water and do not require staining, sanding, sealing, or painting. That is manufacturer guidance for its category and products—not a universal rule for every composite board. Review the manufacturer’s maintenance comparison.
No universal sleeper spacing, fastening schedule, ventilation clearance, or load requirement can be inferred from the words “wood decking” or “composite decking.” Obtain those details from a designed system, the relevant board and subframe manufacturers, and the applicable local requirements.
Where the project changes stairs, guards, structural supports, or connections to a building, ask the local authority and an appropriately qualified trade what review is required. Mortar Desk notes that building requirements vary by locality and directs structural work to qualified trades working to local code. Read Mortar Desk’s editorial and professional-scope statement.
Match the Covering to Water, Sun, and Freeze-Thaw Exposure
There is no universal climate winner. Screen each proposed assembly against the patio’s actual exposure and intended use.
Wet or frequently damp locations
Prioritize:
- A continuous path for water
- Product-specific wet-traction information
- Edge details that preserve the intended runoff route
- Manageable transitions
- Access for cleaning beneath removable surfaces
- Materials approved for repeated exterior wetting
“Slip-resistant” is too general for choosing a pool surround or frequently wet patio. Request the exact product’s test information and confirm that it applies to the finish, installation orientation, and wet condition being considered.
For rugs, wood tiles, and decking, inspect routinely for damp debris, blocked channels, staining, odor, biological growth, loose components, and deterioration. A perforated tile may still retain water if sediment blocks its underside or the perimeter outlet.
Freeze-thaw locations
Where water can freeze, screen the complete assembly for:
- Exterior and freezing-exposure approval
- Water absorption where relevant
- Drainage beneath or through the assembly
- A documented approach to movement
- Compatible adhesives, membranes, bedding, joint materials, and sealers
A commercial contractor guide cautions against rigid tile in freeze-thaw conditions without an appropriate decoupling strategy. Treat that as a screening warning, not a complete installation specification; the tile and installation-system manufacturers must identify the approved assembly. See the contractor’s climate and drainage cautions.
Sunny and high-ultraviolet locations
Investigate fading, thermal expansion, warranty coverage, and surface heat for the exact product and color. Dark coatings, plastic tiles, rubber, composite boards, porcelain, and pavers can behave differently in direct sun, but the supplied evidence does not support a dependable temperature ranking across these categories.
If bare feet, children, or pets will use the space, seek product-specific information and evaluate a sample under actual exposure where practical.
Match the surface to use
A dining area needs a sufficiently stable plane for table and chair legs. A play area may place greater emphasis on cushioning and manageable edge transitions. Poolside use increases the importance of wet-condition traction and drainage.
For grills and fire features, consult both the appliance instructions and the surface-system manufacturer before choosing the material or layout. Do not assume that a product described as “outdoor” is suitable for exposure to heat, embers, or a particular appliance.
Plan the Project—and Know When Not to Cover the Patio
Use this order of work before buying finish materials:
- Define the outcome. Decide whether you want camouflage, color, surface protection, a new walking finish, or a raised deck.
- Inspect the slab. Record cracks, offsets, deterioration, coatings, and uneven areas.
- Document drainage. Observe the patio during or after rain and identify the runoff route.
- Measure the area. Include irregular edges, columns, steps, and proposed borders.
- Calculate complete assembly height. Add adhesive, membranes, bedding, sleepers, framing, and edge components.
- Identify transitions. Check doors, stairs, gates, paving, walls, and routes that require smooth changes in elevation.
- Screen for exposure. Confirm exterior, wet-area, ultraviolet, heat, and freezing suitability where relevant.
- Obtain complete instructions. Review substrate, preparation, installation, maintenance, and warranty documents.
- Estimate quantities and total cost. Include more than the visible finish.
A complete budget may need allowances for cleaning, coating removal, crack or surface repair, moisture testing where required, primers, membranes, bedding, cuts, waste, edge pieces, drainage work, transition profiles, tools, labor, and future maintenance.
Manufacturer-verification checklist
Before ordering, ask:
- Is the existing concrete an approved substrate?
- Can the current paint, sealer, adhesive, or coating remain?
- How should cracks and existing joints be handled?
- What drainage conditions are required?
- Is the complete system approved for exterior use and the expected climate?
- What wet-traction information is available?
- What installation temperature and weather range applies?
- Which primers, adhesives, membranes, fasteners, bedding materials, or subframes are approved?
- Which cleaning products may be used?
- What substrate or installation conditions exclude warranty coverage?
- What complete installed thickness should be expected?
- Is manufacturer technical support available for unusual site conditions?
Plan maintenance before installation
- Rugs: Lift, clean, dry, and remove them as conditions require; inspect the slab below.
- Removable tiles: Clear debris from drainage paths and inspect connectors, edges, and sample areas underneath.
- Paint: Clean gently and use compatible materials for repairs.
- Stain and sealer: Use approved cleaners and reapply protective products only as specified.
- Overlays: Clean routinely and maintain the complete coating system.
- Tile: Inspect joints, transitions, and damaged units.
- Pavers: Check joints, rocking units, settlement, and edge restraint.
- Decking: Inspect boards, supports, drainage routes, fasteners, and concealed debris.
Commercial lifespan estimates are broad generalizations and often lack enough methodology to decide a project. Product suitability, preparation quality, exposure, drainage, use, and maintenance are more useful than an unsupported category-wide lifespan.
Covering may be reasonable when the slab appears stable, defects are mainly cosmetic, runoff remains functional, and enough clearance exists for the complete assembly. Pause when there is active movement, major shifting cracks, severe spalling or crumbling, recurring ponding, problematic elevation changes, or no practical way to preserve drainage.
There is no universal point at which replacement becomes cheaper. Compare the complete preparation and covering scope with repair or replacement proposals. A material that appears economical may no longer be so after extensive substrate work, drainage correction, or transition reconstruction.
Frequently Asked Questions
What is the cheapest way to cover a cement patio?
There is no universally cheapest method. For a small area, an outdoor rug may require the least initial work. Paint or stain can have relatively low material costs and add little height, but cleaning, repairs, coating removal, tools, primers, and application conditions may increase the total.
Interlocking tiles require more surface material but may avoid adhesives or professional installation when the exact product is approved for the slab. Compare whole-project cost rather than advertised unit price, including preparation, drainage, cuts, edges, labor, and maintenance. Renters should also consider reversibility and lease requirements.
Can I cover a cracked or uneven concrete patio?
Sometimes, but first determine what the cracks or unevenness may represent. Stable cosmetic cracking or minor surface texture may be compatible with certain systems after approved preparation. Active settlement, shifting cracks, vertical displacement, severe deterioration, large humps, or recurring ponding should not simply be concealed.
Flexible tiles may follow limited roughness, and an overlay may disguise appropriately repaired cosmetic defects. Neither stabilizes a moving slab. There is no universal acceptable crack width or unevenness tolerance; use the limits for the selected system and obtain a site-specific assessment when the cause is uncertain.
Can pavers be laid over an existing concrete slab?
Some paver systems can be installed over concrete when the slab is suitable and the complete assembly addresses support, drainage, edge restraint, joints, and finished elevation. The method is not appropriate for every slab or paver.
Inspect for movement, large cracks, bumps, crumbling, and ponding first. Then calculate the pavers plus every supporting layer and check doors, stairs, gates, drains, and adjoining surfaces. Use an installation method approved for the selected product instead of copying a generic sand depth or joint detail.
Will interlocking deck tiles trap water on concrete?
They can retain water when the tile underside, slab, perimeter, or drainage outlet does not allow it to escape. Perforated or channeled designs may help water pass beneath the walking surface, but they cannot correct a low area or blocked edge.
Check the product’s drainage configuration, preserve the slab’s runoff route, and lift sample sections periodically to remove sediment and inspect for dampness or staining. Do not assume that solid-backed, carpet, wood, rubber, plastic, and composite tiles drain identically.
How much height will a new patio covering add?
It depends on the complete assembly. Paint, stain, and sealer add minimal height. Overlays add a system-specific layer. Interlocking tiles add the full tile and edge-profile depth. Bonded tile includes the tile, adhesive, and any membrane. Pavers include the units plus bedding or support. Decking includes boards, sleepers or framing, and associated components.
Measure the complete specified build-up before ordering. Check the resulting elevation at doors, stairs, gates, walls, drains, adjoining paving, and walking-route transitions—not merely the thickness printed on the surface material’s label.
The Bottom Line
Choose a patio covering only after deciding whether the slab appears stable, where water will go, and how much finished height the site can accept. A rug, stain, or removable tile may be enough for a cosmetic refresh. Overlays, outdoor tile, pavers, and decking require progressively more preparation and system-specific detailing.
If the patio is moving, crumbling, repeatedly holding water, or unable to accommodate workable transitions, stop treating the project as a cover-up. Obtain a site-specific assessment before buying finish materials.
Mortar Desk publishes general building-material reference information; it is not a contractor or engineering adviser. Direct structural, drainage, accessibility, permit, fire-safety, and code questions to the relevant manufacturers, qualified professionals, and local authorities.