 MortarDesk
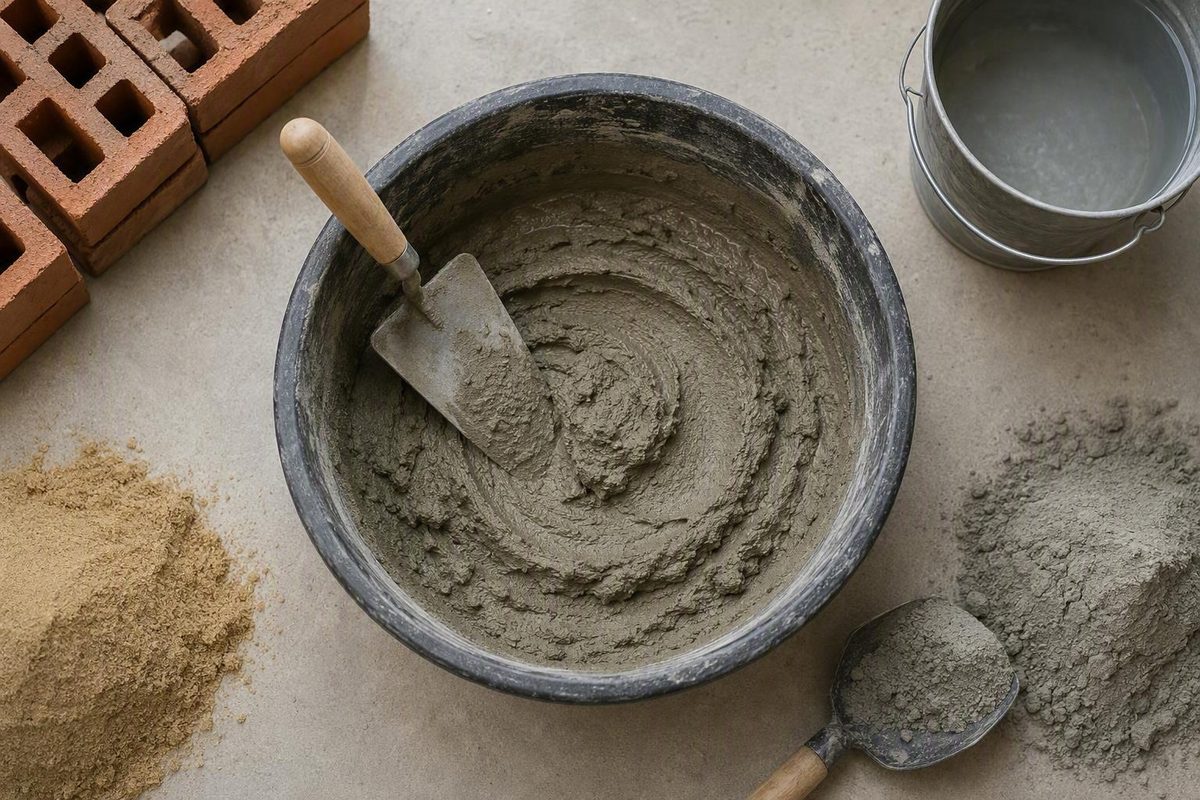
Mixing mortar correctly is less about memorizing a universal water ratio than controlling each batch. The reliable method is to identify the exact product, record its water and timing requirements, measure rather than guess, mix until uniform, and make adjustments only when the manufacturer permits them.
This guide covers prebagged masonry mortar that requires added water for compatible brick, block, stone, and repair work. It explains the mixing sequence, equipment choices, consistency checks, common batch problems, and the separate process used when mortar is made from cement, sand, and lime.
Before Mixing: Confirm That You Have Masonry Mortar
Read the full product name before opening the bag. The main procedure in this guide applies to prebagged masonry mortar, not to:
- Thinset or tile-setting mortar
- Concrete mix
- Grout
- Specialized repair products
- Refractory or heat-resistant mortar
- Lime-only conservation mortar
- Scratch-made mortar batched from separate ingredients
Products that share the word “mortar” may have different water allowances, loading sequences, mixing times, slake requirements, working times, and application limits. Instructions for one category should not be transferred to another.
Masonry mortar and concrete are not interchangeable. Mortar is formulated for workable joints and bonding masonry units, while concrete contains coarser aggregate and is used for different applications, including larger structural placements. Both may contain cement, sand, and water, but their proportions, aggregates, and intended uses differ. Collomix explains these material and application differences.
Before mixing, identify:
- The exact product and bag size.
- The mortar type or performance requirement specified for the project.
Check the plans, project specification, current product documentation, approved repair detail, or other controlling requirement. A general article cannot determine whether a mortar is compatible with an existing wall or appropriate for structural, below-grade, exposed, historic, or otherwise specified work.
Complete this label worksheet before adding water:
| Label item | Record before mixing |
|---|---|
| Product name | |
| Mortar type or designation | |
| Bag weight | |
| Specified water quantity or range per bag | |
| Water for an approved partial batch | |
| Initial mixing time | |
| Slake required? | Yes / No |
| Slake duration | |
| Remix time | |
| Working or pot life | |
| Application or joint limits | |
| Minimum and maximum application conditions | |
| Weather restrictions | |
| Retempering or late-water rule | |
| Curing and protection instructions | |
| Return-to-service requirements |
The current label or technical data sheet overrides generic quantities and times. Formulations and bag weights differ, so a water quantity or timing sequence used successfully with another product should not be assumed to apply.
If the label is damaged or incomplete, obtain the current technical data sheet for the exact product. Do not substitute instructions from a similarly named mortar.
Measure both the dry material and the corresponding water consistently rather than estimating a fraction of the bag by sight. If the manufacturer does not permit or explain partial batching, use the full-bag procedure or request guidance from the manufacturer.
Structural, below-grade, specified, and compatibility-sensitive masonry should not be designed from a general mixing guide. Plans, current standards, local code, product documentation, and the requirements of the relevant inspector or qualified professional take precedence. Mortar Desk is a reference publisher rather than a contractor or engineering adviser, and it notes that specifications change and codes vary by locality and edition.
Tools, Batch Planning and Safety Setup
Prepare the work area before adding water. Water activates cementitious material, so start timing from the point identified by the product label or technical data sheet. Time spent finding tools or preparing the wall after mixing begins reduces the period available for placing the mortar.
For a small or medium batch, gather:
- A clean bucket, mortar tub, or wheelbarrow
- A calibrated water container
- A trowel
- A mortar hoe or square-point shovel for hand mixing
- A suitable low-speed drill and mortar-rated paddle for bucket mixing
- A conventional or compact mortar mixer for larger quantities
- A timer or clock
- A scraper for the sides and bottom of the container
- The tools needed to prepare and complete the application
Match the method to the quantity:
- Hand mixing can suit a small repair batch.
- A drill and paddle can provide more uniform mixing for bucket quantities.
- A mortar mixer is generally more appropriate for larger or repeated batches.
The selected equipment must be suitable for both the material and the batch volume. Follow the drill, paddle, or mixer manufacturer’s operating and capacity limits rather than assuming any tool can handle any quantity.
Clean the container, paddle, hoe, shovel, trowel, and measuring equipment before use. Remove hardened residue so it does not contaminate the fresh mortar or make uniform mixing more difficult.
Plan a batch that can be placed within the product’s stated working time. Do not automatically mix a full bag merely because the bucket or machine can hold it. A smaller, accurately measured batch is preferable when the full quantity cannot be installed promptly.
Wear:
- Safety goggles
- Suitable gloves
- Long sleeves
- Suitable respiratory protection for dry cementitious dust
The product label and safety data sheet are the controlling safety documents. General mortar guidance also recommends goggles, gloves, long sleeves, and respiratory protection when handling dry material. The Home Depot’s mortar guide includes these precautions.
Where the product allows water-first loading, placing water in the container before introducing powder can reduce dry material becoming airborne or sticking to the bottom. This is only a dust-limiting practice; it does not replace respiratory protection, eye protection, ventilation, or the precautions in the safety data sheet. Cementitious-mortar equipment guidance also associates low-speed mixing with better control and less unnecessary air entrainment, although the exact tool and product instructions still govern. RUBI discusses water-first loading and controlled low-speed mixing in its cementitious-mortar guidance.
Complete this checkpoint before mixing:
- The masonry units or repair surface are prepared as required.
- Application tools are clean and within reach.
- Access to the work is clear.
- The intended batch quantity has been selected.
- The required water has been measured.
- A timer is available.
- Site and weather conditions comply with the product instructions.
- The label worksheet is complete.
- Required protective equipment is being worn.
Only then should water and mortar be combined.
How to Mix Prebagged Masonry Mortar Step by Step
The following sequence is a general framework. If any step conflicts with the current bag or technical data sheet, follow the product documentation.
1. Read and record the instructions
Before opening the bag, record:
- The specified water quantity or range
- Initial mixing duration
- Slake requirement and duration
- Remix instructions
- Working or pot life
- Restrictions on later water additions
- Application and weather limits
Confirm whether the instructions apply to a full bag and whether partial batching is permitted. Do not rely on memory from a different brand, bag size, or mortar type.
2. Measure the specified total water
Use a calibrated container. Do not estimate the quantity from how long a hose or faucet has been running.
If the manufacturer provides a range, regard the upper figure as a limit rather than an automatic target. You may be able to begin toward the lower part of the permitted range and adjust during initial mixing, but the final water quantity must remain within the product allowance.
For a permitted partial batch, calculate the water from an accurately measured amount of dry mix.
3. Put most of the water in the clean container
Unless the product specifies another sequence, place most of the measured water in the bucket, tub, or mixer and reserve the balance for controlled adjustment during initial mixing.
A commonly published approach is to begin with roughly two-thirds to three-quarters of the allowed water, but that fraction is a starting technique rather than a universal requirement. The exact product instructions remain controlling. An older masonry-specific Type S procedure illustrates this water-reserving method.
The reserved portion is not extra water. It is part of the measured total allowance.
4. Add the prebagged mortar gradually
Introduce the dry mix into the water while mixing. Avoid abruptly dumping the entire bag into a dry bucket or pouring an uncontrolled quantity of water onto a pile of powder.
Add the material from a low, controlled height and keep your face away from the bag opening. Continue following the product’s dust precautions and safety data sheet.
5. Mix thoroughly and scrape the container
With powered equipment, use a suitable mortar paddle at low speed. With a hoe or shovel, repeatedly turn material from the bottom and outside edges toward the center.
Pause as needed to scrape the sides, corners, and bottom. Continue until:
- Color is consistent throughout.
- Moisture is evenly distributed.
- No dry powder or pockets remain.
- No standing water is visible.
- Lumps have been broken down.
- The batch behaves as one uniform mass.
Do not judge the batch only by its surface.
6. Make only permitted initial adjustments
Assess the consistency only after the batch has been thoroughly mixed and scraped.
If the mortar remains too stiff and the product allows adjustment during initial mixing, add a small amount of the reserved measured water. Incorporate that amount completely before deciding whether another addition is needed.
Do not exceed the label’s maximum water allowance. Lumps and dry pockets often call for more scraping and mixing, not more water.
7. Mix for the specified time
Use a timer and follow the label. There is no universal masonry-mortar mixing duration.
Published examples vary. One older masonry-specific procedure gives an initial mixing period of approximately 3–5 minutes, but that figure applies to the procedure described there and should not be transferred to another product. The same source provides the product-specific context for that range.
Other cementitious products, including tile-setting mortars, may specify periods such as 5–10 minutes. That difference is precisely why thinset instructions must not be used as masonry-mortar instructions.
Check whether the manufacturer defines mixing time as total elapsed time or only the time during which the mixer is running. Follow any instructions concerning pauses for scraping or adding reserved water.
8. Slake only when directed
If the product requires slaking, stop mixing and leave the batch untouched for the stated period. Slaking is a scheduled rest between initial mixing and remixing.
Do not assume that every masonry mortar requires a rest or that one product’s slake time applies to another. During the specified rest, do not casually add water or powder.
9. Remix as specified
After the required rest, remix for the stated time. Scrape the container again so the mortar is uniform from top to bottom.
Unless the current product instructions expressly permit an addition at this stage, remix without adding water, dry mortar, cement, or sand. Final remixing is not an opportunity to alter the designed proportions.
10. Check the consistency and begin placing
Perform the trowel and shape-retention checks described below. If the batch complies with the product instructions and behaves properly, begin placing it promptly.
Hand Mixing Versus a Drill, Paddle or Mortar Mixer
All three methods can produce a workable batch when they suit the product and quantity. The essential requirement is uniform distribution of water and dry ingredients.
Small-batch hand method
For a small quantity:
- Use a clean mortar tub or wheelbarrow.
- Measure the permitted water.
- Place most of it in the container unless the product directs otherwise.
- Add the dry premix gradually.
- Pull mortar from the bottom and outer edges toward the center with a mortar hoe or square-point shovel.
- Turn the entire mass rather than stirring only the surface.
- Scrape the corners, sides, and bottom.
- Add reserved water cautiously during initial mixing only when permitted.
- Continue until color, texture, and moisture are even throughout.
- Slake and remix if the label requires those steps.
Hand mixing is practical for small repairs but requires close attention to the bottom and corners of the container. Repeated turning and scraping help prevent dry pockets and uneven moisture. A small-project hand-mixing guide likewise emphasizes uniform color and texture and thorough scraping.
Bucket mixing with a drill and paddle
For bucket quantities, use a drill capable of handling the load and a paddle intended for mortar. Operate the equipment according to its instructions and keep the mixing action controlled to avoid unnecessary splashing.
Start and stop at low speed. Move the paddle methodically through the batch rather than holding it in one position. Powered mixing does not eliminate the need to stop and scrape the sides and bottom.
There is no single suitable revolutions-per-minute setting for every drill, paddle, batch size, and mortar product. Follow both the equipment limits and the mortar manufacturer’s instructions.
Mortar-mixing machine
A conventional or compact mortar mixer is suitable for larger quantities when the machine is compatible with the material and batch volume. Measure every batch consistently and use the loading sequence required by the selected mortar.
Physical machine capacity should not determine batch size by itself. If the machine can hold more mortar than the crew can place within the stated working time, reduce the batch.
How to Tell When Mortar Has the Right Consistency
Properly mixed masonry mortar should be:
- Smooth
- Homogeneous
- Uniformly moist
- Free of persistent lumps
- Cohesive
- Workable under the trowel
- Able to hold its shape
- Neither crumbly nor flowing
“Thick peanut butter” can serve as a rough visual comparison, but it is not a proportioning rule. The specified water allowance and functional behavior of the mortar are more important than matching a household-food analogy.
The approximately 90-degree trowel test
Load a practical amount of mortar onto the trowel and turn the trowel until its face is approximately vertical.
Workable mortar should cling rather than immediately falling or sliding away. This is a quick cohesion check, not proof by itself that the water quantity or mortar selection is correct. The same practical test is described in The Home Depot’s ready-mix mortar procedure.
The shape-retention test
Form a mound or ridge with the trowel. It should stand without rapidly flattening, sagging, or releasing water, while remaining easy enough to spread and shape.
A ridge that stands but tears, crumbles, or resists spreading may indicate mortar that is too dry. Shape retention must therefore be assessed together with workability.
Signs that mortar may be too dry
- It crumbles when moved.
- It lacks cohesion.
- It is difficult to spread into a continuous bed.
- Dry powder remains after mixing.
- It tears instead of moving under trowel pressure.
- It will not remain on the trowel.
- It leaves poorly consolidated edges.
Before adding water, scrape the container and mix again. If the mortar remains too dry, adjust it only during the permitted initial stage and only with water from the measured allowance.
Signs that mortar may be too wet
- It looks soupy.
- Water stands on the surface.
- The material separates.
- A mound quickly collapses.
- Trowel-formed ridges rapidly slump.
- Mortar immediately slides from the tilted trowel.
- It runs from the joint or bed instead of remaining in place.
The objective is controlled workability within the manufacturer’s water allowance—not the wettest mortar that feels easy to spread. Excess water can make mortar overly fluid and may reduce strength or contribute to cracking, while insufficient water can impair workability and intended bonding. Consolidated Aggregates summarizes these wet- and dry-mix problems.
Troubleshooting Dry, Wet, Lumpy or Stiffening Mortar
Diagnose the condition before changing the batch. More water is not the automatic answer.
| Symptom | Likely cause | Appropriate action |
|---|---|---|
| Stiff or crumbly during initial mixing | Incomplete incorporation or insufficient permitted water | Scrape and mix thoroughly. If initial adjustment is still allowed, add a small amount of reserved measured water and remix. |
| Soupy or separating | Excess water or inaccurate measurement | Stop adjusting. Follow an approved product correction, if one exists; otherwise reject the batch. |
| Persistent lumps | Dry mix added too quickly or incomplete mixing | Break up the lumps, scrape all surfaces, and continue mixing before considering any water adjustment. |
| Dry pockets | Material at the sides, corners, or bottom was not incorporated | Scrape the container and turn the material from the bottom until uniform. |
| Ridges slump rapidly | Excess water or inadequate body | Check the measurement and product limits. Do not improvise with arbitrary dry additions. |
| Mortar stiffens after final mixing | The working period may be advancing | Check the stated retempering rule and time limit. If no approved correction applies, discard the batch. |
Initially stiff is not the same as later stiffening
An initially dry batch may still be adjustable when all three conditions apply:
- It remains in the initial mixing stage.
- The product instructions allow adjustment.
- The total addition remains within the measured maximum water allowance.
Mortar that was workable after final mixing and later becomes stiff is a different condition. Do not assume that adding water will restore its intended performance.
Lumps do not automatically mean “add water”
Stop and scrape the sides, corners, bottom, and mixing tool. Continue mixing until the existing water is evenly distributed, then reassess the mortar.
Do not redesign an overly wet premix
Avoid trying to correct wet prebagged mortar with arbitrary additions of premix, cement, or sand. Additional premix changes the total batch quantity and would require a properly recalculated water allowance. Separate cement or sand changes the manufacturer’s designed proportions.
Follow an expressly approved correction method. If none is provided and the mortar remains soupy, separating, or unable to retain shape, reject it.
Do not revive expired mortar by habit
Water or powder generally should not be added after slaking or final mixing unless the current documentation for that exact product expressly permits retempering. General Sakrete educational guidance discourages later water additions because they change the designed water-to-cement relationship, but the selected product’s current instructions determine what is permitted. See Sakrete’s discussion of mortar and retempering.
Discard mortar when it:
- Has exceeded its stated working time
- Is separating
- Is stiffening without an approved correction
- Cannot be made uniform during the permitted initial process
- Contains hardened contamination
- Falls outside the documented application conditions
Rejecting an uncertain batch is more reliable than attempting an improvised correction after placement.
Mixing Mortar From Cement, Sand and Lime
Scratch-made mortar is a separate batching system. Do not transfer prebagged water quantities, loading order, slake instructions, or working-time assumptions to it.
Scratch mortar may be made from:
- Portland cement, hydrated lime, and fine masonry sand; or
- Masonry cement and fine sand
The proportions depend on the required mortar type, masonry units, exposure, application, compatibility, project specification, and applicable standards or code. Selecting the formulation is a design and specification decision, not merely a matter of producing a convenient texture.
A ratio of one part cement to three parts fine sand is sometimes cited as a simple site-mixed example, but it is not a universal recipe and does not by itself establish a specified Type M, S, N, O, or other mortar. Collomix presents 1:3 only as a common example and states that the correct ratio depends on intended use. Its mortar-mixing guide provides that qualification.
Use calibrated volume containers or weight measurements. Do not treat mounded shovel counts as precise batching because the amount carried by each shovel is not reliably controlled.
General machine-batching sequence
Where the selected specification and materials support it:
- Determine the required formulation.
- Measure every dry ingredient accurately.
- Blend the cementitious material and fine sand.
- Measure the controlled water quantity.
- Introduce the water according to the approved batching procedure.
- Mix until color and moisture are uniform and the mortar is workable.
- Check consistency without exceeding the permitted water.
- Use the batch within the applicable time and conditions.
This sequence differs from the common prebagged bucket method. Separate ingredients must first be proportioned correctly, while prebagged mortar already contains dry components in predetermined proportions.
Small hand-batched scratch mortar
For a small hand batch, measure the dry materials rather than counting approximate shovelfuls. Blend the dry ingredients until the color is even. Add water cautiously in increments while turning the material from the bottom and scraping the container.
Continue until color and moisture are consistent throughout. Judge the batch against both its specified limits and its behavior under the trowel.
Do not select scratch-mortar proportions from a generic article for structural, below-grade, historic, repointing, or otherwise specified work. Verify the formulation against the current plans, standards, code requirements, and professional instructions.
Working Time, Weather Protection and Curing Limits
Working time, sometimes called pot life, is the period during which mixed mortar remains usable under the conditions defined by its manufacturer. Obtain the actual limit from the current bag or technical data sheet.
Do not substitute a general estimate for the product’s stated working time. Use mortar promptly and stop using it when it has exceeded that limit or begun stiffening outside an expressly approved adjustment window.
These milestones are not interchangeable:
- Working or pot life: how long the mixed material remains usable
- Initial set: an early stage of hardening
- Surface drying: loss of visible surface moisture
- Protection period: the time fresh work must be shielded from adverse conditions
- Full curing: continued development of the hardened material’s properties
- Return to service: the point at which the completed work may be exposed to its intended use
A surface that appears dry is not necessarily fully cured. Likewise, the end of a batch’s working time does not mean that installed mortar has completed setting or curing.
Protect fresh work from direct sun and extreme heat, cold, or wet conditions, but do not invent a universal weather threshold. Consult the selected mortar’s documentation and the project requirements for:
- Surface and ambient conditions
- Wind and rapid moisture loss
- Direct-sun protection
- Rain protection
- Cold-weather procedures
- Moisture retention
- Curing method and duration
- Timing of cleaning or loading
- Return-to-service requirements
Mortar Desk provides general reference information, not project-specific contracting or engineering advice. Structural and code-governed questions should be resolved through the applicable plans, current standards, local inspector, product manufacturer, and qualified trade or design professional.
Final quality-control sequence: identify the masonry mortar; copy its label requirements; measure the specified water; place most of that water in a clean container when the product permits; add the premix gradually; mix until uniformly moist and free of dry pockets; adjust only during the permitted initial window; slake and remix when directed; confirm that the mortar holds its shape and clings to a near-vertical trowel; then use it within its stated working time.
Consistency checks support the product instructions. They do not replace them. Specified, structural, below-grade, historic, and compatibility-sensitive masonry must also be checked against current project documents, standards, and local requirements.
How much water do I add to a bag of mortar mix?
Use the quantity or range printed on the current bag or technical data sheet for that exact product and bag weight. There is no reliable universal water-to-mortar ratio.
Measure the permitted total before mixing. If the instructions allow gradual adjustment, begin with most of that water and reserve the balance for small additions during initial mixing. Never exceed the stated maximum.
Should water or dry mortar go into the bucket first?
For the general prebagged masonry-mortar method, put most of the specified water in the clean bucket first and add the dry mortar gradually while mixing.
This can improve incorporation at the bottom of the container and help limit airborne dry material. If the product specifies a different loading sequence, follow the product instructions.
How long should mortar mix slake before remixing?
Slake the mortar only if the manufacturer directs you to do so, and use the stated period. There is no universal slake time.
Leave the batch untouched during the required rest, then remix for the specified duration without unauthorized additions of water or powder.
Can I add water when mixed mortar starts getting stiff?
Do not add water after slaking or final mixing unless the current instructions for that exact product expressly permit retempering and the batch remains within all stated limits.
Distinguish an initially dry batch from mortar that was workable and later stiffened. The first may accept reserved measured water during an allowed initial-adjustment period. If later stiffening has no approved correction, discard the mortar rather than trying to revive it.
Is a 1:3 cement-to-sand mortar ratio suitable for every project?
No. One part cement to three parts fine sand is only a commonly cited scratch-mortar example. It is not a universal, specified, or automatically code-compliant formulation.
Required proportions depend on the mortar system, masonry units, exposure, application, compatibility, plans, specifications, and applicable standards. Structural, below-grade, historic, and specified work requires a verified formulation rather than a generic ratio.