 MortarDesk
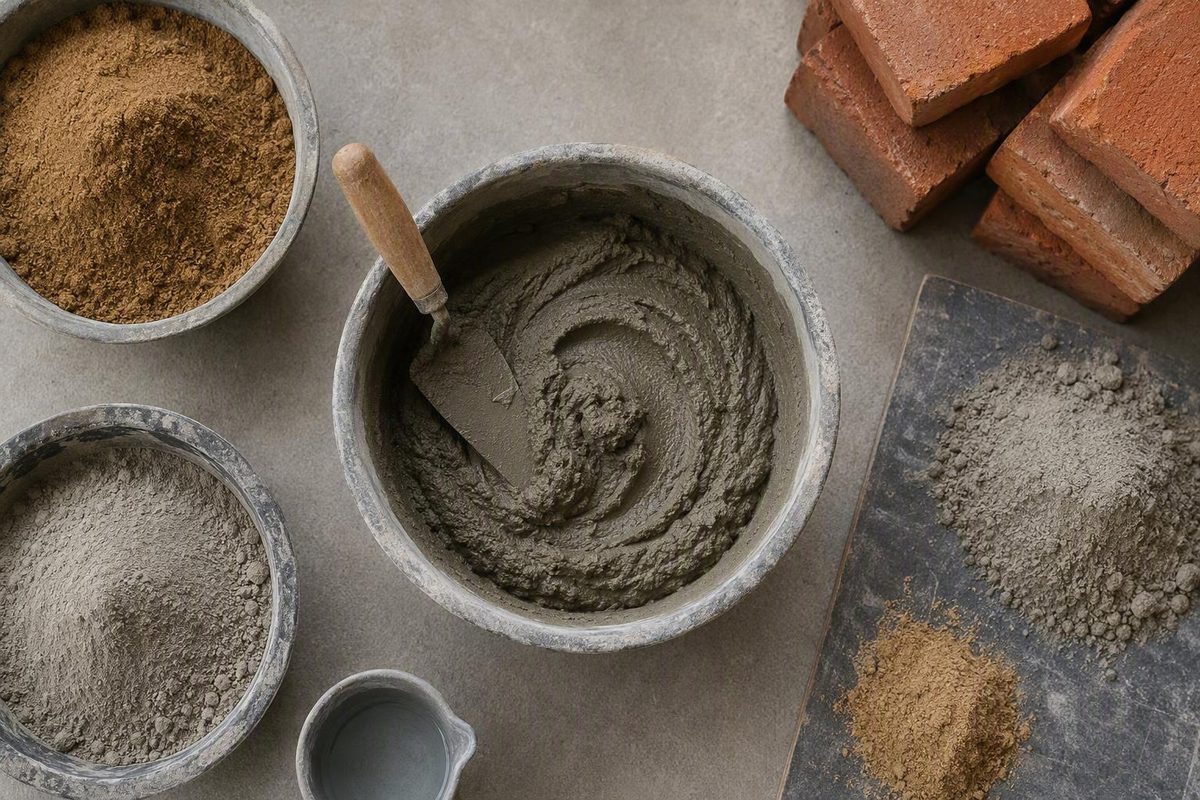
Mortar mix looks simple—binder, sand, and water—but selecting and preparing it correctly is not a strength contest or a matter of memorizing one recipe. The mortar must suit the brick, block, or stone; the wall’s location and exposure; the assembly’s structural role; and the current plans, specifications, product instructions, and locally applicable requirements.
For many DIY projects, the most practical route is a clearly labeled dry preblend. Even then, the mortar type, water quantity, mixing sequence, working time, curing directions, and estimated yield must come from that specific product—not from a generic online formula.
What mortar mix is—and what it is not
Mortar is a workable masonry mixture used to lay, bond, or repair units such as brick, concrete block, and stone.
Common masonry mortars contain:
- A cementitious or lime-based binder
- Fine aggregate, usually masonry sand
- Water
- Lime or another specified component in many formulations
Cement is an ingredient, not mortar
Cement is a hydraulic binder: it reacts with water and hardens. Mortar is the complete mixture containing binder, fine aggregate, water, and any other specified components.
A bag labeled “Portland cement” is therefore not equivalent to a bag of mortar mix. If Portland cement is used to produce site-batched mortar, compatible sand—and, where specified, lime—must still be selected, measured, and added under the applicable specification or approved mix procedure.
Mortar is not concrete
Concrete generally combines cement, water, fine aggregate, and coarse aggregate such as gravel. Mortar normally omits coarse aggregate and is formulated primarily to bond masonry and fill joints. Concrete is commonly used to form solid elements such as slabs, footings, foundations, and structural members; masonry mortar should not be treated as a substitute for structural concrete. Amerimix provides a general manufacturer explanation of these composition and application differences.
The distinction involves more than aggregate size. Concrete and mortar are designed for different placement methods, joint or element dimensions, loads, and performance objectives. A mortar that spreads well beneath brick is not automatically suitable for casting a footing, just as concrete containing coarse stone is generally unsuitable for a thin masonry joint.
Masonry mortar is not tile thinset
Tile thinset is a separate setting-material category designed to bond tile to suitable substrates. Although thinset products are often called “mortar,” ordinary masonry mortar and tile thinset are not interchangeable.
Check whether the package is intended for:
- Laying masonry units
- Repointing or masonry repair
- Setting tile
- Plastering or stucco
- Another specialized application
A sound mortar joint can contribute to weather resistance, but moisture control depends on the complete wall or repair assembly, including workmanship and any specified flashing, drainage spaces, water-resistive layers, weeps, or coatings.
Bagged preblend, site-batched mortar, and the meaning of “ready-to-use”
“Mortar mix” can describe several materially different purchasing and preparation routes. Identify the product format before comparing prices, bag sizes, or coverage.
Dry preblended mortar
A dry preblend generally contains proportioned binder and dried sand. The user adds water and mixes the material according to the manufacturer’s instructions. This format reduces the number of ingredients measured on site and can improve consistency between batches.
For example, the manufacturer describes QUIKRETE Mortar Mix No. 1102 as a dry blend of masonry cement and graded sand that requires added water. QUIKRETE says the product is designed to meet ASTM C270 for Type N mortar and offers it in 40-, 60-, and 80-pound bags. These are manufacturer statements, not independent verification of compliance or suitability for a particular project.
U-MIX also describes its mortar as a dry blend requiring only water.
Masonry cement plus sand
Masonry cement is a factory-prepared binder. To produce mortar, it is combined with masonry sand and water in controlled proportions.
Buying masonry cement alone is not the same as buying complete dry mortar mix. The sand still has to be selected, measured, and mixed on site, and the batching method must follow the applicable project requirements.
Separately batched cement, lime, and sand
Another route is to batch Portland cement, hydrated lime, masonry sand, and water separately. This can provide control where a specification requires it, but it creates more opportunities for variation.
Results can change with:
- Sand grading and moisture
- Measuring-container accuracy
- Partial bags
- Inconsistent volume measurements
- Water additions
- Mixing time and equipment
A shovel count is not equivalent to a controlled measurement because shovel capacity, loading, and sand condition vary.
Traditional lime mortar
Traditional lime mortar is a distinct material system. Lime type, aggregate, preparation method, exposure, and compatibility with existing masonry all matter. Historic mortar should not be reduced to a modern type letter or recreated by casually substituting one form of lime into an old recipe.
Wet, application-ready mortar
A retailer may use the phrase without clarifying whether the container holds wet mortar or a dry blend requiring water.
Before buying, confirm:
- Product format: dry preblend, binder requiring sand, separately batched system, or wet mortar
- Mortar classification: M, S, N, O, K, or a proprietary designation
- Bag or container size
- Required water and mixing equipment
- Intended masonry and exposure
- Current product data sheet
- Current safety data sheet
Preblended bags offer convenience and repeatable dry proportions, but they do not eliminate the need to control water, mixing time, batch size, weather protection, and surface preparation.
Mortar Types M, S, N, O, and K compared
Mortar type letters are useful screening tools, not universal application instructions. They identify broad performance families, but suitability still depends on masonry-unit properties, assembly design, exposure, workmanship, and governing project documents.
| Type | Relative strength | Commonly associated uses | Compatibility concerns | Checks required before selection |
|---|---|---|---|---|
| M | Highest of M, S, and N in the cited manufacturer table | Selected heavy-load or demanding masonry conditions | May be unnecessarily hard for softer brick or stone; compressive strength alone does not establish bond or workability | Structural design, unit properties, exposure, specified mortar, local requirements |
| S | Higher than N and lower than M | Often considered for reinforced, structural, at-grade, or below-grade work | Not automatically correct for every foundation, retaining wall, chimney, or structural wall | Plans, assembly performance, unit properties, reinforcement, exposure |
| N | Moderate | Common starting point for general above-grade brick, block, or stone masonry | May not satisfy demanding structural or below-grade requirements; may still be unsuitable for some historic masonry | Unit compatibility, exposure, design, product scope, project specification |
| O | Lower | Soft masonry, some interior non-load-bearing work, and some repointing contexts | Exterior, wet, freezing, and load-bearing conditions require careful verification | Existing mortar, exposure, structural role, preservation requirements |
| K | Very low | Specialist matching of soft or historic masonry | Rarely a default for modern work; material composition and performance must be matched to the building | Mortar analysis, preservation guidance, exposure, specialist specification |
SPEC MIX publishes minimum average 28-day compressive strengths of 2,500 psi for Type M, 1,800 psi for Type S, and 750 psi for Type N. The manufacturer also states that its M, S, and N products meet the standards identified on its page. Both are manufacturer-published specifications rather than independent findings presented here. See the SPEC MIX masonry-cement-and-sand mortar data.
Type N
Type N is commonly positioned as a general-purpose starting point for above-grade masonry. That does not mean every above-grade brick, block, or stone project requires it.
Selection can change with:
- Unit absorption and strength
- Climate and exposure
- Wall function and loading
- Required assembly performance
- Product scope
- Project documents
Type S
Type S is commonly considered where demands are greater, including some reinforced, structural, at-grade, or below-grade applications. These associations are not blanket approvals.
Reinforced concrete masonry, foundations, retaining walls, and seismic construction require review of the designed assembly. Do not choose Type S merely because a consumer chart associates it with “structural” work.
Type M
Type M has the highest listed compressive strength among M, S, and N in the cited manufacturer table, but that does not make it a premium all-purpose mortar. It is an option for selected heavy-load conditions where specified and compatible.
A harder mortar may be unsuitable for soft masonry, and compressive strength by itself does not establish field bond, workability, moisture performance, or completed-wall strength.
Types O and K
Types O and K are lower-strength mortars generally associated in commercial guidance with soft or historic masonry. Their suitability depends heavily on the existing material, exposure, and construction method.
For preservation work, a type letter may be an incomplete description. General restoration guidance warns that hard mortar paired with soft brick can contribute to deterioration in the masonry units, but it does not replace project-specific analysis.
Laboratory compressive strength is only one property. It does not guarantee field bond, extent of bond, resistance to water penetration, or the strength of the completed assembly. Workability, unit absorption, joint tooling, coverage, curing, and workmanship also affect performance.
How to choose mortar for brick, block, stone, and repair work
Instead of asking, “Which mortar is strongest?” work through six questions.
1. What masonry unit is being used?
Identify whether the work involves modern fired brick, concrete masonry units, dense stone, soft porous stone, historic brick, manufactured veneer, or another material.
A mortar that is much harder than soft brick or stone may concentrate deterioration in the unit rather than in the more readily repaired joint. Conversely, a mortar that cannot meet the needs of a modern structural assembly may perform inadequately.
2. Is the work above or below grade?
Above-grade and below-grade work face different combinations of moisture, soil contact, loading, drainage, and weather exposure.
Type N may be a starting point for ordinary above-grade masonry, while Type S is often considered for more demanding or below-grade conditions. Neither association overrides the design, specification, or product scope.
3. Is it structural or reinforced?
A small nonstructural repair and a reinforced concrete-masonry wall are not comparable selection problems. Reinforcement, loads, wall height, support conditions, unit strength, and required assembly performance may govern the mortar selection.
Load-bearing walls, reinforced masonry, foundations, retaining walls, seismic work, and substantial below-grade construction should be checked against the current approved plans and project requirements. No particular code edition or structural standard is being summarized here.
4. What moisture and weather exposure applies?
Consider rain, wind-driven rain, freezing conditions, soil moisture, heat, shade, salt exposure, and the masonry’s absorption.
Exposure affects both mortar selection and installation. Heat, wind, low humidity, and absorptive units may accelerate water loss; cold conditions can slow strength development and may introduce freezing risk.
Mortar is only one part of moisture management. Traditional solid masonry can behave differently. A stronger or denser-looking joint does not make the entire wall waterproof.
5. Is the masonry modern or historic?
Historic repointing is a compatibility exercise, not simply a choice between Type N and Type S. Existing mortar may need examination for binder, aggregate, hardness, color, texture, and condition.
A lower-strength, lime-rich mortar may be appropriate for soft historic masonry, but the correct formulation can require material analysis and preservation-specialist input.
6. What do the plans, product data, and local code require?
Where project documents specify a mortar type or performance route, confirm that the selected product is intended to satisfy it and is acceptable to the people responsible for the work.
Do not treat these terms as synonyms:
- Compressive strength
- Bond strength
- Extent of bond
- Water retention
- Resistance to water penetration
- Completed assembly strength
An informal engineering-forum discussion also distinguishes these properties and emphasizes the influence of unit strength and overall wall design, but it is not a standard or design specification.
Seek qualified review for structural or reinforced masonry, foundations, retaining walls, load-bearing walls, chimneys, fireplaces, seismic construction, and substantial below-grade work. Direct historic masonry to a restoration specialist where compatibility is uncertain.
Mortar mix ratios: why there is no universal recipe
“One part cement to three parts sand” is often published as a general starting ratio for cement mortar. It is not a universal masonry specification.
Required proportions can change with:
- Mortar type and binder system
- Whether the binder is Portland cement and lime, masonry cement, mortar cement, or another formulation
- Sand grading, shape, cleanliness, and moisture
- Whether materials are measured by mass, controlled volume, bags, buckets, or shovels
- Masonry-unit absorption
- Exposure and required performance
- Proprietary components or admixtures
- Mixing equipment and batch size
- Project specifications
Published Type S field recipes themselves differ in format and precision. One field guide presents separate cement-lime-sand and masonry-cement batches using bags and “mounded shovels,” while treating preblended bags as a third route requiring only water. Its quantities are approximate and regionally framed, demonstrating why published Type S field-batching directions should not be converted into a universal formula.
A shovel is especially poor as a precision measure. The amount changes with shovel size, operator technique, sand moisture, and the meaning of “mounded.” Damp sand can also occupy a different apparent volume from dry sand.
Packaged mortar type versus an improvised recipe
Selecting a preblended Type N or Type S product means buying a manufacturer-proportioned formulation and adding water as directed. It does not mean recreating that product by guessing at bags and shovels.
The change can alter:
- Workability
- Shrinkage
- Compatibility
- Bond behavior
- Color
- Water demand
- Other performance characteristics
Exact proportions should come from the current project specification, applicable approved procedure, or selected manufacturer’s data—not from a universal web recipe.
Preservation note: the historic 1:3 ratio
A historic instruction calling for one part lime to three parts sand may have referred to quicklime before slaking, not modern lime putty or dry hydrated lime. Gerard Lynch’s conservation article reports that quicklime commonly increases in volume during slaking, so a historic quicklime-to-sand proportion cannot be transferred directly to another lime form. See the explanation of historic lime and sand proportions.
Lime putty, dry hydrated lime, natural hydraulic lime, and quicklime differ in volume, density, water content, preparation, and performance. Historic work therefore needs a formulation based on the existing masonry, mortar evidence, lime type, sand, and exposure—not an isolated ratio.
How to mix bagged mortar safely and consistently
For bagged mortar, the package label and current product data sheet control. Another brand’s video, water quantity, mixing time, or slake period may be wrong for the product in front of you.
A label-first workflow
-
Read the documents before opening the bag. Confirm the mortar type, intended application, batch size, temperature limits, water quantity, equipment, mixing time, rest or slake period, working time, curing instructions, and disposal requirements.
-
Check the packaging and storage history. If the bag is torn, wet, or visibly moisture-damaged, follow the manufacturer’s storage and usability guidance rather than assuming the contents remain suitable.
-
Prepare the surface. Remove loose material and contaminants identified by the product instructions, such as oil, paint, and grease. Follow the manufacturer’s directions on dampening absorptive units or repair surfaces.
-
Use clean equipment and potable water. Dirty containers, old mortar, contaminated water, and inconsistent measuring vessels can interfere with repeatable batching.
-
Choose a manageable batch size. Mix only what can be placed within the product’s stated working period. If using less than a full bag, follow any manufacturer instructions for partial batches and scale the water accurately.
-
Measure the specified initial water. Do not estimate by hose time or an unmarked bucket. Use a consistent measuring container.
-
Add materials in the stated sequence. Some products use dry-mix-first instructions; other guidance uses water-first methods. Follow the selected product.
-
Mix for the specified time. Incorporate material from the sides and bottom of the container using equipment suitable for the batch.
-
Rest or slake only if directed. Some products prescribe a rest followed by remixing; others use a different procedure. Do not copy another product’s slake period.
-
Make only permitted adjustments. If additional water is allowed, add it in small, measured increments within the stated limit. Keep the procedure consistent between batches, especially for colored mortar.
As a product-specific example, U-MIX directs an initial rate of one quart of clean potable water per 15 pounds of dry mix and then only enough additional water to produce a stiff, moldable consistency. It warns that excess water may weaken the mixture. The same manufacturer says to apply the product at 40°F and rising, dampen specified blocks or repair areas, and keep new mortar damp for at least three days as directed. These instructions apply to U-MIX, not to every mortar; see the U-MIX product directions.
SPEC MIX provides a different example. It recommends mechanical mixing for four to five minutes but does not publish one universal numerical water quantity on the cited product page. This is why one manufacturer’s rate should not be copied to another product.
What workable mortar looks like
Suitable mortar is generally:
- Smooth and uniform
- Free of dry pockets
- Moldable rather than runny
- Cohesive enough to spread and form a bed
- Able to remain on a trowel when tipped
Immediate runoff or collapse suggests an overly wet mix. A too-dry mix may crumble, resist spreading, or remain unevenly wetted. Correct either condition only within the selected product’s permitted adjustment procedure.
Hand mixing versus mechanical mixing
A small batch may be mixed by hand when the product instructions and project specification allow it. Hand mixing still requires thorough turning and scraping so the batch becomes uniformly moist.
A suitable paddle or mortar mixer generally improves repeatability for larger batches by making it easier to control mixing time and eliminate dry pockets. Equipment must match the material and batch size.
Consistency between batches matters as much as the appearance of one batch. Keep batch size, water measurement, equipment, mixing time, and adjustment method stable—particularly when using colored mortar.
Working time, retempering, curing, and weather protection
Mortar does not pass through one universal “dry time.” Several separate milestones are involved:
- Working time: the period during which mortar may be placed
- Stiffening or initial set: the developing loss of plasticity
- Tooling window: when the joint is firm enough to finish
- Surface drying: visible moisture leaving the surface
- Curing or protection period: any required moisture retention or weather protection
- Cleaning window: when cleaning can occur without damaging the work
- Service or loading readiness: determined by the assembly and project requirements
- Strength development: sometimes represented by a 28-day laboratory value
These milestones are not interchangeable. A surface that looks dry may still be developing strength. A general 24- to 48-hour drying estimate does not establish that every mortar is fully cured, ready for loading, suitable for cleaning, or prepared for severe exposure.
Working-time examples are product-specific
SPEC MIX says its cited mortar should be used within 2.5 hours after initial mixing. The same manufacturer recommends allowing mortar to cure for at least seven but no more than 28 days before cleaning. Its instructions also permit limited replacement of water lost through evaporation under stated conditions and caution that adding water to colored mortar may affect color consistency. These are product-family instructions, not universal rules.
By contrast, a retailer’s general mixing guide gives an approximate 90- to 120-minute pot life for its process. The guide also prescribes its own slaking procedure and warns against adding water afterward. That generic advice cannot override the instructions for a selected product. See the retailer’s general mortar-mixing guidance.
Retempering is not an always-or-never rule
Retempering means adding limited water to restore workability lost through evaporation. Some generic guidance warns against adding water after slaking, while some manufacturer instructions allow restricted retempering under defined conditions.
The practical rule is narrow: follow the selected product and project specification. Permission to replace evaporated water is not permission to revive mortar that has begun setting or exceeded its working time.
Curing and cleaning are separate
Curing or damp-protection directions govern the developing mortar. Cleaning instructions govern when and how residue may be removed from the masonry surface.
The correct cleaning time can depend on:
- Mortar product
- Masonry unit
- Cleaning agent
- Test-area results
- Project requirements
Never substitute a generic cleaning schedule for the mortar and masonry manufacturers’ instructions.
Weather changes the process
Heat, wind, direct sun, low humidity, cold, and highly absorptive masonry can change water loss and strength development. These conditions may affect scheduling, protection, curing, and permissible working methods.
Stop and verify the applicable requirements when:
- Freezing conditions are possible
- Temperatures are unusually high
- Wind or direct sun is causing rapid drying
- Masonry is highly absorptive
- The work is structural
- Mortar is integrally colored
- Acidic or aggressive cleaners are proposed
There is no single weather procedure suitable for every mortar.
How much mortar mix to buy
A “bricks per bag” figure is an estimate, not a fixed conversion. Yield changes with:
- Product formulation and bag weight
- Brick, block, or stone dimensions
- Joint width and depth
- Hollow-unit shell and web geometry
- Frogs, cores, irregular beds, and head joints
- Joint profile
- Bed thickness and workmanship
- Mortar dropped into cavities
- Spillage, cleanup, and waste
- Repairs, cuts, and site conditions
SPEC MIX estimates approximately 40–45 modular bricks or 11–13 eight-inch blocks per 80-pound bag. The manufacturer describes these as approximate figures affected by labor practices, site conditions, design, materials, and typical waste. Its product page also states a 2.5-hour use period and the seven-to-28-day pre-cleaning interval discussed above; see the SPEC MIX product data.
Under stated 3/8-inch-joint assumptions, U-MIX publishes these one-bag estimates:
| U-MIX bag size | Standard modular bricks | Standard 8-inch blocks |
|---|---|---|
| 60 lb | 26 | 8 |
| 80 lb | 34 | 10 |
The U-MIX brick table identifies standard modular units as 8 by 2 by 4 inches. These estimates differ from the SPEC MIX figures even at the same nominal bag size, demonstrating why yield should come from the selected manufacturer’s table rather than a universal bricks-per-bag rule.
A practical quantity worksheet
Use four inputs:
-
Selected product and bag size Record the exact brand, product, mortar type, and bag weight.
-
Masonry-unit dimensions and count Record the actual or specified brick, block, or stone dimensions. For repairs, measure joint length or repair volume rather than assuming a whole-wall brick count.
-
Assumed joint dimensions Record bed- and head-joint width and depth, plus relevant unit geometry. Confirm that these assumptions match the manufacturer’s yield table.
-
Explicit waste allowance Choose an allowance suited to the layout, access, skill level, unit irregularity, and expected spillage. There is no universal waste percentage.
Then calculate:
Estimated bags before waste = total units ÷ manufacturer’s stated units per bag
Apply the chosen waste allowance and round up to whole bags. When the manufacturer publishes a table for the planned quantity, use that table directly.
Estimate the joint or fill volume from project-specific dimensions and compare it with the manufacturer’s stated mixed yield where available.
Purchasing checklist
Before ordering, confirm:
- Correct mortar type and intended application
- Correct bag size and whole-bag quantity
- Packaging is intact and dry
- Storage arrangements will protect unopened bags
- Current product data sheet is available
- Current safety data sheet is available
- Yield assumptions match the units and joints
- Colored-mortar bags are suitably batch-consistent for the work
Do not buy solely by lowest cost per bag. Products with similar names can have different formulations, yields, water requirements, and application limits.
Safety, scope limits, and the final pre-use checklist
The product’s current safety data sheet must control exposure precautions and first-aid procedures.
Baseline precautions supported by general mortar-mixing guidance include:
- Impervious gloves appropriate to the product
- Safety glasses or goggles
- Long sleeves and protective clothing
- Dust-control practices that avoid unnecessary airborne material
- Respiratory protection where directed by the safety data sheet and applicable workplace requirements
- Outdoor mixing or suitable ventilation where practical
Avoid unnecessary dust generation when opening, pouring, or mixing dry material. If exposure occurs, follow the current safety data sheet rather than relying on general first-aid instructions from an article.
Final pre-use checklist
Before opening a bag, verify:
- [ ] The product name and mortar type match the work
- [ ] The intended application and exposure are within the product’s stated scope
- [ ] The package is dry and undamaged
- [ ] Current product data and safety sheets are available
- [ ] Plans, specifications, and locally applicable requirements have been reviewed
- [ ] Masonry units and substrate have been identified
- [ ] Required surface cleaning and preparation are complete
- [ ] Any specified pre-dampening method is understood
- [ ] Clean potable water and accurate measuring containers are ready
- [ ] Mixing tools are clean and suitable for the batch
- [ ] Initial water, mixing time, slake instructions, and adjustment limits are known
- [ ] Weather is within the product’s stated limits
- [ ] Protection and curing arrangements are ready
- [ ] Working-time and discard rules are understood
- [ ] Yield assumptions and total bag quantity have been checked
- [ ] Colored-mortar batching and cleaning controls are established where relevant
This article is general reference information, not an engineering specification or individualized recommendation. Mortar Desk states that it is not a contractor and does not provide engineering advice.
Structural walls, foundations, retaining walls, reinforced masonry, chimneys, fireplaces, and seismic work should be reviewed by the appropriate licensed trade, design professional, and code official. Preservation work should involve a restoration specialist where material compatibility is uncertain.
Standards, product formulations, and locally adopted requirements can change. Current documents accepted for the project control.
Frequently asked questions
Does ready-mix mortar need water?
Often, yes. Many products described as ready-mix or preblended mortar are dry combinations of binder and sand that still require measured water and mixing. QUIKRETE No. 1102 and U-MIX are examples.
“Ready-to-use” is not precise enough by itself. Confirm whether the package contains a dry preblend, a binder that still needs sand, or genuinely wet application-ready mortar. Follow the label and current product data sheet.
Is Type S or Type N mortar better?
Neither is universally better. Type N is commonly a starting point for general above-grade masonry. Type S is often considered for more demanding, reinforced, at-grade, or below-grade conditions.
The correct choice depends on the masonry units, structural design, exposure, required assembly performance, plans, product specification, and locally applicable requirements. Type S should not be selected merely because it has a higher listed compressive strength.
Can mortar mix be used instead of concrete or tile thinset?
Not merely because the products look similar.
Concrete normally includes coarse aggregate and is formulated to create solid elements such as slabs, footings, and structural members. Masonry mortar is primarily formulated to bond masonry units and fill joints.
Tile thinset is a separate setting-material category. Use the product specified for the application; ordinary masonry mortar is not a general substitute for concrete or thinset.
Can water be added when mortar begins to stiffen?
Only when the selected product and project specification permit it. Some instructions prohibit adding water after a specified stage, while others permit limited replacement of water lost through evaporation.
That permission does not extend to mortar that has begun setting, exceeded its working time, frozen, or become contaminated. Additional water may also affect colored mortar’s appearance.
How many bricks or blocks does an 80-pound bag of mortar lay?
There is no universal figure. Manufacturer estimates vary even for nominally similar 80-pound products because formulations and estimating assumptions differ.
Use the table for the exact product, unit dimensions, and joint geometry. Apply an explicit project-appropriate waste allowance and round the order up to whole bags.
The final decision
Reduce the choice to five steps:
- Identify the masonry unit, structural role, grade, and exposure.
- Confirm the required mortar type or performance from the plans and governing project documents.
- Select a clearly documented product intended for that requirement.
- Follow that product’s water, mixing, working-time, curing, and protection instructions.
- Estimate quantity from its yield table using the correct units, joints, bag size, and an explicit waste allowance.
A stronger mix is not automatically safer, and a familiar recipe is not automatically correct. For structural or historic work, qualified review is part of material selection—not an optional response after problems appear.