 MortarDesk
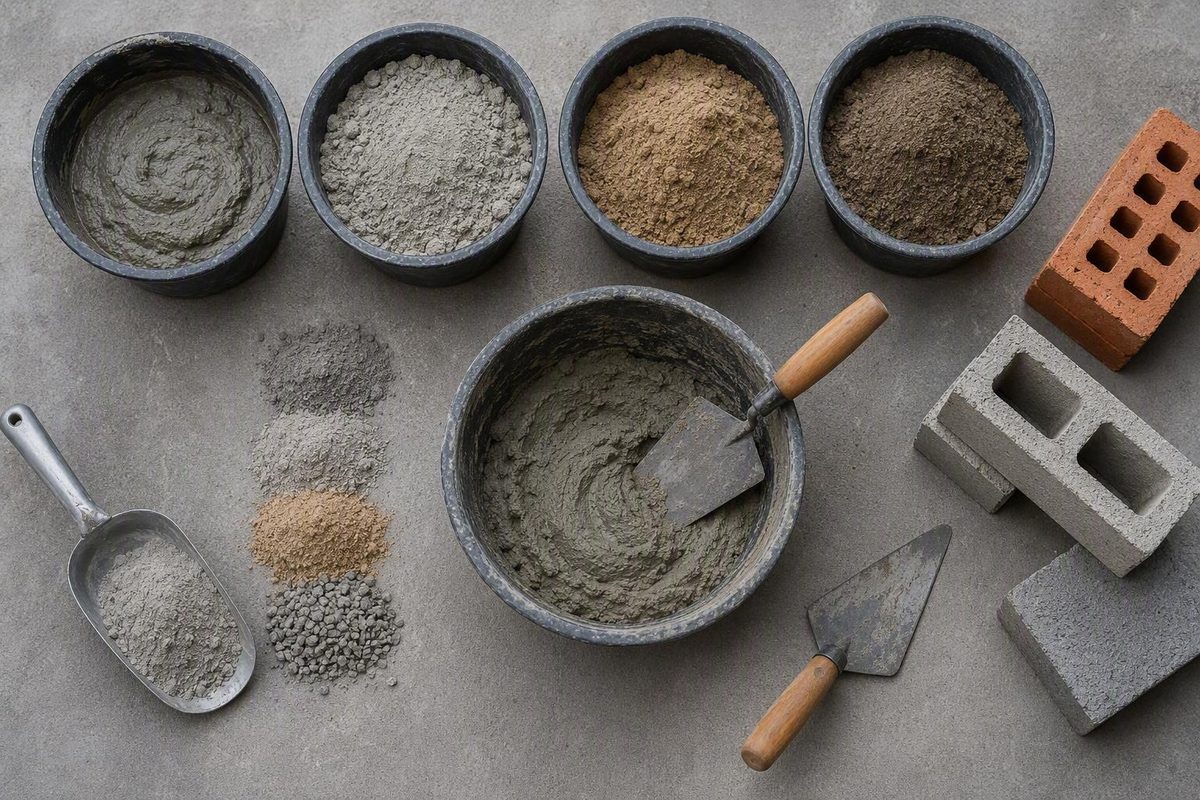
Quick answer: the right ratio depends on what the mortar must do
There is no universal best mortar mix ratio. A usable ratio must identify:
- The intended application
- The binder or binders
- The order of ingredients
- Whether quantities are measured by volume or mass
- The sand specification and moisture condition
- The product instructions, project specification or standard governing the work
The same numbers can describe materially different mixtures. A cement-to-sand 1:3 wall-bed mix is not interchangeable with a lime-to-sand 1:3 restoration mortar, and neither is automatically suitable for a floor mortar bed.
This article is a secondary-source overview, not a reproduction of ASTM, ANSI, building-code or manufacturer requirements. The masonry associations below reflect commonly published field guidance; current project documents and product data take precedence. The Type N, O and S proportions are reported in a retailer’s comparison of common field mixes, which also warns that selection depends on loading, exposure, masonry hardness and workability—not strength alone (Home Depot’s mortar-type comparison).
| Application or material | Commonly reported ratio | Ingredient order | Measurement basis | What takes precedence |
|---|---|---|---|---|
| General-purpose, above-grade masonry commonly associated with Type N | 1:1:6 | Cement:lime:sand | Nominal dry volume | Project specification, applicable standard, local code and selected binder-system instructions |
| Lower-load, non-load-bearing work and some compatible restoration contexts commonly associated with Type O | 1:2:9 | Cement:lime:sand | Nominal dry volume | Existing-masonry analysis, preservation specification and project documents |
| Work requiring greater lateral-load or below-grade performance, commonly associated with Type S | Secondary reports near 2:1:8–9 | Cement:lime:sand | Nominal dry volume | Structural design, governing specification and actual binder system |
| Type M masonry mortar | No single ratio given here because the supplied secondary sources conflict | Must be identified by the governing document | As specified | Current standard, design documents or proprietary product data |
| Standard tile floor mortar bed | Approximately 1:5 | Cement:damp, appropriately graded sand | Proportioned parts described by tile guidance | Applicable tile-installation specification and setting-material instructions |
| Shower receptor mortar bed | Approximately 1:4 | Cement:damp sand | Proportioned parts described by tile guidance | Approved receptor design, tile specification and product instructions |
| Wall mortar bed in the cited context | Reported as 1:3 | Cement:sand | Confirm for the specified system | Wall-bed specification; not a universal masonry or floor-bed recipe |
| Packaged masonry mortar | Do not substitute a generic field ratio | Preformulated ingredients | Product-specific water quantity and method | Current bag label and technical data |
| Proprietary thinset | Do not use a masonry ratio | Formulated setting material | Product-specific water or additive quantity | Current label and technical data |
The tile-bed figures come from application-specific guidance reporting approximately one part cement to five parts damp sand for a standard floor bed, one to four for a shower receptor and one to three for the wall-bed context described there (TileLetter’s mortar-bed guidance).
Packaged mortar and thinset must be mixed according to the current product label and technical data. Do not reverse-engineer a proprietary product from a cement:lime:sand table or transfer a water quantity, slake time or working time from another brand.
These general associations do not approve a mortar for a structural wall, retaining wall, foundation, below-grade assembly, seismic application, chimney or historic building. Those conditions can involve design loads, moisture, exposure, material compatibility, local code and installation details that a ratio alone cannot resolve.
How to read 1:3, 1:1:6 and 1:2:9
Traditional field guidance generally expresses mortar proportions as nominal dry parts by volume unless the source explicitly gives another basis. “Nominal” is important: the notation describes relative proportioning, not an exact chemical formula or guaranteed finished performance.
A two-part ratio such as 1:3 is incomplete until the materials are named. Depending on the specification, it could mean:
- One volume of cement to three volumes of sand
- One volume of lime to three volumes of sand
The arithmetic may be identical while the resulting mortars behave differently. Binder composition affects hardening, workability and compatibility, so the numbers cannot be separated from the ingredient names.
A three-part masonry ratio commonly follows this order:
cement : lime : sand
Under that convention:
- 1:1:6 means one nominal volume of cement, one of lime and six of sand.
- 1:2:9 means one nominal volume of cement, two of lime and nine of sand.
- 2:1:9 means two nominal volumes of cement, one of lime and nine of sand.
The Scottish Lime Centre’s notation guide explains that the first one or two figures identify binder components and the final figure normally identifies the filler, usually sand (practical guide to mortar-ratio notation).
A 1:2:9 mix contains three total binder parts—one cement plus two lime—to nine sand parts. Its overall binder-to-sand relationship is therefore:
3:9 = 1:3
That does not make 1:2:9 equivalent in performance to one part cement and three parts sand. The first mix divides its binder between cement and lime; an explicitly cement-only 1:3 mix does not. Mathematical equivalence at the total-binder level does not erase binder chemistry.
Ratios can also be normalized. For example:
2:1:9 ÷ 2 = 1:0.5:4.5
Both expressions describe the same relative quantities of the same three ingredients. Normalization can simplify batch calculations, but it does not change the materials, create an allowable adjustment range or validate the mortar for a particular application.
Before copying any ratio, confirm:
- Ingredients: What exactly are the binder and aggregate?
- Order: Does the ratio mean cement:lime:sand, binder:sand or something else?
- Measurement basis: Are the parts based on loose volume, compacted volume or mass?
- Application: Is the material for masonry joints, render, a tile bed, a shower receptor or another assembly?
- Controlling document: Does a product label, drawing, standard or preservation specification supersede the generic ratio?
Water is normally separate from dry ratio notation. In 1:1:6 cement:lime:sand, the six means sand—not water. Batch water is controlled independently because sand moisture, product formulation, weather and required consistency vary.
Mortar Types N, S, M, O and K compared
Named mortar types are performance or specification categories, not merely informal recipes. Field-proportion tables can help readers recognize commonly reported cement-lime-sand relationships, but they do not replace the applicable standard, project specification or binder manufacturer’s data.
The following strengths are secondary-source comparison figures. One guide describes them as minimum 28-day compressive strengths and reports common field proportions for Types M, S, N, O and K (Home Depot’s published comparison figures).
A separate manufacturer comparison agrees on Type N and Type O, reports Type S as 2:1:8–9 and gives a different Type M proportion (MARSHALLTOWN’s mortar-type comparison).
| Type | Commonly reported cement:lime:sand field proportion | Secondary-source strength figure | Broad association—not project approval |
|---|---|---|---|
| M | Conflicting reports: 1:¼:3¾ in one guide and 3:1:12 in another | 2,500 psi at 28 days | Heavy-load masonry; governing design and binder system required |
| S | Reports normalize to approximately 2:1:8–9 | 1,800 psi at 28 days | Greater lateral-load or below-grade demands |
| N | 1:1:6 | 750 psi at 28 days | General-purpose, above-grade masonry |
| O | 1:2:9 | 350 psi at 28 days | Lower-load and non-load-bearing work; some restoration contexts |
| K | No universal recipe offered here | About 75 psi | Specialist restoration category |
These values are not guaranteed jobsite strengths or structural design values. Actual results depend on the cementitious materials, binder system, sand, measurement accuracy, water content, mixing, workmanship, curing and test conditions.
Type N
Type N is broadly associated with general above-grade masonry. Its commonly published field proportion is one part cement, one part lime and six parts sand.
“General purpose” does not mean suitable for every masonry unit, exposure or load. The project specification may require a proprietary mortar, a different binder system or tested properties rather than a field-batched cement-lime-sand recipe.
Type S
Type S is broadly associated with greater lateral loads, soil pressure or below-grade exposure. Secondary sources do not present one perfectly uniform field proportion: one published ratio normalizes to 2:1:9, while another reports 2:1:8–9.
That range is a comparison of secondary reports, not permission to vary the sand content freely. A bagged Type S mortar, a masonry-cement system and a field batch made from Portland cement plus hydrated lime are not necessarily proportioned or mixed in the same way.
Type M
The supplied secondary sources conflict on Type M. The retailer comparison reports 1:¼:3¾ cement:lime:sand, while the manufacturer comparison reports 3:1:12. Those proportions do not normalize to the same mixture, so neither is presented here as a definitive formula.
For Type M work, consult the applicable standard edition, design documents and selected product data. That is particularly important because Type M is generally associated with demanding, heavy-load applications where an improvised recipe is least appropriate.
Type O and Type K
Type O is commonly reported at 1:2:9 and broadly associated with lower-load, non-load-bearing applications. It also appears in restoration discussions, but the type name alone does not establish compatibility with old brick or stone.
Type K is better treated as a specialist restoration category than as a default site mix. Secondary comparisons report a strength around 75 psi, but the supplied evidence does not justify presenting one universal Type K field recipe. Historic mortar selection requires analysis of the existing mortar, masonry units and exposure—not simply choosing the lowest number in a table.
Why strongest is not automatically best
Mortar works as part of a masonry assembly. Its relationship with the brick or stone matters, including relative hardness, movement, moisture behavior, bond and exposure.
An excessively hard replacement mortar can be incompatible with softer masonry.
The correct question is therefore not, “Which mortar has the highest compressive strength?” It is, “Which mortar meets the required performance while remaining compatible with the masonry and assembly?”
Secondary guidance describes ASTM C270 as offering proportion-specification and property-specification pathways. At a high level, one controls prescribed constituents and proportions, while the other relies on required tested properties. That summary is not the standard text. Verify the applicable ASTM C270 edition and project documents, and do not assume that a tested proprietary preblend should be recreated from a field-ratio table.
Masonry mortar is not deck mud, wall mud, thinset or concrete
“Masonry mortar” commonly refers to material used to bed, bond or joint brick, block or stone. Tile mortar beds, shower-receptor beds, wall-bed mixes, thinset and concrete serve different functions even when some ingredients overlap.
Before using any recipe, identify:
- The assembly being built
- The masonry unit, tile, substrate or membrane involved
- Whether the work is above grade, below grade, exterior, wet or exposed to freezing
- The loads, movement, drainage and waterproofing requirements
- The governing product instructions, drawings, standards and local requirements
Tile floor mortar beds
Tile-specific guidance reports approximately:
1 part cement : 5 parts damp, appropriately graded sand
This is an application-specific floor mortar-bed proportion. It is not a Type N masonry-joint recipe, and it should not be transferred to another assembly solely because both products are called mortar.
Shower receptors
For a shower receptor, the same tile guidance reports approximately:
1 part cement : 4 parts damp sand
The ratio is only one component of the receptor.
Wall mortar beds and 1:3
The cited tile guidance reports a 1:3 cement-to-sand proportion for its described wall mortar-bed context. It refers to a wall mix using cement identified in that source as Type S or Type M—not to a standard floor bed and not to a universal masonry formula.
Numbers do not transfer safely between applications merely because the materials have similar ingredients.
Thinset
Thinset is a formulated tile-setting material.
Mix thinset with the amount and type of liquid stated on its current label or technical data sheet. Do not add sand, lime or cement unless the manufacturer expressly directs it, and do not derive its water quantity, slake time, remixing procedure or working time from a masonry table.
Mortar versus concrete
Mortar normally uses fine aggregate and serves joints, bedding or comparatively thin applications. Concrete includes coarse aggregate and is generally intended for bulk placements and structural or site-work elements.
Adding gravel to a mortar recipe creates a different material category. Conversely, omitting coarse aggregate from a concrete design does not automatically produce suitable masonry mortar. Select the material from the assembly and required performance, not from whichever ingredients happen to be available.
Why the sand can change binder and water demand
Sand is not an inert number at the end of a ratio.
Grading and particle shape
A well-distributed range of particle sizes packs differently from uniform sand. These characteristics influence the spaces between grains and the amount of paste required to fill voids and coat the aggregate.
That is why two nominal 1:1:6 batches can feel and perform differently when made with sand from different suppliers.
The void-ratio rationale behind 1:3
Traditional explanations for the familiar overall 1:3 binder-to-sand relationship assume that voids occupy roughly one-third of the sand volume. Under that simplified model, the binder fills the spaces and coats the grains.
Actual aggregate can differ substantially. Building Conservation reports that some sands may have void ratios exceeding 50%, illustrating why a familiar proportion cannot be separated from aggregate characteristics (Building Conservation’s explanation of sand voids).
An informal jar estimate
A practical—but nonstandardized—estimate uses a clear vessel of known volume:
- Fill it to a known mark with bone-dry sand.
- Measure water in a separate graduated container.
- Add water slowly until it reaches the sand surface.
- Compare the added water volume with the original sand volume.
If 25 millilitres of water enters 100 millilitres of dry sand before reaching its surface, the practical interpretation is a 25% void ratio.
This is not a standardized laboratory test and does not measure every property governing mortar performance. Do not convert the result automatically into a jobsite recipe. Where performance matters, approved aggregate requirements, project specifications and material testing control.
Moisture and bulking
Damp sand already contributes water to the batch.
That makes two practices unreliable:
- Adding the same fixed water quantity regardless of sand moisture
- Counting variable shovel loads as though they were controlled volumes
Tile-bed guidance similarly states that testing may be needed when the specified graded sand is unavailable rather than simply changing the proportion by guesswork.
Before batching, inspect or verify:
- Specification: Is this the required masonry or tile-bed sand?
- Cleanliness: Is it free from debris, organic matter and obvious contamination?
- Grading: Is its particle-size distribution appropriate for the application?
- Moisture: Is it dry, damp, saturated or changing during the day?
- Measurement: Will it be weighed or placed consistently in a rigid gauge container?
- Continuity: Is the current delivery comparable with material used in earlier batches?
If the sand changes, do not assume that the previous water quantity or handling behavior remains valid.
How to scale and measure a repeatable batch
A volume ratio can be scaled with any equal-volume container—a bucket, gauge box, scoop or litre measure—provided every “part” uses the same container and filling method.
Type N example
For a nominal 1:1:6 cement:lime:sand batch:
- 1 equal container of cement
- 1 equal container of lime
- 6 equal containers of sand
A half-size batch could use half a container of cement, half a container of lime and three containers of sand. The relative proportions remain unchanged.
Type O example in litres
To scale 1:2:9 by a factor of two:
- 2 litres of cement
- 4 litres of lime
- 18 litres of sand
Dividing every quantity by two returns 1:2:9, confirming that the relationship has been preserved.
Two-part binder-to-sand example
If a specified mix is 1:3 named binder:sand and the batch contains 30 litres of sand:
30 ÷ 3 = 10 litres of binder
The nominal requirement is 10 litres of the named binder. The calculation does not establish whether that binder is cement, lime or another material, nor whether the ratio suits the work.
Why shovel counts are weak controls
A shovel is a tool, not a fixed unit. Mound height, shovel angle, material moisture and operator technique all affect the load. Eighteen “shovels” today may contain a different volume from eighteen tomorrow.
Rigid gauge containers provide better volume control. Weight-based measurement can be more repeatable still when the specification or supplier data supports it.
Powdered-binder volume also changes with settling, trapped air, particle characteristics and compaction. A lightly filled bucket and a tapped, compacted bucket are not equivalent merely because both are level at the rim.
Converting binder volume to mass
Where a ratio is specified by volume but repeatable weighing is preferred, use the product-specific relative bulk density:
Binder mass = required binder volume × relative bulk density
For example, if a specification calls for 75 litres of lime and that product has a relative bulk density of 0.5 kilograms per litre:
75 L × 0.5 kg/L = 37.5 kg
The required mass is therefore 37.5 kilograms. This calculation and example appear in specialist guidance on repeatable mortar batching (Building Conservation’s volume-to-mass method).
Do not borrow a density value from another binder or assume that every product in one binder category is identical. Obtain the appropriate bulk-density value from the current bag, technical data or supplier.
Mathematical scaling performs one task: it preserves the stated relationship. It does not prove that the original ratio is correct, that the aggregate is suitable or that the finished mortar will satisfy a property requirement.
Water control and a repeatable mixing workflow
There is no universal mortar water ratio. Water demand changes with:
- Sand moisture and grading
- Binder type and formulation
- Batch size and mixing equipment
- Temperature, wind and substrate absorption
- Required consistency
- Product-specific limits and procedures
For packaged mortar, thinset or another proprietary material, the current label and technical data control. A water quantity from another product or a generic online recipe is not a substitute.
General mixing workflow
The loading sequence can differ by product and equipment. Follow the governing instructions. For an allowed site-batched mortar, a controlled workflow is:
- Prepare clean equipment. Use clean containers, tools and a suitable mixer.
- Measure consistently. Record binder, sand and initial water quantities.
- Confirm the loading sequence. Follow the specification or product instructions rather than assuming one sequence suits every system.
- Dry-blend where required and permitted. Blend compatible dry ingredients uniformly before water addition if the selected system directs this.
- Introduce measured water in stages. Begin with only part of the anticipated quantity.
- Mix toward a uniform consistency. Add water gradually without exceeding stated limits.
- Follow any required rest or slake period.
- Remix only as directed.
- Record the batch time and use the material within its stated working life.
- Discard expired material. Do not restore it with uncontrolled water.
As one retailer example—not a universal procedure—a guide describes approximately 5–10 minutes of initial mixing, a 10-minute rest and about 5 minutes of remixing. It also describes a thick, cohesive mortar that clings when a trowel is tipped as a practical consistency check (Home Depot’s example mixing workflow).
Those times and that visual check do not override a product’s specified water limit, mixing time or application procedure.
Too little water can leave a batch stiff, incompletely blended or difficult to place. Excess water can produce an overly fluid mix and reduce performance. The objective is the specified consistency within the permitted water range—not simply “as wet as workable.”
The same retailer guide prohibits adding water after slaking for its described method. That should not be generalized into a universal prohibition. The selected product instructions or project specification must determine whether post-rest adjustment or retempering is permitted.
The guide also gives an approximate pot life of 90–120 minutes, but that figure is product- and condition-dependent. Use the actual working time stated for the selected material and discard the batch when that time expires.
Surface appearance alone cannot establish readiness for loading, exposure or subsequent work.
Preventing weak or incompatible mortar
Crumbly, cracked, dry or sloppy mortar cannot be diagnosed reliably from appearance alone. The symptom may involve proportions, materials, water, mixing, environmental conditions, curing, contamination, movement or selection of an incompatible mortar.
Use this matrix as a pre-inspection checklist, not as a conclusive failure analysis.
| Symptom | Plausible contributing factors | What to verify next |
|---|---|---|
| Fresh mortar is dry, crumbly or will not cohere | Too little water; incomplete blending; unexpectedly dry or poorly graded sand; incorrect proportions; aged or moisture-damaged binder | Batch records, water measurement, sand condition, mixing procedure, packaging and storage history |
| Fresh mortar is sloppy or segregating | Excess water; wetter-than-expected sand; inaccurate measurement; unsuitable aggregate | Total added water, sand moisture, gauge-container method and aggregate specification |
| Successive batches behave differently | Variable shovel loads; changing binder compaction; changing sand moisture; different mixing times or loading sequences | Container calibration, weight records, delivery changes, batch timing and operator procedure |
| Hardened mortar cracks or underperforms | Incorrect proportions; unsuitable sand; excess water; contamination; inadequate protection or curing; movement; incompatible mortar selection | Plans, specifications, material tests, installation records, weather history and professional inspection |
| Mortar is unusually hard relative to old masonry | Incompatible binder system or selection based on maximum strength | Existing mortar and unit analysis, preservation specification and specialist assessment |
| Bond or joint performance varies | Unit condition, suction, contamination, workmanship, weather or material variation | Unit preparation, joint geometry, placement method, exposure and batch records |
For fresh mortar, begin with facts that can be checked: quantities, materials, sand moisture, sequence, mixing time and storage. Avoid “fixing” an unidentified problem by adding arbitrary cement or water, because that changes the intended proportion and may conceal the underlying cause.
Hardened failures may require inspection or testing. Incorrect proportions are only one possibility; aggregate quality, excess water, contamination, curing conditions, masonry movement and unsuitable mortar selection may also contribute.
Generic ratios must not override:
- Structural plans and engineering details
- Project specifications
- Local building code
- The applicable edition of a referenced standard
- Manufacturer instructions and technical data
- Historic-preservation requirements
- Directions from the authority having jurisdiction
Historic masonry requires compatibility, not a type-name shortcut
Replacement mortar should be compatible with the existing masonry and intended exposure. A nominal type, compressive-strength figure or color match is not enough to establish compatibility.
Soft or weathered brick and stone may be damaged by replacement mortar that is excessively hard or otherwise incompatible. Conversely, selecting the weakest listed mortar without evaluating exposure, bond and existing materials is not a reliable preservation method.
Historic work may require mortar analysis, trial panels and advice from a preservation professional familiar with the masonry and binder system.
When to obtain qualified advice
Structural walls, retaining walls, foundations, seismic work, chimneys and below-grade masonry can involve life-safety, loading, moisture and code issues that a generic ratio cannot resolve. Depending on the work, consult an appropriately qualified mason, engineer or architect.
Historic restoration may require a preservation architect, conservation specialist or mason experienced with the particular masonry. Professional involvement is especially important when the assembly is deteriorated or earlier repairs appear incompatible.
Handling dry cementitious materials
Avoid inhaling dry material and prevent skin and eye contact. Use suitable gloves, eye protection and protective clothing. Consult the specific product’s current safety data sheet, product label, applicable workplace rules and any required exposure assessment for exact controls, including whether respiratory protection is necessary. The supplied retailer mixing guide supports these basic precautions but is not a substitute for product-specific safety documentation (Home Depot’s mortar-handling precautions).
Mortar Desk publishes independent general reference information rather than individual contracting or engineering advice. Standards change and codes are local, so figures should be checked against the edition and requirements used by the project or local inspector (About Mortar Desk).
Frequently asked questions
What does a 1:3 mortar mix ratio mean?
It means one part of a named binder to three parts sand, normally by nominal dry volume unless another basis is stated. The binder must be identified: 1:3 could mean cement:sand or lime:sand, and those are not equivalent materials (Scottish Lime Centre’s notation explanation).
Water is not the unlisted final number. It is controlled separately according to sand moisture, required consistency and the governing product or project instructions.
What is the difference between Type N and Type S mortar?
Secondary field guidance commonly reports Type N as 1:1:6 cement:lime:sand and associates it with general above-grade work. Type S is reported near 2:1:8–9 and associated with greater lateral-load or below-grade demands (MARSHALLTOWN’s comparison).
These are broad secondary-source associations, not automatic approvals. The masonry units, exposure, loads, binder system and governing specification determine suitability.
How much water should be added to mortar?
There is no universal amount. Sand moisture, binder formulation, weather, equipment and required consistency all affect water demand. Published mixing directions themselves vary by binder system and packaged product (Rosie on the House’s comparison of mixing methods).
For an approved site batch, introduce measured water gradually and stay within the specification. For packaged mortar or thinset, use the current label and technical data. Do not restore expired material with uncontrolled water.
What cement-to-sand ratio is used for a floor mortar bed or shower receptor?
Tile-specific guidance reports approximately 1 part cement to 5 parts damp, appropriately graded sand for a standard floor mortar bed and 1 part cement to 4 parts damp sand for a shower receptor (TileLetter’s mortar-bed ratios).
These are tile mortar-bed proportions, not general bricklaying recipes. Sand grading, the complete assembly and the applicable installation specification still control.
Is stronger mortar always better for brick or repointing?
No. Mortar must be strong enough for the application while remaining compatible with the brick or stone. An excessively hard mortar may concentrate deterioration in softer masonry units.
For repointing—especially historic work—do not select mortar solely by maximum compressive strength, nominal type or color. Evaluate the existing mortar, masonry hardness, exposure and moisture behavior. Secondary masonry guidance likewise warns that strength alone is not a sufficient selection method (mortar-type and compatibility overview).
Before you mix
Use this decision sequence:
- Identify the application, exposure and binder system.
- Read the ratio in its stated ingredient order and measurement basis.
- Determine whether it is a field-proportioned mix or a proprietary product.
- Check the governing specification, standard edition and product data.
- Measure each batch consistently.
- Account for sand grading and moisture.
- Add water only within the controlling instructions.
- Obtain qualified advice for structural, high-risk or historic work.
1:3 is notation, not a universal answer. Stronger mortar is not automatically more compatible, and current project documents, product data, applicable standards and qualified professional input govern where the consequences of a wrong mix are significant.