 MortarDesk
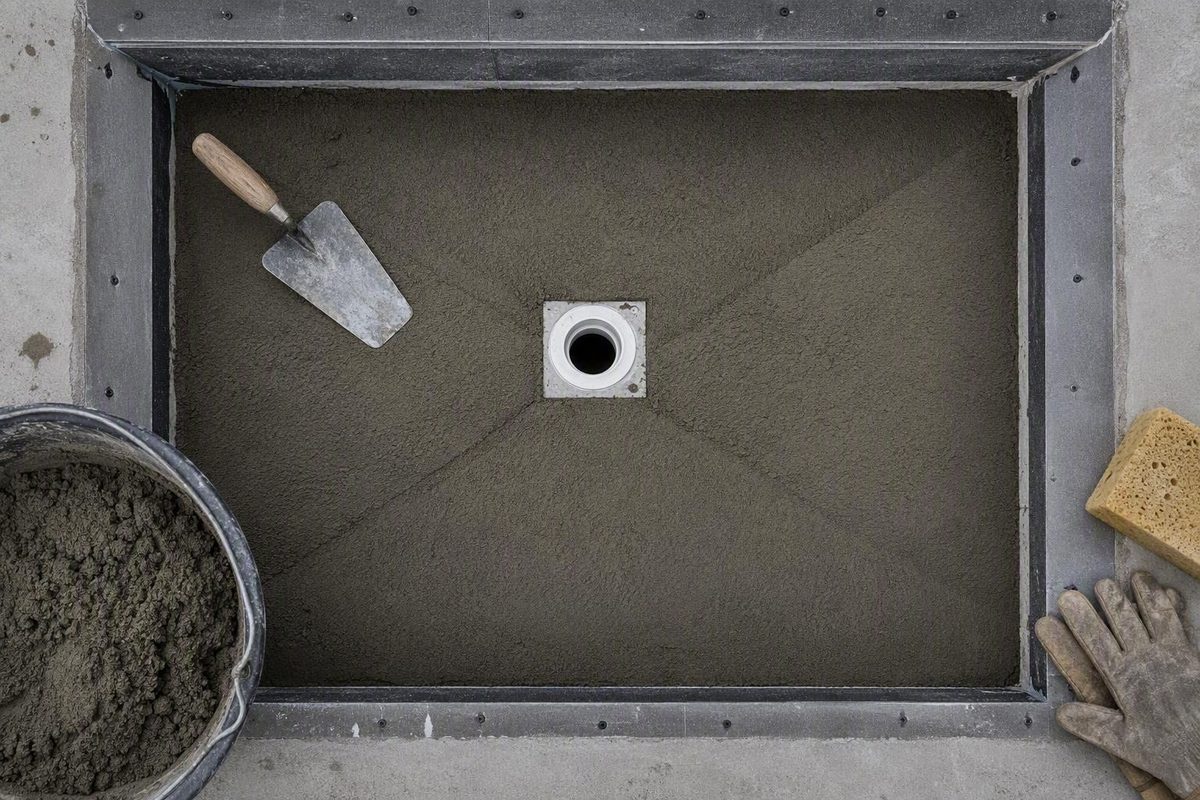
In principle, dry pack mortar for a shower pan is simple: a low-moisture blend of sand and cement is packed into a firm, sloped base. The work becomes complicated when instructions for different drains, membranes, substrates, and mortar products are treated as interchangeable.
Before buying mortar or calculating thickness, identify the complete shower assembly. A traditional liner pan with a clamping drain is not built in the same sequence as a surface-waterproofed pan with a drain approved for that membrane. Details such as preslope, weep holes, bonding slurry, lath, bed thickness, curing, and flood testing all follow from that system choice.
This article is a general selection, planning, and quality-control overview—not a complete installation specification for every shower. The current instructions for the selected mortar, drain, waterproofing membrane, tile-setting products, and locally enforced requirements control the work.
The system controls
- Identify the drain model and waterproofing method.
- Find the waterproofing manufacturer’s approved drain connection and mortar-bed detail.
- Check the mortar data sheet for the substrate, application, thickness, water, yield, and cure limits.
- Confirm compatibility in writing when combining products from different manufacturers.
- Resolve inspection and flood-test requirements before closing the assembly.
The broadly useful workflow is:
- Identify the drain and waterproofing method.
- Select deck or floor mud approved for that method.
- Calculate the rise from the farthest wall to the drain.
- Prepare the substrate and drain as the selected method requires.
- Mix a cohesive, low-moisture mortar.
- Compact and screed a continuous drainage plane.
- Inspect the bed before covering it.
- Follow the current system documents for curing, waterproofing, flood testing, and tile installation.
What dry-pack mortar does—and does not do—in a shower pan
Dry pack—also called deck mud or floor mud—is a low-moisture sand-and-cement mortar. Unlike wet concrete that flows into forms, dry pack remains shapeable. It can be placed slightly high, compressed, cut with a straightedge, and refined with a float.
Its two principal jobs in a shower are:
- Creating a stable substrate for the tile assembly
- Establishing a continuous pitch toward the drain
These products can have different aggregates, cement proportions, additives, water requirements, and intended uses. A bag containing sand and cement is not automatically approved as shower-pan deck mud.
Most importantly, dry-pack mortar is not the waterproofing system. Neither the mortar bed nor the tile-and-grout surface substitutes for an approved liner or surface-applied membrane.
In a traditional liner pan, incidental moisture beneath the tile passes through the porous final mortar bed toward protected weep holes in a clamping drain. In a surface-waterproofed system, the membrane instead follows the finished slope immediately below the tile-setting layer and connects to a drain approved for that membrane. Aquarius Tile’s explanation of traditional shower-pan drainage illustrates why these arrangements should not be confused.
That porosity has a specific function in a traditional pan. The final mortar bed sits above the waterproof liner, so moisture beneath the tile needs a route through the bed to the drain’s weep holes. A dense wet pour is not an automatic substitute for the specified deck mud.
In a surface-waterproofed installation, the drainage concept is different. The membrane covers the sloped bed and directs water into its approved drain directly below the tile-setting layer. The mortar still shapes and supports the floor, but the assembly does not depend on water migrating through a deep final bed to traditional weep holes.
The first checkpoint is therefore not “Which mix ratio should I use?” It is:
What exact drain, membrane, mortar-bed method, and substrate am I building around?
Resolve that question before copying another installer’s thickness, reinforcement, curing schedule, or drain detail.
Identify the drain and waterproofing system before mixing mortar
A shower floor should be treated as a complete assembly rather than a collection of independently selected products. Start by recording:
- Drain manufacturer and model
- Drain type, such as clamping or bonding-flange
- Waterproofing product and whether it is a liner, sheet membrane, or liquid-applied membrane
- Subfloor or slab material
- Intended mortar product
- Approved installation detail
- Planned tile-setting mortar
- Applicable inspection and flood-test requirements
Traditional liner-and-clamping-drain assembly
The following conceptual cross-section is not to scale:
                         TILE
                ---------------------
                        THINSET
                ---------------------
                 FINAL DRY-PACK BED
/
/
/
                [open weep passages]
                         │
                  CLAMPING DRAIN
              upper clamping ring/grate
                         │
       LINER CLAMPED BETWEEN DRAIN COMPONENTS
        =====================================
                WATERPROOF LINER
                 follows preslope
/
/
                DRY-PACK PRESLOPE
                ---------------------
                       SUBFLOOR
The conceptual sequence is:
- Subfloor
- Sloped mortar preslope
- Waterproof liner connected to a compatible clamping drain
- Protected weep-hole passages
- Final dry-pack mortar bed
- Thinset
- Tile
The preslope and final bed are separate layers with different functions. The preslope establishes a drainage plane beneath the liner. If the liner is placed flat on the subfloor, water reaching it lacks a deliberate downhill route to the drain.
The final mortar bed establishes the tile plane while permitting moisture to reach the drain’s open weep passages. The liner connection, corners, wall transitions, curb, and fastener locations must follow the approved traditional-pan method.
Surface-waterproofed assembly
A surface-waterproofed mortar pan uses a different sequence:
                         TILE
                ---------------------
                        THINSET
        =====================================
             SURFACE WATERPROOF MEMBRANE
/
/
            MEMBRANE BONDED TO APPROVED
              DRAIN CONNECTION / FLANGE
                         │
                 SLOPED DRY-PACK BED
/
/
                ---------------------
                 PREPARED SUBSTRATE
Here, an approved waterproofing membrane covers the sloped mortar bed and connects directly to a drain approved for the selected surface-waterproofing system. A bonding-flange drain is one common example, but the exact connection depends on the specified system.
The danger is an improvised hybrid. Because the two assemblies place waterproofing and drain connections differently, familiar components do not necessarily form a documented system when mixed.
Use this document-selection sequence:
- Start with the waterproofing instructions. Identify the specified drain connection and the illustrated floor assembly.
- Open the drain manual. Confirm that the drain model and membrane connection match the waterproofing detail.
- Check the mortar data sheet. Verify substrate, bonded or unbonded use, thickness limits, water range, cure requirements, and suitability beneath the next layer.
- Check the tile-setting instructions. Confirm the required mortar and substrate condition.
- Resolve cross-brand combinations. If the mortar, drain, and membrane come from different manufacturers, obtain written compatibility confirmation rather than assuming that individually acceptable products form an approved assembly.
If the selected manufacturer diagram does not resemble the intended cross-section, stop and reconcile the difference before deciding on bed thickness, reinforcement, bonding, curing, or flood testing.
Choose a preblended mud or a site-mixed sand-and-cement blend
Purpose-made deck mud or floor mud is the clearest product category to search for. Even then, read the current technical data sheet rather than relying solely on the product name. Confirm that the exact product covers the intended substrate, bed type, application, and thickness.
There are two common purchasing approaches.
Preblended mortar
The installer still has to measure the product and water correctly, mix it completely, maintain consistency between batches, and work within the published placement and cure windows.
Advantages include:
- Factory-controlled dry proportions
- Less on-site measuring
- More repeatable batches
- Published water and yield information
Tradeoffs include:
- Product-specific water and thickness limits
- Limited working time
- The need to obtain enough matching material
- No permission to modify the blend unless the manufacturer allows it
Site-mixed sand and Portland cement
Site mixing allows control over batch size and may be practical where suitable sand is readily available. It also introduces additional variables:
- Sand grading
- Existing moisture in the sand
- Proportioning accuracy
- Thoroughness of dry blending
- Batch-to-batch consistency
Trade guidance commonly describes blends around four or five parts sand to one part Portland cement, but no ratio is universal. Fine Homebuilding installer Tyler Grace describes a preferred 5:1 site mix while emphasizing complete dry blending and restrained water addition; that ratio represents his method, not a specification for every product or assembly. Fine Homebuilding’s dry-pack installation guide documents the example.
A preblended product may instead be formulated at 4:1, demonstrating why a packaged formulation and an installer’s site mix need not use the same proportion. Tile Pro Depot’s overview of dry-pack mortar describes four- or five-part sand blends as common guidance rather than one mandatory recipe.
Sakrete, for example, specifies its Sand Mix for the manufacturer’s documented two-stage traditional-pan method. That supports the named product in that particular method; it does not establish that every sand mix, topping mix, or similarly named mortar is interchangeable.
The following table is a terminology and purchasing checklist, not a category-wide approval chart:
| Product category | What the name generally suggests | What to verify |
|---|---|---|
| Deck mud or floor mud | Low-moisture bedding mortar intended to be packed and shaped | Confirm the exact shower-bed application, substrate, thickness, water, and cure requirements |
| Sand or topping mix | Sand-and-cement material whose formulation and approved uses vary | Check whether the manufacturer permits the intended mortar-bed use and whether modification is required or prohibited |
| Masonry mortar | Mortar generally marketed for masonry-unit work | Do not infer shower-bed suitability from the word “mortar”; verify the exact data sheet |
| Thinset mortar | Bonding mortar used to set tile or, in some methods, bond another mortar layer | Do not use it as bulk deck mud unless the written assembly specifically requires that use |
| Concrete mix | Cementitious material that commonly contains coarse aggregate | Verify whether the exact product can be placed and shaped for the specified bed; do not assume it behaves like deck mud |
| Specialty bedding mortar | Proprietary material for mortar beds, tile substrates, or repairs | Confirm substrate, thickness range, water, membrane compatibility, and cure schedule |
Before purchase, verify:
- Intended application
- Required mixing-water range
- Whether added sand, cement, or admixtures are permitted
- Minimum and maximum thickness for the selected method
- Bonded or unbonded installation requirements
- Substrate preparation
- Reinforcement or lath requirements
- Published yield
- Pot life and working time
- Cure window before the next layer
- Compatibility with the drain, membrane, and tile-setting products
The safest specification is not “use a 4:1 mix” or “buy sand mix.” It is “use this named product in this documented shower-pan assembly.”
Calculate slope, perimeter elevation and material volume
Approximately 1/4 inch of rise per horizontal foot toward the drain recurs in the supplied shower-pan guidance. The selected system and locally enforced requirements still control.
Use the farthest horizontal distance from the specified drain reference point to the shower perimeter:
Required rise in inches
= farthest drain-to-perimeter distance in feet × 0.25 inch per foot
For a three-foot run:
3 feet × 0.25 inch per foot = 0.75 inch
The perimeter reference is therefore 3/4 inch above the selected drain reference elevation. The reference might be a flange surface, mortar contact point, or another elevation defined by the drain detail. Do not use the finished grate elevation unless the approved instructions use that surface as the reference.
For an off-center drain, calculate the rise from the longest run and carry that elevation level around the perimeter. The shorter runs will consequently be steeper. Fine Homebuilding illustrates this with a three-foot farthest run producing a 3/4-inch rise while the level perimeter creates greater pitch on the shorter sides. The illustrated off-center-drain calculation shows why nearby perimeter points should not simply be lowered to maintain exactly the same pitch on every side.
For example, if the farthest wall is three feet from the drain but a nearer wall is two feet away:
- Longest run: 3 feet
- Perimeter rise above the drain reference: 3/4 inch
- Perimeter: level at that elevation
- Shorter run: reaches the same 3/4-inch rise over 2 feet
The short side is therefore steeper. Lowering that side to a 1/2-inch rise would create an out-of-level perimeter and alter the intended drainage plane.
Sakrete’s preslope example uses a different datum
Rise is not the same as total height above the subfloor. In Sakrete’s documented traditional-pan example, the drain flange is 1/2 inch above the subfloor. A three-foot run adds 3/4 inch, producing a perimeter 1-1/4 inches above the subfloor. Sakrete’s preslope calculation applies to the drain geometry and starting elevation in that example, not to every shower.
Drain reference above subfloor:       1/2 inch
Rise over 3 feet:                     3/4 inch
                                      ---------
Example perimeter above subfloor:   1-1/4 inches
Final bed thickness cannot be taken from one universal online figure. It depends on:
- Drain design and elevation
- Whether the layer is a preslope or final bed
- Substrate
- Bonded or unbonded installation
- Cleavage layer, lath, or reinforcement requirements
- Mortar product thickness limits
- Waterproofing assembly
- Wall, curb, and entry transitions
Estimate material without assuming a false average thickness
For a region with uniform thickness:
Volume in cubic feet
= area in square feet × thickness in inches ÷ 12
A sloped point-drain pan normally does not have one uniform thickness. A level perimeter can create several planes with different runs, particularly when the drain is off-center.
Instead:
- Draw the pan and mark the drain position.
- Divide the floor into defined geometric regions based on the actual slope planes.
- Determine the thickness or volume geometry for each region.
- Add the regional volumes.
- Compare the result with any calculator supplied for the selected product or system.
- Convert total volume to bags using the product’s published yield.
- Add an explicitly stated allowance for waste and handling loss.
- Round up to whole bags.
Base bag count
= calculated mortar volume ÷ published yield per bag

Order quantity
= base bag count × (1 + stated waste allowance)
Do not rely on a generic “bags per shower” estimate. Pan dimensions, drain locations, bag weights, bed profiles, product yields, and waste assumptions vary too widely.
Prepare the substrate and drain for the specified mortar-bed method
Substrate preparation is method-specific. Plastic, roofing felt, metal lath, reinforcing wire, bonding slurry, and primer should not be combined into a universal shopping list.
One installer guide demonstrates a thinset slurry over concrete while using plastic sheeting and metal lath in a plywood example. Those are substrate-specific examples within that installer’s surface-drain method, not instructions to combine all of those materials or transfer them to a traditional liner pan. Tile Coach’s dry-pack guide shows the distinction.
Before work begins, resolve:
- Whether the wood subfloor is suitable for the intended method
- Required subfloor support and deflection criteria
- Whether the bed is bonded or unbonded
- Required cleavage membrane, primer, or bonding material
- Lath type, orientation, and permitted fastening
- Reinforcement requirements
- Perimeter movement or isolation details
- Wall, curb, and entry transitions
- Drain support and connection
- Waterproofing fastening limits
- Inspection access and sequence
This overview cannot establish universal lath fastening patterns, liner heights, drain elevations, or curb details. Those requirements depend on the documented system and locally enforced provisions.
For a traditional clamping-drain pan, the preslope supports the liner and creates its drainage plane. The drain body must be stable and positioned so that the liner can connect without unsupported gaps or an incompatible change in elevation.
The final bed must preserve drainage to the weep holes. Clean gravel or crushed tile are examples shown in traditional-pan instructions for keeping mortar away from those openings. Use only a protection detail accepted by the drain and waterproofing instructions; the objective is to preserve subsurface drainage without damaging the liner or interfering with the drain assembly.
For a surface-waterproofed pan, prepare the substrate and drain according to the selected system. A bonding-flange drain, where specified, may require support and integration with the mortar at a defined elevation. Its membrane connection is not equivalent to clamping a buried liner beneath a final bed.
Before mixing mortar, confirm that the drain is:
- The correct model for the waterproofing system
- Firmly supported
- Stable under working pressure
- Level where the instructions require it to be level
- Set at the specified elevation
- Connected to the waste line as required
- Protected from mortar entering the drain
- Ready for the specified membrane connection
Resolve either condition before placing the bed.
Mix dry pack to a cohesive, low-moisture consistency
Prepare the work area before adding water. Mark the perimeter, confirm the drain elevation, select straightedges, stage the dry material, and establish a plan for moving each batch into the shower.
For a site mix, measure the sand and Portland cement consistently. Blend the dry ingredients until their color and texture are uniform before introducing water.
For a preblended product, begin with its published water range and mixing procedure. Do not begin from an arbitrary depth of water in a bucket. A measurement such as “one inch of water” is not transferable because bucket diameter, product weight, batch size, existing sand moisture, and formulation all affect the result.
Add water gradually because:
- Site-mixing sand may already contain moisture.
- Different products absorb water differently.
- Small batches can be oversaturated quickly.
- Excess water is difficult to remove consistently.
- Later batches should match earlier batches as closely as practical.
A useful field check is the squeeze test. Compress a handful of thoroughly mixed mortar:
- It should form a cohesive ball.
- It should not slump.
- It should not release visible water.
- The hand should remain relatively clean instead of becoming heavily coated in paste.
- The ball should survive gentle handling.
- It should break apart when deliberately poked or crumbled.
The target resembles damp sand that can hold a sandcastle shape.
Signs the mix may be too wet
- It sticks heavily to tools or gloves.
- It smears instead of cutting cleanly.
- It slumps after being shaped.
- It releases water when squeezed.
- Perimeter screeds deform instead of holding elevation.
- Screeding drags paste across the surface.
An overly wet mixture is harder to hold at the intended pitch and is associated in the supplied trade guidance with increased shrinkage risk.
Signs the mix may be too dry or incompletely blended
- A squeezed handful will not stay together.
- Some portions form balls while others fall apart.
- Dry cement or sand streaks remain visible.
- Edges disintegrate during light shaping.
- The material cannot be compacted into a coherent screed.
The squeeze test is qualitative. It does not prove a quantified water-to-cement ratio, compressive strength, or acceptable completed bed. Product measurement, mixing, placement time, compaction, thickness, substrate preparation, and curing still matter.
When multiple batches are needed, keep the proportions and moisture level consistent. Place them without unnecessary delay and compact transitions deliberately. Avoid leaving a loose edge to dry while the next batch is mixed.
A practical staging checklist includes:
- Premeasured dry materials
- Graduated water container
- Suitable mixing vessel and tool
- Buckets or tubs for transport
- Tamping and floating tools
- Straightedges covering the required spans
- Cleanup water kept separate from measured mix water
- A helper for larger placements, if needed
The objective is continuity: each batch should be mixed, moved, packed, and joined while the material remains workable.
Pack, screed and finish the mortar bed
The following is a general field sequence. Product-specific placement instructions control where they differ.
1. Mark the level perimeter
Use the calculated elevation based on the farthest drain-to-perimeter distance. Transfer that mark around the enclosure with a reliable level or laser. Confirm that it represents the correct layer—preslope or final bed—and the correct drain reference.
With an off-center drain, do not alter individual wall marks merely to make every side have the same pitch. The level perimeter normally causes the shorter runs to be steeper.
2. Form compact perimeter screeds
Place mortar against the edges and compact it into firm screeds at the marked elevation. Check height and level. These screeds form one end of the reference plane used by the straightedge.
Build only as much perimeter as can be maintained while filling the field. An edge that crumbles under the straightedge is not a reliable reference.
3. Place field mortar slightly high
Fill between the drain and perimeter with more material than the finished plane appears to require. Starting low can leave thin areas and encourage superficial filling later.
4. Compact methodically
Pack the bed in manageable zones, paying particular attention to:
- The area around the drain
- Corners
- Wall edges
- Transitions between batches
- Narrow areas
- Changes in plane
- Locations disturbed by tools
Compaction should create a coherent bed without shifting the drain or damaging components beneath the mortar.
5. Screed from the perimeter to the drain
Rest an appropriate straightedge between the perimeter screed and the specified drain reference. Cut down high material with controlled back-and-forth movements. Rotate around the drain using straightedges suited to each span.
The goal is a continuous drainage plane, not merely several isolated lines with the correct pitch. Check between screed paths for ridges, bowls, and flat areas.
6. Rake out and refill low or weak areas
If a low spot appears, remove or roughen the loose material sufficiently to accept fresh mortar. Refill the area, compact it, and screed again. Do not simply dust loose dry material over a depression and smooth the surface until the color looks uniform.
Rebuild a crumbling edge as compacted material rather than treating it as a cosmetic defect.
7. Float and finish appropriately
A wood or magnesium float can consolidate the surface, close minor irregularities, and refine the slope. Do not add unmeasured water merely to make the surface look smoother.
Steel-trowel finishing is method-dependent. One installer uses a steel trowel lightly to embed loose particles, while Sakrete describes steel troweling as optional on the preslope in its method. Neither example establishes that every mortar bed should receive a dense or polished finish. The surface must remain compatible with the next membrane, bonding mortar, or tile-setting step.
Pre-cover inspection
Before installing the next layer, confirm:
- The perimeter reference is level.
- Every part of the bed falls continuously toward the drain.
- There are no reverse slopes or visible depressions.
- The drain remains stable.
- The surface is firm rather than broadly loose or movable.
- Edges and corners are supported.
- Batch transitions are consolidated.
- Required thicknesses have been maintained.
- Weep passages remain unobstructed where the assembly uses them.
- The finish is suitable for the next layer.
- No waterproofing component has been punctured, displaced, or contaminated.
Visual smoothness alone does not prove adequate compaction, strength, waterproofing, drainage, or compliance. A smooth-looking pan can still contain low areas, a loose drain, blocked weep holes, or an incompatible layer sequence.
Cure, inspect and troubleshoot before waterproofing or tile
The relevant waiting period and moisture-management procedure come from the mortar manufacturer and the manufacturer of the next layer.
Generic timeframes are only reference points. Sakrete’s traditional-pan method allows its preslope to cure for 24 hours before liner installation. Sakrete’s product-specific cure interval applies to that documented method, not automatically to another mortar or membrane.
A separate installer guide recommends at least 24–48 hours before waterproofing or tiling. Tile Coach’s stated cure window is general instructional guidance and does not override a mortar or membrane data sheet.
Before covering the bed, reconcile:
- Mortar cure requirements
- Minimum or maximum time before the next layer
- Sheet- or liquid-membrane substrate requirements
- Permitted substrate moisture condition
- Tile-setting mortar requirements
- Ambient temperature and humidity limits
- Any prescribed curing cover or moisture-retention procedure
- Flood-test timing
Do not mist the bed, cover it, accelerate drying, or apply a curing product solely on the basis of general online advice. Those practices can differ among products and assemblies.
How to evaluate a sandy surface
Light surface dust is not the same condition as deep erosion. The available evidence does not establish a universal scratch test or acceptable erosion depth.
Inspect systematically:
- Depth: Does rubbing release isolated grains, or can material be excavated into a meaningful divot?
- Movement: Does the bed shift, flex, rock, or compress under normal inspection pressure?
- Distribution: Is softness confined to one small area or present throughout the shower?
- Edges: Are the drain perimeter, corners, and wall edges stable?
- Cracking: Are there cracks, separations, or broken transitions?
- Sound: Are there suspicious hollow areas requiring professional evaluation?
- Slope: Has erosion or settlement changed the drainage plane?
- Drain: Is the drain still solid and at its intended elevation?
- Compatibility: Does the membrane manufacturer accept the surface condition or proposed repair?
A DIY forum discussion about a sandy bed produced conflicting recommendations and did not establish whether the installation was sound or ultimately required replacement. It also mixed advice for traditional and surface-membrane systems. The dry-pack shower-base forum discussion is useful as evidence of that uncertainty, not as a repair specification.
Minor surface irregularity and widespread weakness are different conditions. Do not assume either that every dusty bed must be demolished or that every crumbly bed can safely be covered.
Avoid applying any of the following solely because an online commenter recommended it:
- Additional water
- SBR or another bonding resin
- Curing compound
- Thinset skim coat
- Patching mortar
- Liquid waterproofing
- A second mortar layer
Obtain written guidance from the relevant mortar and waterproofing manufacturers before proceeding.
Stop and request system-specific evaluation when there is:
- Deep or continuing disintegration
- Widespread softness
- Bed movement
- Significant cracking
- Hollow or debonded areas
- Unstable edges
- A loose drain
- Loss of slope
- Standing-water areas
- Blocked or buried weep holes
- Incorrect drain or membrane integration
- Uncertainty about repair compatibility
Before waterproofing or tiling, verify the installation against:
- Mortar instructions and technical data
- Drain installation manual
- Waterproofing membrane manual
- Tile-setting mortar instructions
- The applicable ANSI or TCNA method
- Applicable plumbing requirements
- Locally adopted code
- Required inspections
- Approved flood-test procedure and timing
Mortar Desk provides general building-material reference information, not approval of an individual installation or individualized contracting or engineering advice. Specifications change and locally enforced requirements vary, so figures and methods should be checked against the current documents used by the manufacturers and local authority. Mortar Desk’s reference-information limitations explain that boundary.
The final decision sequence is concise:
- Identify the drain and waterproofing assembly.
- Find the documented detail that connects those components.
- Select a mortar approved for that substrate and method.
- Calculate rise from the farthest perimeter point.
- Mix to a cohesive, low-moisture consistency.
- Compact and screed a continuous pitch.
- Inspect the drain, slope, firmness, and drainage details.
- Follow the current mortar, drain, membrane, tile-setting, inspection, and local requirements before covering the bed.
Generic ratios, thicknesses, cure times, and repair suggestions cannot replace those project-specific documents.
Dry-pack shower-pan FAQ
What is the correct sand-to-cement ratio for dry-pack shower-pan mortar?
There is no single ratio that is correct for every product and shower-pan system. Supplied trade guidance commonly describes approximately four or five parts sand to one part Portland cement. A packaged floor or deck mud may be formulated at 4:1, while an installer may prefer a 5:1 site mix. Tile Pro Depot’s mortar overview presents those proportions as common guidance rather than a universal specification.
For a preblended product, do not add cement, sand, or admixtures unless the manufacturer expressly permits it. For a site mix, use the proportion required by the selected method, choose suitable sand, measure consistently, and dry-blend completely before adding water.
A regional or forum-sourced 3:1 screed recipe should not be adopted as a general shower-pan specification without confirmation from the selected mortar and waterproofing manufacturers.
How wet should dry-pack mortar be?
It should be damp enough to form a cohesive ball when squeezed but dry enough that it does not slump or release water. The ball should tolerate gentle handling, leave the hand relatively clean, and break apart when deliberately poked.
Add water gradually and begin with the product’s published instructions. Existing moisture in site-mixing sand can change the amount required. A batch that smears, sticks heavily, or loses its shape may be too wet; one that cannot hold together consistently may be too dry, incompletely blended, or insufficiently compacted.
The squeeze test is a practical field check, not a quantified strength or water-content test.
Does dry-pack mortar waterproof a shower pan?
No. Dry pack forms and supports the sloped shower floor, but the shower still requires an approved waterproofing assembly.
In a traditional system, the liner sits over a preslope, connects to a clamping drain, and directs subsurface moisture toward protected weep holes beneath the final mortar bed. In a surface-waterproofed system, an approved membrane covers the sloped bed and connects to a drain approved for that membrane directly below the tile-setting layer. Aquarius Tile’s comparison of traditional and surface-sealed drainage explains the distinction.
Tile and grout do not replace the liner or membrane.
How do I calculate a 1/4-inch-per-foot shower-pan slope with an off-center drain?
Measure the farthest horizontal distance from the specified drain reference point to the shower perimeter. Multiply that distance in feet by 0.25 inch:
Rise = farthest run in feet × 0.25 inch per foot
For a three-foot run:
3 × 0.25 inch = 0.75 inch
Set the level perimeter 3/4 inch above the drain reference elevation. Because an off-center drain has shorter runs on some sides, those sides will be steeper. Do not lower the nearer perimeter merely to make every side exactly 1/4 inch per foot. Fine Homebuilding’s off-center-drain example demonstrates the level-perimeter approach.
Add the calculated rise to the actual drain reference elevation when determining total height above the subfloor.
Does a sandy or crumbly surface mean the mortar bed must be replaced?
Not automatically, but it should not be dismissed without inspection. Light surface dusting differs from material that erodes deeply, moves under pressure, cracks, sounds hollow, has unstable edges, or has lost its drainage pitch.
Check the depth and extent of erosion, bed movement, cracking, drain stability, low areas, and compatibility with the intended membrane. The available forum evidence does not establish an objective universal pass-or-fail test.
Do not decide on replacement—or attempt a thinset skim coat, resin treatment, patch, added water, or membrane coating—solely from photographs or anecdotal advice. Deep crumbling, widespread softness, movement, cracking, incorrect slope, or an unstable drain warrants system-specific guidance before the bed is covered.