 MortarDesk
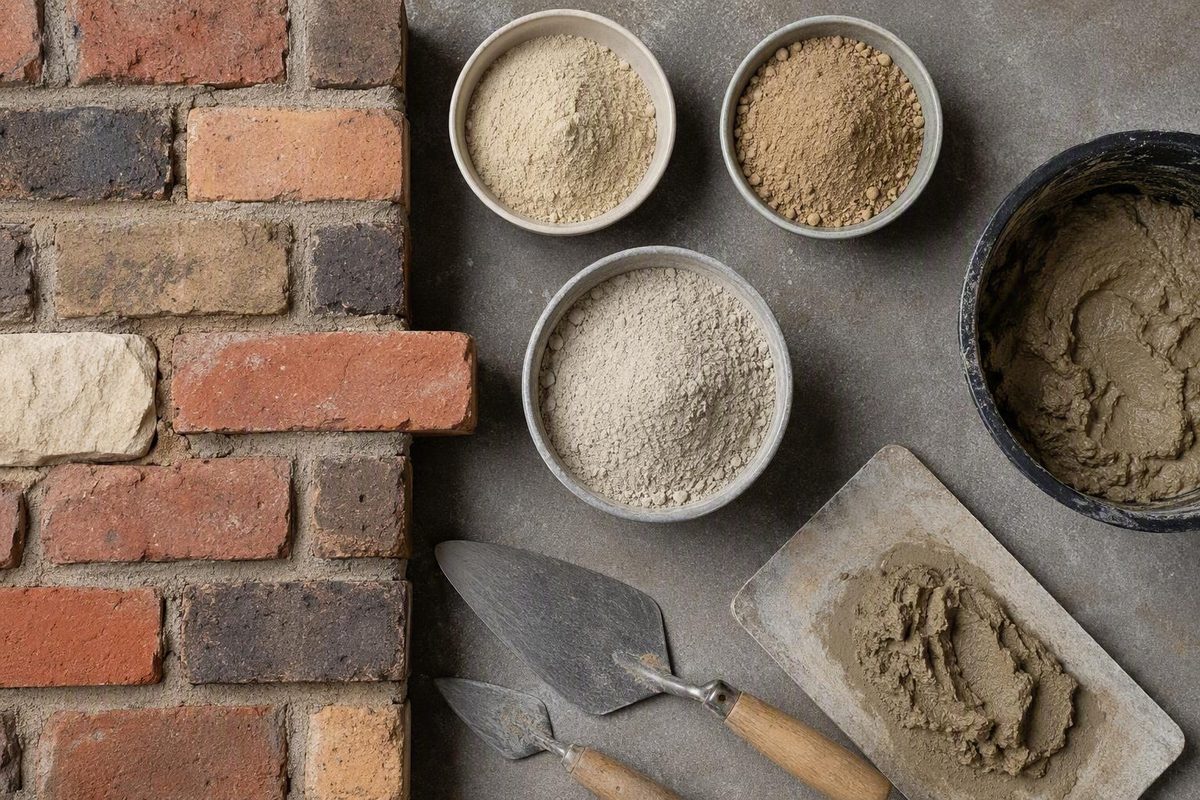
Choosing tuckpointing mortar is not a matter of buying the strongest or most familiar bag. The appropriate mortar must work with the existing brick or stone, surviving original mortar, wall function, moisture exposure, weather conditions, and project requirements.
Type N, Type O, Type S, informal Type K, and lime-based mortars are useful starting categories—not automatic answers. Before committing to a mix, inspect the wall, investigate moisture and movement, examine intact mortar from within the joints, prepare measured trials, and approve a cured mock-up.
The available published guidance is largely drawn from manufacturer instructions and masonry-contractor practice rather than a complete set of primary standards. Accordingly, the ratios, strengths, removal depths, and review periods below should be treated as screening information. The selected product data, project documents, and advice from a qualified masonry or preservation professional should control the actual work.
First, clarify whether the work is tuckpointing or repointing
Traditional tuckpointing is an appearance technique. A mason uses two mortar colors—typically a background mortar coordinated with the masonry and a narrow contrasting fillet—to create a fine, sharply defined joint line.
Repointing means removing deteriorated mortar from joints and replacing it with new mortar. Graciano distinguishes the decorative two-color technique from repair-oriented repointing.
This guide addresses both usages:
- For repair-oriented work, the first objective is physical compatibility and effective joint renewal.
- For traditional tuckpointing, physical compatibility still comes first, followed by the colored fillet and precise visual finish.
- In either case, the background mortar must suit the masonry rather than merely look convincing.
There is no single tuckpointing mortar that is correct for every wall. Selection may depend on:
- Brick or stone type and condition
- Composition and condition of surviving mortar
- Structural or load-bearing role
- Above-, at-, or below-grade location
- Rain, saturation, drainage, and drying conditions
- Freeze-thaw exposure
- Joint width, depth, and profile
- Previous repairs
- Product instructions and project specifications
- Any requirements identified by the applicable local or preservation authority
First determine whether deteriorated joints are the principal problem or a symptom of something larger.
If units are displaced, the wall is leaning or bulging, cracks are changing, or water repeatedly enters the assembly, investigate those conditions before removing mortar.
Choose for compatibility, not maximum compressive strength
Mortar is often described as the repairable or sacrificial part of a masonry wall. The practical idea is that weathering and small movements should not be redirected into irreversible loss from brick faces or carved stone merely because a repair joint is exceptionally hard.
That does not mean replacement mortar should be intentionally weak. It means the mortar and masonry must function as a compatible system.
A mortar that is too hard, rigid, or otherwise incompatible with softer units may alter where deterioration occurs. Instead of the joint gradually eroding, damage may appear in the adjacent brick or stone. Contractor guidance associates incompatible hard repairs with cracked units, loose masonry, joint separation, and deterioration around comparatively intact mortar. It also warns that mortar that is too weak for the load or exposure may fail prematurely. Building Restoration Corporation summarizes these competing compatibility risks.
“Softer” is therefore not a complete selection rule. A low-strength mortar may be unsuitable for a heavily loaded, retaining, foundation, below-grade, or severely exposed assembly. Conversely, a higher compressive-strength figure does not by itself prove better bond, drying behavior, weather resistance, or service life.
Properties and conditions that may matter include:
- Compressive strength
- Bond with the existing units
- Ability to accommodate movement
- Water absorption and drying behavior
- Vapor movement
- Workability and water retention during placement
- Aggregate grading and particle shape
- Joint geometry
- Preparation and workmanship
- Curing conditions
- Rain, salts, saturation, and freezing exposure
Physical compatibility and appearance must be approved separately. Mortar can reproduce an old joint’s color while being much harder, denser, or compositionally different. It can also be physically suitable but visually wrong because its sand, tooling, or cured color does not match.
Use this checklist before settling on a candidate:
- Masonry units: Are they dense modern brick, soft handmade brick, concrete masonry, limestone, sandstone, granite, or mixed rubble?
- Unit condition: Are the faces sound, powdering, cracked, or spalling?
- Original mortar: Is intact material available from within the joints?
- Previous repairs: Are there hard gray patches, several colors, or visibly different repair generations?
- Wall function: Is the masonry load-bearing, veneer, infill, retaining, or part of a foundation?
- Location: Is the work above grade, at grade, or below grade?
- Moisture: Does the wall dry readily, or is it affected by leaks, splashback, or persistent dampness?
- Climate: Is the assembly likely to freeze while wet?
- Aggregate: What are the original sand’s color, grading, shape, and visible mineral particles?
- Appearance: What do the unweathered color and texture look like?
- Joint profile: Is the original joint flush, concave, weathered, struck, ruled, or another shape?
- Project controls: Do product data, drawings, specifications, or instructions from an applicable authority govern the work?
The result should be a compatibility decision, not a strength contest.
Type N, O, S, K and lime mortar compared
A classification label does not by itself identify every constituent, manufacturing method, or relevant performance property.
The values below are commonly reported laboratory classification figures in the supplied manufacturer and contractor material. They are not guaranteed field strengths and do not establish bond, permeability, flexibility, durability, or compatibility with a particular wall.
| Mortar category | Commonly reported laboratory strength | Broad starting applications | Important cautions |
|---|---|---|---|
| Type N | About 750 psi | Compatible newer or harder masonry; ordinary above-grade walls | Not a universal exterior mortar; verify compatibility with the units, original mortar, and exposure. |
| Type O | About 350 psi | Some soft or historic masonry; lower-load repair work | Exterior recommendations conflict, so moisture and freezing exposure require project-specific evaluation. |
| Type S | About 1,800 psi | Structural, higher-load, or below-grade work | Higher strength is not an automatic upgrade and may be unsuitable beside soft masonry. |
| Informal Type K | No dependable classification value stated here | Specialized preservation discussions involving very soft masonry | The label does not replace a defined material and performance specification. |
| Lime putty and sand | No single value | Some traditional and historic masonry | Requires a mix and curing plan for the actual materials and exposure. |
| Natural hydraulic lime and sand | Varies by formulation | Selected historic brick or stone work where hydraulic set is desired | Not interchangeable with lime putty or Portland-cement-containing mortar. |
Contractor guidance commonly reports approximately 350 psi for Type O, 750 psi for Type N, and 1,800 psi for Type S, while emphasizing that masonry type, structural demands, and exposure must also guide selection. Restoration Systems presents these figures as approximate classification values.
Type N
Type N is a reasonable starting candidate for compatible newer or harder masonry in ordinary above-grade service.
A commonly reported cement-lime proportion example is:
- 1 part Portland cement
- 1 part hydrated lime
- 6 parts sand
The same contractor source reports a laboratory strength of about 750 psi for Type N and presents the 1:1:6 recipe as a nominal volumetric mix. Neither number proves that a Type N product or site mix will suit a particular wall. North Shore Brickwork lists the ratio and approximate strength as general guidance.
Soft brick, sensitive stone, persistent saturation, harsh exposure, or substantially weaker original mortar can all change the decision. Type N is best understood as a general candidate for evaluation, not “the exterior tuckpointing mortar.”
Type O
Type O is a lower-strength mortar classification. In cement-lime contractor guidance, a commonly reported proportion example is:
- 1 part Portland cement
- 2 parts hydrated lime
- 9 parts sand
The commonly reported laboratory figure is about 350 psi, and the proportion example is 1:2:9. These figures describe a reported cement-lime formulation and classification benchmark, not every possible Type O cementitious system or a complete field specification. Atek Masonry lists the nominal recipe and strength.
Type O may be considered for some lower-load, soft, or historic masonry where a stronger repair could be incompatible. Exterior guidance in the supplied contractor material is not uniform. Some sources recommend Type O for selected historic exterior brick, depending on the masonry and exposure.
Another contractor source characterizes Type O as unsuitable for exterior or moisture-exposed locations. Building Restoration Corporation presents that more restrictive recommendation.
The disagreement cannot be resolved from the Type O label alone. Unit properties, rain exposure, saturation, drainage, freezing conditions, and the project’s controlling instructions must decide whether it is a viable candidate.
Type S
Type S is a higher-strength classification commonly associated in contractor guidance with load-bearing, structural, and below-grade work. Its commonly reported laboratory figure is about 1,800 psi.
That does not make Type S an upgraded Type N. A foundation, retaining wall, or demanding load condition may justify evaluating Type S or another designed mortar, while routine replacement of joints in soft above-grade brick may not.
Above-grade location does not automatically rule Type S in or out. A chimney or parapet may experience severe wetting, salts, thermal cycling, and freezing even though it is above the soil. Other above-grade walls may carry substantial loads. The assembly, rather than height alone, should govern the evaluation.
Type K
“Type K” appears in preservation-oriented contractor literature as a label for very weak, lime-rich mortar intended for sensitive masonry.
Do not select a repair from the letter alone. If project documents call for Type K, they should define the binder, aggregate, proportions, performance requirements, placement, and curing rather than relying on an informal name.
Lime putty, NHL, and cement-lime mortar
“Lime mortar” can describe materially different systems:
- Lime-putty mortar generally means lime putty and sand without Portland cement.
- Natural hydraulic lime mortar uses NHL as the binder with sand. Different NHL formulations should not be assumed interchangeable.
- Cement-lime mortar combines Portland cement and hydrated lime; commonly reported Type N and Type O recipes are examples of this binder approach.
- Hydrated lime added to Portland cement does not make the mixture equivalent to traditional lime-putty mortar.
The available evidence supports distinguishing them but does not provide an authoritative universal recipe or curing schedule for every lime-putty or NHL application. Use a defined product or project specification rather than substituting one lime system for another by name.
Finally, do not choose solely from the building date. A pre-1900 or pre-1920 date may justify closer investigation, but it does not prove brick hardness, surviving mortar composition, or the absence of later rebuilding. Sample the materials actually present.
Understand what is in the mix before copying a ratio
A nominal mortar ratio is shorthand. It is not a complete purchasing, batching, installation, or curing specification.
Sand
Sand is the aggregate and generally the largest component by volume. Its characteristics affect:
- Mortar color and visible particles
- Surface texture
- Water demand
- Workability
- Packing and shrinkage
- The appearance of the tooled joint
“Six parts sand” does not identify the source, grading, particle shape, mineral content, cleanliness, or moisture condition. Two nominal 1:1:6 mixes made with different sands can look and handle differently.
Portland cement and hydrated lime
Portland cement is a hydraulic binder that develops strength through reaction with water. Hydrated lime is an ingredient used in cement-lime mortar and is associated in the supplied contractor guidance with workability, adhesion, water retention, porosity, and flexibility.
Those broad functions do not establish the right quantities for a specific wall. Changing one constituent can affect several properties at once, so informal field adjustment is not a substitute for a defined mix.
Natural hydraulic lime
Natural hydraulic lime is itself a binder. It is not the same as hydrated lime added to Portland cement, and it is not the same as nonhydraulic lime putty.
“NHL” should therefore be accompanied by a defined product or formulation and project-specific requirements. It should not be treated as a generic synonym for all historic mortar.
Masonry cement, mortar cement, and complete preblends
It normally still needs the specified sand and water unless its packaging says otherwise.
A complete dry preblend already includes proportioned binder and sand. As a product-specific example, SPEC MIX describes its tuckpoint mortar as a dry blend of Portland cement, hydrated lime, and dried masonry sand. The manufacturer identifies the ingredients on its product page.
Read the bag and current data sheet. “Just add water” and “add sand and water” describe different products.
Why a ratio is incomplete
A recipe such as 1:1:6 or 1:2:9 does not establish:
- Whether constituents are measured by weight or volume
- Aggregate grading or particle shape
- Sand-moisture corrections
- Exact water content
- Mixing sequence and duration
- Permitted additives
- Pigment limits
- Air content
- Required bond or moisture behavior
- Placement method
- Curing and weather protection
- Compatibility with the existing masonry
Copying a ratio from an unrelated project can therefore produce disappointing results even when the arithmetic is correct.
Site-mixed versus preblended mortar
A complete preblend can improve convenience and batch consistency because its dry constituents are already proportioned. It may also provide a clearly defined mixing procedure and product-specific wet yield.
A custom site mix can provide closer control over aggregate, binder system, texture, and color. That advantage depends on measured, repeatable batching. Variable shovelfuls, changing sand moisture, and uncontrolled water additions make a custom mix less predictable.
Whichever route you use, follow the selected product’s current data and the project specification. Do not transfer one manufacturer’s water demand, mixing time, working time, retempering rule, or cleaning interval to another mortar.
Use a selection workflow before buying mortar
A disciplined workflow keeps the mortar aisle from becoming the starting point for diagnosis.
1. Identify the wall’s function and exposure
Classify the work before comparing products:
- Ordinary above-grade wall
- Veneer or non-load-bearing infill
- Load-bearing masonry
- Chimney
- Parapet
- Foundation
- Retaining wall
- Below-grade wall
- Fireplace or another heat-exposed assembly
- Persistently damp or salt-affected masonry
A chimney and a sheltered wall may both be above grade but experience very different moisture and temperature conditions. A foundation and decorative veneer may contain similar-looking brick while placing different demands on the joints.
2. Inspect the whole assembly
Look for:
- Bulging or leaning
- Displaced or loose units
- Extensive, changing, or stair-step cracks
- Distress near lintels and openings
- Recurring brick-face spalling
- Open copings, failed flashing, or roof leaks
- Damp areas or deposits on the surface
- Deterioration concentrated near grade
- Hard previous repairs beside damaged brick
- Multiple mortar colors or joint profiles
These conditions may show that repointing is only one part of the required work. Filling joints does not correct active movement or stop unresolved water entry.
3. Collect representative original mortar
Do not match only the exposed face. Surface mortar may be dirty, stained, washed out, or heavily weathered.
Where practical and appropriate, examine intact material from within an original joint. Sample more than one area if the building has additions, altered openings, repaired elevations, or visibly different construction phases. Record where each sample came from.
The objective is not simply to find the dominant color. It is to determine whether the wall contains several mortar generations and which material belongs to the work being repaired.
4. Review the available project information
Check for:
- Original drawings or specifications
- Previous repair reports
- Current product instructions
- Design-professional directions
- Conditions attached to the property or project
- Instructions from the applicable local or preservation authority
Do not assume that a generic retail recommendation overrides project documents. If you are uncertain which requirements apply, ask the relevant authority or project professional before purchasing material.
5. Build a candidate list
Only after inspection should nominal categories enter the decision.
| Existing condition or application | Candidates to evaluate | Questions that remain |
|---|---|---|
| Compatible newer, hard brick in ordinary above-grade exposure | Type N | Is the surviving mortar similar? Does the wall dry properly? Are bond and cured appearance acceptable? |
| Soft historic brick or sensitive stone | Type O, explicitly defined Type K, lime putty, or NHL | Which binder system suits the existing work? Is the exposure appropriate? What curing and protection are required? |
| Foundation, retaining wall, or demanding load condition | Type S or another designed specification | What loads, moisture conditions, and unit properties govern the work? |
| Chimney or parapet | Project-specific Type N, Type S, lime-based, or designed mortar | How severe are saturation, salts, heat, movement, and freezing exposure? |
| Mixed masonry or several repair generations | Analysis-led or separately specified repairs | Which areas are original, and should different zones receive different mortars? |
This matrix narrows the investigation. It is not a project-ready specification.
6. Escalate when the project requires documentation
Contractor guidance indicates that designated historic projects may require petrographic analysis to document compatibility. Restoration Systems identifies petrographic analysis as a possible requirement for designated historic work.
The supplied evidence does not establish a universal rule for when testing is necessary or everything a particular analysis can determine. For specification-controlled historic work, ask the preservation authority, project professional, or qualified materials laboratory what documentation and test methods are required.
Prepare, mix, place and tool the mortar correctly
A suitable mortar can still perform poorly when applied as a shallow skim or placed against dusty, unstable material. Preparation and workmanship matter as much as the type printed on the bag.
Remove unsound mortar to a meaningful depth
Do not smear a thin layer over deteriorated mortar. Remove loose and unsound material to a consistent depth that allows replacement mortar to occupy the joint rather than form only a cosmetic surface.
“Twice the joint width” or “at least 3/4 inch” appears in contractor guidance, while SPEC MIX directs 3/4-inch joint preparation for its named product. These are source-specific reference points, not universal requirements. Actual removal depends on deterioration, joint geometry, masonry fragility, sound material that should remain, and the project specification.
Protect masonry edges
The exposed brick or stone edges framing a joint are called arrises.
Grinders and routers can speed removal, but careless use can cut units, enlarge narrow joints, or produce uneven depths. Whichever method is selected, remove dust, chips, and loose debris before placing new mortar.
Batch consistently
For site-mixed mortar:
- Measure constituents consistently.
- Keep the sand source and binder products unchanged within the approved work area.
- Maintain the same mixing sequence.
- Measure pigment additions.
- Account for substantial changes in sand moisture.
- Add water consistently rather than adjusting every batch by appearance alone.
- Record batch quantities and sample locations.
It must still be workable enough for the intended application. Excess water added merely to ease placement can change consistency and appearance.
Follow the project documents or selected manufacturer’s directions for filling, consolidation, and any treatment of deep or irregular joints. The supplied evidence does not support one universal lift depth or compaction procedure for every mortar system.
Tool at the specified stage
Tool the mortar at the firmness directed by the selected product or specification—often described in manufacturer guidance as thumbprint hardness—and reproduce the original or specified profile.
Joint shape affects shadows, apparent color, and the visual relationship between the repair and surrounding masonry. Tools should suit the required joint width and profile, but the exact equipment and method depend on the units and project requirements.
Treat manufacturer directions as product-specific
For its own tuckpoint mortar, SPEC MIX directs five minutes of mechanical mixing, a relatively dry pointing consistency, use within 2.5 hours of initial mixing, and tooling at thumbprint hardness. It allows retempering only to replace water lost through evaporation. The manufacturer also recommends waiting at least 7 days but no more than 28 days before cleaning, identifies a mock-up or field sample as imperative, and lists joint preparation and cleaning precautions. These dimensions, times, and instructions apply specifically to the named SPEC MIX product.
Do not transfer those limits to another mortar. Discard mortar when required by its product data or project specification.
Protect fresh mortar
Fresh joints may require protection from rapid drying, direct sun, wind, rain, freezing, and temperature extremes. The exact measures depend on the binder system, product, weather, and masonry absorption.
Plan weather protection before mixing and use the selected mortar’s instructions rather than a generic timetable.
Before cleaning, test the proposed method on the approved mock-up. Consult the instructions for the masonry units, mortar, and cleaning product instead of assuming that one waiting period or chemical is suitable for all materials.
Match color, texture and joint profile with cured mock-ups
Color matching should begin with representative original material, not necessarily the exposed surface. Old mortar may carry dirt, staining, biological growth, cleaning damage, or aggregate loss. Where feasible, compare the new mortar with the unweathered interior of a sound original joint unless the project defines a different visual target.
Final appearance can be affected by:
- Sand source, color, and particle distribution
- Gray or white Portland cement
- Lime
- Pigment
- Water content
- Mixing time
- Curing conditions
- Weathering
- Tooling time
- Joint depth and profile
- Light and shadow
- Adjacent brick or stone color
Start with the sand. Because it is a major component by volume, its mineral colors and particle sizes strongly influence texture and color.
Make documented trials
Prepare several small, measured batches instead of altering a production batch by eye. For each trial, record:
- Sand source and quantity
- Binder product and quantity
- Pigment type and amount
- Water added
- Mixing time
- Date and weather
- Tooling time and method
- Joint profile
- Sample location
Install trials in representative joints or mock-up panels.
Once a trial is approved, keep its variables consistent. Changing the sand source, water addition, mixing time, or profile can change appearance even if the mortar classification remains the same.
Judge cured mortar rather than wet mortar
Wet mortar generally appears darker than cured mortar and should not be used for final color approval.
North Shore Brickwork suggests an early review after about 48 hours. That is a contractor-practice recommendation rather than a universal endpoint. Its guidance presents 48 hours as a sample-review period.
Delta recommends curing test patches for at least 72 hours before comparison. It also identifies sand, binder color, pigment, water, curing, weathering, and joint profile as appearance variables. Delta’s color-matching guidance provides the 72-hour recommendation.
Neither period guarantees final color. Appearance may continue to change through curing, drying, cleaning, and weathering.
Compare mock-ups:
- In relevant natural daylight
- At more than one time of day
- From normal viewing distances
- Beside the actual brick or stone
- In both sunlit and shaded areas where relevant
Do not judge mortar as an isolated color chip. Adjacent units and joint shadows influence how the color is perceived.
Pigments can adjust buff, brown, red, gray, or black tones, but the supplied evidence does not support a universal dosage across all systems. Use compatible pigments within the limits given by the mortar or pigment manufacturer.
Approve visual agreement and physical suitability as separate decisions. A convincing color match does not prove compatible strength, moisture behavior, aggregate, or binder composition.
Estimate mortar from joint volume, not wall area alone
Wall area by itself does not reveal how much mortar to buy. Equal-sized walls can have different unit dimensions, joint spacing, joint widths, removal depths, and percentages of joints requiring repair.
Estimate the filled joint volume:
Mortar volume = total joint length × average joint width × average filled depth
Use consistent units. If every measurement is in inches, the result is cubic inches. If every measurement is in feet, the result is cubic feet.
Then:
- Add an explicitly chosen waste allowance for dropped material, irregular voids, tooling losses, and field practice.
- Divide the adjusted volume by the selected product’s stated wet yield.
- Round up to whole packages.
- Check whether the batch size, storage conditions, and project schedule make the order practical.
There is no universal waste percentage in the supplied evidence. State the allowance used instead of concealing it in a coverage assumption.
Worked volume example
Suppose a repair contains:
- 500 linear feet of joints
- Average joint width of 3/8 inch
- Average filled depth of 3/4 inch
Convert the length:
500 ft × 12 = 6,000 in
Calculate joint volume:
6,000 × 0.375 × 0.75 = 1,687.5 cu in
For illustration only, assume the estimator selects a 15% project-specific waste allowance:
1,687.5 × 1.15 = 1,940.6 cu in
SPEC MIX states that one 80-pound bag of its named tuckpoint mortar yields approximately 1,296 cubic inches, or 21.2 liters, of wet mortar. It lists 80-pound bags and reusable 3,000-pound bulk bags for that product. These are manufacturer-specific figures, not category-wide package sizes.
Using that wet yield:
1,940.6 ÷ 1,296 = 1.50
Round up to two 80-pound bags.
The 15% allowance belongs only to this example. Actual coverage varies with joint dimensions, irregular voids, labor practices, site conditions, and work design. Verify the current yield and package size for the product actually purchased.
Know the safety limits and when not to DIY
Mortar removal can create airborne dust and flying fragments. Contractor guidance identifies respirators, goggles or face protection, and dust-suppression systems among measures used during removal.
The supplied evidence does not include an authoritative occupational-safety standard and is not sufficient to select a respirator, determine exposure, design dust controls, or establish regulatory compliance. Before beginning work, consult the applicable occupational-safety requirements and the current instructions for the tools and protective equipment being used. Where those requirements cannot be confidently applied, use a qualified contractor.
Power tools can also cut masonry edges, enlarge narrow joints, produce uneven removal, and damage fragile historic units. Tool selection and operating methods should account for the joint geometry and substrate.
Stop routine DIY work and seek appropriate assessment when you find:
- A bulging, leaning, or unstable wall
- Displaced or loose masonry units
- Extensive or changing cracks
- Stair-step cracking associated with apparent movement
- Active water entry
- Recurring brick or stone spalling
- Distress around lintels, foundations, or openings
- An unstable chimney or parapet
- Suspected foundation or structural movement
- Hard previous repairs that must be removed from fragile units
Designated historic properties, very soft brick or stone, uncertain original mortar, and walls containing several repair generations also justify specialist review. Depending on the problem, that may mean an experienced restoration mason, masonry conservator, qualified materials laboratory, or structural professional.
Chimneys, parapets, foundations, retaining walls, and persistently wet locations deserve particular caution. Their loads, drainage, salts, weather exposure, and access conditions may exceed what a generic Type N, Type O, or Type S recipe can address.
Mortar Desk publishes general building-material reference information. It is not a contractor and does not provide engineering advice. Specifications change and requirements vary by locality, so verify the selected mortar, installation method, and applicable project requirements for the actual property. Mortar Desk explains its reference-only role.
What is the best mortar for tuckpointing old brick?
There is no universally best mortar for old brick. Age alone does not establish brick hardness, original mortar composition, moisture exposure, or structural role.
For soft historic brick, candidates may include Type O, an explicitly defined Type K, lime-putty mortar, or NHL mortar. Harder masonry or later alterations may call for a different formulation. Inspect intact material within the joints, identify previous repairs, and evaluate moisture and movement before choosing.
The selected mortar should be physically compatible while reproducing the appropriate aggregate, color, texture, and joint profile. Approve those characteristics through project requirements and a cured mock-up rather than from the bag label alone.
Should I use Type N or Type O mortar for tuckpointing?
Type N may be a starting candidate for compatible newer or harder masonry in ordinary above-grade service. Type O may be considered for some lower-load, soft, or historic masonry where Type N could be incompatible.
Do not decide from those descriptions alone. Contractor recommendations for Type O outdoors conflict, particularly where masonry stays wet or freezes while saturated. Type N is not automatically suitable merely because a wall is exterior.
The commonly reported cement-lime proportion examples—1:1:6 for Type N and 1:2:9 for Type O—are not complete specifications. Compare the existing units and mortar, investigate moisture exposure, and follow the applicable product and project requirements.
Can Type S mortar be used for above-grade tuckpointing?
Potentially, but above-grade location alone does not answer the question. Type S is commonly associated with higher-load, structural, or below-grade conditions. Some above-grade assemblies may have demanding structural or environmental exposure, while an incompatible high-strength repair may be unsuitable for soft brick.
A chimney or parapet should not receive Type S automatically simply because it is exposed. Evaluate the units, surviving mortar, saturation, salts, thermal cycling, freezing exposure, loads, and project requirements. Type S is a candidate where those conditions justify it, not a universal upgrade.
How deep should mortar joints be cut out before repointing?
Remove deteriorated mortar to a meaningful, consistent depth that exposes sound material and allows the replacement mortar to occupy the joint. Do not apply a thin skim over loose or decayed mortar.
Twice the joint width or at least 3/4 inch appears in contractor and manufacturer guidance, but it is not a universal rule. Required depth depends on deterioration, joint geometry, masonry fragility, the material that should remain, and project instructions.
Protect the masonry arrises and remove dust and loose debris before placing replacement mortar.
How many joints will an 80-pound bag of tuckpointing mortar fill?
The answer depends on total joint length, average width, filled depth, waste, and the selected product’s wet yield. Calculate:
Joint length × average width × average filled depth
Add a stated project-specific waste allowance, divide by the product’s wet yield, and round up to whole bags.
For the named SPEC MIX tuckpoint mortar, the manufacturer states a wet yield of approximately 1,296 cubic inches, or 21.2 liters, per 80-pound bag. Other products may differ, so do not use that figure without confirming the product being purchased.
Practical buying rule: Identify the masonry and existing mortar before choosing a bag. Treat Type N, Type O, Type S, informal Type K, and lime-based products as candidates rather than automatic answers. Approve physical suitability and appearance through project-specific requirements and a cured mock-up.
Careful removal, clean joints, measured batching, appropriate tooling, curing protection, and moisture diagnosis matter as much as the mortar label. For historic soft masonry, recurring spalling, active leaks, unstable walls, or suspected structural movement, stop short of a generic DIY recipe and consult an appropriate masonry, preservation, or structural professional.