 MortarDesk
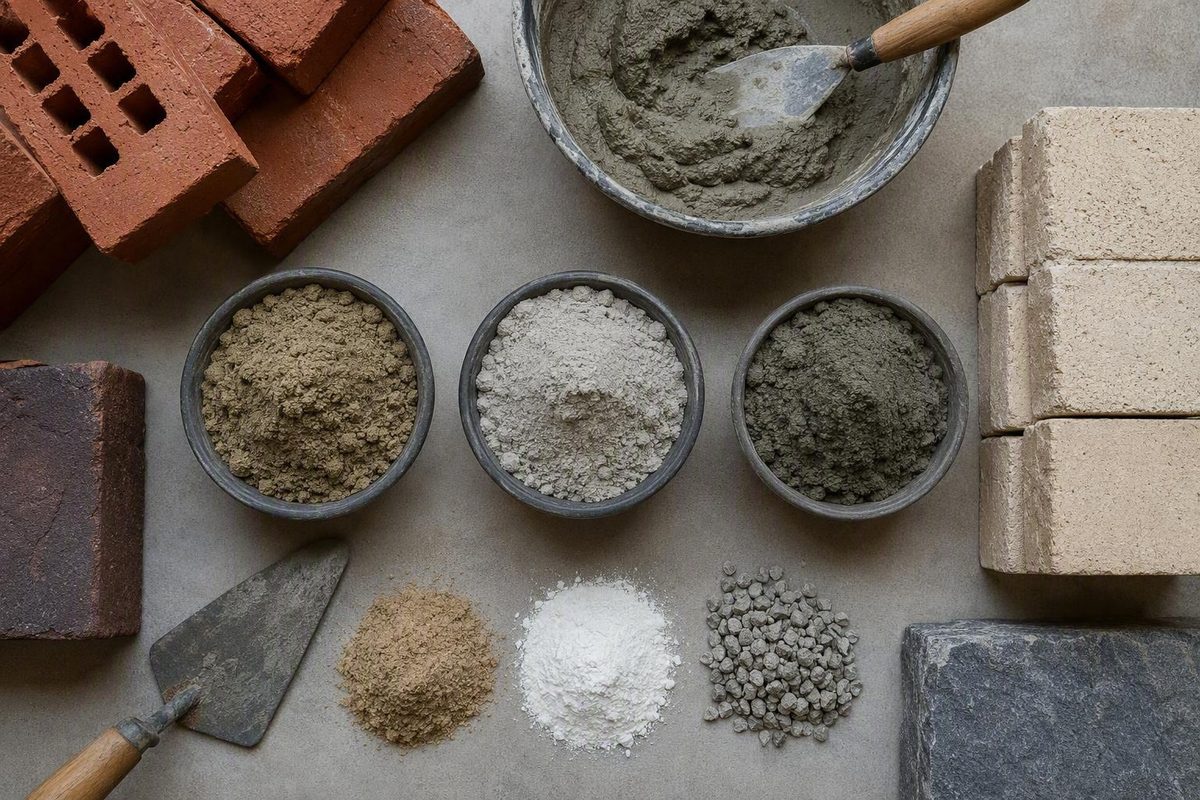
“Brick mortar” here means masonry mortar used with brick, not a physical brick-and-mortar business. Choosing it is not simply a matter of buying the strongest bag. The mortar must suit the brick, the wall’s structural role, its exposure to water and weather, the existing construction, and the desired appearance.
That is especially important in repair work. A hard, dense mortar can be appropriate in one assembly and damaging in another. The practical goal is a joint that supports the wall without overpowering the masonry units.
This guide provides an introduction to mortar selection and product labels. It is not an engineering specification or a substitute for current project documents, local requirements, manufacturer instructions, or qualified preservation advice.
What brick mortar is—and what it does in a wall
Mortar is a workable mixture that hardens between masonry units. It generally contains:
- Fine aggregate, usually sand
- Water
- A binder such as Portland cement, lime, masonry cement, or a blend
- Optional ingredients such as pigments or approved additives
Its first visible job is to join bricks, but mortar performs several connected functions. It bonds masonry units, fills irregular gaps, distributes loads across adjacent units, helps manage moisture, accommodates limited movement, and contributes to the wall’s color, pattern, and texture. A general overview of masonry mortar and its constituent materials describes it as a workable material that hardens between brick, stone, or concrete masonry units.
Mortar is not concrete. Mortar normally uses fine aggregate and is formulated to bond units or fill joints. Concrete generally contains coarse aggregate, such as gravel or crushed stone, and is placed as a structural material in its own right. A bag labeled “concrete mix” is therefore not a substitute for brick mortar.
In a compatible masonry assembly, the joint is commonly intended to remain the more maintainable or sacrificial component: it is preferable for weathering and limited movement to affect replaceable mortar rather than an irreplaceable brick face. That does not mean every mortar must be extremely weak. It means the mortar’s properties should be balanced with those of the brick and the demands on the wall.
Mortar alone does not determine whether a wall is strong or weather-resistant.
The selection rule that matters most: compatibility before maximum strength
Compressive strength is useful, but it is only one part of mortar selection. Other relevant properties include:
- Bond with the masonry unit
- Water retention during placement
- Workability and the ability to fill joints
- Elasticity and movement accommodation
- Vapor permeability and drying behavior
- Resistance appropriate to the exposure
- Compatibility with the brick’s hardness and absorbency
- The wall’s design and structural function
- Project specifications and local requirements
This is why “stronger” does not automatically mean “better.” Commercial restoration guidance describes mortar as the repairable or sacrificial part of a masonry assembly. The final selection still has to reflect the specific masonry, wall design, and exposure conditions. Atlantic Restoration discusses this compatibility principle in its overview of mortar in masonry restoration.
A useful selection process separates four questions that are often conflated.
1. What structural demand must the wall meet?
Establish whether the masonry is structural or nonstructural, reinforced or unreinforced, above or below grade, and subject to vertical load, lateral load, soil pressure, or other design demands. Mortar selection must follow the project design rather than a simplified retail chart.
2. What can the brick tolerate?
Consider the brick’s strength, density, absorption, surface condition, age, and deterioration.
3. How will moisture and exposure affect the assembly?
Assess wind-driven rain, splashback, chronic leaks, rising or trapped moisture, salts, freeze-thaw cycling, and contact with soil. More exposure does not automatically mean that the densest possible mortar is best; the wall must also be able to dry in a manner compatible with its construction.
4. What must the repair look like?
Mortar is visually prominent. A physically compatible repair can still be conspicuous if those variables are ignored.
Before shopping, write down:
- New construction, veneer pointing, or repair
- Full-size brick or thin veneer
- Above-grade or below-grade location
- Structural or nonstructural role
- Reinforcement and lateral-load requirements
- Brick age, condition, hardness, and absorbency
- Existing mortar condition and probable composition
- Rain, freeze-thaw, salt, and soil exposure
- Joint dimensions and intended profile
- Project specification, product approval, and applicable local requirements
Reported mortar strength is generally based on prepared and tested mortar specimens. It is not the strength of a completed masonry wall, nor does it establish that a product will bond properly to a particular brick. SPEC MIX similarly tells specifiers to consider compatibility, bond, workability, water retention, elasticity, design requirements, and codes rather than relying on compressive strength alone on its masonry-cement-and-sand mortar technical page.
Do not reduce signs of wall failure to a choice between Type N and Type S. Structural movement, displaced or loose units, severe or recurring cracks, chronic water entry, bulging, and major load-bearing work require qualified evaluation. Chimneys, parapets, foundations, retaining walls, and historically significant masonry can combine structural and moisture risks that changing mortar type alone will not resolve.
Types M, S, N, O and K compared
Mortar letters describe broad performance categories, not complete project specifications. The table below summarizes commonly reported minimum average 28-day property-specification strengths. A secondary retailer guide reports that ASTM C270 principally identifies Types M, S, N, and O, while treating Type K as an appendix or restoration category. These statements summarize that guide rather than quoting or independently interpreting the standard itself. The same mortar-type guide reports the strength values and broad application categories shown below.
| Type | Approximate minimum average 28-day property-specification strength | Relative hardness | Commonly cited contexts | Important limitations |
|---|---|---|---|---|
| M | 2,500 psi | Highest of these types | Heavy structural demands and demanding below-grade conditions | Can be much too hard for soft or historic brick; actual use must follow design and unit compatibility |
| S | 1,800 psi | High | Structural or lateral loads, soil pressure, below-grade work, and severe exposure | Not an automatic foundation or retaining-wall answer; may be incompatible with delicate masonry |
| N | 750 psi | Medium | General above-grade modern masonry in moderate exposure | Not universally suitable or unsuitable for load-bearing work; design, brick, exposure, and specifications control |
| O | 350 psi | Low | Some interior work, repointing, and restoration of softer masonry | Not a universal historic mortar and generally not selected for high structural or severe-exposure demands |
| K | About 75 psi | Very low | Specialized restoration involving very soft masonry | Commonly treated as a restoration or appendix category rather than one of the four principal types; specialist evaluation is appropriate |
These are mortar-specimen values, not guaranteed in-wall strength. A lower-strength mortar can be the more compatible choice when it bonds adequately, accommodates movement, and permits a traditional wall to dry. Conversely, a low-strength mortar is not automatically suitable merely because the brick is old.
Type M
Type M is associated with the greatest compressive strength among these categories. It may be considered where substantial loads or demanding below-grade conditions justify it. Its high strength does not by itself authorize its use: wall design, brick properties, moisture conditions, and the applicable specification remain controlling.
Using Type M simply because it sounds conservative can be counterproductive. With soft masonry, the joint may become less repairable than the brick and concentrate deterioration in the units.
Type S
Type S is commonly considered where structural or lateral loads, soil pressure, below-grade placement, or severe exposure call for greater strength than a general-purpose mortar provides.
Type S may be too hard for soft historic brick. A wall’s age does not automatically exclude it, but a project-specific compatibility assessment should precede its use.
Type N
Type N is a common starting point for general above-grade modern brickwork in moderate conditions.
“Starting point” is the important qualification. Secondary sources are not consistent when they casually classify Type N as load-bearing or non-load-bearing. A letter designation alone cannot settle that question; the wall design, masonry units, applicable code, and project specification must do so.
Types O and K
Types O and K are commonly associated with softer masonry and restoration. Their lower compressive strengths can make them candidates when a harder mortar would overpower the units.
Neither is a universal “old brick” prescription. An old building can contain hard-fired brick, later repairs, several generations of mortar, unusual exposure, or structural conditions requiring further analysis. Type K also needs careful terminology because secondary guidance treats it as a specialized restoration or appendix category rather than one of the four principal ASTM C270 types.
What about cement, lime, and sand ratios?
Secondary guides publish approximate cement:lime:sand proportions for the different mortar categories, but those abbreviated ratios are not safe universal jobsite recipes. Proportion and property specifications are different approaches, and binder type, sand moisture and grading, batching, additives, and proprietary formulations all affect the result.
Use the type designation and current product or project documents—not a copied internet ratio—to select and batch mortar. Do not reverse-engineer or extend a preblended product unless its manufacturer or the project specifier gives written approval.
Choose by project: laying brick, pointing veneer or repointing joints
Laying full-size brick, filling thin-veneer joints, and replacing deteriorated mortar in an existing wall impose different demands. They should not be treated as interchangeable tasks.
| Project | Reasonable starting approach | Main checks before selection |
|---|---|---|
| New, full-size modern brickwork above grade | Type N may be considered in moderate exposure | Brick compatibility, structural design, bond, exposure, product instructions, specification, and local requirements |
| Thin-brick veneer pointing | Use a pointing mortar expressly approved for the veneer system | Veneer manufacturer, substrate, setting system, joint depth, interior/exterior approval, temperature, and curing |
| Routine repointing of modern brick | Match the existing assembly rather than selecting by strength alone | Existing mortar, brick condition, joint depth, moisture source, color, aggregate, and profile |
| Historic masonry repair | Investigate original materials; evaluate compatible lime-rich or restoration mortars | Significance, brick softness, existing binder and aggregate, moisture, salts, exposure, and specialist input |
| Chimney | Follow project-specific requirements and qualified evaluation | Heat and weather exposure, flashing, crown, liner, structural condition, saturation, and freeze-thaw |
| Foundation | Type S or M may be considered where design demands it | Loads, reinforcement, soil pressure, water, drainage, unit compatibility, code, and engineering |
| Retaining wall | Treat as structural work; consider mortar only within the overall design | Stability, footing, reinforcement, drainage, soil pressure, water, units, and local requirements |
For ordinary above-grade modern brickwork, Type N may be a useful place to begin the conversation. It is not blanket approval. Verify that the selected product is intended for laying the brick and satisfies the project’s design and exposure requirements.
Higher-load, below-grade, retaining, or severe-exposure work may lead the specifier toward Type S or M. The stronger designation does not replace structural design, drainage, or brick compatibility. Foundations and retaining walls in particular should not be specified from a mortar chart alone.
Repointing requires investigation. The replacement must work with both the brick and the remaining original mortar. If it is harder, denser, or less permeable than the surrounding material, the wall may weather unevenly or redirect deterioration into the masonry units. Recurring joint failure may also indicate movement or water entry rather than an inadequate mortar type.
Thin-brick pointing belongs to a separate product category. Brick It, for example, markets a 40-pound pointing mortar for thin brick, thin stone, manufactured masonry veneer, and tile in interior and exterior applications. That description does not establish approval for laying full-size structural brick; use must remain within the manufacturer’s stated applications. Brick It identifies the package size and approved veneer applications on its product page.
Packaging language also needs care. One retailer lists a 10-pound Natural Type N “ready-to-use” dry blend for laying brick, block, or stone and repointing existing brick. Here, “ready-to-use” still means water must be added, as the retailer’s Type N mortar listing explains.
Chimneys, foundations, retaining walls, reinforced masonry, unstable walls, and structural repairs should be checked against project documents, current local code, and qualified professional requirements. Similar caution applies to parapets and persistently saturated masonry, where exposure may be more severe than the wall’s location initially suggests.
Historic, reclaimed and soft brick need a different approach
Historic or reclaimed brick cannot be classified reliably by age alone. Units from the same wall may differ in firing, density, strength, absorption, wear, cracking, and residual mortar.
Begin with the actual material. Look for weathered faces, rounded edges, cracking, surface loss, unusually rapid absorption, and residual soft mortar.
Commercial restoration sources describe lime-rich mortar as generally softer and more vapor-permeable than rigid, Portland-cement-rich mortar. Those characteristics can make it compatible with some traditional walls by accommodating limited movement and encouraging drying through the joints. Commercial guidance on mortar for reclaimed brick also emphasizes variation among reclaimed units and the need to consider absorbency, exposure, salts, and freeze-thaw conditions.
The common mistake is to remove an old lime-rich joint and automatically replace it with a hard, cement-rich mortar. If the brick is softer and the replacement restricts drying or movement, deterioration may shift into the brick face. That can turn a maintainable joint problem into loss of the masonry unit.
Possible categories for evaluation include:
- Lime-rich mortar
- Type O mortar
- Type K restoration mortar
- Natural hydraulic lime products
- Carefully selected blended or proprietary restoration mortars
These are candidates, not automatic answers. The supplied commercial guidance does not establish NHL 3.5—or any other single mortar—as universally suitable for reclaimed brick. Products, walls, exposures, and joint geometries vary.
Before repairing older masonry, record:
- Approximate wall age and historical significance
- Whether the masonry is structural, veneer, or infill
- Brick softness, cracking, spalling, and surface wear
- Existing joint hardness, depth, erosion, and prior patches
- Probable binder and visible sand characteristics
- Recurring leaks, rising moisture, splashback, or trapped moisture
- Efflorescence or other indications of soluble salts
- Freeze-thaw and wind-driven-rain exposure
- Structural cracks, bulging, displacement, or loose units
- Previous repairs that appear harder or denser than the original work
Visual inspection cannot always identify mortar composition. Analysis beyond visual inspection may be needed to characterize the mortar or diagnose persistent deterioration.
A preservation specialist or mason experienced in traditional materials can help with significant but stable fabric. An engineer may be needed where the wall is structural, displaced, severely cracked, or unstable. Persistent moisture damage may require investigation of roofing, flashing, drainage, grading, or plumbing rather than repeated repointing.
How to read mortar labels, standards references and bag specifications
A mortar-type letter is not enough information for a purchase. Before ordering, check the current technical data sheet and record:
- Mortar type or product classification
- Intended application: laying, pointing, repointing, veneer, or repair
- Approved masonry units and substrates
- Interior, exterior, above-grade, or below-grade limitations
- Package weight
- Required water range
- Mixing equipment and mixing time
- Slaking or remixing requirements
- Working time and retempering limits
- Substrate and ambient temperature range
- Rain and weather protection
- Curing requirements
- Cleaning restrictions and timing
- Estimated yield for the intended unit and joint
- Shelf life and storage conditions
- Available color and pigment procedure
- Current technical and safety data sheets
- Referenced standard edition
- Project specification and local approval requirements
A secondary retailer guide describes two broad ASTM C270 approaches: a proportion specification, based on ingredient proportions, and a property specification, based on prepared mortar meeting specified tested properties. This is a secondary summary, not a substitute for the current standard or project specification. The retailer guide outlines the distinction between those two approaches.
An ASTM reference on a retailer or manufacturer page does not independently establish certification, code approval, or suitability for a particular wall. Determine exactly what the seller claims, which standard and edition it references, and whether the product satisfies the project specification.
As an attributed example, SPEC MIX offers preblended masonry-cement-and-dried-sand mortar in Types M, S, and N. The manufacturer reports compliance with ASTM C270, ASTM C1714, and CSA A179 and lists minimum average 28-day property-specification strengths of 2,500 psi for Type M, 1,800 psi for Type S, and 750 psi for Type N. These are manufacturer-reported mortar results, not guaranteed strength for completed brickwork. SPEC MIX reports these standards and strength figures in its technical product information.
Yield must also remain product-specific. For an 80-pound bag, the same manufacturer estimates approximately:
- 40–45 modular bricks
- 34–39 queen-size bricks
- 28–33 king-size bricks
- 23–28 utility bricks
Those manufacturer estimates illustrate why “bricks per bag” is incomplete without brick size. Joint width and depth, work design, site conditions, labor practices, spillage, and waste can alter actual coverage. One manufacturer’s figures should not become a universal mortar calculator.
Before ordering a full quantity, verify the latest data sheet, availability, package size, storage limits, and color. Then compare the document with the project specification, applicable standard edition, and locally enforced requirements. Standards and codes can change by edition and locality.
Mixing, placing, tooling and curing: follow the selected product
Treat the following as an execution checklist, not a universal mortar recipe.
- Obtain the manufacturer’s current technical data sheet.
- Confirm that the product is approved for the substrate and application.
- Use clean potable water in the stated quantity.
- Measure consistently from batch to batch.
- Use the specified mixing equipment, speed, and duration.
- Observe any required slake and remix period.
- Stay within the stated temperature and working-time limits.
- Fill joints fully and avoid hidden voids.
- Tool at the firmness required by the product and desired finish.
- Protect the work and delay cleaning for the stated period.
Do not improvise by adding extra water, sand, cement, lime, or pigment.
Product instructions differ substantially. As a thin-veneer example, Brick It specifies approximately 2–3 quarts of potable water per 40-pound bag, mixing with a slow-speed half-inch drill at 450–550 rpm, followed by a five-minute slake and remix. Its instructions also give a substrate-temperature range of 40–90°F, call for dampening the surface, filling horizontal joints before vertical joints, avoiding voids, and tooling at thumbprint hardness. The manufacturer states that fresh work should be protected and cured for at least 72 hours at 70°F before rain exposure. These figures and procedures are specific to Brick It pointing mortar.
That is not a universal rain rule. Another product may specify a different water range, mixing method, temperature limit, or protection period.
For contrast, SPEC MIX tells users of its masonry-cement-and-sand mortar to mix mechanically and consistently for four to five minutes, use the mortar within 2.5 hours after initial mixing, and tool at thumbprint hardness. It states that cleaning should occur after at least 7 days but no more than 28 days.
The difference between the two examples is the point: water, mixing, working time, rain protection, curing, and cleaning limits cannot be generalized from one product to another.
Likewise, do not assume all mortars can be hand-mixed, retempered, pigmented, or extended with sand. If an alteration is needed for a specified color, texture, or performance, obtain written approval from the manufacturer or specifier and create a trial panel.
Review the current safety data sheet before handling or mixing the selected product, and follow applicable workplace guidance. The data sheet—not a generalized masonry article—should govern product-specific handling, protective equipment, first aid, storage, and disposal.
Match the cured mortar—not just the color chip
Mortar changes how a brick wall is perceived. A contrasting joint emphasizes each unit and the bond pattern; a closer color match can make the wall appear more uniform. Texture, aggregate exposure, joint width, and shadow lines can be as influential as pigment.
Evaluate all of the following:
- Binder color
- Pigment, if used
- Sand color
- Aggregate size and grading
- Degree of exposed aggregate
- Joint width and depth
- Surface texture
- Tooling profile
- Batch consistency
- Curing and cleaning method
Never approve a match solely from wet mortar, a printed chart, or a screen image. Prepare physical samples with the actual brick whenever possible.
A practical mock-up process is:
- Clean and dry a representative area or salvaged sample.
- Document the existing joint width, depth, profile, color, and aggregate.
- Prepare several small, clearly labeled trials.
- Keep water, batching, mixing, and tooling consistent.
- Reproduce the intended joint profile and surface texture.
- Allow the samples to cure rather than judging them wet.
- Compare them directly beside the existing wall.
- Inspect them in more than one lighting condition.
- Approve physical compatibility and appearance before full production.
A This Old House repair offers a bounded example. A mason tested multiple mixes against cleaned and dried circa-1960 brickwork, selected test number 14, and used coarser concrete sand to imitate the exposed aggregate in the existing joints. The demonstrated mix began with Type S, and the mason said adding sand reduced compressive strength; the proportions were not disclosed in the mortar-matching project video.
That project should not be converted into a general historic-mortar formula. Matching texture is important; uncontrolled product modification is not a safe general method for achieving it.
Common visible joint profiles include:
- Concave: curves inward with a rounded recess
- V joint: has an angular, V-shaped recess
- Raked: sits back from the brick face and exposes the unit edges
- Flush: aligns with the brick face
- Grapevine: has a depressed central line
- Extruded or squeezed: projects beyond the face
German Smear is different from an ordinary joint profile. It is an overmortar treatment in which mortar extends across portions of the brick face. Glen-Gery’s illustrated guide to mortar colors and joint profiles shows how these profiles and finishes alter a wall’s visual character.
Some design guidance assigns greater moisture resistance to particular profiles. Without comparative testing for the actual materials, workmanship, and exposure, those claims should not be treated as universal. Full joints, sound tooling, compatible materials, and proper wall water management remain essential regardless of appearance.
Frequently asked questions
Is Type N or Type S mortar better for brick?
Neither is inherently better for every brick project.
Type N is often a possible starting point for general above-grade modern masonry in moderate exposure. Type S has a higher reported property-specification compressive strength—approximately 1,800 psi compared with 750 psi for Type N—and may be considered for greater structural or lateral demands, below-grade conditions, soil pressure, or severe exposure. These figures are mortar-specimen values, not completed-wall strengths.
The decision should also account for brick hardness, bond, moisture, wall design, reinforcement, project specifications, and local requirements. Type S can be too hard for delicate or soft brick, while Type N should not be assumed suitable for a structural wall merely because it is commonly used above grade.
Can mortar that is too strong damage old brick?
Yes. If the mortar is substantially harder or denser than soft masonry, movement and moisture-related deterioration can shift into the bricks. Possible outcomes include cracking, spalling, edge damage, or impaired drying.
Strength is not the only issue: permeability, elasticity, bond, joint geometry, and exposure also matter. Existing mortar and brick should be investigated before repointing an older wall.
Can thin-brick pointing mortar be used to lay full-size brick?
Not unless the manufacturer expressly approves that application.
Thin-brick pointing mortar is formulated and marketed for filling veneer joints within a particular system. That does not establish its suitability for bedding full-size brick or structural masonry. Check the technical data sheet for approved units, substrates, applications, and limitations.
How much mortar does one bag yield?
There is no universal yield per bag. Coverage changes with:
- Package weight and product density
- Brick dimensions
- Joint width and depth
- Solid or perforated units
- Wall and bond pattern
- Workmanship and waste
- Whether the product is used for laying or repointing
For one manufacturer’s 80-pound bag, estimates range from 40–45 modular bricks to 23–28 utility bricks, with separate estimates for queen and king sizes. These are approximate, product-specific figures affected by work design, site conditions, labor practices, and waste. Use the estimate for the exact product and unit size rather than calculating from bag weight alone.
How long should mortar cure before rain or cleaning?
Follow the selected product rather than a universal timeline. Brick It’s thin-veneer pointing product specifies at least 72 hours at 70°F before rain exposure. The SPEC MIX masonry-mortar example states a 7-to-28-day interval before cleaning. These instructions apply to different products and different stages of the work; they are not interchangeable.
Verify current rain-protection, curing, and cleaning instructions before mixing.
Make the buying decision in five steps
A sound mortar decision can be reduced to five steps:
- Identify the wall and application: new brickwork, thin veneer, repointing, structural work, or preservation.
- Assess the brick and existing mortar: hardness, absorption, damage, composition, and prior repairs.
- Account for loads and exposure: above or below grade, moisture, salts, freeze-thaw, soil pressure, and structural demands.
- Compare compatible products: use current technical data, project specifications, applicable standards, and local requirements.
- Approve a cured mock-up: confirm workmanship, color, aggregate, and joint profile before full production.
The right mortar joint supports the wall without overpowering the brick. Before structural, retaining, foundation, chimney, or preservation work, verify current standards and local code and obtain the professional input appropriate to the project.