 MortarDesk
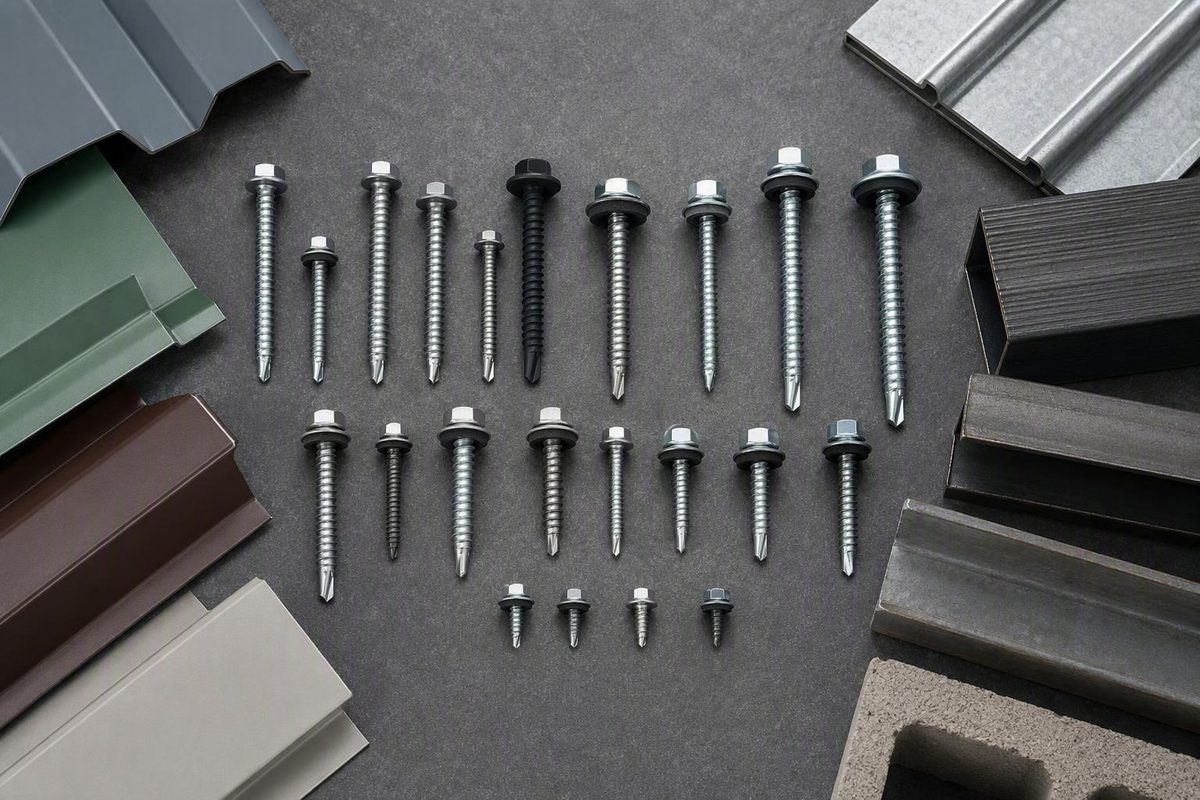
The correct metal-to-metal roof screw cannot be selected by length—or by a generic “roofing screw” label—alone. Start with the connection. Then match the fastener’s diameter, thread, drill-point capacity, grip length, head, sealing washer, material, coating and documented performance to the roof panel, supporting steel, environment and approved assembly.
A screw intended for a panel sidelap may be wrong for attachment to a purlin. A screw long enough to pass through the panel may still be unable to drill the supporting steel. A corrosion-resistant finish may still be incompatible with the connected roof metal. For structural, high-wind or approval-dependent work, all applicable requirements—including the approved plans, project specifications, engineering, code, panel-system documents and verified fastener data—must be satisfied.
What makes a roof screw metal-to-metal?
Before comparing sizes, identify the connection:
- Roof panel to steel purlin or Z-channel
- Panel sidelap to panel sidelap
- Trim or flashing to sheet metal
- Concealed clip to metal support
- Repair of a stripped or enlarged attachment
Do not choose a product until the connection is known. Fasteners that look similar can have different threads, points, heads and intended load paths.
A metal-to-metal roof screw is intended to connect a roofing panel or related component to metal framing or another metal component. Fine threads and self-drilling points are common for panel-to-steel attachment, but those features do not prove that a screw suits every support thickness, panel profile or roof assembly.
Metal-to-wood roofing screws commonly use a sharper point and coarser thread intended to bite into wood. A metal-to-metal screw instead needs a point capable of drilling the specified metal and a thread pattern that can form and hold mating threads in the support. Seller-authored guidance illustrates this distinction by describing metal-to-wood products with coarse threads and Type 17 points while describing panel-to-steel products as fine-thread, self-drilling fasteners. Its product rankings are promotional, but the connection distinction is useful when interpreting labels (Eagle Claw’s roofing-fastener guide).
Panel-to-purlin screws, stitch screws and clip fasteners have different jobs:
- Panel-to-purlin screws pass through the roof panel and anchor it to supporting steel. They may form part of the roof’s wind-uplift load path.
- Stitch or lap screws are short fasteners used where specified to join overlapping sheets, sidelaps, trim or similar sheet-to-sheet details.
- Concealed-clip fasteners secure clips below standing-seam or other concealed panels. These may require a low-profile or pancake head so the panel can fit and move as designed.
- Repair fasteners address damaged or stripped attachments and may use a larger diameter or another system-specific design.
Retail categories support this separation: metal-to-metal screws, stitch-lap screws and pancake-head screws are listed as different product families rather than interchangeable products (metal-roofing fastener category examples).
An ordinary sheet-metal screw is not automatically acceptable for a structural or wind-critical roof attachment. The required fastener may need documented pull-out, pull-over, shear and tensile performance and may need to be identified in a tested or approved roof assembly. Similar appearance is not evidence of equivalent capacity.
How to read diameter, thread pitch, length and Tek point
A label such as #12-14 × 2 inches provides three basic pieces of information:
- #12 is the nominal screw-diameter designation.
- 14 means the screw has 14 threads per inch.
- 2 inches is the listed length.
- A separate Tek or drill-point designation identifies the point configuration.
The meaning of #12-14 is documented in manufacturer-authored selection guidance, which defines it as a nominal #12 diameter with 14 threads per inch (Western States Metal Roofing’s fastener-selection guide).
The label does not by itself establish:
- drilling capacity;
- permitted combined metal thickness;
- usable grip range;
- required thread engagement;
- pull-out, pull-over, shear or tensile performance;
- screw, point or cap material;
- coating performance;
- washer composition;
- installation setting; or
- acceptance in the roof system.
Higher Tek point numbers generally identify configurations intended to drill progressively heavier steel. They do not create a universal thickness chart. Flute geometry, point material, screw design and manufacturer all matter, so the permitted drilling range must come from the current technical data for the exact product.
For example, one manufacturer-authored guide discusses a #12-14 screw for some light-metal applications and #12-24 screws with higher drill points for heavier steel. Seller-authored guidance uses different point-number examples for light-gauge framing, typical purlins and structural steel. These are illustrations—not interchangeable sizing rules—and their differences reinforce the need to use the selected product’s drilling table.
Drilling capacity is not screw length
Two separate conditions must be satisfied:
- The drill point must penetrate the combined metal thickness encountered during installation. That can include multiple panel layers, a clip, trim or other metal above the support.
- The screw length must accommodate the complete grip stack and provide the engagement required by the roof-system and fastener documentation.
A longer screw does not compensate for an underspecified drill point. It may also make alignment and installation more difficult. Nor is a longer screw automatically stronger: capacity depends on diameter, material, thread engagement, substrate and the governing failure mode.
Retail inventory shows why length alone is a poor selector. Listings include #12 self-drilling metal-to-metal roofing screws in approximately 3/4-, 1-, 1-1/2-, 2- and 3-inch lengths, but that range describes products for sale rather than the requirements of a particular roof (Lowe’s metal-to-metal roofing-screw listings).
Treat gauge descriptions carefully as well. A gauge number is incomplete unless the material is known, and a nominal gauge description should not replace the actual thickness used in the fastener’s drilling and load tables. Verify the panel and support materials and thicknesses from project documents or suitable measurements.
A step-by-step selector for the right screw
Use this workflow before adding a box of metal-to-metal roof screws to an order:
- Identify the connection. Decide whether the fastener joins a panel to a purlin, one sheet to another, trim to sheet, a concealed clip to support or a repair detail.
- Identify the panel system. Record the manufacturer, panel profile, attachment method and applicable installation manual.
- Verify the connected materials. Determine the panel metal and thickness, supporting-metal type and thickness, and any clips, laps or trim through which the point must pass.
- Establish the combined drilling thickness. Add the metal layers the drill point must penetrate. Do not confuse this with the complete grip stack.
- Establish the required grip and engagement. Use the approved project documents, panel manual and fastener data rather than a generic penetration or exposed-thread rule.
- Select diameter and thread. Match them to the connection, substrate and required performance.
- Verify drill-point capacity. Confirm that the exact product’s published drilling range includes the actual combined thickness.
- Choose the head and washer. Determine whether the connection requires an exposed sealing head, a low-profile concealed head or another specified configuration.
- Check environmental compatibility. Consider the panel, support, fastener, coating, washer, sealants and exposure as one assembly.
- Verify performance and approvals. Review applicable pull-out, pull-over, shear and tensile data under relevant substrate conditions, together with required evaluation reports, wind approvals or regional approvals.
- Confirm placement and quantity. Use the applicable fastening schedule for field, perimeter, corners, eaves, ridges, laps and trim.
Connection decision table
| Connection | Likely fastener category | Thread and point considerations | Head and washer | Documents to check |
|---|---|---|---|---|
| Exposed panel to steel purlin | Metal-to-metal panel fastener | Fine thread and a self-drilling point are common; drilling range must include the panel stack and support | Commonly a hex washer head with a bonded sealing washer | Approved project documents, panel manual, fastener data, tested assembly and fastening schedule |
| Panel sidelap | Short stitch or lap screw | Must join the specified sheet layers; should not be treated as a purlin fastener | Exposed sealing-head configuration where required | Sidelap detail, panel manual and sealant requirements |
| Trim or flashing | Trim, stitch or other detail-specific fastener | Point and thread depend on whether the connection is sheet-to-sheet or into support | Head profile and washer must fit the detail | Manufacturer’s trim drawings and project details |
| Concealed clip | Clip fastener, often with a low-profile or pancake head | Must suit the clip, support metal and movement requirements | Usually low-profile; a projecting exposed-fastener head may interfere | Concealed-panel manual, clip specification and approved assembly |
| Stripped-hole repair | Approved repair fastener or approved new location | May require a larger diameter or revised attachment, but only as documented | Seal must restore weather resistance without unacceptable panel deformation | Roof-system repair procedure, repair-fastener data and applicable engineering or approval documents |
For an exposed panel-to-steel connection, a #12 fine-thread self-drilling screw with a hex washer head and bonded EPDM washer is a common market configuration. It is not a universal specification; diameter, pitch, length and point can change with the purlin, panel profile, roof zone and design load. Commercial guidance describes this configuration for steel-purlin fastening but also stresses that substrate and project conditions affect selection (roofing-screw configuration examples).
For a sidelap, begin with the stitch screw specified by the panel manufacturer. Do not substitute a longer panel-to-purlin screw merely because it can pass through both sheets. It may have the wrong thread, grip behavior or head configuration for the lap.
For heavier supporting steel, find a published drilling range that includes the actual combined drilling thickness. Do not infer suitability from the Tek number, product name or screw length alone.
Structural or wind-critical connections require more than labels such as “heavy gauge,” “hurricane” or “high wind.” Review pull-out performance in the actual support material and thickness, pull-over performance through the specified panel, and relevant shear and tensile values. Confirm that the fastener, panel profile, support and spacing correspond to the tested, engineered or approved assembly.
A responsible final selection is not possible without these critical inputs:
- purlin material and actual thickness;
- panel manufacturer and profile;
- panel metal and thickness;
- exposed or concealed attachment detail;
- environmental exposure;
- roof-zone and wind-design requirements;
- approved plans, tested assembly or project specification; and
- applicable evaluation, code or regional approval requirements.
If these are unknown, pause the purchase. A nominal screw size cannot replace missing design information.
Head styles and sealing washers for exposed and concealed systems
Exposed roof penetrations commonly use hex heads or hex washer heads with bonded sealing washers. The head supplies a positive driving surface, while the compatible washer seals around the penetration when it is compressed correctly.
EPDM is frequently listed as a sealing material for metal-roofing fasteners. Other roofing guidance uses the term neoprene. The available evidence does not establish that one is universally superior, so use the washer material required for the selected panel and fastener system.
Concealed systems are different. Clips below standing-seam or similar panels commonly require low-profile or pancake-head fasteners. A projecting hex head can interfere with panel seating or movement, so the clip, screw head and support need to be selected as a system.
Dome-cap heads and extra-wide-washer products are also sold. A cap can cover the washer or create a particular finished profile, while a wider washer changes the bearing area around the hole. Neither feature alone proves superior durability, leak resistance or wind performance.
What correct washer seating looks like
The screw should be driven perpendicular to the panel. The washer should be compressed evenly enough to seal without being crushed, split, distorted or forced out from beneath the head.
A useful visual inspection distinguishes four conditions:
- Correctly seated: The washer is evenly compressed around the head and the panel remains properly shaped.
- Underdriven: The washer is barely compressed or a gap remains beneath part of the seal.
- Overdriven: The washer bulges markedly, splits or is displaced; the panel may also dimple.
- Angled: One side of the washer is compressed while the opposite side remains loose.
Overtightening can strip the hole, deform the panel or damage the washer. Undertightening can leave inadequate clamping and an incomplete seal. Roofing-supplier guidance therefore calls for perpendicular driving and controlled equipment set in accordance with the applicable manufacturer’s instructions (Great Northern Metal Company’s installation guidance).
There is no universal rule that every roof screw belongs in the flat, valley, rib or peak. Placement can change with the panel profile and with the location at an eave, in the field or at another detail. Follow the drawing for the exact panel and roof location.
Coatings, stainless steel and galvanic compatibility
Metal-to-metal roof screws are sold in several material and finish configurations, including:
- zinc-plated carbon steel;
- galvanized steel;
- painted galvanized steel;
- proprietary coated carbon steel;
- stainless steel;
- capped-head products; and
- bi-metal products combining different materials for the body and drilling point.
Corrosion resistance and galvanic compatibility are separate questions. A screw may resist atmospheric corrosion yet remain unsuitable in contact with a particular roof metal, support, coating or sealant. Conversely, a compatible metal pairing does not establish that a coating will withstand a coastal, agricultural or industrial environment.
Evaluate the assembly rather than the screw in isolation:
- screw-body alloy;
- drill-point material;
- cap or head material;
- coating specification;
- sealing-washer material;
- roof-panel metal and finish;
- supporting-metal material and coating;
- clips, sealants and flashings;
- drainage and recurring moisture; and
- salt, fertilizer, industrial fallout or other chemical exposure.
Comparing the main options
Coated carbon steel may provide useful drilling and mechanical characteristics, but its corrosion performance depends on the specific coating, installation condition and exposure. “Zinc-plated,” “galvanized” or “coated” does not mean corrosion-proof.
Stainless steel can improve corrosion resistance in an appropriate assembly, but the stainless grade, strength, drilling behavior and compatibility still matter. An unspecified stainless substitute should not be installed merely because another fastener has rusted.
Bi-metal fasteners can combine a corrosion-resistant body with a hardened drilling point. This construction can address the different material demands of corrosion resistance and drilling, but suitability still depends on the exact product, connected materials and environment.
One manufacturer-authored guide recommends Type 304 stainless screws for aluminum roofing and advises against Type 410 for that application. This is source-specific guidance rather than a complete rule for all aluminum panels, coatings and exposures; confirm it with the selected roof-panel and fastener manufacturers (Western States Metal Roofing on fastener materials).
For coastal, persistently wet, agricultural, industrial or chemically aggressive locations, obtain product-specific corrosion information and written compatibility guidance. Do not assign an expected service life from a finish name alone.
Cautious compatibility checklist
Before selecting galvanized, Galvalume, painted steel, aluminum, copper, 304 stainless, 410 stainless or a bi-metal construction, ask:
- Does the panel manufacturer identify permitted fastener alloys or coatings?
- Does the fastener manufacturer approve contact with both the panel and support metals?
- Is the washer approved for the panel finish and specified sealants?
- Is corrosion testing available and relevant to the actual exposure?
- Does drilling or installation alter any protected portion of the product?
- What cleaning and installation practices does the panel manufacturer require?
- Does the approved assembly identify an exact fastener model?
- Do the project specification, warranty conditions or local approvals impose additional restrictions?
These are verification questions, not universal requirements for every product. A checklist is more reliable than a generic alloy matrix because material names alone do not account for coatings, moisture, contaminants or fastener construction.
How to compare products and technical data before buying
Retail listings help identify available configurations. They do not establish structural, environmental or roof-system suitability.
Basic purchase checklist
For each candidate fastener, record:
- intended connection;
- compatible panel system or stated application;
- supported drilling range;
- usable grip range;
- nominal diameter;
- thread pitch;
- point type and designation;
- listed length;
- head style and size;
- required driver size;
- washer material and dimensions;
- screw-body alloy;
- drill-point material;
- coating specification;
- available corrosion-test information;
- painted-head color or finish;
- cap material and construction; and
- package quantity.
Then examine the performance documentation for:
- pull-out values;
- pull-over values;
- shear and tensile values;
- substrate material and thickness associated with each value;
- test standards and boundary conditions;
- design or allowable values applicable to the project;
- current evaluation reports;
- wind-uplift or regional approvals;
- installation limitations; and
- inclusion in the panel system’s tested or approved assembly.
A load value without its substrate and test conditions is not enough. Pull-out from supporting steel, pull-over through a roof sheet and tensile failure of the screw are different failure modes. Which mode governs depends on the complete assembly.
Comparing retail examples
Retail listings include #12 self-drilling metal-to-metal roofing screws in 3/4-, 1-, 1-1/2-, 2- and 3-inch lengths. Another product page describes a #12-14 × 2-inch self-drilling screw with a 3/8-inch hex washer head, coated-steel shaft and zinc/aluminum cap. Its title says 250 per bag, while the description says 250 per box, illustrating why package details should be verified before ordering (S-5! 2-inch metal-to-metal screw listing).
To compare prices fairly:
- Confirm that the products serve the same connection.
- Verify the package count.
- Confirm equal or technically equivalent dimensions and configurations.
- Compare washer type, coating, head finish and cap construction.
- Determine whether tested-system acceptance or approvals differ.
- Calculate cost per fastener only after technical equivalence is established.
- Add freight, minimum quantities and expected waste last.
A lower price per screw is not a saving if the product lacks the required drilling range, performance data, approval or panel-system acceptance. Promotional names, customer ratings and seller rankings are not substitutes for technical documentation.
Retail pages may omit load values, equipment settings, substrate limits and panel-system compatibility. Where those items are absent, request the current technical data from the manufacturer rather than filling the gaps with a generic rule.
There is no universal document hierarchy that resolves every conflict. Instead, verify that the selected fastener complies with all applicable sources:
- adopted code and authority requirements;
- approved plans and project specifications;
- project-specific engineering;
- tested or approved roof assemblies;
- panel installation instructions;
- current fastener technical data; and
- applicable evaluation reports or regional approvals.
If those documents conflict, do not choose one informally. Refer the discrepancy to the project designer, panel or fastener manufacturer, building official or other authority having jurisdiction, as appropriate.
Installation checks that protect the seal and connection
A self-drilling screw normally creates its hole and forms mating threads in one operation. A conventional self-tapping screw forms threads in an existing or correctly sized hole, although point designs and permitted applications vary. Manufacturer guidance distinguishes the categories and notes that point type, substrate thickness and pilot-hole size affect performance (SFS guide to self-tapping metal screws).
This distinction resolves apparently conflicting pre-drilling advice:
- Substrate pilot hole: A self-drilling screw generally does not require one when used within its documented drilling range. A conventional self-tapping fastener may require one.
- Panel-stack alignment hole: Panel instructions may permit or recommend pre-drilling the sheets for alignment while leaving the structural support undrilled.
- Pre-punched or repair hole: A special detail may already contain a hole and require a fastener selected for that condition.
Do not assume that “self-drilling” prohibits every form of panel pre-drilling, or that instructions to pre-drill panels also authorize drilling the support. Follow the selected panel and fastener instructions.
Installation sequence
- Confirm the specified fastener, point and washer before starting work.
- Use the correct, unworn driver or socket.
- Inspect the screw for coating damage, a worn or bent point, and a split or displaced washer.
- Align the panel stack as required by the roof system.
- Hold the driver perpendicular to the panel.
- Use controlled driving equipment set according to the panel or fastener instructions.
- Install a test fastener in representative materials where permitted.
- Inspect drilling performance, clamping and washer compression.
- Adjust equipment only within the manufacturer’s permitted procedure.
- Periodically inspect completed work for angled, overdriven or underdriven screws.
There is no responsible universal torque setting for every roofing screw. Driver type, speed, screw design, panel stack and support thickness affect installation. A test fastener can verify the result, but it does not override a specified setting or inspection method.
What overdriving and underdriving do
Overdriving can:
- deform or dimple the panel;
- crush, split or displace the washer;
- strip threads formed in the support;
- enlarge the hole; and
- make a compliant repair more difficult.
Underdriving can:
- leave inadequate clamping;
- leave the washer incompletely seated;
- allow water entry;
- permit unwanted sheet movement; and
- reduce resistance to panel movement.
Unsupported thin sheet can flex away from the drill point, causing the screw to walk, chatter or enlarge the panel opening before reaching the support. Where permitted by the roof system and safe access, stabilize the work using the method authorized for the installation. Seller guidance similarly identifies unsupported sheet, misalignment and inappropriate driving technique as causes of walking or enlarged holes (self-drilling installation and troubleshooting guide).
Fastener placement and spacing must come from the applicable panel schedule. They may differ in the field, perimeter and corners and at eaves, ridges, sidelaps and trim. Seller guidance suggesting 12 to 24 inches for some lap screws is application-specific and must not be converted into a universal structural fastening schedule.
Before production installation, check for:
- correct screw and drill point;
- correct driver;
- compatible, undamaged washer;
- intact coating;
- clean, perpendicular alignment;
- required panel placement and spacing;
- approved sealants and accessories; and
- applicable roof-access and fall-protection procedures.
Troubleshooting leaks, walking points and stripped holes
A visible symptom may result from the wrong fastener, incorrect installation or another assembly problem. Stop and identify the cause before replacing screws in bulk.
| Symptom | Possible causes | Checks and response |
|---|---|---|
| Point walks across the panel | Misalignment, excessive speed, unsupported sheet, damaged point or unsuitable drilling range | Check perpendicular alignment, work support, point condition and documented drilling capacity |
| Drill point stalls | Steel outside the drilling range, worn point, unsuitable equipment setting or misaligned layers | Stop rather than forcing it; verify combined thickness, alignment and point condition |
| Screw spins without clamping | Stripped support threads, enlarged hole, overdriving or inadequate engagement | Remove and inspect; follow the approved repair procedure |
| Washer bulges beyond the head | Overdriving or angled installation | Inspect the washer and panel for damage; repair as required by the system |
| Washer does not seat | Underdriving, obstruction, wrong grip, incorrect head or uneven stack | Verify the material stack, head, washer and clamping condition |
| Screw is angled | Poor driver alignment, point walking or unstable work position | Stop and correct the cause; inspect the hole and seal |
| Rust appears | Coating damage, unsuitable exposure, retained moisture, debris or incompatible materials | Investigate the environment and material pairing before selecting a replacement |
| Water staining appears | Failed washer, angled screw, panel deformation, corrosion, enlarged hole or water entering elsewhere | Trace the water path and inspect the complete detail |
| Panel moves or rattles | Missing or loose fasteners, stripped holes, inadequate clamping, incorrect spacing or another assembly defect | Compare the installation with the approved panel schedule and inspect affected supports |
For a walking screw, do not simply push harder. Verify alignment, sheet support, driving technique, point condition and whether the specific fastener’s drilling range covers the material.
For a stalled point, stop. Continued force can damage the point, distort the panel or enlarge the opening. A new screw of the same type will not correct a drilling-capacity mismatch.
A screw that spins without drawing the sheets together may have stripped its mating threads or enlarged the hole. Do not drive the same screw back into the damaged opening. The approved repair may call for a new location, a larger-diameter repair fastener or another documented method.
Larger #17 strip-out repair products are available, including products described for particular stripped #14 or 1/4-inch connections. Their availability does not make every #17 fastener suitable for every damaged roof hole; product-specific attachment limits and roof-system requirements still apply (SFS repair-fastener examples).
For a leaking penetration, inspect screw angle, washer compression, washer condition, panel deformation, corrosion and the hole itself. Replacing only the washer will not correct stripped support threads, an enlarged opening or a deformed panel.
For rust, determine whether the cause is coating damage, persistent moisture, chemical exposure, metallic debris or material incompatibility. Do not automatically replace a corroded screw with an unspecified stainless or galvanized alternative. The replacement must preserve both compatibility and required mechanical performance.
Wind-critical, structural, approval-dependent or repeatedly failing connections should be referred to the panel manufacturer, applicable technical documents, project designer, local authority or a qualified roofing or engineering professional. Mortar Desk publishes general building-material reference information; it is not a contractor and does not provide project-specific engineering advice, as explained on its About page.
Frequently asked questions
Do metal-to-metal roof screws need pilot holes?
A self-drilling metal-to-metal roof screw normally creates its own hole and mating threads when used within its documented drilling range. A conventional self-tapping screw may require an existing or correctly sized pilot hole.
Panel-stack pre-drilling is a separate issue. A panel manual may permit or recommend alignment holes through the sheets while leaving the supporting steel undrilled. A pre-punched panel or repair detail may instead require a particular hole-and-fastener combination. Follow the fastener and panel instructions rather than adopting an “always” or “never” rule.
What is the difference between a panel-to-purlin screw and a stitch screw?
A panel-to-purlin screw anchors the roof panel to the supporting steel and may be part of the wind-uplift connection. It therefore needs the correct drilling capacity, thread engagement and documented performance in the support.
A stitch screw is generally a shorter fastener used to join specified sheet overlaps, sidelaps, trim or flashing. It should not be assumed to perform the same function as a purlin fastener. Use the screw and spacing identified in the applicable panel details.
What size metal-to-metal roof screw should I use for steel purlins?
There is no universal size for steel purlins. A #12 fine-thread self-drilling screw with a hex washer head and bonded EPDM washer is a common market configuration, but the required diameter, pitch, length and point depend on the panel, purlin and approved assembly.
Confirm:
- panel profile and thickness;
- purlin material and actual thickness;
- combined drilling thickness;
- required grip and engagement;
- roof zone and design load;
- exposed or concealed attachment;
- corrosion exposure; and
- tested-assembly or approval requirements.
Choose the screw only after confirming that its documented drilling range and performance data cover the actual assembly.
How tight should the sealing washer on a roofing screw be?
The washer should have even compression sufficient to create the specified seal, without being crushed, split or displaced and without dimpling the panel. The screw should remain perpendicular. Manufacturer guidance identifies both over-tightening and under-tightening as installation errors that can impair the panel, washer or connection (exposed-fastener tightening guidance).
There is no universal torque value. Use controlled equipment according to the applicable instructions, install a test fastener where permitted and inspect the result before production fastening.
Should metal roofing screws go through the flat or the rib?
Follow the installation manual for the exact panel. Depending on the profile and roof location, the specified placement may be in a flat, valley, rib, peak or a particular eave or field detail.
A generic flat-versus-rib rule can conflict with the tested assembly, affect washer seating or place the fastener outside the intended load path. The approved panel drawing governs.
Before ordering:
- Identify the exact connection.
- Obtain the applicable panel manual and approved project documents.
- Verify the panel and supporting-steel materials and thicknesses.
- Match the fastener’s documented drilling and grip ranges.
- Choose a compatible head, washer, alloy and coating.
- Confirm tested loads, approvals, placement and spacing.
- Resolve conflicts with the designer, manufacturer or authority having jurisdiction.
No diameter, length, Tek point, coating or generic spacing rule is correct for every roof. Structural, high-wind, corrosive and approval-dependent applications require confirmation from the governing roof-system and project documents and, where applicable, a qualified professional or local authority.