 MortarDesk
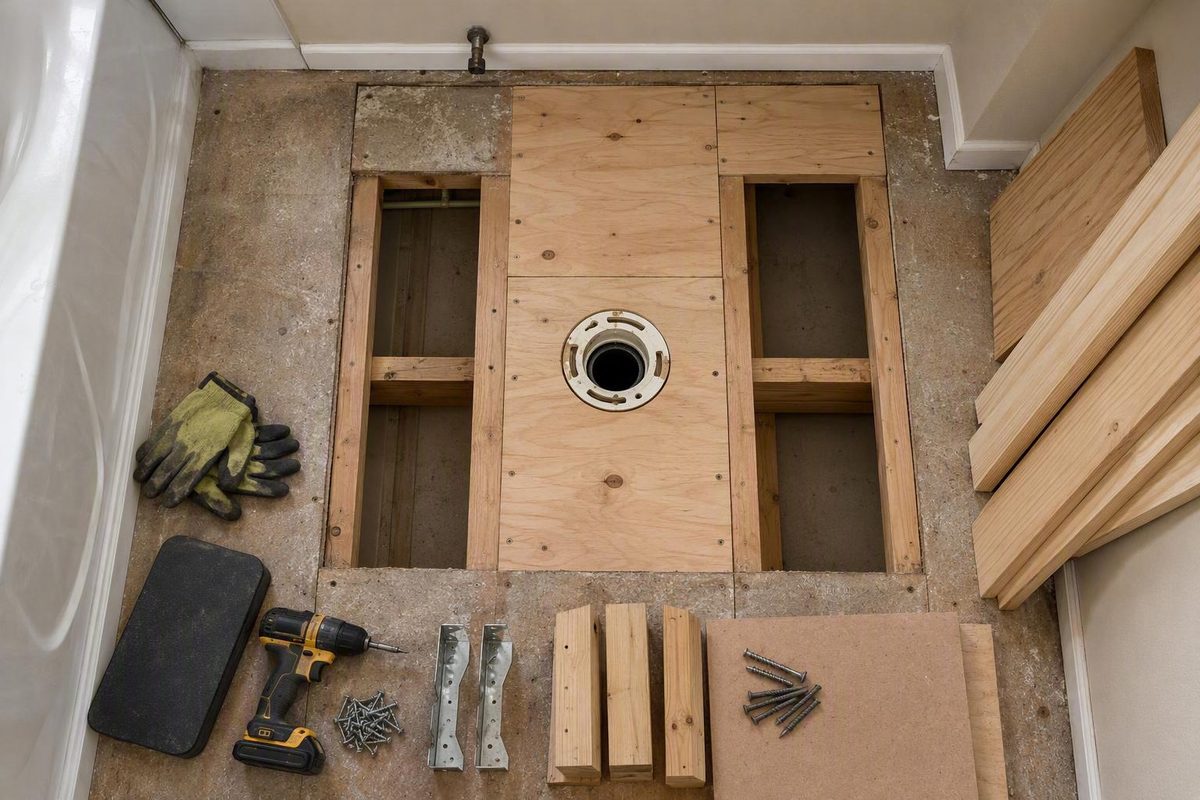
To replace a bathroom subfloor correctly, first stop the leak and expose the full damaged area. Identify the framing and existing panel specification, cut back to dry and firm material, and lay out a patch whose seams can be supported. Select the replacement by its actual thickness, span rating, Performance Category, orientation, framing spacing, and compatibility with the complete finish-floor assembly—not by “bathroom plywood” or nominal thickness alone. Plan the toilet flange for the final finished-floor elevation.
Start here: the bathroom subfloor replacement sequence
Use this order of work:
- Find and stop the moisture source. Check the toilet seal or flange, shower or tub, supply connections, drains, and possible wall leaks.
- Remove obstructing fixtures and finish layers. Take out the toilet and remove enough flooring, underlayment, backer board, or membrane to expose the structural deck.
- Map the damage. Inspect beyond visible stains for soft, swollen, crumbling, or delaminated material.
- Locate framing and services. Establish where joists, drains, water lines, wiring, ducts, and other concealed services run.
- Plan supported cut lines. Lay out each patch seam over a joist or a location where suitable blocking can be installed.
- Remove deteriorated panel material. Cut back to dry, firm plywood or OSB that can accept a sound connection.
- Inspect the framing. Do not close the floor over soft, split, decayed, heavily notched, or otherwise compromised framing.
- Install edge support and the specified panel. Verify actual thickness, rating, orientation, joint spacing, attachment, and finish-floor compatibility.
- Rebuild the approved finish-floor assembly. Install the underlayment, substrate, membrane, waterproofing, or other layers specified for the selected finish.
- Set and anchor the toilet flange. Coordinate it with the final floor elevation rather than the structural panel alone.
Rebuilding over an unresolved toilet, shower, supply, drain, or wall leak exposes the replacement to the same failure mechanism. Soft or spongy areas, a rocking toilet, recurring grout cracks, lifted flooring seams, musty odors, and stains on the ceiling below are reasons to investigate, but they do not define the repair boundary. The full extent often remains hidden until the finish floor and underlayment are removed, as this water-damaged bathroom subfloor guide explains.
Stop work: Pause if the opening reveals compromised framing, uncertain load paths, services that prevent safe cuts, widespread deterioration, significant suspected mold, or flooring and adhesive suspected of containing hazardous material. These conditions are outside a straightforward panel patch; do not disturb suspect materials without appropriate assessment.
Identify the layer that is actually damaged
A bathroom floor is an assembly, not one interchangeable sheet:
Finished floor
────────────────────────────────
Specified membrane or waterproofing, if required
────────────────────────────────
Approved underlayment, backer board, or tile substrate
────────────────────────────────
Structural plywood or OSB subfloor
════════════════════════════════
Floor joists and properly detailed blocking
At the toilet, the flange connects to the drain but must also coordinate with the finished-floor surface.
The subfloor is the structural deck attached to the joists. Underlayment is a separate, generally nonstructural layer that provides a suitable surface for the floor covering. Cement backer board, uncoupling membranes, waterproofing products, and visible flooring have different functions.
Remove deteriorated material until the retained plywood or OSB is dry, firm, and capable of accepting a supported connection.
| Finding | Localized patch is more plausible | Broader removal or assessment is more appropriate |
|---|---|---|
| Damage | Clearly bounded | Widespread softness, swelling, or delamination |
| Surrounding panel | Dry, firm, and intact | Weak, crumbling, or unable to hold a connection |
| Framing | Sound and unaltered | Soft, split, decayed, heavily notched, or modified |
| Patch layout | Each seam can be supported | Practical support lines cannot be established |
| Walls and fixtures | Damage stops clear of supported loads | Damage extends beneath walls or heavy fixtures |
| Moisture source | Identified and corrected | Multiple or unresolved leak paths |
These are screening criteria, not an engineering diagnosis. In particular, do not improvise a joist repair from a generic “sistering” description. The supplied guidance does not establish one repair detail for solid-sawn joists, I-joists, and floor trusses. If framing is damaged, obtain a detail appropriate to the member, load path, and manufacturer where applicable.
Record these specifications before buying a replacement panel
Matching the existing thickness helps make the patch flush, but thickness alone does not establish adequate span capacity. Before shopping, photograph the full grade stamp and complete this worksheet.
| Field measurement or marking | Record |
|---|---|
| Existing panel’s actual measured thickness | ______ |
| Material: plywood, OSB, planks, or other | ______ |
| Panel grade | ______ |
| Performance Category | ______ |
| Span rating | ______ |
| Product standard: PS 1, PS 2, or other | ______ |
| Bond classification: Exposure 1, Exterior, or other | ______ |
| Edge profile: square or tongue-and-groove | ______ |
| Joist type and spacing on center | ______ |
| Direction of joists or supports | ______ |
| Marked strength-axis direction | ______ |
| Proposed patch dimensions | ______ |
| Available supported cut lines | ______ |
| Planned underlayment or substrate | ______ |
| Membrane or waterproofing, if specified | ______ |
| Finished-floor material and thickness | ______ |
| Total floor buildup and transition height | ______ |
An APA trademark can identify grade, Performance Category, span rating, product standard, and exposure classification. In a two-number sheathing rating such as 32/16, the second number represents the maximum subfloor-support spacing under the rating assumptions. APA Rated Sturd-I-Floor instead carries a single floor span rating associated with maximum floor-joist spacing. The strength axis normally follows the long panel direction and runs across the supports unless the marking states otherwise, according to APA’s plywood selection guidance.
Do not order only “3/4-inch bathroom plywood.” Measure the installed panel and read its stamp. A familiar nominal description may not communicate the actual thickness, structural rating, exposure classification, or intended use required for a flush, compatible repair.
Check the selected product against:
- actual joist spacing and framing type;
- expected loads and support conditions;
- span rating and strength-axis orientation;
- support beneath patch seams;
- the planned finish-floor system;
- current panel and floor-system manufacturer instructions; and
- the locally adopted code and amendments.
Plywood, OSB, Rated Sheathing, and Sturd-I-Floor compared
Plywood and OSB are materials. Rated Sheathing, Rated Sturd-I-Floor, and Structural I are performance or use designations, not competing names for one property.
| Material or designation | Structural role | Markings to verify | What the label does not prove |
|---|---|---|---|
| Plywood | Structural panel when appropriately rated | Grade, Performance Category, span rating, standard, bond class | Correct thickness, span, or finish compatibility by itself |
| OSB | Structural panel when appropriately rated | Grade, Performance Category, span rating, standard, exposure class | Suitability of every OSB product for every floor |
| APA Rated Sheathing | Subfloor beneath a separate underlayment or structural finish assembly | Floor-use span rating, thickness category, exposure, standard | Waterproofing or finish-floor suitability |
| APA Rated Sturd-I-Floor | Combination subfloor-underlayment, often tongue-and-groove | Single floor span rating, Performance Category, exposure | Approval for a particular tile, membrane, or resilient system |
| Structural I | Enhanced shear and cross-panel performance where specified | Structural I mark and applicable floor ratings | Necessity for an ordinary bathroom patch |
Properly rated plywood and OSB can both serve as structural floor panels when rating, support spacing, orientation, fastening, and the overall assembly are suitable. APA describes Rated Sheathing as usable beneath a separate layer and Sturd-I-Floor as a combination subfloor-underlayment product commonly available with tongue-and-groove edges. Structural I is for applications where enhanced shear and cross-panel strength matter; it is not automatically required for a routine patch. See APA’s OSB designation comparison.
Exposure 1 is not a waterproof rating. It describes adhesive-bond durability during construction moisture or similarly limited exposure. It does not make a panel rot-proof or resistant to fungal decay. Panels commonly called CDX are generally Exposure 1 rather than automatically Exterior-rated, as detailed in APA’s plywood guidance cited above.
Tongue-and-groove edges also require context.
How to remove the damaged panel and build a supported patch
Begin only after the leak is corrected and the work area can be opened safely.
- Remove obstacles. Take out the toilet and enough trim, flooring, underlayment, backer board, or membrane to expose the structural panel.
- Identify framing from both sides where possible. Fastener lines can suggest joist locations, but verify the layout. Access from below may reveal pipes, wiring, ducts, and previous alterations.
- Map concealed services before cutting. If their routes cannot be established well enough to cut safely, stop and obtain appropriate access or qualified help.
- Draw the opening. Extend it beyond deteriorated material to sound panel and workable support lines.
- Control cutting depth. Use a method that avoids cutting joists or concealed services; if that cannot be done reliably, do not proceed.
- Make straight, controlled cuts. Finish corners cautiously rather than extending cuts blindly beyond the layout.
- Remove the panel carefully. Adhesive may make prying difficult and can damage adjacent material.
- Inspect the opening. Check framing, retained edges, penetrations, and the moisture source before installing support.
Documented localized repairs show patches laid out over joists and blocking added beneath otherwise unsupported seams. Treat that as a repair workflow to verify for the actual floor—not as a universal framing detail. The support arrangement should provide bearing and fastening for both the retained panel edge and the patch. Blocking size and connections vary with framing geometry, loads, access, and member type.
Do not use a generic blocking or joist-repair detail on an engineered I-joist or floor truss. If attaching support would require cutting, drilling, notching, or otherwise modifying engineered framing, stop and obtain the framing manufacturer’s detail or a qualified assessment.
Dry-fit the patch before applying adhesive or installing fasteners. Confirm:
- the marked strength axis runs in the required direction;
- the planned edges have suitable bearing and fastening;
- specified joint clearance is present;
- the patch is flush with the retained panel;
- the drain opening fits the actual pipe and flange;
- fasteners and cuts will avoid services; and
- the complete floor buildup works at the toilet and doorway.
APA generally recommends approximately 1/8 inch at panel edge and end joints, including tongue-and-groove joints, unless the manufacturer specifies otherwise. APA characterizes this as a recommendation intended to reduce buckling, not a universal code requirement. It also recommends a glued floor system and clean framing, but adhesive compatibility, bead size, working time, and whether adhesive is required must come from the selected products and assembly.
There is no universal bathroom screw or nail schedule. Fastener type, length, and spacing depend on the panel product, panel thickness, joist spacing, framing conditions, manufacturer instructions, and the applicable attachment table.
Documented examples—not transferable specifications
In one sponsored DIY repair, the existing floor was described as 3/4-inch plywood over I-joists at 12 inches on center. The author added a 2-by-4 at one unsupported edge and used a project-specific close screw pattern. These are details from that bathroom, not a specification for another floor. See the Home Repair Tutor example.
A separate homeowner repair used material described as 23/32-inch OSB, 2-by-8 blocking, and different edge and field screw spacing. The source does not identify all ratings, framing assumptions, or applicable tables, so its numbers illustrate workflow only. See the Hill Home Love repair.
Plan the toilet opening and flange around the finished floor
A damaged or obstructing flange may need to be removed before fitting the patch. Cutting drain piping, choosing transitions, and installing a permanent flange are plumbing tasks that depend on the actual pipe material and the flange manufacturer’s instructions. Ask the local building or plumbing authority whether the proposed work requires a permit, inspection, or licensed trade.
Do not copy a hole-saw size, pipe diameter, or toilet offset from another project. Measure the installed drain and flange, verify the toilet rough-in, and dry-fit the components.
Plan the elevation as a complete assembly:
Toilet
        │
Toilet flange base — flush on top of finished floor
════════════════════════════════  Finished floor
────────────────────────────────  Specified membrane, if any
────────────────────────────────  Approved underlayment or substrate
████████████████████████████████  Structural subfloor patch
╪                              ╪  Joists or blocking
        │ drain pipe │
Oatey’s manufacturer guidance places the flange base flush on top of the finished floor. It calls for corrosion-resistant screws through tile or resilient flooring into the supporting wood subfloor—or into concrete for a concrete assembly—and warns that tile alone does not provide adequate holding strength. It also calls for compatible products for PVC, ABS, cast iron, and transition conditions, plus a new wax ring when the toilet is reinstalled. Follow the selected product’s exact instructions; the Oatey toilet-flange installation guide is manufacturer-specific rather than a universal solvent-welding procedure.
A low, broken, unsupported, or incompatible flange needs a remedy approved for the actual flange, pipe, and elevation. A spacer, thicker wax ring, repair ring, or complete replacement is not universally correct.
Rebuild the floor assembly for the selected finish
Choose the finished floor before finalizing the replacement panel.
A tile assembly may use cement backer board or an uncoupling membrane, but there is no universal bathroom-tile buildup. Backer board and membranes are not structural substitutes for a flexible, underspecified, unsupported, or damaged subfloor. Coordinate the instructions for the selected tile, membrane, heating system, resilient flooring, adhesive, and underlayment as one assembly.
Before covering the patch, calculate the combined thickness of:
- the structural panel;
- any underlayment or tile substrate;
- a membrane or heating layer, where specified;
- setting or bonding materials; and
- the finished flooring.
Perform a final substrate check:
- surfaces are dry and suitable for the selected products;
- framing and panel surfaces are clean;
- patch seams have the required support;
- the patch is flush and meets the finish manufacturer’s flatness requirements;
- fastener heads are correctly seated;
- panel joints follow the manufacturer’s spacing instructions; and
- no damaged area or active leak has been concealed.
Use the drying criteria, waterproofing method, leveling product, and number of layers required by the selected system. No single threshold or buildup applies to every bathroom finish.
Final verification, stop-work triggers, and scope variables
Before closing the floor, verify:
- [ ] The moisture source has been identified and corrected.
- [ ] Retained panel material is dry, firm, and capable of accepting the planned connection.
- [ ] Exposed framing has been inspected.
- [ ] Each patch seam has suitable support for the retained panel and replacement.
- [ ] Panel grade, Performance Category, span rating, actual thickness, and bond classification have been checked.
- [ ] Strength-axis orientation is correct for the supports.
- [ ] Panel manufacturer instructions for joints and attachment have been followed.
- [ ] The finish-floor assembly is approved for the actual substrate and framing.
- [ ] Total layer thickness has been calculated.
- [ ] Toilet-flange elevation, compatibility, and anchorage have been planned.
- [ ] Local permit, inspection, and licensing questions have been resolved.
The cited 2018 International Residential Code is a historical model-code edition. Its Chapter 5 establishes general principles requiring floors to carry applicable loads and transfer them to supporting structural elements, and it directs wood structural-panel subflooring to Section R503.2. Those general provisions do not establish the project-specific panel thickness, rating, or fastening schedule. Consult the complete code edition and amendments adopted by the jurisdiction, its applicable tables, local plumbing requirements, and the selected panel’s current instructions. The ICC’s 2018 IRC floor chapter is an edition-specific reference, not proof of the rules currently enforced locally.
Stop and obtain qualified local assessment if the work reveals:
- soft, split, decayed, heavily notched, or altered joists;
- damaged I-joists or floor trusses;
- a bearing wall or heavy fixture over the repair;
- deterioration extending widely or beneath inaccessible construction;
- an unresolved moisture source;
- services that prevent safe cutting;
- significant suspected mold;
- flooring, underlayment, or adhesive suspected of containing hazardous material; or
- a drain or flange requiring an uncertain alteration or incompatible transition.
Cost and duration depend on scope rather than bathroom area alone. Demolition, access from below, fixture removal, finish-floor replacement, drying, plumbing alterations, framing damage, mold or hazardous-material work, permits, and inspections can each expand the job. A small exposed patch over sound framing is fundamentally different from deterioration beneath a wall, shower, or altered joist.
This is material-selection and repair-planning guidance, not an engineering repair design or project-specific contracting advice. The buy-and-build rule is straightforward: do not order a panel from the room name or nominal thickness alone. Stop the leak, expose the repair, document the panel stamp and framing, establish supported cut lines, and specify the complete floor assembly. If the work reveals damaged framing, uncertain loads, hazardous materials, or plumbing beyond straightforward fixture removal, pause and obtain qualified local assessment.