 MortarDesk
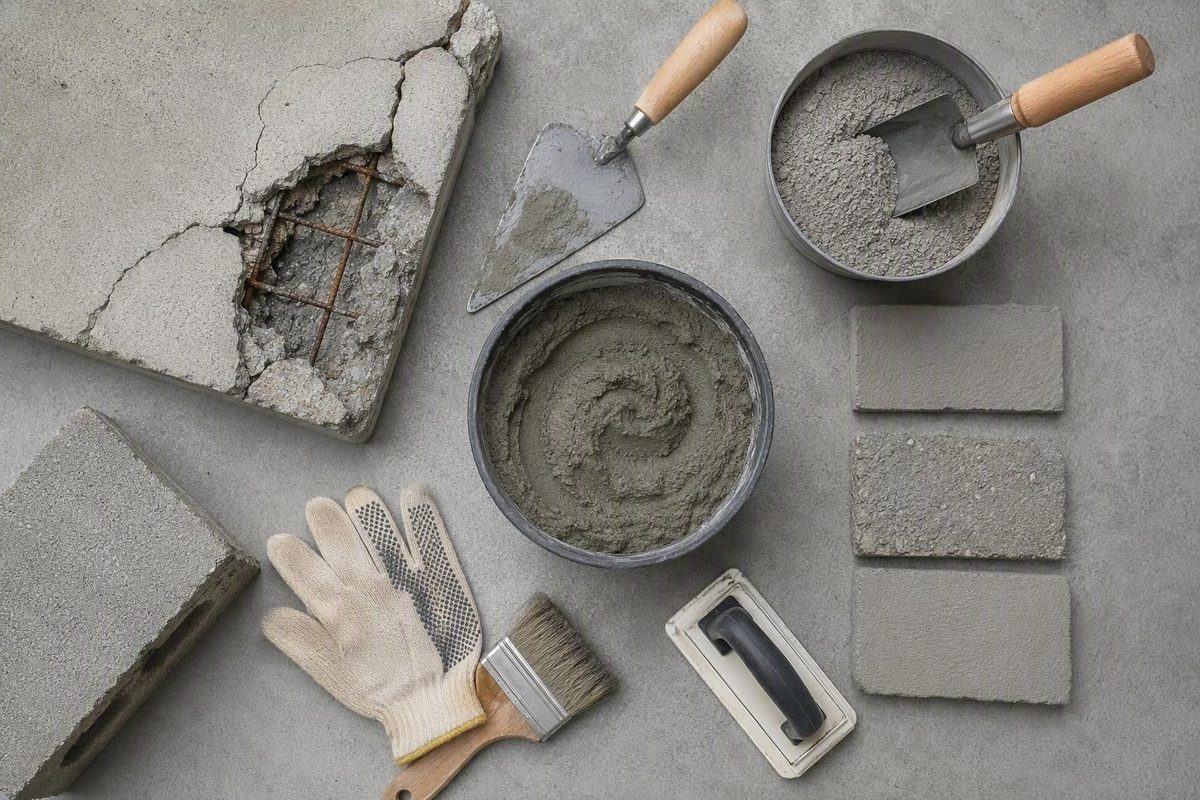
Stop work and seek qualified assessment if you see: active movement, settlement, heaving, rocking, misalignment, joint displacement, extensive cracking, recurring leakage, undermining, widespread hollow or delaminated concrete, exposed or damaged reinforcement, or signs of structural failure. Filling the visible defect will not correct these underlying conditions. Dam-owner repair guidance identifies movement, settlement, improper alignment, extensive cracking, joint displacement, and undermining as signs of major structural problems requiring professional evaluation; although written for dams, those warning signs are relevant reasons not to proceed with an unsupported patch repair. See the Association of State Dam Safety’s concrete repair guidance.
Concrete repair mortar cannot be selected reliably by brand, headline strength, or a “fast-setting” label alone. A durable repair begins by identifying why the concrete failed and deciding whether a localized patch is appropriate. Only then can you match a product to the surface orientation, prepared depth, substrate condition, exposure, temperature, traffic, and required return to service.
This guide provides a product-neutral framework for comparing options for slabs, steps, curbs, walls, soffits, and industrial concrete. It does not turn structural repair into a DIY task. If damage affects load-carrying performance or suggests broader instability, obtain qualified engineering or repair-contractor input.
What concrete repair mortar is—and what it can and cannot fix
Concrete repair mortar is formulated to restore or replace the profile—and, where properly designed, the required function—of damaged concrete. It can rebuild a broken edge, fill a prepared spall, restore localized section loss, or form part of a larger repair system.
The term mortar covers substantially different materials. Cementitious products may contain hydraulic cement, aggregate, polymers, fibers, and performance-modifying additives. Resin-based mortars may combine epoxy resin, hardener, and mineral aggregate. Neither “cementitious” nor “epoxy” proves that a product is structural, suitable outdoors, compatible with damp concrete, resistant to a particular chemical, or appropriate for the prepared depth.
Patch, inject, resurface, or replace?
These methods address different conditions:
- Localized mortar repair: Rebuilds a limited damaged area where the surrounding concrete and supporting base remain sound. Possible candidates include isolated spalls, pits, broken edges, and localized surface loss.
- Crack filling or injection: Treats a crack rather than rebuilding a larger missing section. The appropriate material depends on whether the crack is active or dormant, whether it leaks, and whether structural bonding is required.
- Full-surface resurfacing: Covers a broader area after localized defects have been repaired. It may suit widespread wear or pitting when the underlying concrete remains stable and sound.
- Concrete replacement: Removes and replaces part or all of the concrete. It may be necessary where deterioration is extensive or full-depth, the support is unstable, or settlement or heaving continues.
A commercial overview draws the same broad distinction between localized repair, full-surface resurfacing, and replacement, while associating replacement with unstable support. Its recommendations are service-provider guidance rather than an engineering assessment, so project-specific diagnosis still controls. Compare the broad repair, resurfacing, and replacement categories.
What mortar does not correct
Repair mortar can fill a properly prepared cavity, but it cannot by itself:
- stop active structural movement;
- stabilize a settling slab or failing sub-base;
- relieve water pressure behind a wall or beneath a floor;
- restore missing reinforcement capacity;
- stop reinforcement corrosion without addressing its cause;
- realign displaced joints or structural elements;
- prevent recurring leakage while the water path remains open; or
- establish structural adequacy without design and verification.
The visible spall may be a symptom rather than the underlying problem. If a wall continues moving, a rigid patch may crack again. If a slab rocks on unstable support, a surface patch cannot stabilize it.
The first buying question is therefore not “Which bag should I buy?” It is “Is this a localized material-loss problem surrounded by sound concrete and supported by a stable base?”
Diagnose the damage before choosing a bag
Begin with a written and photographic condition survey. Visual inspection cannot always establish the full failure mechanism, but it helps identify what requires further investigation.
Classify what you can see
Use specific defect terms rather than describing every problem as a crack:
- Crack: A narrow separation through or along the concrete.
- Spall: A localized area where concrete has broken or flaked away.
- Crumbling edge: Progressive loss at a step, slab, curb, or joint edge.
- Pitting or erosion: Multiple shallow depressions or broader surface loss.
-
Joint damage: Breakdown, displacement, or missing material beside a designed joint.
-
Misalignment or displacement: Adjacent surfaces no longer sit in their intended relationship.
Record the location, orientation, approximate area, shallowest and deepest points, representative crack widths, moisture or leakage, and any observed change over time. A dry-day inspection may not show wet-weather leakage.
Investigate the likely cause
Possible mechanisms include:
- impact or mechanical damage;
- abrasion from traffic or equipment;
- repeated freezing and thawing;
- water ingress;
- chemical exposure;
- thermal or drying movement;
- settlement or loss of support;
- corrosion-related expansion around reinforcement;
- excessive loading or structural stress; and
- poor original materials, placement, or detailing.
Several mechanisms may act together. A loading-dock edge, for example, may experience impact, abrasion, water entry, and freezing conditions. A product matched to only one exposure may remain vulnerable to the others.
Look beyond the cavity. Check nearby concrete for cracks, looseness, hollow areas, moisture, displacement, or deterioration. Consider where water originates and where it drains. Ask whether the defect followed an impact, change in loading, excavation, drainage failure, or severe weather. These observations help define the problem but do not replace professional investigation where structural significance is possible.
Determine whether a crack appears active or dormant
A single inspection may not establish which condition exists.
Rigid repair mortar is not a universal crack treatment. Packing mortar over an active crack may reproduce the crack in the patch. Leakage creates another distinction: controlling water and restoring structural continuity are separate objectives.
The dam-owner guidance cited above distinguishes epoxy injection for structural bonding of dormant cracks from flexible urethane treatment that can control water flow in active cracks without creating a structural bond. That distinction is not a DIY prescription. Structural crack repair requires evaluation, design, and verification.
Confirm the surrounding concrete and support are sound
Localized patching requires reliable concrete to bond to. Removing visibly loose material may expose a much larger area of weak or delaminated concrete. A sound-looking slab surface may also be unsuitable for patching if the slab moves because its base is unstable.
Escalate the job if investigation reveals movement, settlement, unstable support, extensive delamination, recurring leakage, damaged reinforcement, repeated patch failure, or damage affecting structural performance. Selecting a higher-strength mortar is not an adequate response to a broader failure mechanism.
Choose the repair method by orientation, depth, area, and geometry
Once localized repair has been judged appropriate, use orientation as the first product filter:
- horizontal floor, slab, pavement, tread, or curb top;
- vertical wall, riser, curb face, or slab edge; or
- overhead soffit or ceiling.
A mortar that works on a floor may slump or fall from a wall. Vertical and overhead products need cohesive, thixotropic, non-sag behavior and explicit approval for the intended orientation. SpecChem’s manufacturer-authored selection guide likewise starts with horizontal versus vertical or overhead placement, then considers method and depth. See its orientation-based selection framework.
Broad placement categories
Hand-troweled horizontal mortar Used for many localized slab, step, pavement, and curb repairs. Products range from stiff, shapeable mortars to more flowable materials. Confirm traffic exposure, depth, slope-forming ability, and finishing requirements.
Vertical or overhead mortar Designed to remain in place against gravity. Check approved orientation, thickness per lift, total depth, working time, and any specified formwork or temporary support.
Spray-applied mortar Placed by wet- or dry-process spray equipment on larger vertical or overhead areas. Because the evidence supplied establishes only the broad category, equipment, application, and quality-control requirements must come from the selected system and project specification.
Self-leveling underlayment A high-flow product intended to produce a level horizontal surface within a documented depth range. “Self-leveling” does not establish suitability for exterior pavement, sloped work, structural section replacement, or use as an exposed wear surface.
Form-and-pour repair A flowable or cast material placed behind forms. It may suit deeper or full-section voids where hand placement is impractical, provided the product is approved for the orientation, depth, substrate, and service conditions.
Rapid-setting or specialized chemical-action mortar Used where downtime or installation temperature creates a special requirement. Rapid setting does not automatically establish adequate working time, early traffic resistance, structural suitability, or exposure compatibility.
One manufacturer organizes its range into vertical and overhead, spray-applied, horizontal, self-leveling, form-and-pour, and specialized mortar groups. This illustrates the breadth of placement categories, not the suitability of any particular product. Review Sika’s repair-mortar category structure.
Method matrix
| Defect or condition | Orientation and geometry | Likely method to investigate | Key limits to verify |
|---|---|---|---|
| Isolated shallow spall | Horizontal bounded cavity | Trowel-grade horizontal repair mortar | Minimum thickness, edge detail, traffic exposure |
| Broken step or curb edge | Horizontal and vertical faces | Shapeable non-sag mortar or formed repair | Orientation approval, lift depth, edge support |
| Wall spall | Vertical | Vertical-grade thixotropic mortar | Maximum lift, total depth, working time |
| Soffit spall | Overhead | Overhead-approved mortar | Lift limits, support, reinforcement condition |
| Large wall or soffit area | Vertical or overhead | Spray-applied repair system | System instructions, equipment, thickness, curing |
| Broad shallow floor irregularity | Horizontal | Compatible self-leveling or resurfacing system | Approved substrate, wear-layer status, depth, moisture |
| Deep or full-section void | Any orientation | Form-and-pour system or concrete replacement | Forming, placement depth, consolidation |
| Small hole deeper than its surface diameter | Accessible for firm compaction | Dry pack may be considered | Geometry, compaction access, specification |
| Widespread pitting over sound concrete | Broad horizontal or vertical area | Local repair followed by compatible resurfacing | Base soundness, system compatibility |
| Active or leaking crack | Any orientation | Movement- or water-control system | Movement, leakage, structural significance |
| Unstable slab or extensive full-depth damage | Horizontal | Partial or complete replacement | Support correction, drainage, design |
This matrix narrows the field; it does not select the final product.
Depth and lift limits are product-specific
Measure the cavity after all unsound concrete has been removed. Record:
- minimum prepared depth;
- maximum prepared depth;
- average depth for quantity calculations;
- total area;
- edge and corner geometry;
- whether the void passes through the section; and
- whether reinforcement, anchors, joints, or embedded items are present.
Compare both the shallowest and deepest points with the current technical data sheet. A product’s maximum total thickness may differ from its maximum thickness per lift. Multiple lifts may require defined timing, surface conditioning, or bonding procedures. Do not assume that repeating lifts makes a shallow-patch product suitable for deep repair.
There is no universal feather-edge rule or surface-profile value supported by the supplied evidence. Some systems allow tapering; others require a defined boundary and minimum edge thickness. Follow the selected system’s current instructions.
Where dry pack fits
Dry pack is a specific method, not a synonym for any stiff repair mortar. The dry-pack method can be used on small holes in new concrete which have a depth equal to or greater than the surface diameter Concrete Repair Techniques | Association of State Dam Safety. That proportion belongs to the cited dam-repair method and is not a universal site-mix recipe for proprietary products or other geometries.
Deep, broad, or full-section voids may instead require a form-and-pour system or concrete replacement.
Cementitious versus epoxy repair mortar
The useful question is not “Which category is better?” It is “Which documented formulation fits the substrate, geometry, exposure, installation conditions, and reopening requirement?”
The basic curing difference
Cementitious repair mortar uses hydraulic cement and aggregate, often with polymers, fibers, or other additives. It hardens primarily through cement hydration. Polymer modification and rapid-setting chemistry can alter handling and performance, but neither feature proves universal suitability.
Epoxy repair mortar generally combines resin, hardener, and mineral aggregate. It cures through a chemical reaction between resin and hardener. Component proportions, mixing completeness, temperature, batch size, and usable working time are therefore product-specific controls.
A commercial comparison describes the same basic composition and curing distinction. Its broader performance comparisons are marketing-oriented and should not replace product data or project requirements. See the epoxy and cementitious composition comparison.
When to investigate cementitious mortar
A cementitious product may be a candidate for:
- exterior concrete;
- placement on a substrate that must remain damp, if expressly permitted;
- deeper or larger-volume repairs;
- shapes requiring conventional mortar handling;
- compatibility with surrounding concrete movement; or
- a repair that will receive a coating, topping, or overlay.
These are screening considerations, not category-wide guarantees. Verify:
- water quantity and permitted tolerance;
- required substrate-moisture condition;
- minimum and maximum application temperature;
- minimum and maximum thickness;
- lift limits and lift timing;
- curing method and duration;
- strength-development schedule;
- documented freeze-thaw or deicing-salt performance where required;
- abrasion or permeability data where relevant; and
- primer, bonding-coat, or direct-placement requirements.
When to investigate epoxy mortar
An epoxy mortar may be a candidate where a specific formulation documents suitability for:
- heavy or concentrated traffic;
- impact or abrasion;
- rapid reopening;
- low-permeability service;
- bonding to an approved substrate; or
- exposure to a specifically identified chemical.
Do not select epoxy merely because it is described as “industrial” or “high strength.” Verify:
- permitted substrate-moisture condition;
- primer or bonding-coat requirements;
- resin, hardener, and aggregate proportions;
- mixing order and equipment;
- working time at the expected temperature;
- application-temperature limits;
- permitted depth per placement and total depth;
- any restrictions on thicker placements;
- compatibility with expected thermal movement;
- UV-exposure limitations;
- cure and reopening criteria; and
- compatibility with later coatings.
Chemical resistance requires a precise comparison
“Chemical resistant” is not a complete specification. Identify:
- the exact chemical or mixture;
- concentration;
- liquid and substrate temperature;
- whether exposure is vapor, splash, spill, or continuous contact;
- contact duration and cleaning regime; and
- the exact tested mortar formulation.
Obtain the manufacturer’s current chemical-resistance information and compare its test conditions with actual service.
There is no category-wide winner. Engineered cementitious systems can be structural, rapid-setting, and exposure-resistant. Epoxy systems can be highly specialized but may have formulation-specific moisture, temperature, UV, movement, or depth restrictions. Compare equivalent documented fields rather than broad claims about strength, life, or cost.
The product-data-sheet checklist: numbers to verify before purchase
Retail packaging is only a starting point. Compare products using the current technical data sheet, safety data sheet, written project specification, and any required approval documents.
Application and substrate worksheet
| Field | Product A | Product B | Project requirement |
|---|---|---|---|
| Approved substrate | |||
| Horizontal approved | |||
| Vertical approved | |||
| Overhead approved | |||
| Interior/exterior use | |||
| Minimum thickness | |||
| Maximum total thickness | |||
| Maximum thickness per lift | |||
| Feather edge permitted? | |||
| Required edge geometry | |||
| Application temperature | |||
| Substrate-moisture condition | |||
| Primer, bond coat, or scrub coat | |||
| Required surface preparation |
A blank or vague field is not evidence of suitability. Seek written clarification from the manufacturer instead of inferring permission from marketing language.
Mixing and timing worksheet
| Field | Product A | Product B | Project requirement |
|---|---|---|---|
| Water quantity or component ratio | |||
| Mixing equipment | |||
| Mixing sequence and duration | |||
| Maximum batch size | |||
| Induction or rest period | |||
| Working time or pot life | |||
| Retempering permitted? | |||
| Initial set | |||
| Finishing window | |||
| Curing method and duration | |||
| Strength-development milestones | |||
| Foot-traffic reopening | |||
| Vehicle or equipment reopening | |||
| Coating or overlay interval |
Do not treat working time, initial set, curing period, strength development, and return to service as interchangeable:
- Working time or pot life is the usable mixing and placement window.
- Initial set is an early stage in hardening.
- Curing period is the required post-placement treatment or protected interval.
- Strength development reports measured performance at stated ages and conditions.
- Return to service is the manufacturer’s criterion for a defined load or exposure.
A fast initial set does not prove readiness for vehicle traffic, chemical contact, coating, freezing conditions, or design loading.
Quantity worksheet
Record:
- package weight;
- manufacturer’s published yield per package;
- measured repair volume;
- number of packages before waste;
- separately stated project waste allowance; and
- final whole-package order quantity.
Use this general method:
- Divide irregular repairs into measurable shapes.
- Calculate each cavity’s volume in consistent units.
- Add the cavity volumes.
- Convert the total to the unit used for the published yield.
- Divide repair volume by yield per package.
- Round up to whole packages.
- Add a separately justified allowance for project waste.
Do not use package weight as though it were repair volume, and do not borrow yield from a competing product. There is no universal waste percentage; geometry, access, surface roughness, batch size, and working time all affect material loss.
Performance worksheet
For demanding repairs, compare values and stated test conditions for:
- compressive strength;
- bond strength;
- shrinkage;
- abrasion resistance;
- freeze-thaw durability;
- deicing-salt resistance;
- permeability or water absorption;
- chemical resistance;
- modulus or movement compatibility, where relevant; and
- service-temperature range.
“High strength,” “low shrinkage,” and “salt resistant” are screening claims, not equivalent technical values. Check the test method, specimen age, conditioning, temperature, substrate, and specified acceptance requirement.
For example, TCC Materials’ product page states that Rapid Patch Concrete Repair Mortar is intended for placements from 1/2 to 6 inches, has a 15-minute initial set, reaches what the manufacturer calls “structural strength” after one hour, and meets ASTM C928 and ASTM C387. Those are attributed product-page claims; the page does not define the one-hour strength with a value in the supplied evidence. Verify the current technical data sheet, its revision, and the project requirements before relying on any of them. Review the manufacturer’s Rapid Patch product information.
Retail filters for location, repair type, drying time, price, or brand can narrow a catalog. They cannot determine whether a mortar fits the prepared cavity, substrate moisture, exposure, structural requirement, or required reopening load.
Surface preparation and bonding: the repair starts at the substrate
A suitable mortar placed over unsuitable concrete is still a poor repair. The substrate—not the bag—is the foundation of the bond.
Remove unsound material
Remove concrete that is loose, delaminated, crumbling, or otherwise incapable of supporting the repair. Continue until the remaining material appears sound and the cavity can be prepared to the selected system’s requirements.
Removal may reveal a larger problem than the visible surface suggested. Stop and reassess if it exposes extensive deterioration, deep voids, movement, or reinforcement that is corroded, displaced, damaged, or visibly reduced in section. The supplied evidence does not support a universal DIY procedure for evaluating or treating reinforcement.
Clean the repair area
Dust, loose particles, and other bond-breaking debris must not remain. The correct process for oil, curing compounds, sealers, coatings, or chemical contamination depends on the contaminant and selected repair system. Do not assume rinsing alone is sufficient, and do not introduce a cleaner or solvent without confirming compatibility and residue requirements.
Preparation must also produce cavity geometry that the selected mortar can fill. Dam-oriented guidance favors a sawed boundary over an irregular chipped edge, but the required edge detail and minimum depth remain system- and project-specific. Do not adopt a generic saw-cut depth without considering reinforcement, embedded items, utilities, and the repair design.
Set the correct moisture condition
There is no universal instruction to leave old concrete dry, damp, or saturated-surface-dry. Depending on the formulation, the substrate may need to be:
- dry;
- pre-dampened;
- saturated and then left without standing water;
- treated with a specified moisture-tolerant primer; or
- conditioned by another documented method.
Follow the exact wording and timing in the technical data sheet. “Damp” does not necessarily permit puddles, and a generic instruction to let rinsed concrete dry does not override a product-specific requirement.
Determine whether a bonding agent is required
A bonding agent is not automatically beneficial. Repair methods may use a sand-cement bond coat, latex-cement emulsion, epoxy-resin bonding coat, proprietary primer, scrub coat, or direct placement onto prepared concrete.
Conversely, omitting a required primer or missing its placement window can take the installation outside the specified system. Treat the mortar, primer, bonding coat, and curing materials as one coordinated repair system.
Pre-placement hold point
Do not mix material until every answer below is “yes”:
- The likely cause has been investigated and addressed to the extent required by the repair scope.
- Localized repair remains appropriate.
- The remaining concrete and support appear sound.
- Exposed or damaged reinforcement is not an unresolved issue.
- Prepared dimensions fit the product’s thickness and lift limits.
- The orientation and substrate are approved.
- Temperature and moisture conditions comply with the product instructions.
- Required materials, tools, forms, primers, and curing provisions are ready.
- The batch can be placed within its documented working time.
- The area can remain isolated until the applicable reopening criterion is met.
If any answer is uncertain, pause before opening the package.
Mixing, placing, finishing, and curing without defeating the specification
Once a suitable system has been selected, follow a controlled sequence rather than improvising from one step to the next.
1. Isolate the area and follow the specified safety controls
Keep occupants, children, pets, and unrelated traffic out of the work area. Use the gloves, eye protection, dust protection, ventilation, and other controls required by the product and task. Read the current safety data sheets for the mortar and every primer, resin, hardener, cleaner, or curing material before work begins. Review the general repair and safety overview.
Cutting, grinding, and chemical handling may require controls not established by this general guide. Follow the equipment instructions, site rules, product documentation, and applicable occupational requirements.
2. Prepare and verify the substrate
Complete removal, cleaning, forming, and dimensional checks before mixing. Confirm that the observed surface-moisture condition matches the selected system. Protect joints, drains, finishes, and adjacent areas from unintended bonding or contamination.
3. Condition or prime exactly as specified
Apply pre-wetting, primer, bond coat, or scrub coat only when required. Follow the stated coverage, timing, and placement sequence. Do not substitute a generic bonding adhesive.
4. Measure components
For proprietary cementitious mortar, measure the stated water quantity rather than adjusting by appearance. If the instructions provide a permitted range, remain within it.
For resin systems, use the specified proportions and mixing sequence. Do not estimate ratios by eye, divide package units unless expressly permitted, or add solvent to restore workability.
There is no universal proprietary repair-mortar ratio. The correct ratio is the one documented for the selected product and package configuration.
5. Size the batch to the working time
Mix only the quantity that can be placed, consolidated, and finished within the documented usable window. This is particularly important for rapid-setting cementitious products and reactive resin systems.
Temperature and batch limits must be taken from the product instructions. If material begins to stiffen, do not add water, resin, solvent, or another component unless the manufacturer expressly permits adjustment.
6. Mix as directed
Use the specified mixer or paddle, speed, sequence, and duration. Observe any stated induction or rest period. Follow the instructions for scraping the vessel and combining components.
Controlled measurement and complete mixing remain necessary.
7. Place and consolidate
Place the material firmly against the prepared substrate and fill corners and permitted spaces around embedded details. Avoid smearing a thin film across unprepared adjacent concrete.
Dam-oriented guidance describes placing horizontal replacement material near its final position in layers and consolidating each layer. Apply that principle only where it is consistent with the selected repair system; layer thickness and consolidation method remain product- and geometry-specific.
For vertical and overhead work, use only a product approved for that orientation. Follow its lift limits, timing between lifts, and any stated formwork or support requirements. If the material will not remain in place as specified, stop rather than trying to compensate through repeated surface tooling.
8. Finish within the permitted window
Finish to the required profile, slope, and texture without bridging a designed moving joint unless the repair design expressly requires it. Preserve drainage paths and joint function.
9. Cure and protect
The dam-oriented guidance reports that adequate moist curing supports bond development and reduces shrinkage and loosening in conventional concrete repairs. The exact method and duration for a proprietary cementitious mortar must nevertheless come from its technical data sheet.
Epoxy systems cure chemically but still have documented temperature, moisture, and loading restrictions.
Keep the repair isolated and apply the product-specified protection until the relevant curing and reopening requirements have been met.
10. Treat sealing and overcoating as separate operations
Before adding another system, verify:
- compatibility with the repair material;
- permitted cure age;
- required surface preparation;
- applicable moisture condition or limit;
- primer requirements; and
- suitability for the expected exposure.
11. Inspect and reopen on documented criteria
Reopen the area only when the manufacturer’s stated criterion for the actual service has been met. Pedestrian access, carts, forklifts, road traffic, coating, immersion, chemical exposure, and structural loading are different service conditions.
Failure prevention, inspection, and when to call a professional
Many patch failures begin with a mismatch between the repair and the actual condition, not simply with the choice between cementitious and epoxy mortar.
Common failure patterns
The same crack or spall returns The original movement, leakage, impact, corrosion, or support problem may still be active. A stronger patch does not necessarily correct the cause.
The patch debonds or sounds hollow The interface or substrate may be involved, but appearance alone cannot establish why. Isolate the area and compare the preparation, moisture, primer, mixing, placement, and curing records with the selected system’s instructions.
A wall or soffit patch sags Confirm that the product was approved for the orientation and that its lift and support requirements were followed.
A cementitious patch cracks or loosens Review the selected system’s water, placement, curing, geometry, and movement requirements rather than assigning a cause from appearance alone.
The repair is damaged soon after installation Check whether the area reopened before the documented criterion for the actual traffic, load, temperature, or exposure was met.
An epoxy remains soft or inconsistent Restrict access and consult the manufacturer with the package, batch, temperature, proportioning, and mixing records. Do not diagnose the problem solely by touch or appearance.
The repair discolors or degrades Compare actual UV, moisture, heat, chemical, and coating exposure with the formulation’s documented limits.
Edges fail while the center remains intact Check whether the prepared boundary, minimum thickness, joint treatment, and traffic exposure complied with the selected system. Edge appearance alone does not establish the cause.
Pre-service inspection
Before reopening, document a visual inspection for:
- new cracks;
- gaps at the interface;
- sagging or settlement;
- incomplete fill or visible voids;
- edge distress;
- poor drainage or ponding;
- damage during the protected period;
- unexpected softness or surface breakdown; and
- failure to match the intended profile.
For significant repairs, retain:
- product name and batch or lot information;
- technical and safety data sheets used;
- substrate and air temperatures;
- relevant weather and moisture conditions;
- cavity dimensions;
- mixing ratios and batch times;
- placement and finishing times;
- curing records;
- photographs before, during, and after work; and
- the manufacturer’s reopening criterion.
The method and pass/fail values must come from the repair design, contract documents, applicable standard, or qualified professional—not from a generic rule.
When the job is beyond mortar selection
Stop and obtain qualified assessment for active movement, settlement, misalignment, extensive cracking or delamination, recurring water ingress, undermining, unstable support, damaged reinforcement, repeated repair failure, full-depth deterioration, or any repair affecting structural performance.
Mortar Desk is an independent general-reference publisher, not a contractor or engineering adviser. Its scope and limitations note that specifications change and local requirements vary. Confirm the current manufacturer documents, project specification, and applicable local code or inspector requirements.
The practical buying rule has five parts:
- Diagnose the cause, not just the visible defect.
- Confirm localized repair is appropriate and that the surrounding concrete and support are sound.
- Match the mortar to orientation and prepared depth, including lift and edge limitations.
- Compare current technical data sheets on equivalent fields, not broad category claims.
- Follow the selected system’s preparation, mixing, curing, and reopening requirements exactly.
Frequently asked questions
Can concrete repair mortar be used on vertical walls or overhead concrete?
Yes, but only when the exact product is explicitly approved for vertical or overhead placement. These mortars need cohesive, thixotropic, non-sag behavior so they can remain in place against gravity. Verify maximum thickness per lift, total depth, working time, and any forming, support, or anchorage requirements.
Do not assume a horizontal patching product will work on a wall or soffit. Overhead repairs involving exposed reinforcement, extensive delamination, movement, or structural section loss require qualified assessment.
Is epoxy mortar better than cementitious repair mortar?
Not universally. An epoxy mortar may be a candidate for documented heavy traffic, impact, low permeability, rapid reopening, or specific chemical exposure. A cementitious mortar may be a candidate for exterior, permitted damp-substrate, deeper, or larger-volume work.
Compare exact products for substrate moisture, depth, temperature, working time, curing, movement compatibility, UV exposure, abrasion, chemical contact, and reopening. Category-wide claims about strength, cost, or service life are not substitutes for product data and project requirements.
Should concrete be dry or damp before repair mortar is applied?
It depends on the product. Some systems require dry concrete, some require pre-dampening or a saturated condition without standing water, and others require a specified primer or bond coat.
Follow the current technical data sheet for the selected system. Do not transfer the moisture instructions from one product to another or assume that every epoxy or cementitious mortar has the same requirement.
When should damaged concrete be replaced instead of patched or resurfaced?
Replacement should be considered when deterioration is extensive or full-depth, sound repair boundaries cannot be established, the slab or support is unstable, settlement or heaving continues, or the remaining concrete cannot perform its required function.
Localized patching is more plausible for limited defects surrounded by sound concrete over stable support. Resurfacing may suit broad surface wear or pitting where the underlying base remains sound, but an overlay cannot stabilize a failing sub-base or stop structural movement.
Can repair mortar fix a structural or actively moving crack?
Generic repair mortar should not be treated as a structural or movement-capable crack repair. A rigid patch over an active crack may be stressed again as movement continues.
Epoxy injection may be specified to bond a dormant structural crack, while a flexible urethane system may be used to control leakage in an active crack without restoring structural continuity. Selecting the objective and method requires investigation. Structural cracking, active movement, recurring leakage, settlement, or misalignment warrants qualified professional assessment.