 MortarDesk
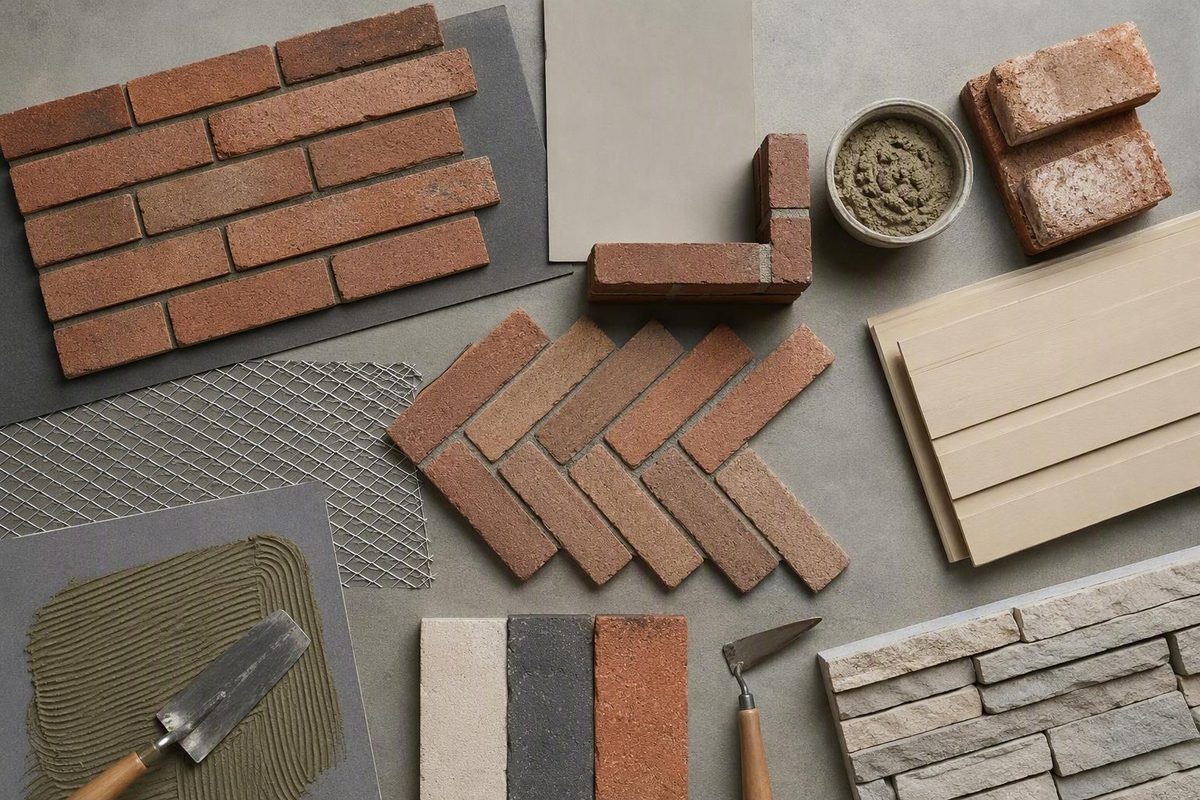
Brick veneer installation is not one universal process. A thin-brick accent wall bonded with adhesive, an exterior manufactured veneer installed over lath and mortar, and a full-depth brick wythe tied to a structural wall may all be called “brick veneer,” but their substrates, attachment, drainage, support, and inspection requirements are fundamentally different.
Start by identifying the exact system. Then confirm the approved substrate, exposure, bonding or anchoring method, moisture-management details, joint material, and governing instructions. That decision determines whether the project is a manageable decorative installation or a building-envelope assembly that needs a mason, designer, engineer, or building official.
This guide is a system-selection and general workflow overview. It is not a substitute for current product instructions, approved project documents, locally adopted codes, tool manuals, product labels, or safety data sheets.
First identify which brick veneer system you have
Use this decision tree before buying adhesive, mortar, lath, ties, or flashing:
-
Are the units thin, individually applied pieces used as a decorative finish? - If they will be installed in a dry interior with an approved adhesive or mortar adhesive and filled joints, follow an interior adhered thin-brick system. - If they will be exposed to weather or regular water, do not assume the interior method applies. Continue to the next question.
-
Does the manufacturer specify a panel, track, mortar-and-lath, drainage, or proprietary adhered system? - Follow that complete proprietary or exterior adhered veneer system, including its substrate, weather-resistive barrier, flashing, lath, mortar, accessories, curing, and sealing requirements. - Do not combine convenient steps from competing systems unless the responsible manufacturers approve the resulting assembly.
-
Are these full-depth bricks forming a separate outer wythe with a cavity behind them? - This is anchored brick veneer. It needs gravity support at its base or at designed intermediate supports, lateral ties to approved structural backing, and a coordinated drainage system. It is not adhesive-applied thin brick.
Anchored veneer is a self-supporting, single-wythe cladding. It carries its own weight to a foundation ledge, shelf angle, lintel, or another designed support, while ties connect it laterally to the structural backup wall. The structural wall supports the building; the brick wythe serves as exterior cladding. The assembly functions as a rainscreen with a cavity, water-resistive barrier, flashing, and weeps, as explained in the IIBEC overview of anchored brick veneer.
| Project scope | Typical attachment approach | Moisture management | Structural support | Design and installation implications |
|---|---|---|---|---|
| Dry decorative interior | Individually adhered thin brick using a bonding product approved for the veneer and substrate | Protect against incidental spills as specified; ordinary face sealing does not create a waterproof wall | Existing wall must securely carry the finish, but there is no separate full-depth brick ledge | May be suitable for experienced DIY installation after compatibility, layout, and fire-rating questions are resolved |
| Regularly wet interior | An adhered or panel system specifically approved for that exposure | Requires an approved waterproofing and transition strategy behind or within the finish assembly | Substrate must support the complete wet-area assembly | Waterproofing must be established before veneer installation; face sealer alone is insufficient |
| Exterior adhered veneer | Product-specific mortar, lath, panel, track, or proprietary adhesive assembly | WRB, flashing, drainage, sealants, terminations, and weather protection as specified | Secure structural substrate; lath and accessory attachment must reach the backing required by the system | Manufacturer details and local requirements govern; complex openings and transitions merit professional review |
| Anchored exterior veneer | Full-depth brick laid in mortar and tied laterally to structural backing | Continuous WRB, clear cavity, flashing, end dams, mortar control, and weeps | Foundation ledge, lintels, shelf angles, or engineered supports carry gravity loads | Masonry, structural, water-management, movement, and code details must be coordinated and inspected |
A product name does not establish its installation method. “Thin brick,” “brick tile,” “manufactured brick veneer,” and “brick veneer” can refer to materially different products. Obtain the current technical data, installation instructions, accessory requirements, and project drawings for the exact product—not merely a sales page or tutorial featuring something visually similar.
Verify the substrate, exposure, and specified materials
An adhered veneer needs a substrate that is secure, clean, dry, sufficiently flat, and compatible with both the veneer and the selected bonding material. Remove contamination, loose coatings, dust, grease, failing paint, and anything else that prevents the specified bond. Repair deterioration and movement before covering the wall.
Drywall illustrates why there is no universal substrate rule. A homeowner documented bonding veneer to unfinished drywall, but that was a particular interior backsplash project rather than a tested general specification, as the documented DIY installation makes clear. Other product instructions list plasterboard among acceptable surfaces, while some guidance calls for water-resistant drywall, cement board, or tile backer where needed. A separate promotional method tells users to remove drywall and install cement board.
Do not resolve those differences by declaring that drywall is always acceptable—or that cement board is always required. Check all of the following:
- The exact veneer product, including unit material, dimensions, and weight
- The adhesive, mortar adhesive, or setting mortar
- The existing wall material, fasteners, coatings, flatness, and condition
- Whether the location is dry, intermittently damp, regularly wet, exterior, or exposed to heat
- The complete assembly weight and the capacity of the substrate and its attachment
- Any required waterproofing, vapor-control, fire-resistance, or noncombustible construction
- Penetrations, outlets, trim, fixtures, and movement interfaces
- Current instructions from both the veneer and bonding-product manufacturers
- Project drawings, specifications, and locally adopted requirements
System-specific exclusions matter. For example, Glen-Gery says not to apply the thin-brick system covered by its guide over wallpaper, smooth tile, or damp surfaces. It calls for a secure wall and identifies water-resistant drywall, cement board, or tile backer as possible preparation where necessary. Those are useful warnings, but they remain specific to the manufacturer’s thin-brick installation guide.
Wet areas require a separate decision. A decorative sealer may change stain resistance or appearance, but it does not establish that the wall behind the brick is waterproof. Showers, tub surrounds, and other regularly wet locations need a complete approved waterproofing assembly, including treatment of seams, corners, penetrations, and transitions. Confirm compatibility among the waterproofing, setting material, brick, joint filler, and any sealer.
Exterior anchored veneer has different prerequisites:
- Designed gravity support
- Approved structural backup
- A continuous water-resistive barrier
- Correctly integrated base, opening, roof, and transition flashing
- A clear drainage cavity
- Corrosion-resistant ties and compatible fasteners
- Weeps immediately above the relevant flashing
- Movement provisions and support transitions
- Inspection access before concealed work is covered
Stop work and obtain clarification if:
- The wall is damp, deteriorated, soft, unsupported, or visibly moving.
- The substrate or coating cannot be identified.
- Veneer would cover an unresolved leak or crack.
- The manufacturer does not approve the proposed veneer, bonding product, substrate, and exposure as one assembly.
- A fire-rated, wet-area, exterior, or structurally significant detail would be altered without an approved design.
- Full-depth veneer lacks a documented ledge, lintel, shelf angle, backing, tie, flashing, or drainage detail.
Plan quantities, tools, safety, and the course layout
Measure and plan the complete wall before mixing mortar or opening adhesive. Calculate gross wall area, subtract openings as appropriate for the chosen ordering method, and separately count outside corners, returns, special shapes, and purpose-made corner units. Allow for cuts, breakage, pattern selection, and replacement pieces.
Waste allowances depend on the product and layout. Z-BRICK, for example, directs customers to purchase 5% extra and recommends mixing units from several cartons to distribute normal color variation. Those are product-specific instructions, not universal allowances, as shown in the Z-BRICK installation guide.
A practical preparation checklist includes:
- Tape measure, pencil, chalk line, and level or laser
- Straightedge or a securely established temporary ledger where required
- Buckets and clean water
- Mixing paddle and specified mixing equipment where required
- Caulk gun if the bonding product is cartridge-applied
- Appropriate notched, margin, pointing, or brick trowels
- Mortar or grout bag and compatible tip
- Jointing tool in the specified size and profile
- Stiff, nonmetal brush that will not damage the brick face
- Spacers, temporary tape, or another approved alignment aid
- Cutting equipment approved for the selected units
- Drop cloths, plastic protection, masking materials, and cleanup tools
- The current instructions, labels, and safety data for every tool and product being used
This article does not provide a masonry-cutting, dust-control, electrical-work, or respiratory-protection procedure. Do not improvise those operations. Before cutting or mixing, obtain and follow the current tool manual, product label, safety data sheet, and any applicable workplace or site requirements. If those documents do not provide enough information to perform the work safely, stop and obtain qualified guidance.
Dry-lay a base course before bonding anything. Include corner units or returns so the layout reflects their true dimensions. Check the intended bond, joint width, end cuts, transitions, outlets, and whether the proposed spacing creates narrow slivers at a visible edge.
Establish horizontal course lines from the actual unit height plus the selected joint. A joint near 3/8 inch appears in multiple interior thin-brick instructions, but it is not mandatory for every product. Unit dimensions, tolerances, pattern, visual intent, joint material, and manufacturer directions control.
If the floor, countertop, hearth, or ceiling is out of level, do not let the first course follow it. Establish a truly level reference line or secure ledger, then plan how the lower or upper cut course will absorb the variation. Otherwise, each subsequent course will repeat the error.
Plan the bond before making production cuts. A conventional running bond can be created by alternating full and half units at the ends of successive courses. Where purpose-made corner pieces are available, alternating their long and short legs can maintain the bond around the corner.
Measure outlet, fixture, edge, and return cuts individually. Small variations can accumulate as the installation progresses. If several pieces are prepared at once, label each piece and its location rather than assuming one measurement fits the entire edge.
Install dry-interior adhered thin brick step by step
This workflow is limited to a dry decorative interior where the veneer manufacturer and bonding-product manufacturer both approve the substrate, exposure, and product combination. It is not an exterior, shower, fireplace-firebox, or full-depth veneer method.
-
Protect the room. Cover floors, counters, cabinets, and nearby finishes. Remove trim, cover plates, and other components that interfere with a flat installation. Work around electrical components only under the applicable project requirements; this guide does not provide an electrical-work procedure.
-
Prepare and mark the wall. Complete approved repairs and cleaning, then transfer horizontal course lines and enough vertical references to keep the bond from drifting. Mark corners, openings, focal points, and finish edges.
-
Dry-fit the first course and corners. Confirm joint spacing and visible end cuts. Modest, evenly distributed spacing adjustments may be preferable to one conspicuously narrow piece, provided the resulting joints remain within the product’s permitted range.
-
Choose the specified bonding approach. Do not merge instructions from unrelated products. One system may use non-sag adhesive applied to the back of each unit. Another may require an approved wall adhesive spread only over the area that can be covered within its open time.
-
Follow the bonding-product details exactly. Bead pattern, trowel shape, bed thickness, coverage, working time, venting method, and pressing technique are not interchangeable. For example, one Glen-Gery method describes a 1/4- to 3/8-inch back application; that measurement belongs to the system covered by its guide, not to thin brick generally.
-
Do not transfer thicknesses between systems. Z-BRICK specifies an approximately 1/8-inch spread of its mortar adhesive or traditional mortar for its own installation method. The difference between that figure and other published methods demonstrates why the selected product instructions must control.
-
Set corners and reference units. Where the chosen method calls for corners first, alternate the legs as required by the bond. Press each unit firmly using the specified motion while maintaining the planned spacing.
-
Work in short, controlled sections. Do not spread more adhesive than can be covered before it skins. LIQUID NAILS’ interior veneer guide reports a surface skin time of about 10 minutes for the named method and calls for at least 24 hours of drying before grouting; the current label and technical data govern the actual project. The guide also describes a product-specific venting method and temporary tape for slipping pieces in its interior veneer instructions.
-
Check continuously. Use spacers, tape, or another approved temporary aid if units move. Check level and alignment after short runs. Correcting a small variation immediately is easier than disguising accumulated error near the ceiling.
-
Install whole pieces before final cuts where practical. Measure edge, outlet, and fixture pieces from their actual locations. Maintain required clearances and do not conceal electrical boxes or interfere with cover-plate attachment.
-
Allow the bond to cure. Do not fill the joints until the bonding material reaches the stage required by its manufacturer. A homeowner account reports waiting overnight, while the named adhesive guide above specifies at least 24 hours. Neither establishes a universal curing period. Temperature, humidity, substrate, application thickness, and product chemistry can affect the applicable schedule.
Avoid pulling pieces back off after the adhesive has begun to skin unless the instructions specifically prescribe a set-and-vent method. If repeated slipping, poor transfer, or inadequate tack occurs, stop and investigate rather than trying to hold an unapproved assembly in place with increasing amounts of tape.
Fill, tool, and clean the joints without damaging the face
Joint material is system-specific. Available installation guidance describes Type N mortar, sanded grout, proprietary mortar adhesive left visible as a joint, and other mortar mixes. Select the filler approved for the veneer, bonding system, joint dimensions, exposure, and desired profile.
For a conventional bagged-mortar workflow:
- Confirm that the veneer bond has cured for the required period.
- Protect adjacent finishes and test the process on spare units or in an inconspicuous area.
- Mix the joint material to its specified proportions and consistency.
- Fill the joints deeply and continuously rather than applying a superficial face cap.
- Where the selected method requires it, fill horizontal bed joints before vertical head joints.
- Keep material off the brick face as much as practical.
- Wait for the specified tooling stage.
- Tool the joint to the required depth and profile.
- Brush away loose crumbs only when doing so will not tear or smear the joint.
A useful readiness cue repeated in installation guidance is a sandy or crumbly surface. Material that is still glossy or wet is more prone to smearing; material left too long may resist compaction and tooling. Actual timing depends on the mix, absorption, temperature, humidity, and joint depth.
Under Glen-Gery’s thin-brick method, vertical joints are tooled before horizontal joints with a concave jointer. Treat that as the sequence for that method, not a rule that overrides another product’s instructions.
Exterior joints need particular attention because incomplete or poorly tooled joints can provide easier water-entry paths. Glen-Gery’s masonry recommendations call for fully filled exterior joints and identify concave, V, and grapevine profiles as weather-resistant choices while discouraging struck and raked profiles. The same guidance presents Type N as a common first choice for general exposed masonry above grade while recognizing that other conditions may require a different specification in the manufacturer’s masonry construction recommendations.
Clean with the least aggressive method expressly approved for the materials. Once the joints are firm enough, a compatible stiff nonmetal brush may remove loose particles without gouging fresh work. Test the proposed brush, sponge, or cleaner on spare units first.
Published cleanup accounts conflict sharply. One homeowner reported using a wire brush and diluted muriatic acid, while manufacturer guidance warns that wire brushes can scratch brick. Separate exterior guidance advises against pressure washing and chemical cleaners. Those reports do not establish a generally safe or compatible method.
This guide does not provide instructions for handling acids, chemical cleaners, pressure-washing equipment, or solvent-based coatings. Before using acid, proprietary cleaner, pressure washing, polyurethane, shellac, sealer, or another finish treatment, obtain written compatibility and use instructions from the brick, joint-material, cleaner, and coating manufacturers. If suitable instructions are unavailable, do not use the treatment.
Treat exterior adhered thin brick as a separate specified assembly
Do not use an interior construction-adhesive method outdoors merely because the pieces look identical. The available evidence supports construction adhesive for certain dry-interior installations; it does not establish that method as a universal exterior assembly.
One documented exterior manufactured-veneer sequence is:
- Prepare a structurally sound, clean, bondable wall.
- Install the specified weather-resistant or water-resistive barrier.
- Integrate flashing at the base, openings, penetrations, and transitions.
- Fasten the required lath to approved backing.
- Apply the specified mortar layer.
- Back-mortar each veneer unit.
- Press the units into the prepared mortar bed.
- Fill and finish the joints.
That sequence comes from StoneWorks guidance for its cement-based manufactured thin-brick veneer. It illustrates why an exterior installation can involve much more than face bonding, but it does not govern unrelated products. The StoneWorks exterior veneer overview also does not provide every fastening, flashing, drainage, or curing detail needed to design another manufacturer’s assembly.
By contrast, Z-BRICK states that its proprietary mortar adhesive can be installed without metal lath over substrates listed in its instructions. That is permission for the named system under its stated conditions—not permission to omit lath, tracks, mortar layers, or drainage accessories from another system.
Weather limits and curing instructions also vary. Z-BRICK gives an outdoor installation range of 40°F to 90°F, calls for rain-free conditions, directs users to protect fresh exterior adhesive from moisture for at least three days, and describes covering installed veneer for two to four days or longer in damp climates. Its page also gives differing descriptions of how long to wait before sealing, which is a reason to obtain current technical clarification rather than selecting the shortest published interval.
A complete exterior detail must show how water exits at:
- The wall base
- Window and door heads, jambs, and sills
- Deck and balcony interfaces
- Utility and fastener penetrations
- Roof-to-wall intersections
- Changes in cladding
- Inside and outside corners
- Upper terminations, parapets, and copings where applicable
- Grade, paving, and horizontal-surface transitions
Face-applied veneer does not automatically manage water behind it. Nor does the available evidence establish universal rules for when lath, a scratch coat, drainage mat, waterproofing layer, or proprietary accessory is required. Those decisions belong to the selected approved system, project documents, and local requirements.
Build anchored exterior veneer as a drained rainscreen
Full-depth anchored brick veneer should be understood as a layered wall, moving from inside to outside:
- Structural backup wall
- Sheathing where applicable
- Continuous water-resistive barrier
- Exterior insulation where designed
- Clear drainage cavity
- Corrosion-resistant ties connected to approved structural backing
- Flashing, end dams, mortar-control components, and weeps
- The outer brick wythe
Brick and mortar are porous. The wall succeeds by managing water that penetrates the masonry, not by treating the face as waterproof. Water reaching the back of the veneer should descend to flashing and leave through open weeps rather than entering the backup wall.
Gravity support and lateral support are different functions. A foundation ledge, lintel, shelf angle, or another designed element carries the brick’s weight. Ties stabilize the wythe laterally and transfer applicable loads to structural backing while accommodating or restraining differential movement as designed. Attachment to sheathing alone is not automatically acceptable; the project must identify the approved backing, fastener, and load path.
Flashing and weeps are commonly required at the wall base, above lintel-supported openings, at shelf angles, at cavity interruptions, and wherever a transition must return water outside. Sill and lintel flashing should include end dams so water cannot run off the ends into the wall. The WRB must lap with the flashing in the direction of drainage. At the lower end of a roof-to-wall intersection, kickout flashing should direct runoff outward rather than behind the veneer. These continuity principles are illustrated in trade guidance on constructing brick veneer as a supported, drained wall.
Keep the cavity clear. Mortar droppings can accumulate at the base, bridge the gap, obstruct weeps, or redirect water toward the backup. Utilities, insulation, fasteners, and other projections can create similar obstructions. A specified drainage mesh or mortar-collection system may help, but no single proprietary product is mandatory for every design.
Tie type, fastener, spacing, corrosion protection, embedment, and backing depend on the wall height, framing, cavity and insulation thickness, wind and seismic conditions, material compatibility, project design, and locally adopted code. Ties must be installed as the masonry rises so they remain properly aligned and embedded. Bent-down, loosely attached, or missed ties cannot be assumed to perform as designed.
Why the numbers cannot be universal
An IIBEC article summarizing the 2024 IRC describes a general provision limiting each tie to 2.67 square feet of wall area, with maximum spacing of 32 inches horizontally and 24 inches vertically. It also reports weeps at 33 inches on center immediately above flashing. Those figures come from the cited code summary and are not a nationwide specification for every wall, building, or jurisdiction.
By contrast, an inspection guide based on the 2003 Michigan Residential Code presents a different tie arrangement and describes weeps at no more than 32 inches on center, with 24-inch spacing over openings. Those legacy details remain useful for illustrating inspection concepts, but the residential brick-veneer inspection guide does not establish current requirements outside its stated code context.
Verify the locally adopted code edition, amendments, engineered design, wall materials, exposure, and manufacturer requirements before setting spacing or selecting hardware.
Movement also needs a deliberate path. Fired brick can expand while wood framing may shrink, and structural elements can deflect independently. Plan vertical movement joints near corners, openings, offsets, wall intersections, changes in substrate, and changes in support.
BIA-derived planning guidance reported by IIBEC refers to approximately 20-foot spacing for walls with multiple openings and 25-foot spacing for walls without openings. Those figures are planning references, not automatic dimensions. Actual joint locations and spacing must respond to the façade geometry, materials, supports, openings, expected movement, and governing design.
Where shelf angles interrupt the veneer, the horizontal movement joint belongs immediately below the support so expansion does not load the angle or the brick above. That joint uses compressible material, backer rod, and compatible sealant rather than mortar. Its width and sealant geometry must be designed for the expected movement.
Create inspection hold points before masonry conceals:
- Base flashing and its connection to the WRB
- Sill and lintel flashing, corners, seams, and end dams
- Roof intersections and kickouts
- Tie attachment, alignment, corrosion protection, and embedment
- Cavity clearance and insulation position
- Mortar-control or drainage accessories
- Weep placement and open discharge paths
- Shelf angles, lintels, bearings, and movement joints
Photographs and inspection records taken at these stages are more useful than trying to infer concealed conditions after a leak or crack appears.
Catch installation failures before they become concealed defects
Use stage-based quality control instead of waiting for the finished wall to reveal problems.
| Stage | What to verify |
|---|---|
| Substrate acceptance | Identified, sound, dry, clean, sufficiently flat, securely attached, and approved for the veneer, bond, exposure, and assembly weight |
| Layout | Level references, bond, corners, balanced end cuts, opening alignment, joint spacing, and movement locations |
| Bonding | Correct product, mixing, bead or trowel pattern, coverage, transfer, open time, pressing method, and environmental conditions |
| Cure | Required temperature and moisture protection maintained; no joint filling, loading, cleaning, or sealing before the specified stage |
| Joint filling | Compatible material, full packing, controlled face contact, proper firmness before tooling, and specified profile |
| Weather protection | Unfinished exterior work and stored materials protected as required by the governing product and project documents |
| Flashing | Continuous drainage-directed laps, sealed seams, corners, end dams, kickouts, and exterior termination |
| Ties and support | Correct backing, fasteners, alignment, spacing, embedment, corrosion resistance, ledges, lintels, and shelf angles |
| Cavity | Required clearance maintained and free of mortar bridges, displaced insulation, utilities, and debris |
| Weeps | Installed immediately above applicable flashing, open, unobstructed, and able to discharge outside |
Visible defects often point to several possible causes:
- Uneven courses: The first course followed an uneven floor or counter, reference lines were missing, units varied without layout adjustment, or small joint errors accumulated.
- Poor adhesion or slipping units: The substrate may be contaminated, damp, weak, or unapproved; the bonding product may lack sufficient initial tack; its open time may have expired; or cure conditions may not have been maintained.
- Smeared or weak-looking joints: Tooling may have begun while the material was too wet, the mix may have been over-watered, joints may be incompletely filled, or an incompatible cleanup method may have disturbed the surface.
- Exterior leakage or efflorescence: Water may be moving through the assembly because of missing or discontinuous flashing, blocked weeps, reverse laps, absent end dams, or cavity obstructions. Appearance alone cannot identify which concealed component failed.
- Cracking near corners, openings, long wall runs, or support transitions: Unaccommodated movement is one possibility, but foundation movement, support deflection, corrosion, material incompatibility, and other causes require project-specific assessment.
Stop and obtain qualified evaluation if full-depth veneer is loose, displaced, bulging, or moving; if lintels or ties appear corroded; if leakage recurs; or if gravity support and tie attachment cannot be verified. Structural supports, tall walls, unusual geometry, high-wind or seismic exposure, complex transitions, and deteriorated construction should not be resolved by trial and error.
The authority hierarchy is straightforward:
- Approved project drawings and specifications
- The currently adopted local code and amendments
- Current veneer, adhesive, mortar, flashing, tie, sealant, and accessory instructions
- Direction from the responsible designer, qualified mason, engineer, or building official
- General online installation guidance
Mortar Desk is an independent general-reference publisher, not an installer, contractor, or engineering adviser. Its site description emphasizes that specifications change and codes are local, so project-specific documents and responsible authorities take precedence.
Can thin brick veneer be installed directly over drywall?
Sometimes, but not as a universal rule. Some product guidance accepts plasterboard or particular drywall assemblies, and individual homeowners have reported decorative installations over unfinished drywall. Other methods call for water-resistant drywall, cement board, tile backer, or removal of drywall and installation of cement board.
Approval depends on the exact veneer, bonding material, wall condition and attachment, assembly weight, moisture exposure, fire-rating requirements, and current manufacturer instructions. Do not install over damp, deteriorated, moving, or unidentified drywall, and do not treat ordinary drywall as an approved wet-area backing without a complete specified assembly.
Should brick veneer be installed with construction adhesive or mortar?
It depends on the system. Certain dry-interior decorative veneers have manufacturer instructions permitting construction adhesive. Other thin-brick systems use proprietary mortar adhesive. Exterior manufactured veneer may require a WRB, flashing, lath, a mortar layer, back-mortared units, and filled joints. Full-depth anchored brick is laid in mortar, supported by ledges or designed steel, and connected to structural backing with ties.
Do not choose solely according to convenience. Use the bonding or masonry method approved for the product, substrate, exposure, and complete assembly.
Is a 3/8-inch mortar joint required for brick veneer?
No. Approximately 3/8 inch appears in several interior thin-brick layout guides and may suit many conventional running-bond installations, but it is not mandatory for every product.
The correct joint depends on actual unit dimensions, manufacturing tolerances, pattern, desired appearance, filler requirements, movement details, and manufacturer instructions. Dry-lay the units and calculate course heights using the selected joint before marking the wall.
Are brick and mortar waterproof on an exterior veneer wall?
No. Brick and mortar are porous, so an exterior veneer must manage water that passes through the face. In anchored construction, the intended path runs down the rear of the veneer to flashing and then outside through weeps.
That requires a continuous WRB, drainage cavity, correctly lapped flashing, end dams, open weeps, and careful treatment of penetrations and transitions. Face sealer is not a substitute for those concealed components.
What mortar type should be used for brick veneer?
Type N is commonly identified as a first choice for general exposed, above-grade brick veneer, but it is not universally correct. Exposure, brick properties, structural movement, wind, wall height, backup flexibility, and the selected veneer system can lead to a different specification.
For adhered thin brick, the joint filler might instead be sanded grout, proprietary mortar adhesive, or another approved material. Follow the project specification and current product instructions. For full-depth exterior veneer, coordinate mortar selection with the masonry design and applicable requirements.
The final decision returns to the first one: identify the veneer system. An approved dry-interior thin-brick installation may be a manageable exercise in preparation, layout, bonding, cutting, and joint finishing. Exterior adhered and full-depth anchored veneers depend on specified drainage, flashing, support, attachment, weather protection, and movement details that are frequently concealed as construction proceeds.
Verify the exact product instructions and locally adopted requirements before ordering materials. Route uncertain structural support, concealed water-management details, unusual geometry, and deteriorated existing walls to qualified professionals.