 MortarDesk
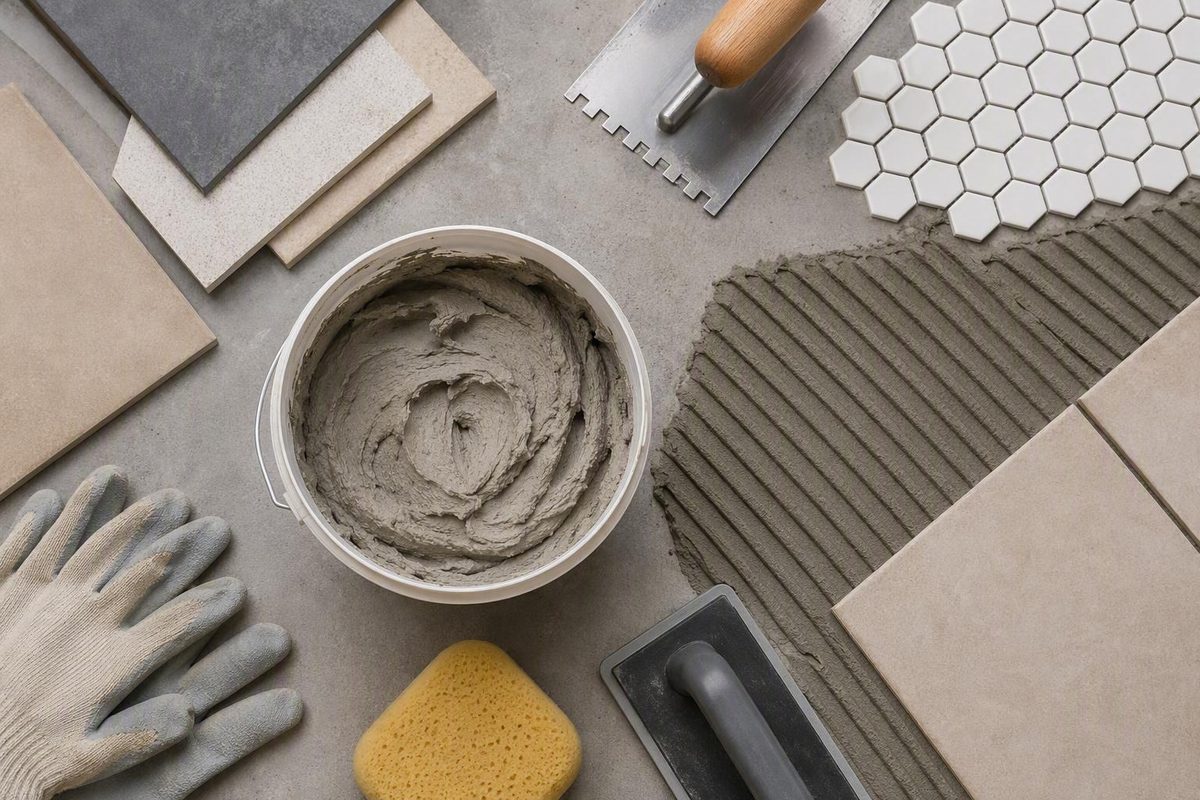
Thin set mortar is easy to recognize on a store shelf and surprisingly easy to choose incorrectly. “Modified,” “rapid set,” “large and heavy tile,” “white,” and “premium” describe different characteristics, but none tells you by itself whether a mortar belongs in your tile assembly.
A better approach is to identify the tile, substrate, location, membrane, and heating system first. Then choose a mortar whose current technical documents approve that combination. During installation, the decisive check is not the product name or nominal trowel size—it is the mortar transfer visible when you lift a newly placed tile.
What thin set mortar is—and what it is not
Thin set mortar—also written thinset or thin-set mortar—is generally a cement-based setting material made with cement, fine sand, and water-retention agents. It is spread in a relatively thin, controlled bed to bond tile or stone to an approved substrate. Other terms include dry-set mortar, drybond mortar, polymer-modified mortar, and, for a specialized product category, large-and-heavy-tile mortar.
There are two broad cementitious families:
- Unmodified thin set contains the basic cement, fine sand, and water-retention components.
- Modified thin set adds polymers or latex intended to change properties such as adhesion and workability.
Those definitions do not make one family universally better. The correct choice depends on the product’s approvals and every material in the assembly.
The word thin describes the installation method relative to a traditional thick mortar bed. It does not mean the mortar can be feathered to an arbitrary thickness, applied inconsistently, or expected to flatten a seriously uneven surface.
Thin set is also not a catch-all term for every product used around tile:
- Grout fills the joints after the tile has been set; thin set bonds the tile to its support.
- Bricklaying mortar is formulated for masonry construction, not as a substitute tile adhesive.
- Thick-bed or mud-set mortar belongs to a different installation method and is not interchangeable with ordinary thin-set mortar.
- Mastic is a separate adhesive category with its own approved tiles, substrates, and exposure limits.
- Premixed tile adhesive may be sold near cementitious mortar or described informally as “premixed thinset,” but the bucket may contain different chemistry. Check the label and technical data sheet rather than assuming it behaves like a dry cementitious product.
The practical distinction is simple: identify the material by its actual product description and instructions, not merely by the shelf category or a familiar word on the front label.
Choose mortar by assembly, not by a single label
Before comparing bags, write down five inputs:
- Tile material: ceramic, porcelain, natural stone, glass, or a specialty-backed product.
- Tile dimensions and back profile: including deep ribs, recesses, mesh, or other features that affect contact.
- Substrate: the exact board, slab, underlayment, existing surface, or approved panel receiving the mortar.
- Exposure and location: floor or wall, interior or exterior, wet or dry, heated or unheated.
- System components: waterproofing, uncoupling or crack-isolation membrane, heating cable, mat, or proprietary panel.
Use those inputs to compare each mortar’s approved uses, limitations, and exclusions.
Modified versus unmodified
Modified mortar includes polymer or latex additives, while unmodified mortar relies on its basic cementitious formulation. Either may be correct in a particular assembly. Neither is the default answer for every floor, shower, membrane, or tile.
This matters especially around membranes. Generic advice that every membrane requires unmodified mortar—or that modified mortar is always better—is unreliable. Check both the membrane manufacturer’s current installation instructions and the mortar manufacturer’s technical data sheet. If they disagree, stop and obtain clarification rather than improvising.
As a system-specific example, Schluter says its SET, ALL-SET, and FAST-SET mortars can be used to set tile over DITRA, DITRA-HEAT, KERDI, and KERDI-BOARD. That approval applies to the named Schluter products; it is not a universal modified-versus-unmodified rule. The same page does not recommend those mortars for moisture-sensitive stone, resin-backed tile, or glass tile, illustrating why broad category guidance is insufficient (Schluter’s thin-set mortar compatibility information).
Rapid-setting mortar
Rapid-setting mortar can shorten the wait before grouting or moving to another installation stage. The tradeoff is generally a shorter working window. Depending on the product and jobsite conditions, that can leave less time to place and adjust tile before spread mortar becomes unusable, as well as less time to clean joints or correct coverage.
That may be useful for a time-sensitive repair or an experienced crew. For a beginner laying a complicated pattern, a standard-setting product may be more forgiving. “Rapid” still does not tell you whether the mortar is compatible with the tile, substrate, membrane, or exposure.
Large-and-heavy-tile mortar
Large-and-heavy-tile mortar is a specialized product category for demanding tile installations. Its technical data may provide application-specific thickness, support, or positioning characteristics, but tile dimensions alone do not establish suitability. Confirm the approved tile material, substrate, orientation, thickness range, and other installation limits in the data sheet.
Large tile also creates a technique challenge. A larger footprint, deep back pattern, or uneven substrate may require more mortar, a deeper notch, greater tile movement, or back-buttering to achieve transfer. The bag label does not remove the need for test lifts.
Wall and non-sag products
A wall installation may benefit from mortar specifically rated for non-sag or non-slump performance. That can make tile positioning easier, but the description must be verified against the product’s approved uses and thickness limits.
Terms such as premium, reinforced, professional, and high performance are not substitutes for written compatibility. Nor are price, package weight, retailer ratings, or shelf placement reliable performance rankings.
Compatibility checklist for tile, substrate, and location
Use this checklist before buying. “Approved” means named or clearly included in the current mortar data sheet and, where applicable, in the tile or system instructions.
| Tile or condition | What to confirm | Practical installation concern |
|---|---|---|
| Ordinary ceramic or porcelain | Mortar names the tile type and exact substrate | Verify transfer by lifting an early tile |
| Large or deeply patterned tile | Product is approved for the application and intended thickness | More mortar, a deeper notch, tile movement, or back-buttering may be needed |
| Natural stone | Written approval for the stone and any sensitivity or backing | Mortar color and moisture behavior may matter; do not generalize from porcelain |
| Glass tile | Explicit approval from the glass and mortar manufacturers | White mortar may be considered, but color alone does not establish compatibility |
| Resin-backed tile | Explicit written product approval | Do not extrapolate from ordinary stone or ceramic guidance |
| Wet areas | Compatibility with the complete waterproofing assembly | “Moisture resistant” is not the same as system approval |
| Exterior work | Exterior approval for the tile, mortar, substrate, and exposure | Coverage, movement, weather, and curing restrictions become especially important |
| Membranes | Agreement between membrane instructions and mortar data | Avoid a universal modified-versus-unmodified rule |
| Radiant heating | Agreement among the heating system, membrane, substrate, mortar, and tile instructions | Keep heat off for the required cure period and follow the prescribed startup sequence |
Ordinary ceramic or porcelain
For ordinary ceramic or porcelain over an approved cementitious substrate, begin with a mortar that names both the tile and substrate. Confirm whether the location is included and whether the product is suitable for the tile dimensions. Then verify transfer while setting. Compatibility on paper is necessary, but poor troweling or skinned mortar can still produce inadequate contact.
Large-format and patterned backs
A large tile or a back with deep recesses creates more variation between ridge tops and low areas. The response may involve a mortar approved for that application, a larger notch, more mortar, back-buttering, or longer movement across the ridges.
The correct combination is the one that produces adequate transfer without exceeding the product’s thickness limits or flooding the joints. Verify it by lifting a newly placed tile rather than relying on a size-based chart alone.
Natural stone, glass, and specialty backings
Glass, resin-backed tile, and moisture-sensitive stone are stop-and-confirm materials. Obtain explicit written approval rather than extending ceramic or porcelain instructions to them.
White mortar is commonly considered behind translucent glass, light-colored finishes, or stone that may be visually or chemically sensitive. But white is only a color. It does not prove that the mortar is approved for glass, resin backing, or a particular stone.
Showers and other wet areas
A shower is an assembly, not merely a place where “water-resistant mortar” is needed. Confirm the substrate or backer, waterproofing membrane, seams and transitions, mortar, tile, drains, and any proprietary panels as one compatible system.
The mortar also remains subject to product-specific coverage, curing, and water-exposure restrictions.
Radiant floors
For a heated floor, review the heating-system instructions before choosing mortar. Some systems require mortar below a membrane or heating component; others use different methods. A recommendation for one mat or membrane should not be generalized to another.
The heating system should remain off for the cure period required by the installation documents. Restart it using the heating manufacturer’s procedure, not simply when the floor appears dry. Warmup, for example, recommends modified mortar for its electric floor-heating systems while emphasizing that installation methods differ by system and that the applicable manufacturers’ directions control (Warmup’s modified-versus-unmodified guidance).
Stop and check
Do not proceed if the substrate is unidentified, coated with an unknown material, contaminated, structurally unstable, moving, or significantly uneven. Stop as well if the tile, mortar, membrane, or heating instructions conflict.
Thin set cannot compensate for structural deflection, major flatness defects, contamination, incompatible coatings, or missing movement accommodation. Resolve those conditions through the applicable system instructions or qualified project-specific guidance before setting tile.
Read the bag before buying: color, yield, and working times
The front of the bag helps you find a category. The technical data sheet tells you whether the product can do the job.
Purchase checklist
Record the following for every candidate mortar:
- Approved tile and stone types
- Explicit exclusions
- Approved substrates
- Interior or exterior use
- Floor, wall, or both
- Wet-area approval
- Membrane compatibility
- Heating-system compatibility
- Maximum tile or application limitations
- Allowable mortar thickness
- White or gray color
- Package weight
- Specified water or additive quantity
- Mixing time and speed
- Required slake time
- Remixing instructions
- Pot life
- Open time
- Approximate yield for the intended trowel
- Earliest grouting time
- Light-traffic time
- Heavy-traffic time
- Full-cure restrictions
- Water-exposure restrictions
- Freeze-thaw or exterior restrictions
- Radiant-heat startup restrictions
- Safety data sheet requirements
Open time is not pot life
These two clocks concern mortar in different locations:
- Pot life is the usable period for mixed mortar remaining in the bucket or container.
- Open time concerns mortar after it has been spread on the substrate and before tile placement.
A batch may still appear workable in the bucket while the layer on the floor has already skinned over. Conversely, spreading only a small area does not extend the bucket’s pot life. Monitor both.
Product differences can be substantial. At 70°F, Schluter lists 20–30 minutes of open time and 2–4 hours of pot life for ALL-SET and SET. FAST-SET lists 10 minutes of open time and a 30-minute pot life. Its stated grout time is 4 hours rather than 12 hours, although all three list 24 hours to heavy traffic under the published conditions (Schluter’s published working and traffic times).
Those figures illustrate variation; they are not universal schedules. Treat printed times as product-specific values under stated conditions, not guarantees for every jobsite.
Grout-ready is not fully cured
Keep these milestones separate:
- End of open time
- End of pot life
- Earliest grouting
- Light-foot-traffic readiness
- Heavy-traffic readiness
- Full cure
- Water-exposure readiness
- Freeze-thaw exposure readiness
- Radiant-heat startup
Passing an early milestone does not imply that all later restrictions have ended. A floor may be grout-ready but not ready for heavy loads, water exposure, freezing conditions, or heating.
White versus gray
White and gray are common retail colors. Choose between them based on the tile and the manufacturer’s directions. White may be preferable behind translucent or light-colored finishes and where stone staining or visual show-through is a concern, but it does not independently establish compatibility.
For opaque ceramic or porcelain, either color may be acceptable if the approved product instructions say so. Also consider grout-joint cleanup: hardened gray mortar can be conspicuous beneath light grout, just as white mortar can show beneath dark grout.
Estimating quantity without relying on bag weight
Yield changes with:
- Trowel notch and application angle
- Tile-back relief
- Substrate variation
- Mortar thickness
- Back-buttering
- Coverage requirement
- Squeeze-up and cleanup
- Test lifts
- Waste and discarded material
Use this cautious method:
- Find the selected product’s stated yield for the intended trowel.
- Divide the project’s net tile area by that yield.
- Round up to whole packages.
- Add an allowance for tile-back filling, substrate variation, back-buttering, testing, waste, and layout conditions.
- Recheck the estimate after the first test area if actual consumption differs.
Do not substitute a universal square-feet-per-bag estimate. Retail prices, inventory, package sizes, and catalog categories also change, so they are poor technical specifications.
Prepare and mix thin set without weakening the batch
The controlling rule is straightforward: use the liquid quantity, mixing time, mixing speed, slake period, remixing procedure, and permitted additives specified by the selected mortar manufacturer.
A common workflow is useful as a framework, but not as a universal recipe:
- Read the current bag instructions and technical data sheet.
- Read the safety data sheet before opening or pouring powder.
- Use clean tools, a clean container, and the specified clean liquid.
- Measure the liquid accurately.
- Add powder in the sequence directed by the manufacturer.
- Mix at the stated speed for the stated time.
- Allow the required slake period.
- Remix as directed, without unauthorized liquid or additives.
- Use the batch within its pot life.
Slaking is the specified rest between initial mixing and remixing. The required duration varies. Do not adopt a remembered duration from another brand, and do not assume every formula uses the same procedure.
Do not rescue stiffening mortar with water
Once mortar has been mixed and has begun to stiffen, casually adding water can change the intended ratio and working properties. Do not retemper it unless the product’s written instructions expressly allow a specific procedure.
The same caution applies to additives. Do not add polymer or latex to an already modified mortar unless the manufacturer authorizes it. “More polymer” does not necessarily mean a better batch.
Informal descriptions such as peanut butter, frosting, or creamy can help an installer recognize an obviously abnormal mix. They cannot replace the stated liquid ratio. Two products can look similar while requiring different liquid quantities, mixing speeds, or slake procedures.
Match batch size to your pace
Mix only as much as you can place and check within the product’s working window. Smaller batches can be sensible for a beginner, complicated cuts, walls, or hot and dry conditions, but only if the product instructions allow partial batching and the specified liquid-to-powder ratio can be measured accurately.
This is especially important with rapid-setting mortar. A batch that hardens before use wastes material and can encourage bad decisions such as adding late water or rushing tile placement.
Use equipment capable of following the selected product’s instructions without introducing excessive air.
Dry-mix safety
Read the selected product’s current safety data sheet before handling or mixing it, and follow its specified dust controls and respiratory, eye, skin, and hand protection. One manufacturer’s general overview notes that dry thin set may contain silica dust and lime, but the specific product’s SDS—not a generic checklist—should control protection and handling decisions (Warmup’s thin-set handling overview).
Arrange the mixing area before opening the bag. Follow the SDS and applicable workplace or local safety requirements for ventilation, dust collection, pouring methods, access control, cleanup, and protective equipment.
Trowel for transfer and continuous tile support
A trowel’s purpose is not merely to spread mortar neatly. It must place enough mortar in a pattern that can collapse into continuous support beneath the tile.
Use this sequence:
- Prepare the approved substrate as its instructions require.
- With the trowel’s flat side, key a layer of mortar firmly into the substrate.
- Add sufficient mortar.
- Comb it with the notched side into straight, parallel ridges.
- Place the tile while the mortar remains open.
- Move the tile perpendicular to the ridges to collapse them.
- Lift an early tile and inspect the tile back and substrate.
- Adjust the method if transfer is incomplete.
Straight, parallel ridges give air a short, predictable escape path as the tile moves across them. Circular, fan-shaped, or swirled ridges can enclose air and make complete collapse more difficult.
For rectangular plank tile, run the ridges parallel to the tile’s short side. Then move the tile perpendicular to those ridges. This reduces the distance trapped air must travel.
Do not merely press the tile straight down. Use deliberate back-and-forth movement across the ridges while maintaining alignment. The aim is to merge ridge tops and valleys into a continuous layer.
The Ceramic Tile Education Foundation describes the same core method: key mortar into the substrate, comb straight ridges in one direction, and move the tile perpendicular to those ridges. It also advises periodic tile lifting because actual support—not nominal notch size—determines whether the method is working (CTEF’s directional-troweling guidance).
Choose a notch by testing transfer
Trowel size is a starting point, not a guarantee. Actual mortar transfer changes with:
- Tile dimensions
- Tile-back relief
- Substrate flatness
- Mortar consistency
- Trowel angle
- Ridge continuity
- Tile movement
- Back-buttering
- Installer technique
After placing one of the first tiles, lift it before the mortar sets. Inspect both interfaces. Look for mortar transferred across the tile back, collapsed ridges, supported edges and corners, and no substantial dry or unsupported areas.
If transfer is inadequate, adjust one or more variables:
- Increase the notch or mortar amount within product limits.
- Keep ridges straight and continuous.
- Change the direction or amount of tile movement.
- Correct the substrate condition.
- Back-butter the tile.
- Replace mortar that has skinned over.
- Confirm that the mix and product are appropriate.
Repeat the test after making changes. Continue periodic checks as tile type, substrate conditions, mortar age, or installer position changes.
CTEF reports coverage targets of at least 80% in dry areas and 95% in wet areas and attributes those figures to tile-industry requirements. Because the complete current primary ANSI and TCNA language was not supplied here, verify the requirements that apply to the specific installation rather than treating those percentages as universal rules (CTEF’s discussion of mortar coverage).
When back-buttering helps
Back-buttering means applying mortar to the tile back, either as a keyed coat or to fill permitted recesses. It can improve contact where the back is irregular and is often useful for large-format tile, natural stone, glass, and exterior work when the selected mortar and tile instructions permit it.
It also cannot repair skinned-over mortar, an incompatible product, contamination, poor substrate preparation, or inadequate movement across the ridges.
Avoid universal tile-size-to-notch charts. They can suggest a starting point, but the lifted-tile inspection is the deciding test.
Prevent skinning, voids, and other application failures
Skinning occurs when spread mortar loses usable surface moisture before the tile is embedded. Ridges may still look intact, yet little or no mortar transfers to the tile.
Prevent it by spreading only as much mortar as you can cover within the product’s open time under current conditions. Heat, wind, sun, dry air, and an absorbent substrate can shorten the practical window. Whether a substrate may or should be dampened is product- and substrate-specific; some materials permit it and others prohibit it.
If a test lift shows no transfer because the surface has skinned, remove the affected mortar and replace it.
Avoid spot bonding and swirls
Isolated mortar globs leave unsupported spaces between them. That is not continuous support, even if the tile face appears aligned. Similarly, swirled patterns can trap air and resist ridge collapse. Key mortar into the substrate, comb parallel ridges, and move the tile across them.
An undersized notch, broken ridges, irregular tile back, poor substrate flatness, incorrect mortar consistency, skinning, or inadequate movement can each contribute to poor transfer. A symptom does not always identify one cause, so inspect the entire method.
Troubleshooting table
| Symptom | What it may indicate | Response |
|---|---|---|
| No mortar transfer to the tile | Skinned mortar, contamination, insufficient pressure or movement, incompatible surface | Remove and replace affected mortar; verify open time, surface preparation, product compatibility, and tile movement |
| Ridges remain standing after a test lift | Inadequate movement, mix issue, insufficient mortar, wrong notch, uneven substrate, or unfilled tile back | Review consistency, notch, ridge direction, tile motion, substrate condition, and back-buttering; retest |
| Excessive squeeze-up in joints | Too much mortar, excessive movement, trowel angle, or an oversized starting notch | Correct mortar volume or technique while still confirming required coverage; clean joints before hardening |
| Mortar slumps on a wall | Product not suited to the application, incorrect mix, excessive thickness, or tile load | Stop and confirm non-sag approval, liquid ratio, allowable thickness, and installation limits |
| Mortar hardens in the bucket | Pot life expired, oversized batch, rapid-setting formulation, or adverse conditions | Discard as directed; mix a smaller accurate batch and do not add water to revive it |
| Hollow or unsupported areas during a test lift | Spot bonding, uncollapsed ridges, insufficient mortar, poor flatness, or irregular tile back | Remove and reset using keyed mortar, straight ridges, suitable notch and movement, and permitted back-buttering |
Excessive squeeze-up should be corrected, but clean grout joints are not a reason to leave tile edges unsupported. Spread and comb mortar to the full tile footprint, then adjust the volume and technique while preserving required transfer.
Sound can be influenced by the tile and assembly. During installation, a lifted-tile inspection provides more direct evidence because it reveals transfer before the mortar hardens.
Curing, cleanup, and the final pre-installation check
Do not use a generic “wait 24 hours” rule for every next step. Record the selected product’s separate limits for:
- Open time
- Pot life
- Grouting
- Light traffic
- Heavy traffic
- Full cure
- Water exposure
- Freeze-thaw exposure
- Radiant-heat startup
Rapid-setting and standard-setting products can have different grouting and working schedules even when a later traffic milestone is similar. Use the selected mortar’s current technical data rather than carrying timing figures from one product to another.
Environmental conditions and impervious layers can change curing behavior. Grout-ready or traffic-ready does not automatically mean ready for water, heavy loads, freezing conditions, or heat. Follow both the mortar data and the complete tile-system instructions when restrictions differ by milestone.
For radiant floors, leave the heat off until the specified cure period is complete. Then follow the heating-system startup procedure. Do not use the thermostat to accelerate curing.
Cleanup and disposal
Clean trowels, paddles, buckets, spacers, and tile faces before mortar hardens. Keep cementitious mortar and wash water out of household drains because residue can settle and harden in plumbing (Tile Outlets’ thin-set handling guidance).
For unused powder, slurry, hardened material, collected dust, packaging, and contaminated cleanup water, consult the product safety data sheet and the waste authority responsible for the project location. Requirements vary, so do not assume every form of waste is handled identically or that one disposal procedure applies everywhere.
Final pre-installation checklist
Before mixing the first batch, confirm that:
- [ ] The mortar is approved for the tile material and dimensions.
- [ ] The exact substrate is approved, sound, clean, and ready.
- [ ] Wet, exterior, wall, or other exposure conditions are approved.
- [ ] Membrane compatibility has been confirmed in both manufacturers’ documents.
- [ ] Heating-system compatibility and startup restrictions are recorded.
- [ ] Specialty approval exists for glass, resin-backed tile, or sensitive stone.
- [ ] The correct trowel and mixing tools are available.
- [ ] Liquid quantity, mixing time, speed, slake time, and remixing procedure are recorded.
- [ ] Pot life and open time are understood separately.
- [ ] The batch size matches the installer’s pace and the product instructions.
- [ ] An early lifted-tile coverage test is planned.
- [ ] Grouting, traffic, water, freezing, and heat restrictions are recorded separately.
- [ ] Cleanup, dust control, personal protection, and waste handling are planned.
The decision sequence is short: identify every layer in the tile assembly; select mortar approved for those materials and conditions; record the bag-specific mixing, working, and curing instructions; and verify real transfer by lifting an early tile.
No rule of thumb about white versus gray, modified versus unmodified, notch size, or cure time overrides the current technical documents for the tile, mortar, substrate, membrane, and heating system. Mortar Desk publishes general reference information rather than project-specific contracting or engineering advice; specifications and local requirements can change (Mortar Desk’s general-reference limitations).
Frequently asked questions
Is thin set mortar the same as grout?
No. Thin set mortar bonds tile or stone to an approved supporting surface. Grout fills the joints between tiles after the tile has been set. They serve different functions and should not be substituted for one another.
Should I use modified or unmodified thin set over a waterproofing membrane?
Use the mortar specified by the membrane manufacturer for the exact membrane, tile, substrate, and exposure. Confirm that the mortar’s own data sheet also approves the application.
There is no universal rule that modified or unmodified mortar belongs over every waterproofing membrane. If the documents conflict or do not address your combination, stop and obtain written clarification rather than relying on advice for another membrane system.
When should I back-butter tile?
Back-butter when it is needed to achieve the required transfer and continuous support and when the selected product permits it. It can be particularly useful for large-format tile, deeply patterned backs, stone, glass, and exterior work.
After back-buttering, lift a tile and inspect it. Back-buttering is helping only if it improves contact; it cannot fix skinned mortar, poor preparation, incompatibility, or failure to move the tile across the ridges.
How can I tell whether a tile has enough mortar coverage?
Lift a newly placed tile while the mortar is fresh. Inspect the tile back and substrate for transferred mortar, collapsed ridges, supported edges and corners, and the absence of substantial voids.
If transfer is inadequate, adjust the notch, mortar volume, back-buttering, ridge direction, or tile movement, then test again. Do not judge solely from the trowel size, the appearance of ridges before placement, or a hollow-sound test after curing.
How long does thin set need to cure before grouting, walking, water exposure, or radiant heat?
There is no universal cure time. Check the current mortar technical data and complete system instructions for separate grouting, light-traffic, heavy-traffic, full-cure, water-exposure, freeze-thaw, and radiant-heat milestones.
Temperature, humidity, substrate absorption, mortar thickness, tile permeability, and membranes can affect curing. Keep radiant heat off for the specified cure period and restart it according to the heating-system procedure, even if the installation is already grout-ready or open to light foot traffic.